Java Quickstart for ADK
This guide shows you how to get up and running with Agent Development Kit for Java. Before you start, make sure you have the following installed:
- Java 17 or later
- Maven 3.9 or later
Create an agent project
Create an agent project with the following files and directory structure:
my_agent/
    src/main/java/com/example/agent/
                        HelloTimeAgent.java # main agent code
                        AgentCliRunner.java # command-line interface
    pom.xml                                 # project configuration
    .env                                    # API keys or project IDs
Create this project structure using the command line
Define the agent code
Create the code for a basic agent, including a simple implementation of an ADK
Function Tool, called getCurrentTime().
Add the following code to the HelloTimeAgent.java file in your project
directory:
package com.example.agent;

import com.google.adk.agents.BaseAgent;
import com.google.adk.agents.LlmAgent;
import com.google.adk.tools.Annotations.Schema;
import com.google.adk.tools.FunctionTool;

import java.util.Map;

public class HelloTimeAgent {

    public static BaseAgent ROOT_AGENT = initAgent();

    private static BaseAgent initAgent() {
        return LlmAgent.builder()
            .name("hello-time-agent")
            .description("Tells the current time in a specified city")
            .instruction("""
                You are a helpful assistant that tells the current time in a city.
                Use the 'getCurrentTime' tool for this purpose.
                """)
            .model("gemini-2.5-flash")
            .tools(FunctionTool.create(HelloTimeAgent.class, "getCurrentTime"))
            .build();
    }

    /** Mock tool implementation */
    @Schema(description = "Get the current time for a given city")
    public static Map<String, String> getCurrentTime(
        @Schema(name = "city", description = "Name of the city to get the time for") String city) {
        return Map.of(
            "city", city,
            "forecast", "The time is 10:30am."
        );
    }
}
Caution: Gemini 3 compatibility
ADK Java v0.3.0 and lower is not compatible with Gemini 3 Pro Preview due to thought signature changes for function calling. Use Gemini 2.5 or lower models instead.
Configure project and dependencies
An ADK agent project requires this dependency in your
pom.xml project file:
<dependencies>
    <dependency>
        <groupId>com.google.adk</groupId>
        <artifactId>google-adk</artifactId>
        <version>0.6.0</version>
    </dependency>
</dependencies>
Update the pom.xml project file to include this dependency and
additional settings with the following configuration code:
Complete pom.xml configuration for project
The following code shows a complete pom.xml configuration for
this project:
<?xml version="1.0" encoding="UTF-8"?>
<project xmlns="http://maven.apache.org/POM/4.0.0"
        xmlns:xsi="http://www.w3.org/2001/XMLSchema-instance"
        xsi:schemaLocation="http://maven.apache.org/POM/4.0.0 http://maven.apache.org/xsd/maven-4.0.0.xsd">
    <modelVersion>4.0.0</modelVersion>

    <groupId>com.example.agent</groupId>
    <artifactId>adk-agents</artifactId>
    <version>1.0-SNAPSHOT</version>

    <!-- Specify the version of Java you'll be using -->
    <properties>
        <maven.compiler.source>17</maven.compiler.source>
        <maven.compiler.target>17</maven.compiler.target>
        <project.build.sourceEncoding>UTF-8</project.build.sourceEncoding>
    </properties>

    <dependencies>
        <!-- The ADK core dependency -->
        <dependency>
            <groupId>com.google.adk</groupId>
            <artifactId>google-adk</artifactId>
            <version>0.6.0</version>
        </dependency>
        <!-- The ADK dev web UI to debug your agent -->
        <dependency>
            <groupId>com.google.adk</groupId>
            <artifactId>google-adk-dev</artifactId>
            <version>0.6.0</version>
        </dependency>
    </dependencies>

</project>
Set your API key
This project uses the Gemini API, which requires an API key. If you don't already have Gemini API key, create a key in Google AI Studio on the API Keys page.
In a terminal window, write your API key into your .env file of your project
to set environment variables:
Using other AI models with ADK
ADK supports the use of many generative AI models. For more information on configuring other models in ADK agents, see Models & Authentication.
Create an agent command-line interface
Create a AgentCliRunner.java class to allow you to run and interact with
HelloTimeAgent from the command line. This code shows how to create a
RunConfig object to run the agent and a Session object to interact with the
running agent.
package com.example.agent;

import com.google.adk.agents.RunConfig;
import com.google.adk.events.Event;
import com.google.adk.runner.InMemoryRunner;
import com.google.adk.sessions.Session;
import com.google.genai.types.Content;
import com.google.genai.types.Part;
import io.reactivex.rxjava3.core.Flowable;
import java.util.Scanner;

import static java.nio.charset.StandardCharsets.UTF_8;

public class AgentCliRunner {

    public static void main(String[] args) {
        RunConfig runConfig = RunConfig.builder().build();
        InMemoryRunner runner = new InMemoryRunner(HelloTimeAgent.ROOT_AGENT);

        Session session = runner
                .sessionService()
                .createSession(runner.appName(), "user1234")
                .blockingGet();

        try (Scanner scanner = new Scanner(System.in, UTF_8)) {
            while (true) {
                System.out.print("\nYou > ");
                String userInput = scanner.nextLine();
                if ("quit".equalsIgnoreCase(userInput)) {
                    break;
                }

                Content userMsg = Content.fromParts(Part.fromText(userInput));
                Flowable<Event> events = runner.runAsync(session.userId(), session.id(), userMsg, runConfig);

                System.out.print("\nAgent > ");
                events.blockingForEach(event -> {
                    if (event.finalResponse()) {
                        System.out.println(event.stringifyContent());
                    }
                });
            }
        }
    }
}
Run your agent
You can run your ADK agent using the interactive command-line interface
AgentCliRunner class you defined or the ADK web user interface provided by
the ADK using the AdkWebServer class. Both these options allow you to test and
interact with your agent.
Run with command-line interface
Run your agent with the command-line interface AgentCliRunner class
using the following Maven command:
# Remember to load keys and settings: source .env OR env.bat
mvn compile exec:java -Dexec.mainClass="com.example.agent.AgentCliRunner"

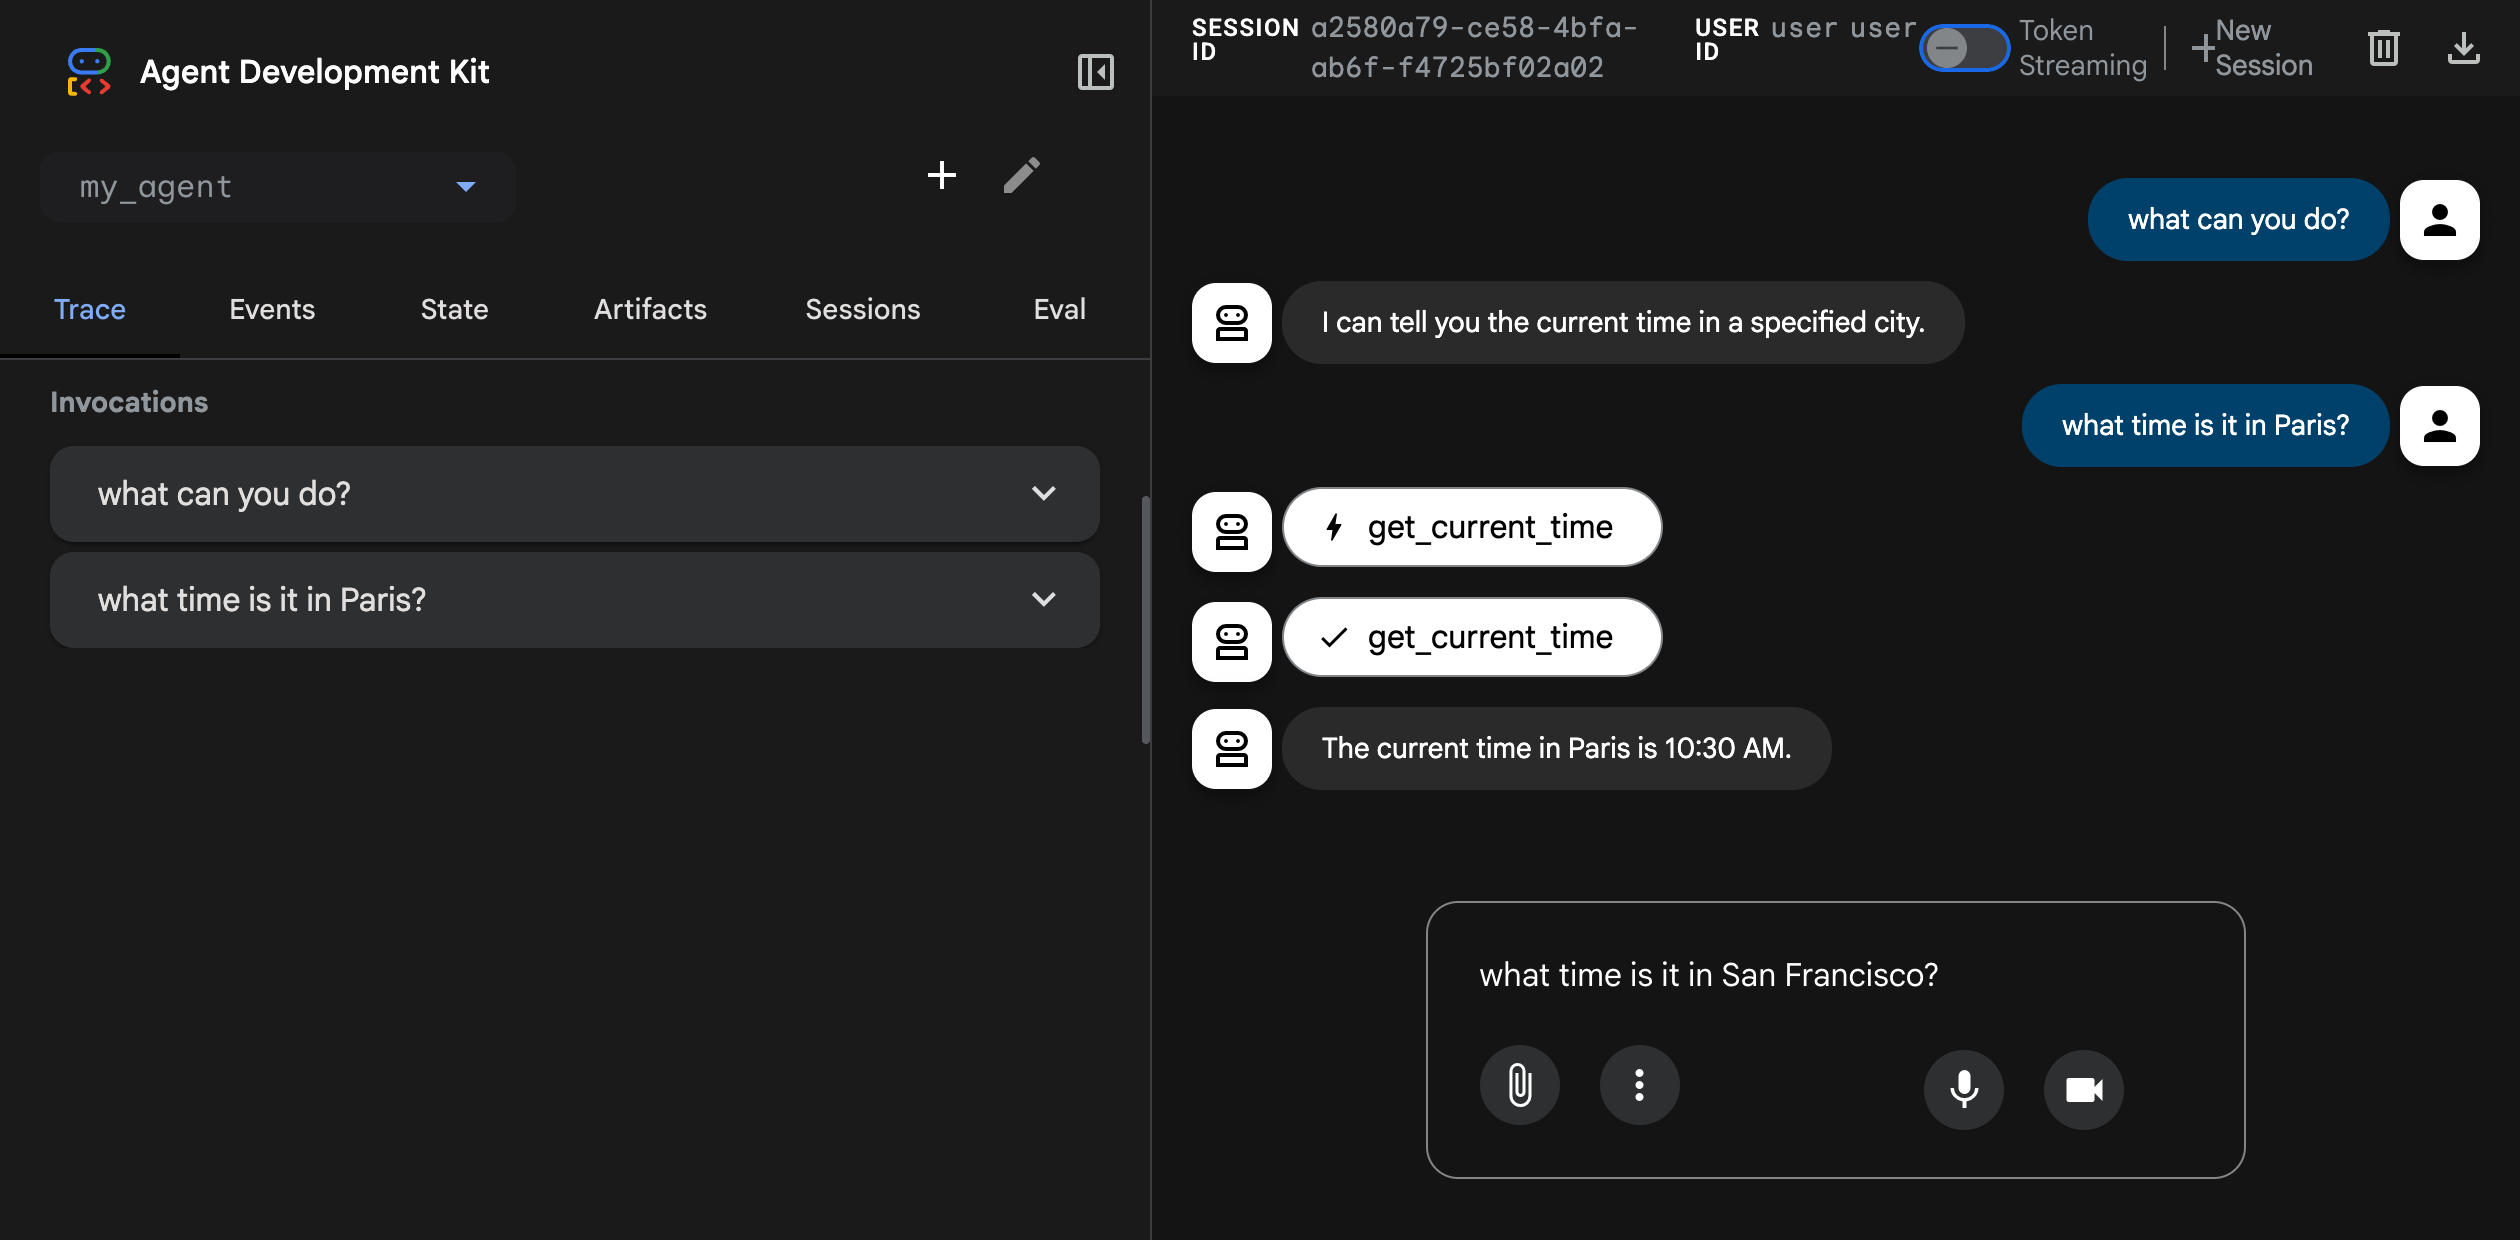
Run with web interface
Run your agent with the ADK web interface using the following Maven command:
# Remember to load keys and settings: source .env OR env.bat
mvn compile exec:java \
    -Dexec.mainClass="com.google.adk.web.AdkWebServer" \
    -Dexec.args="--adk.agents.source-dir=target --server.port=8000"
This command starts a web server with a chat interface for your agent. You can access the web interface at (http://localhost:8000). Select your agent at the upper left corner and type a request.
Caution: ADK Web for development only
ADK Web is not meant for use in production deployments. You should use ADK Web for development and debugging purposes only.
Next: Build your agent
Now that you have ADK installed and your first agent running, try building your own agent with our build guides: