Opening up the VoltAir Project
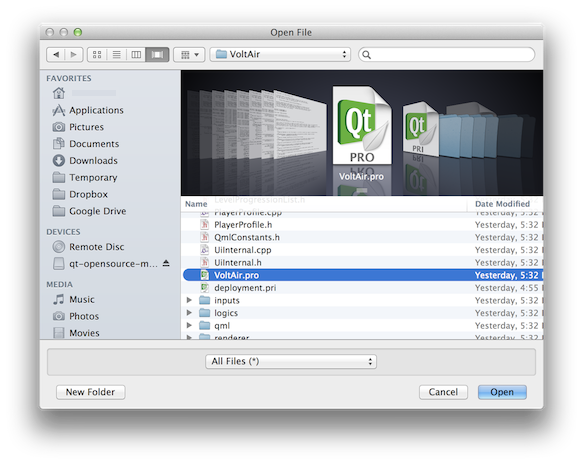
Start up Qt Creator. It will look like this (on the Mac). Please Press the Open Project button, found here:

Navigate to the voltair tree, and then one more level down into VoltAir, in which you will find a file called VoltAir.pro, as seen here:
Upon opening, you will be presented with the following dialog box about kits (if this dialog does not show up, hit the Projects button on the left). Kits are the way Qt Creator provides for building to multiple platforms. Please select the following two kits:
- Android for armeabi-v7a (GCC 4.8, Qt 5.3.1)
- Desktop Qt 5.3.1 clang 64bit
The name of the latter may be slightly different under Linux.
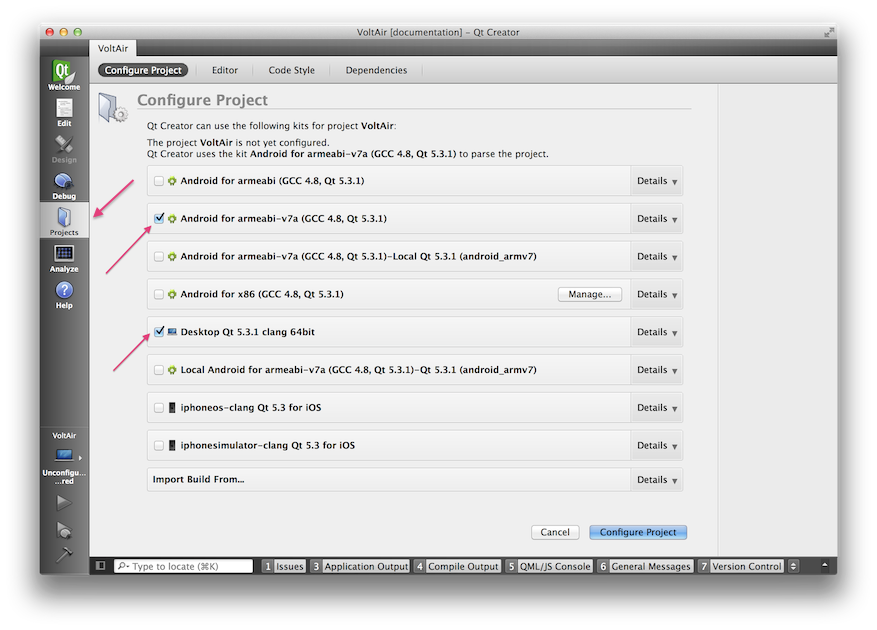
When you are done, hit the Configure Project button.
Setting Android Preferences
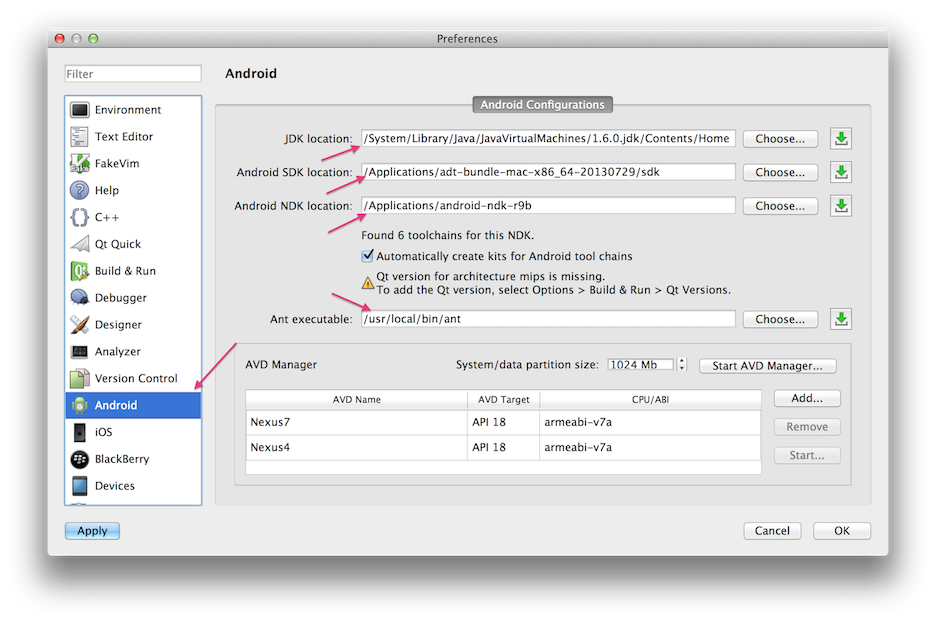
Next we must make certain that Qt Creator is properly configured to build for Android. To do this, first bring up the Preference dialog box (found in the Qt Creator menu on the mac). Then on the left, click on the Android section. There are four software subsystems you will have to populate:
- JDK Location: The location of the java bin/ and lib/ directories on your machine. Typically found in /System/Library/Java/JavaVirtualMachines/1.6.0.jdk/Contents/Home on a mac.
- Android SDK Location: This is the sdk directory of the download found on the Android SDK Download page, as seen in the example below.
- Android NDK Location: This is the root directory of the download found on the Android NDK Download page, as seen in the example below. NOTE: Please use android-ndk-r9b or later.
- Ant executable: This is the path to the Apache ant executable. It can be obtained via Macports or Homebrew on the Mac or Apt-get under linux. NOTE: Please use ant version 1.9 or later.
Setting Up Parallel Build
VoltAir has scores of C++ files that need to get built. Given this, it makes sense to run its make in parallel. We take the following steps to set this up:
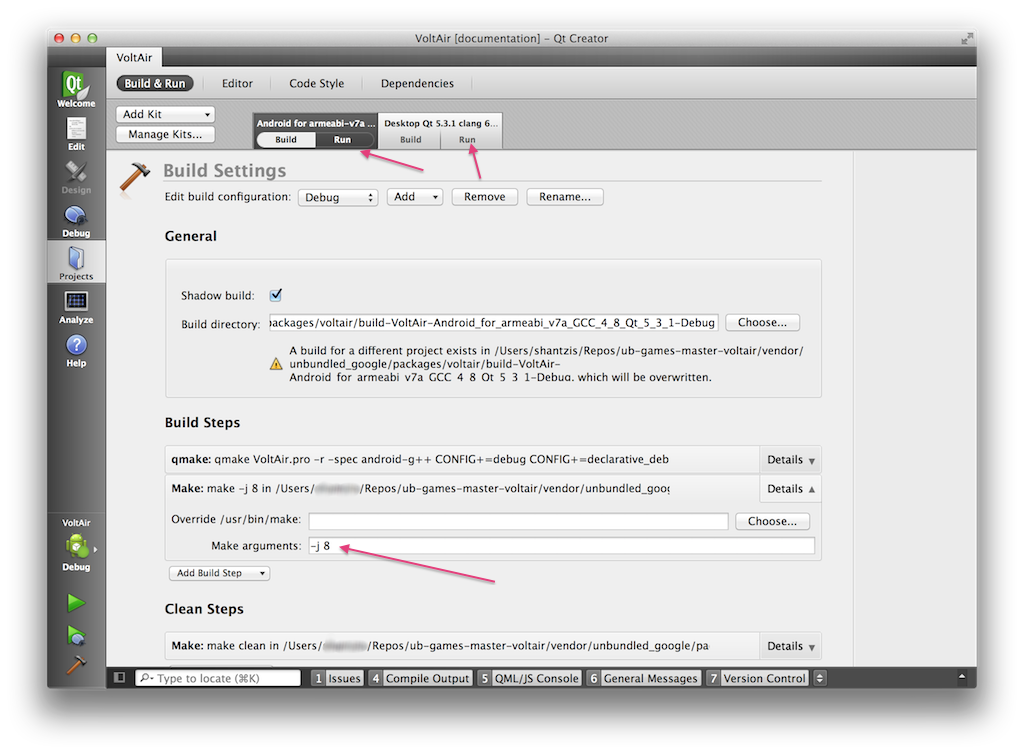
- In Qt Creator, bring up the Projects section.
- For each of the kits (there are two, remember), select the Build section, as seen below.
- Under the Build Steps, open up the Details on the Make step.
- In the Make Arguments line entry, type
-j 8. - Again, remember this needs to be done twice, once for each kit.
Referencing an External LiquidFun
If you are building LiquidFun strictly for VoltAir, simply make sure it is cloned as specified in [Downloading VoltAir][] and built as stated in the LiquidFun Build Instructions.
As mentioned earlier, the VoltAir git repository is set up to include a LiquidFun submodule (see [Downloading VoltAir][] for more information). However, if you have a pre-existing version of LiquidFun that you wish to use instead, you can do so by appropriately setting a LIQUIDFUN variable in your build environment. Take the following steps:
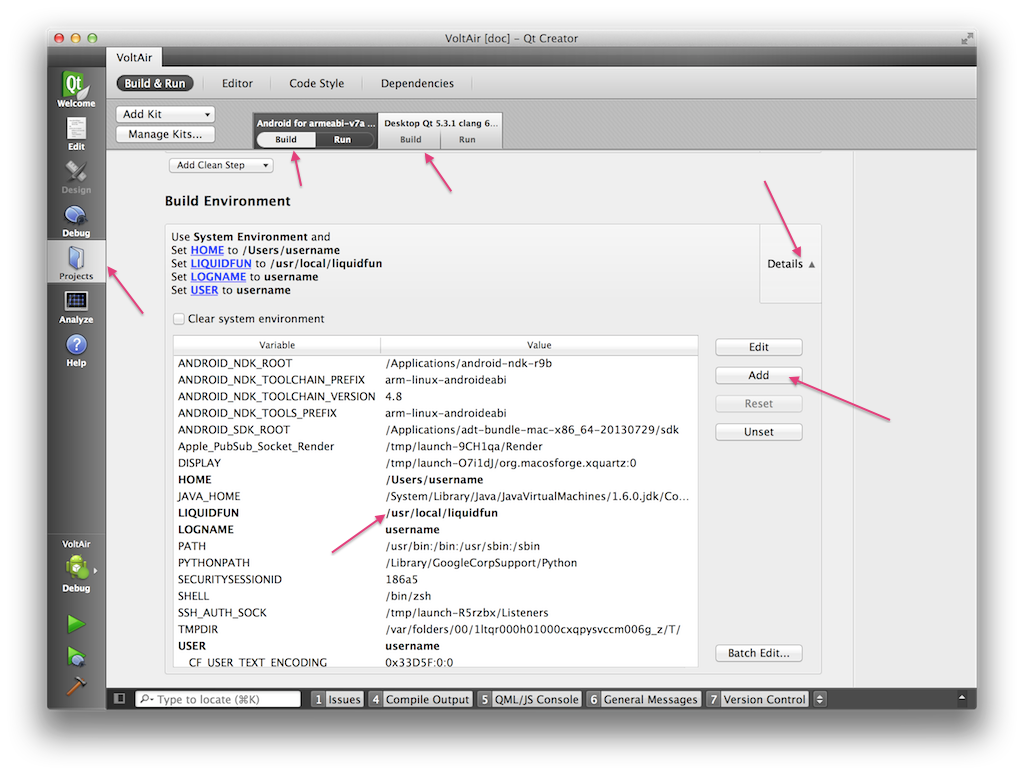
- In Qt Creator, bring up the Projects section.
- For each of the kits (there are two, remember), select the Build section, as seen below.
- Under Build Environment, press the Details button, which brings down a list of environment variables.
- Press the Add button to add another one, name the variable LIQUIDFUN and set its value to the root of your LiquidFun directory.
- Again, remember this needs to be done twice, once for each kit.
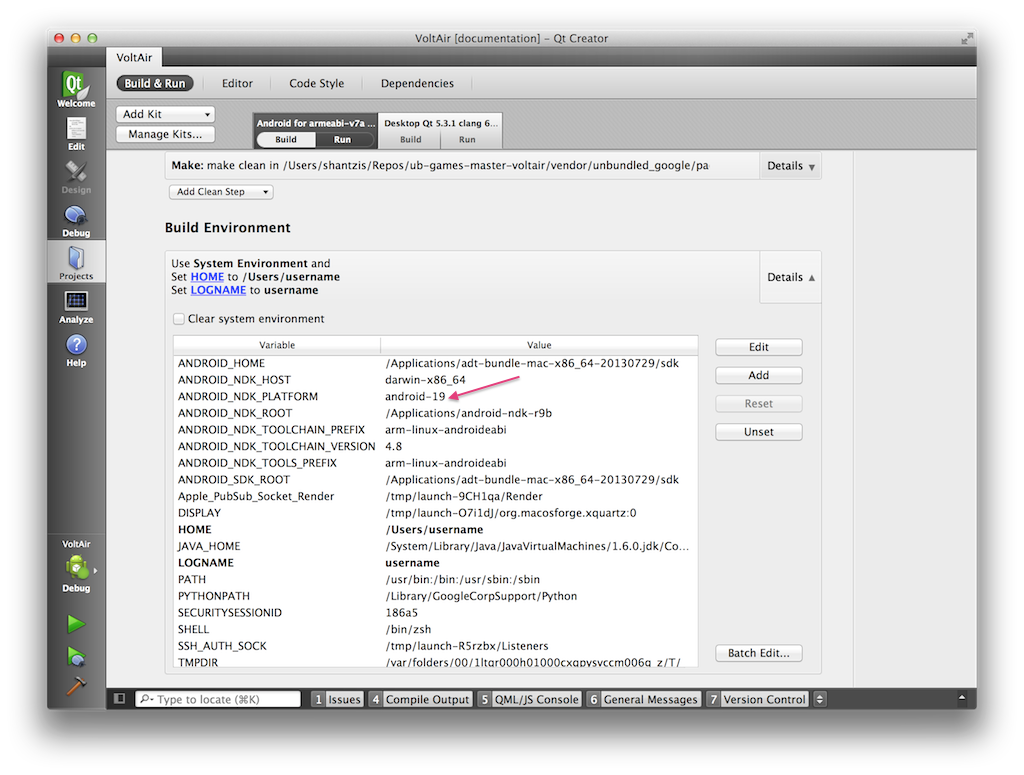
Setting Android Environment to use the android-19 API
This ONLY applies to the Android for armeabi-v7a (GCC 4.8, Qt 5.3.1). In the same Build Environment location, make certain that the ANDROID_NDK_PLATFORM is set to android-19.
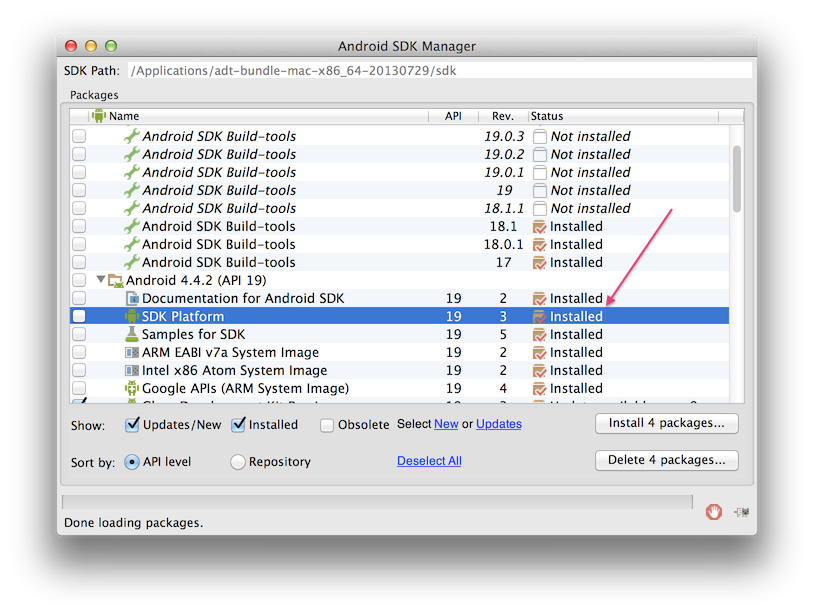
You also need to make certain that your Android SDK has API 19 installed. This is done from within the Android SDK Manager. The image below shows what you should expect to see:
For more information on configuring Qt Creator, please see the Configuring Projects of the official Qt documentation.
You are now ready to proceed to Building and Running VoltAir.