Chicago Brick P5 Surface Codelab
- Chicago Brick P5 Surface Codelab
- What does P5Surface do for you?
- Example p5 sketch
- Example sketch using P5Surface
Chicago Brick ships with a p5js Surface that allows p5 sketches to run on a wall with minimal changes. Sketches need to be written like p5 instance mode. All p5 method calls need to come from a p5 instance.
What does P5Surface do for you?
At its core, p5.js provides a setup() method that is run once and a draw() method that is run to draw every frame. P5Surface provides a setup() wrapper that does the following things for you:
- Initializes p5 and creates the canvas it will use to draw into for each client instance.
- Calls p5.scale() so you can do local development more easily.
- Initializes the random seed to a consistent value based on start time.
- Disables looping because the Chicago Brick framework calls draw() for you.
- Calls p5.translate() so that you can operate in wall coordinates and the individual client window will show the right stuff.
- Figures out the video wall size and exposes those as 2 new p5 properties:
- p5.wallWidth - the width in pixels of the entire wall.
- p5.wallHeight - the height in pixels of the entire wall.
Your p5 sketch must be contained in a Sketch with the following interface:
- constructor(p5, surface)
- preload()
- setup()
- draw()
An example basic Sketch class looks like this:
class P5BareBonesSketch {
  constructor(p5, surface) {
    this.p5 = p5;
    this.surface = surface;
  }

  setup() {
    var p5 = this.p5;
  }

  preload() {
    var p5 = this.p5;
  }

  // t is the time in milliseconds, with microsecond precision.
  draw(t) {
    var p5 = this.p5;
  }
}
Example p5 sketch
Let’s look at a simple p5 sketch in instantiation mode. This sketch simply draws a rotating ellipse and uses the time value to cycle the colors and rotation.
var sketch = function( p5 ) {
  p5.setup = function() {
    p5.createCanvas(400, 300)
    p5.background(128, 128, 128);
    p5.ellipseMode(p5.CENTER);
    p5.fill(0);
    p5.strokeWeight(p5.width / 100);
  };

  p5.draw = function() {
    let mappedSin = p5.map(p5.sin(p5.millis()/1000), -1, 1, 0, 255);
    let mappedCos = p5.map(p5.cos(p5.millis()/1000), -1, 1, 0, 255);
    p5.background(mappedSin);
    p5.stroke(mappedCos);
    p5.fill(mappedSin, mappedCos, mappedSin);

    p5.push();
    p5.translate(p5.width / 2, p5.height / 2);
    p5.rotate(p5.millis()/1000);
    p5.ellipse(0, 0, p5.width / 2, p5.height / 2);
    p5.pop();
  };
};

var myp5 = new p5(sketch, document.getElementById('p5_sketch'));
Example sketch using P5Surface
Converting this sketch to run on a Chicago Brick instance across multiple processes, machines and displays is very simple and involves only a couple of changes to the p5 sketch from above.
Every Chicago Brick p5 module has 3 classes in it: Server, Skech and Client.
For this sketch, we will use empty server and client classes and focus on the Sketch class that holds our p5 code.
Create the sketch
Add a new file in the chicago-brick directory at
demo_modules/tutorials/p5/01_bare_bones/01_bare_bones.js and put the
following classes into it.
// ServerModules extend ServerModuleInterface.  This sketch doesn't use any
// server functionality, so it can be left empty.
class P5BareBonesServer extends ServerModuleInterface {
  constructor(config, startTime) {
    super();
  }
}

// A p5 module needs a very basic client instance that sets up the P5Surface
// using the sketch class.  It also calls the draw method on the sketch and does
// some cleanup when the module is cycled out.
class P5BareBonesClient extends ClientModuleInterface {
  constructor(config) {
    super();
  }

  finishFadeOut() {
    if (this.surface) {
      this.surface.destroy();
    }
  }

  willBeShownSoon(container, deadline) {
    this.surface = new P5Surface(container, wallGeometry, P5BareBonesSketch, deadline);
  }

  draw(time, delta) {
    this.surface.p5.draw(time);
  }
}

// The Sketch class is where your actual p5 code will live.  It is built with a
// p5 instance that is created for you and is already set up to take over the full
// chrome window.
class P5BareBonesSketch {
  constructor(p5, surface) {
    this.p5 = p5;
    this.surface = surface;
  }

  setup() {
    var p5 = this.p5;

    p5.background(128, 128, 128);
    p5.ellipseMode(p5.CENTER);
    p5.fill(0);
    // Notice the use of p5.wallWidth instead of p5.width.  p5.width in a
    // P5Surface will be the given chrome window's dimensions, not the wall's.
    p5.strokeWeight(p5.wallWidth / 100);
  }

  preload() {
  }

  draw(t_millis) {
    var p5 = this.p5;

    // To synchronize the clients the time is controlled via a simple
    // synchronization and skew calculation based on server time.  That means
    // you want to use the time value provided to draw instead of calling
    // performance.now() or Date.now() since those will not have the skew
    // correction applied.
    let mappedSin = p5.map(p5.sin(t_millis/1000), -1, 1, 0, 255);
    let mappedCos = p5.map(p5.cos(t_millis/1000), -1, 1, 0, 255);
    p5.background(mappedSin);
    p5.stroke(mappedCos);
    p5.fill(mappedSin, mappedCos, mappedSin);

    p5.push();
    p5.translate(p5.wallWidth / 2, p5.wallHeight / 2);
    p5.rotate(t_millis/1000);
    p5.ellipse(0, 0, p5.wallWidth / 2, p5.wallHeight / 2);
    p5.pop();
  }
}

// register() finishes the setup for the server and client modules.
register(P5BareBonesServer, P5BareBonesClient);
That’s it! With only 2 different calls in the p5 code and a pair of small classes to satisfy the Chicago Brick module interfaces you now have a p5 sketch that can run on a large number of machines and stay in sync! Let’s see it in action next.
Create the p5 codelab playlist
Modules need to be in a playlist to be loaded. Add a new playlist config file
named config/p5-codelab-playlist.json with the following contents:
{
  "modules": [
    {
      "name": "01_bare_bones",
      "path": "demo_modules/tutorials/p5/01_bare_bones/01_bare_bones.js",
    },
  ],
  "playlist": [
    {
      "collection": "__ALL__",
      "duration": 600,
      "moduleDuration": 60,
      "maxPartitions": 1,
    },
  ],
}
Run the server and client
Let’s start a 1x1 server with the following command. This is equivalent to running the p5 sketch in your browser, but excercizes all of the Chicago Brick code.
./bin/run_1x1.sh -p config/p5-codelab-playlist.json
Load up http://localhost:3000/ in your browser and you should see the example p5 sketch running in the entire window, like this:
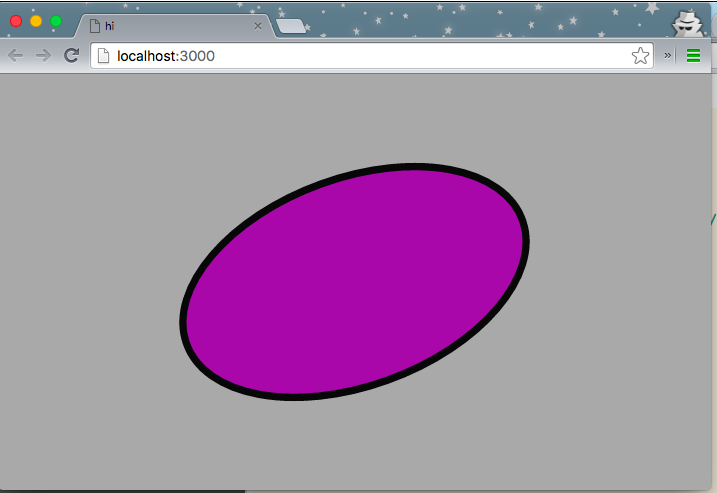
Close that tab and then kill the server.
To run a server with a 2 screen x 2 screen geometry, run
./bin/run_2x2.sh -p config/p5-codelab-playlist.json
Next, start up 4 distinct chrome instances configured for a 2x2 wall configuration. The chrome instances should be arranged as you would arrange screens for a wall. The sketch should now be running on all 4 instances indepently. After they have all started up you should see them stay in pretty close synchronization even though they are all independent processes. Ginchy!
sh ./bin/start_2x2_clients.sh
With the 2x2 configuration you should see something like this: