Exposure Notification Reference Key Server
View on GitHub
Getting Started
How to Deploy
Application Configuration
How to Publish Keys
How to Download Keys
Key Server Migration Guide
Estimating the Cost of Deployment
Design
Server Deployment Options
Server Functional Requirements
Verification Protocol Design
API Definitions
Application Configuration
Here we explain how to configure both severs for a client application so that it works end-to-end.
We will assume that the application has been deployed at exposure-notifications-test.org, but
you will want to substitute that with the domain name that you have registered for
this purpose. We will also be configuring an application in the fictional jurisdiction of
Magrathea (with fake ISO code MAG).
Before You Begin
This guide assumes that you have deployed both the key server and verification server to Google Cloud Platform in our chosen region, in two separate projects.
If you haven’t yet deployed the servers, you can follow the deployment guides.
Starting from that point, this will direct you to everything that is needed to configure a verification server realm, define admission to the key sever, generate exports, and share a public key for those exports with Apple and Google.
Configure Verification Server Realm
Admin User
First, make sure you have bootstrapped the system
by logging in AND creating an additional system admin account that represents a real user
and deleting the bootstrap (super@example.com) account.
Create Realm
Follow the verification admin guide for creating a new realm.
When creating the realm, be sure to:
- select Create realm specific signing key
- set the issuer to the reverse DNS of the verification sever + the ISO region code, for example:
org.exposure-notifications-test.mag
- set the audience to the reverse DNS of the key server, for example:
org.exposure-notifications-test.key
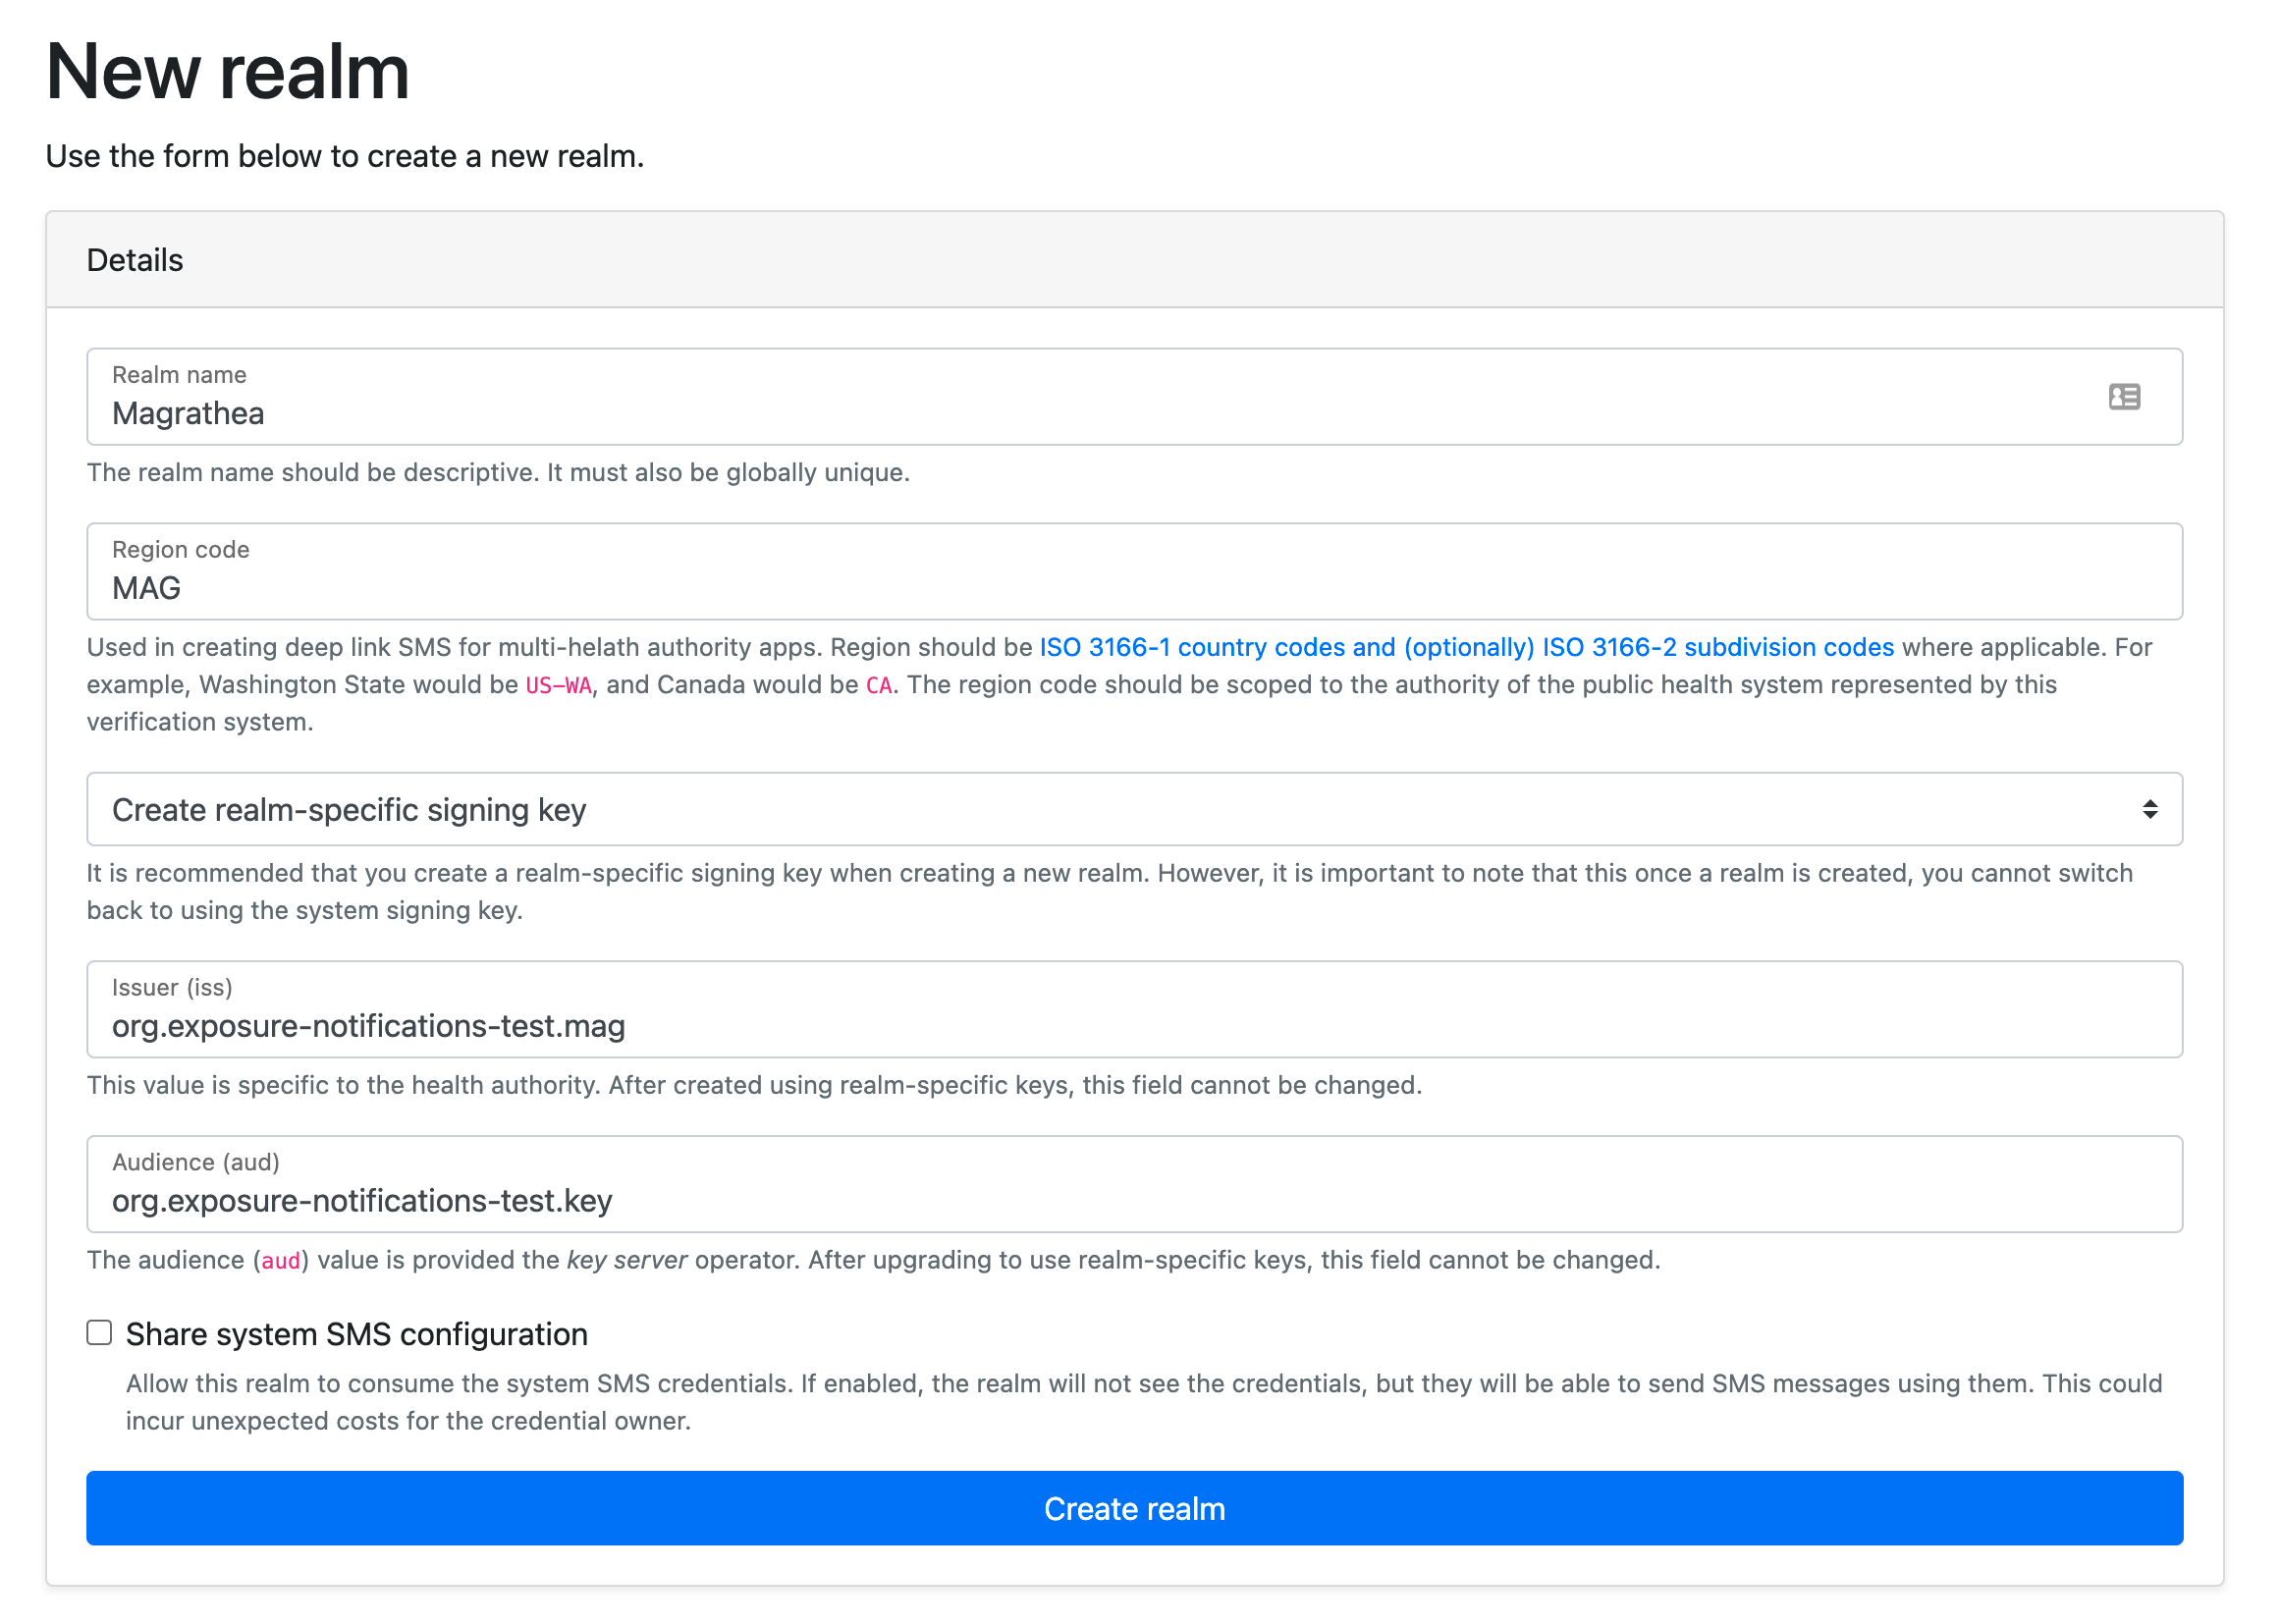
When you create the realm, you will automatically join it.
Go to the realm’s settings, and we’ll continue the configuration.
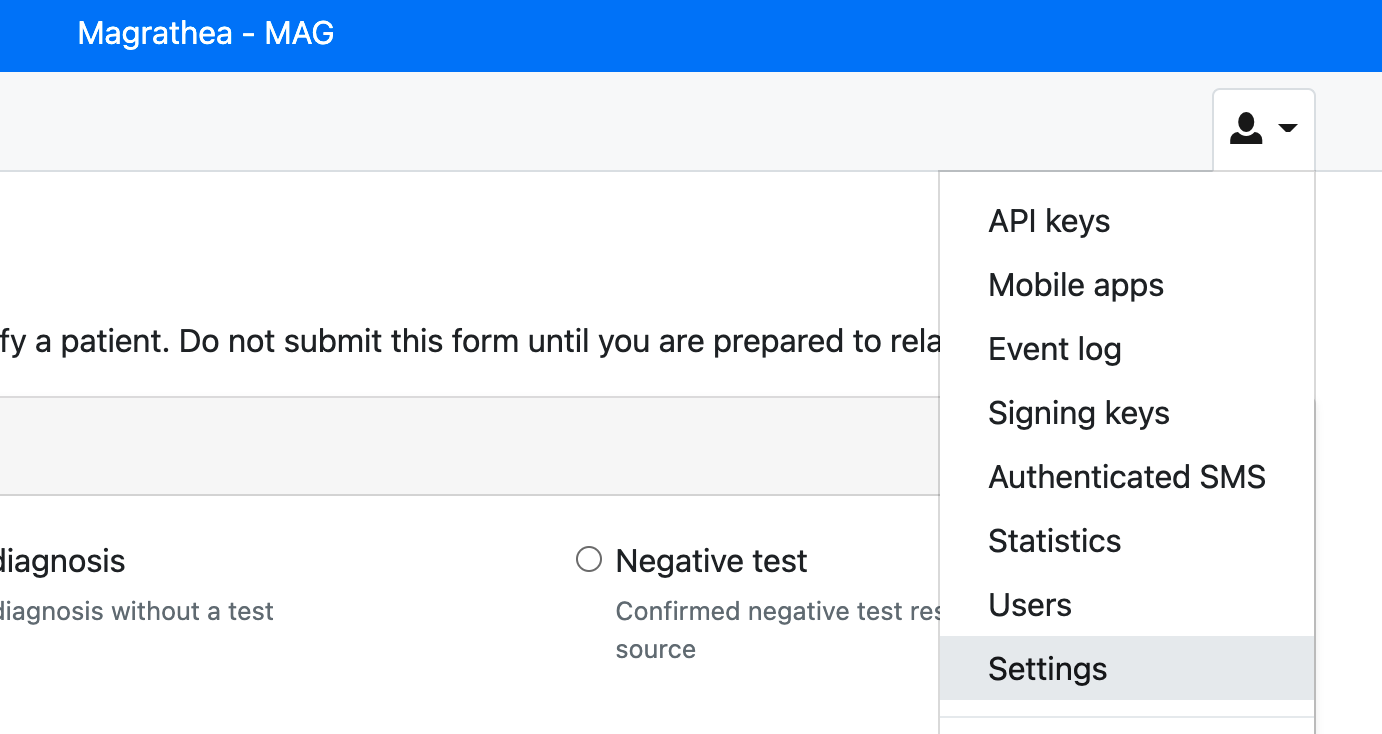
Configure Realm
These are the recommended settings in tha general realm configuration, you are free to deviate from this.
- On the General tab
- Select
Enable key-server statistics - Leave everything as as defaults.
- Select
- On the Codes tab
- Set
Bulk issue codestoAllow - Set
Allowed test typestoPositive - Set
Date ConfigurationtoRequired
- Set
- On the SMS tab [optional]
- Enter your Twilio credentials
- On the Security tab
- Change
Multi-factor authenticationtoRequired
- Change
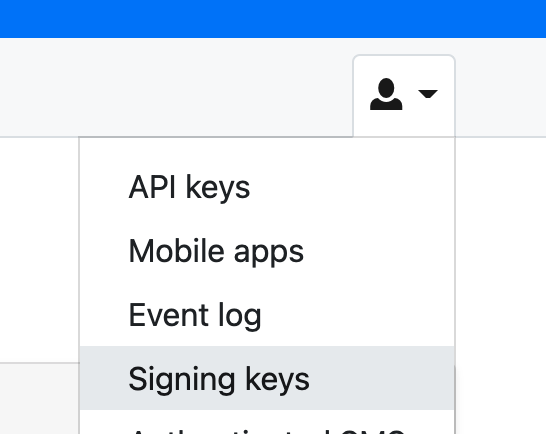
Signing Keys
Navigate to the signing keys screen.
Follow the realm admin guide to enable automatic rotation
Click on the View public discovery link and note the URL for thw JWKS document.
You will need this URL later.
For this example, our Magrathea URL is https://exposure-notifications-test.org/jwks/8
Configure the Key Server
For this section, you will need to first:
- On your local machine
- Install the Google Cloud SDK
- Install Golang
- Install cloud-run-proxy
- Be an owner on the cloud project hosting the key server
Connect to the Admin Console
As part of the standard terraform deployment, the key sever has an admin console that is used to configure the system.
Navigate to the Google Cloud console and select your key server project.
Navigate to the Cloud Run section and select your admin-console service.

There will be a URL for the admin console (ending in a.run.app). Open a command line terminal on your laptop/workstation. Log into Google cloud and start the cloud-run-proxy.
❯ gcloud auth login && gcloud auth application-default login
❯ cloud-run-proxy --host https://YOUR-SERVICE_URL.a.run.app
127.0.0.1:8080 proxies to https://YOUR-SERVICE_URL.a.run.app
Open a browser to http://localhost:8080
Admission Control
The first step is making sure your application can publish temporary exposure keys to the key server.
Create a Verification Key
Click on the New Verification Key button.
Fill out the form as follows, use the information from earlier steps.
- Name: Locale name
- Issue/Aud/JWKS URI: fields from before.
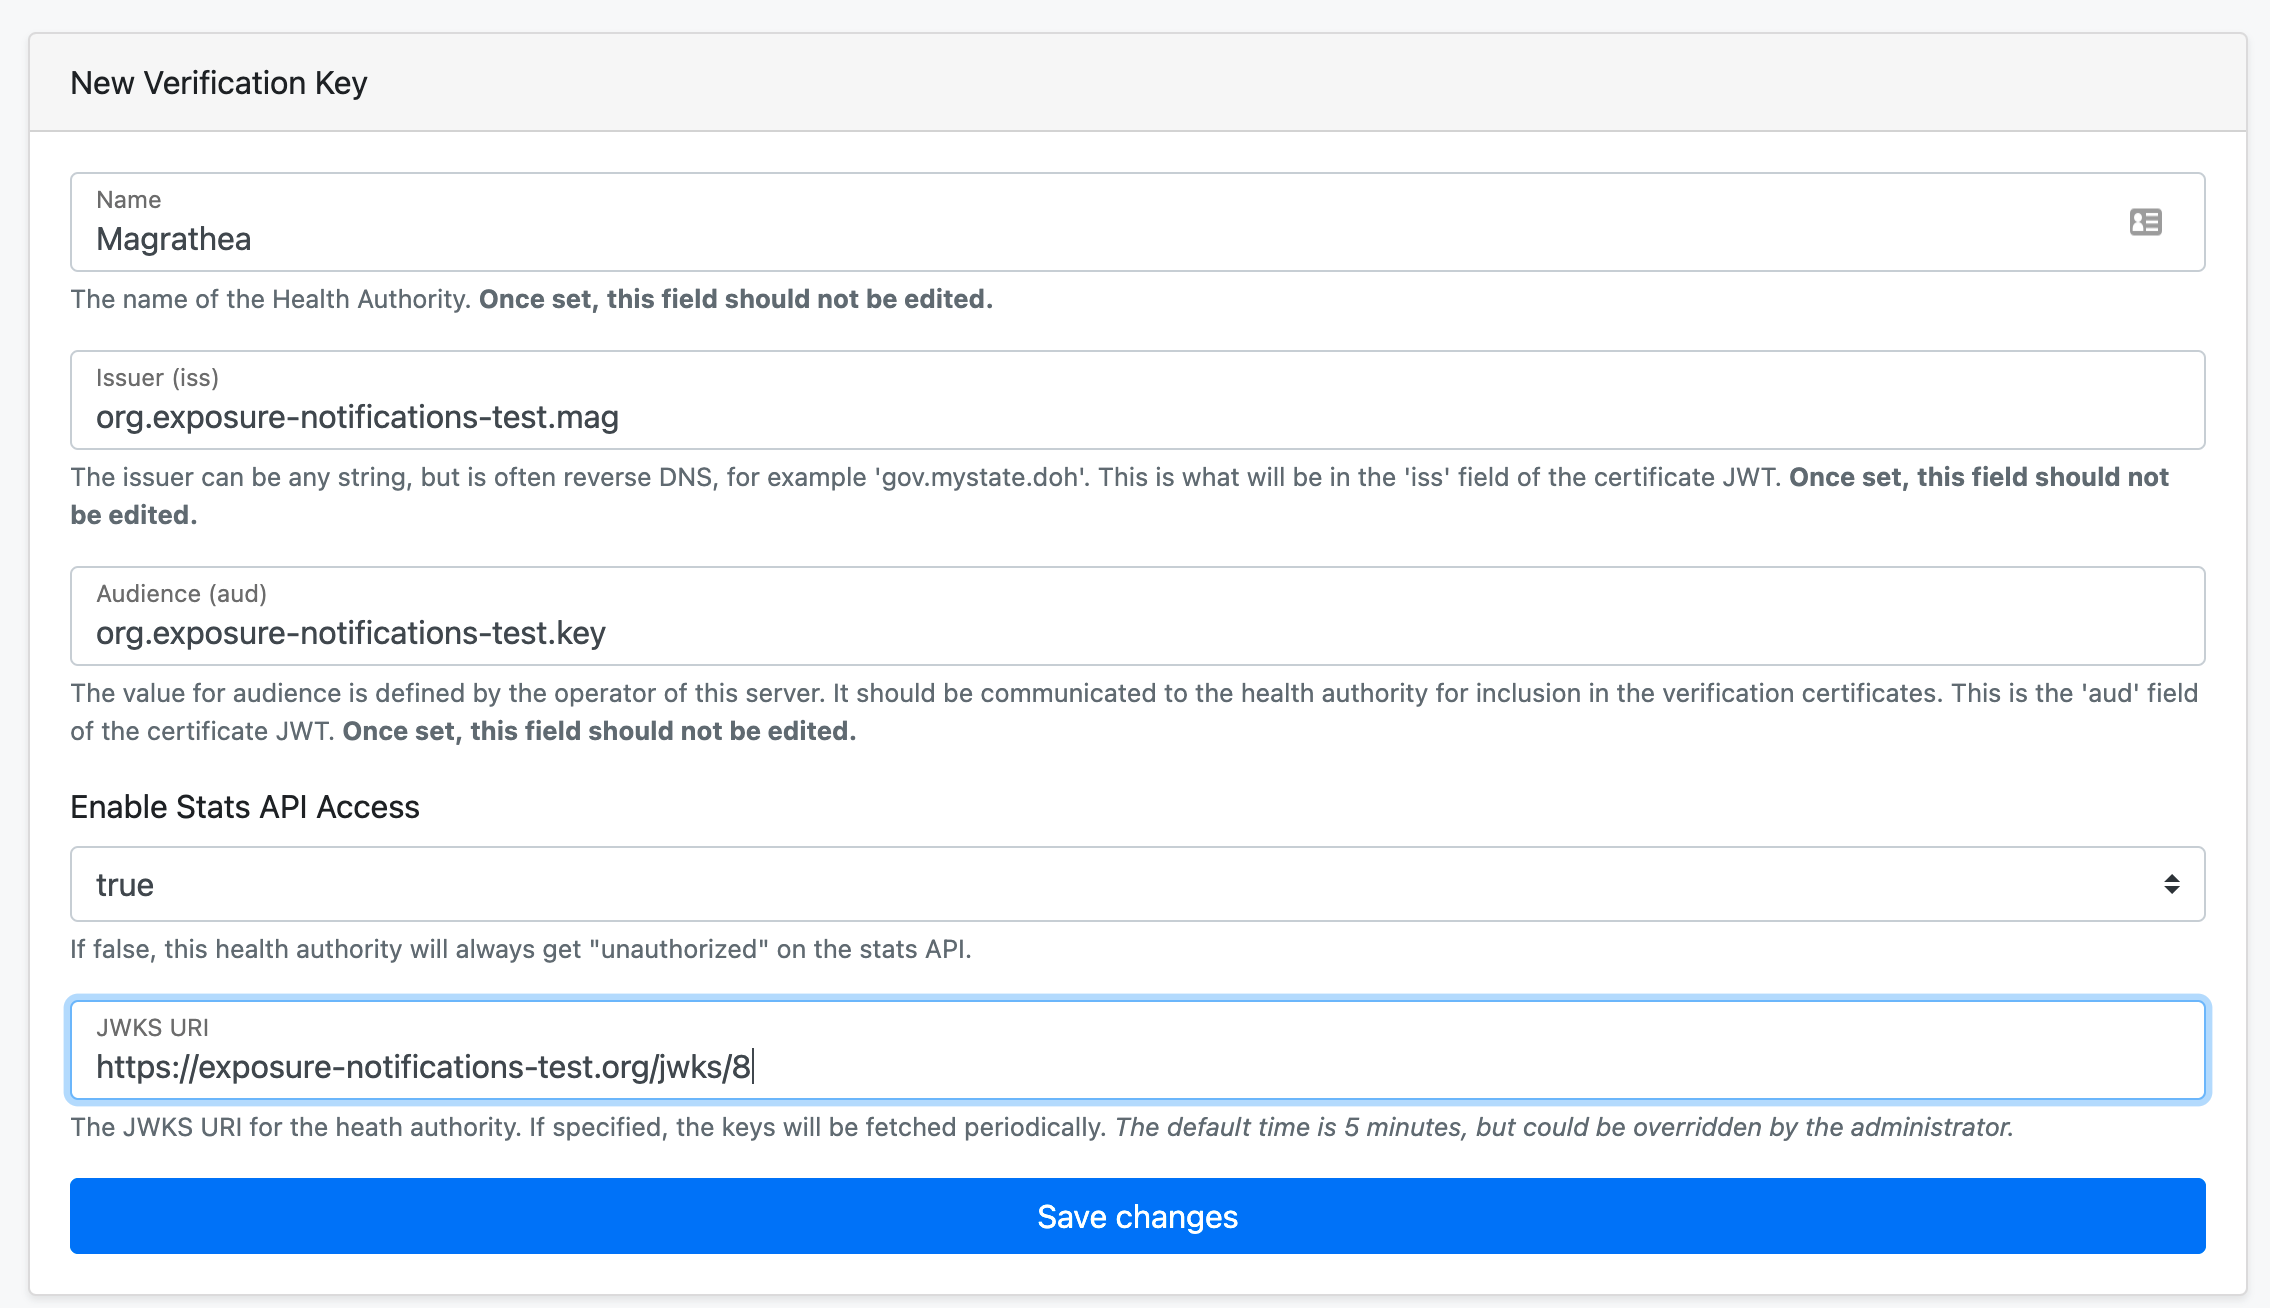
Click ‘Save changes’
If successful, click Home in the navigation menu and wait 5 minutes.
Then click into the verification key for your locale and you should see the public key is now present. For example, this is our public key after being imported.
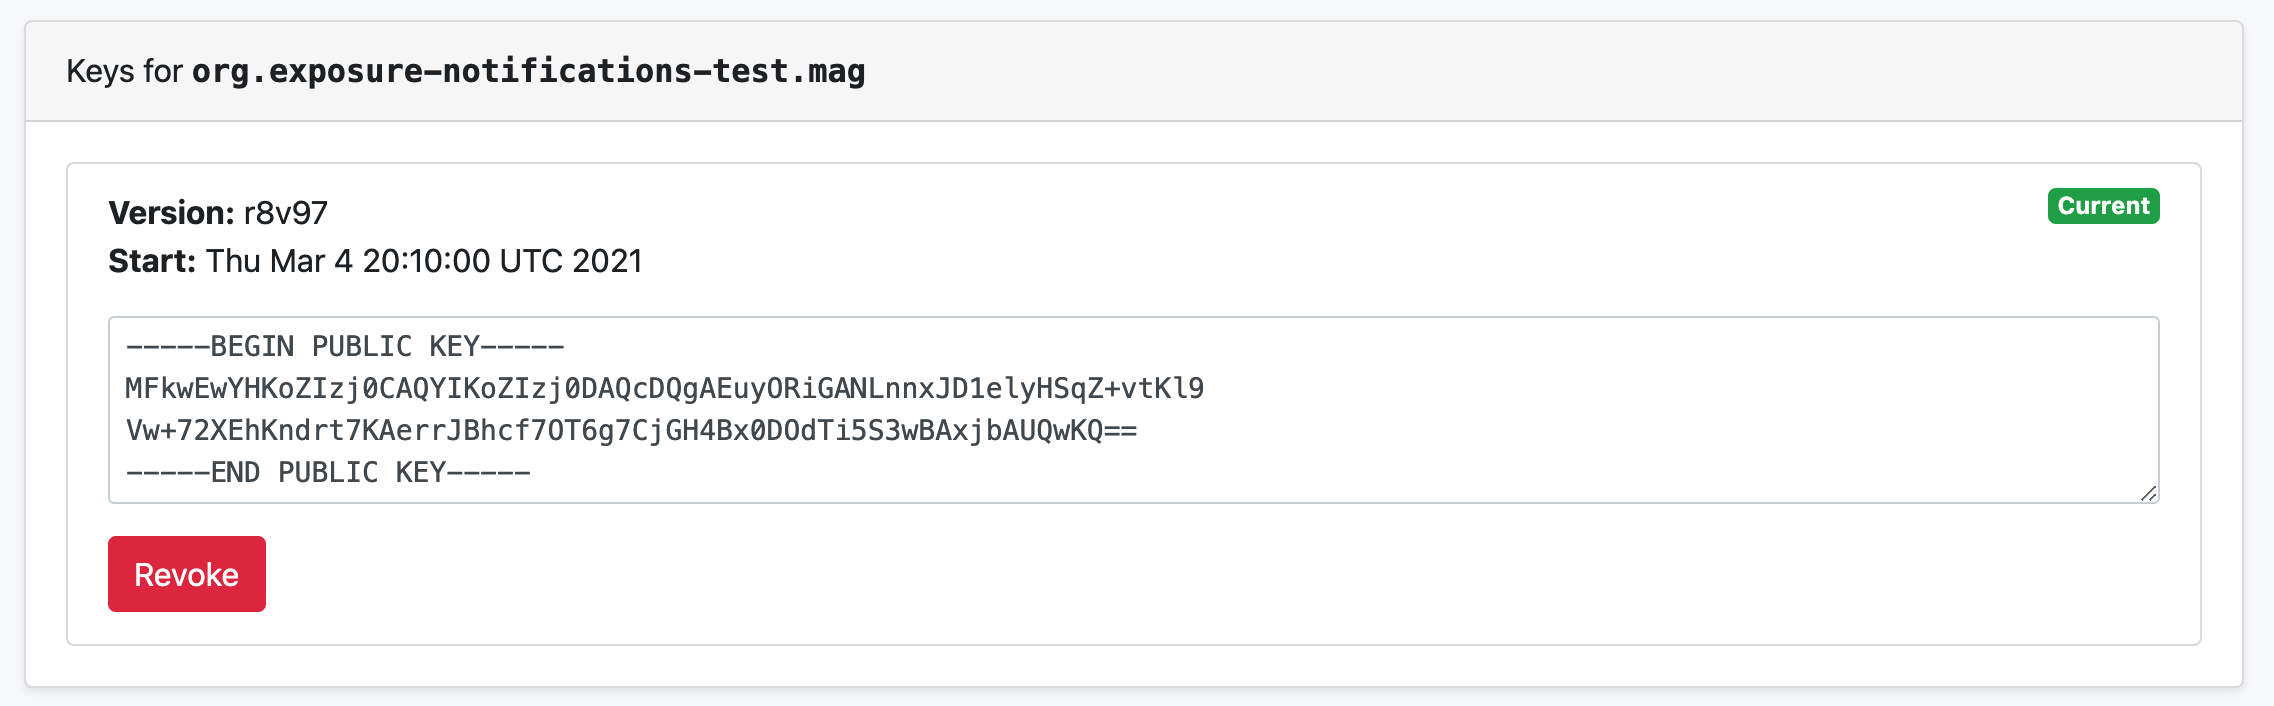
Once confirmed, click Home in the navigation menu.
Create Authorized Health Authority
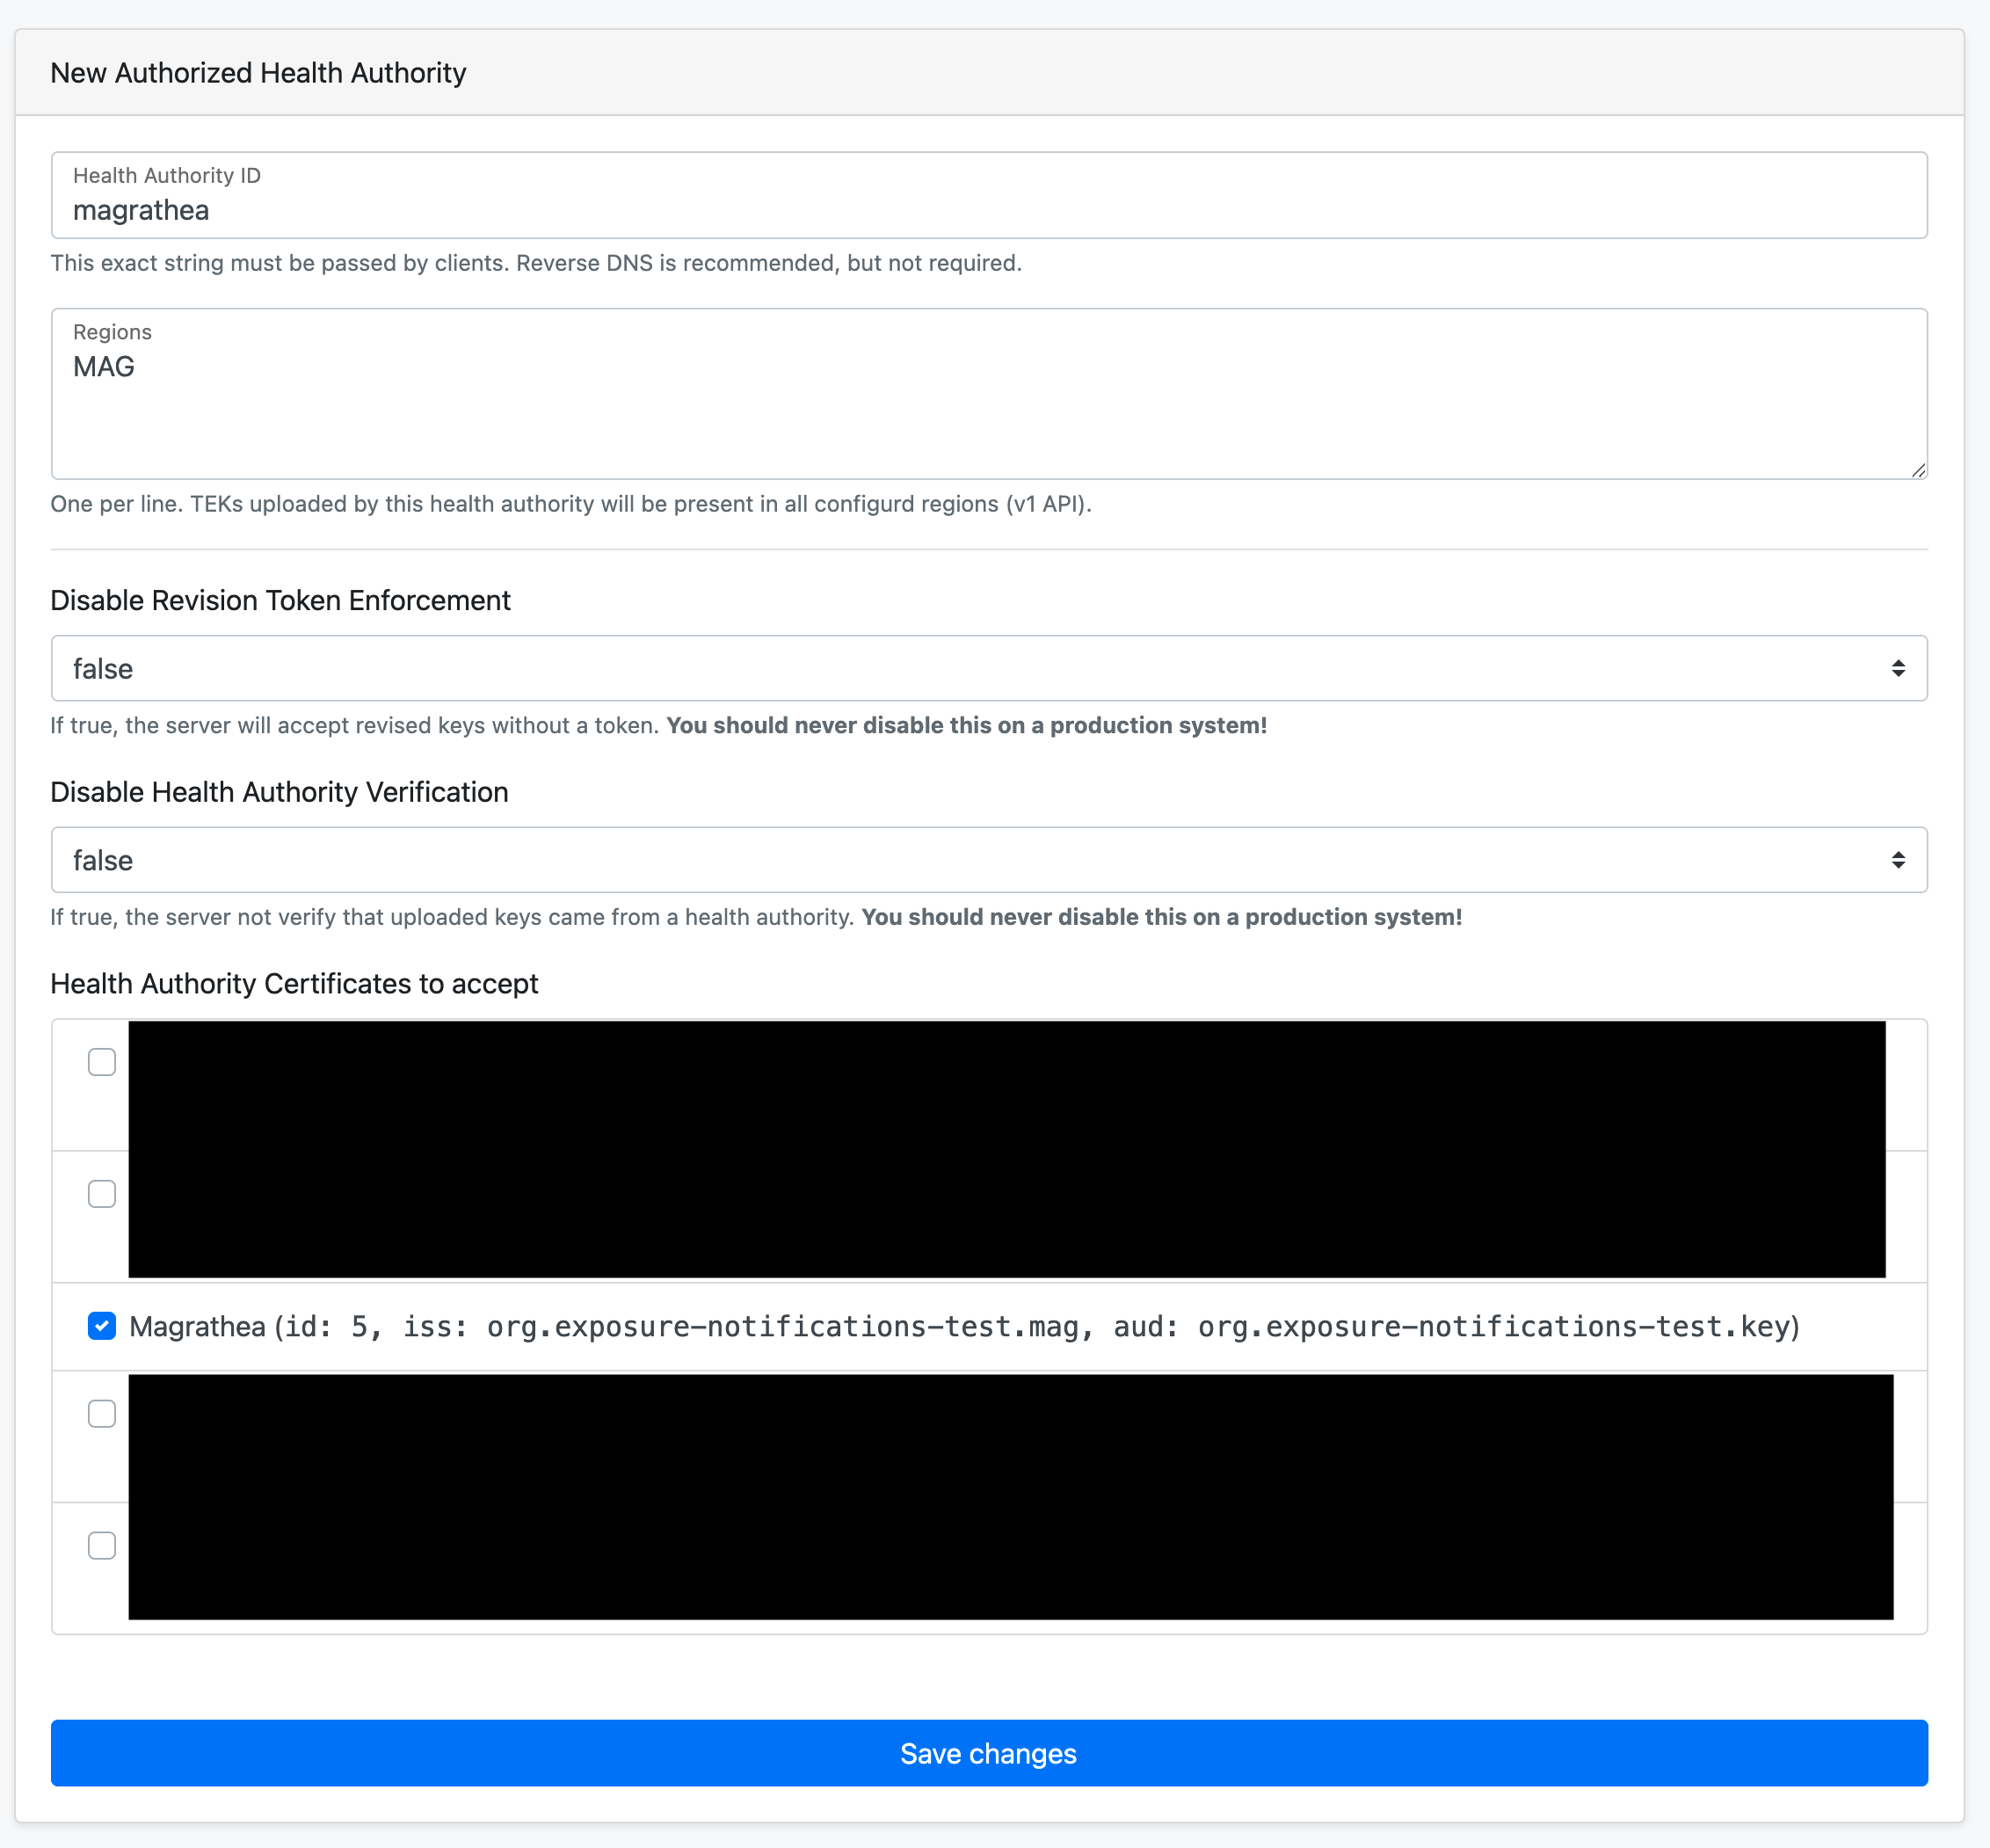
Click on the New Authorized Health Authority button.
- Enter the health authority ID to be the name of your locale (lowercase)
- This value is what your application will pass as the
healthAuthorityIDfor publish requests.
- This value is what your application will pass as the
- The region should be the same ISO region entered on the verification server
- All uploaded keys will be tagged with this region, this is important when creating export configurations.
Disable Revision Token EnforcementMUST BEfalsein production environments.Disable Health Authority VerificationMUST BEfalsein production environments.- Select the
Health Authority Certificatecheckbox for the key we just created.
Press the Save Changes button when done. And then press Home in the navigation
bar.
Export Configuration
The next step is to create an export file for consumption by your application out in the field. This involves 2 steps, creating and configuring the export signing key and then configuring the export.
We will be using both the Google Cloud console and and the key server admin console (using the cloud-run-proxy from the previous section).
Signing Key Configuration
In the Google cloud console, navigate to ☰ -> Security -> Cryptographic Keys.
Here you will seen a keyring called export-signing that was created as part
of the server deployment. Click on the name of the key ring to view the keys.
As part of the deployment, there is a key created called signer. You are free
to use this as your signing key or create a new one. If you create a new key
it must be an asymmetric signing key if type Elliptic Curve P-256 key SHA256 Digest.
The use of HSM level protection is recommended, but not required.
Click into the key that you are using.

Click the 3 dots menu and select copy resource name.
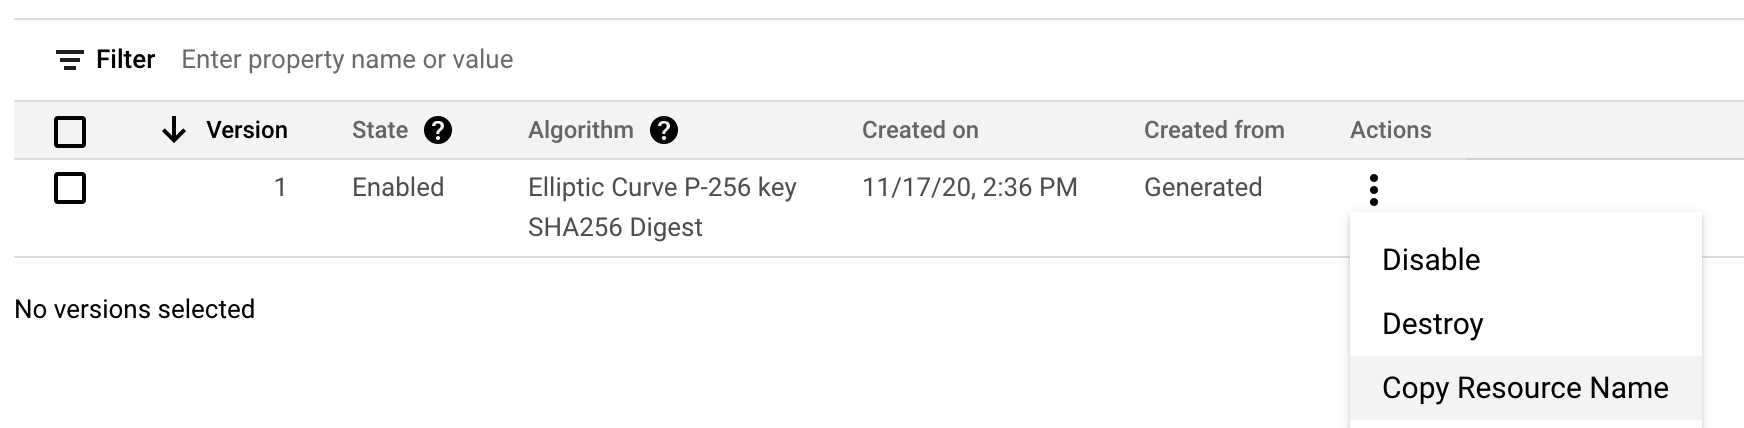
It will be of the form
projects/PROJECT-ID/locations/REGION/keyRings/export-signing/cryptoKeys/KEY-NAME/cryptoKeyVersions/1.
You will need this value later.
Under that same menu, you will see the Get Public Key option. Use that option
to get the public key that needs to be shared with Apple/Google.
Change over to the admin console, which should still be at localhost:8080.
Press the Create New Signature Info button and fill out the form
- Signing Key: the full resource name of the key version we copied earlier
- Signing Key ID: the MCC code for your country
- Signing Key Version: Any value, typically
v1
Press save changes and once created, press Home in the navigation menu.
For Apple/Google to activate your public key on devices, you need these pieces of information, the:
- KeyID
- KeyVersion
- Public Key in PEM format, for example
-----BEGIN PUBLIC KEY-----
MFkwEwYHKoZIzj0CAQYIKoZIzj0DAQcDQgAEpKJ5cMAxnYzPS70SSjNug/ToJ840
jUYCYP+f8hRT9qIsBTFXkAQ4mKVeivRJJvbCi+QMCSh9W2yvX46SbgXGvQ==
-----END PUBLIC KEY-----
Create Export Configuration
Back on the Google Cloud console, we need to find the cloud storage bucket
that is used for your deployment. Navigate to ☰ -> Storage -> Browser.
You will see a bucket where the name starts with exposure-notifications-export-,
copy the full bucket name, you will need it to configure the export.
Move back to the key server admin console. Press the
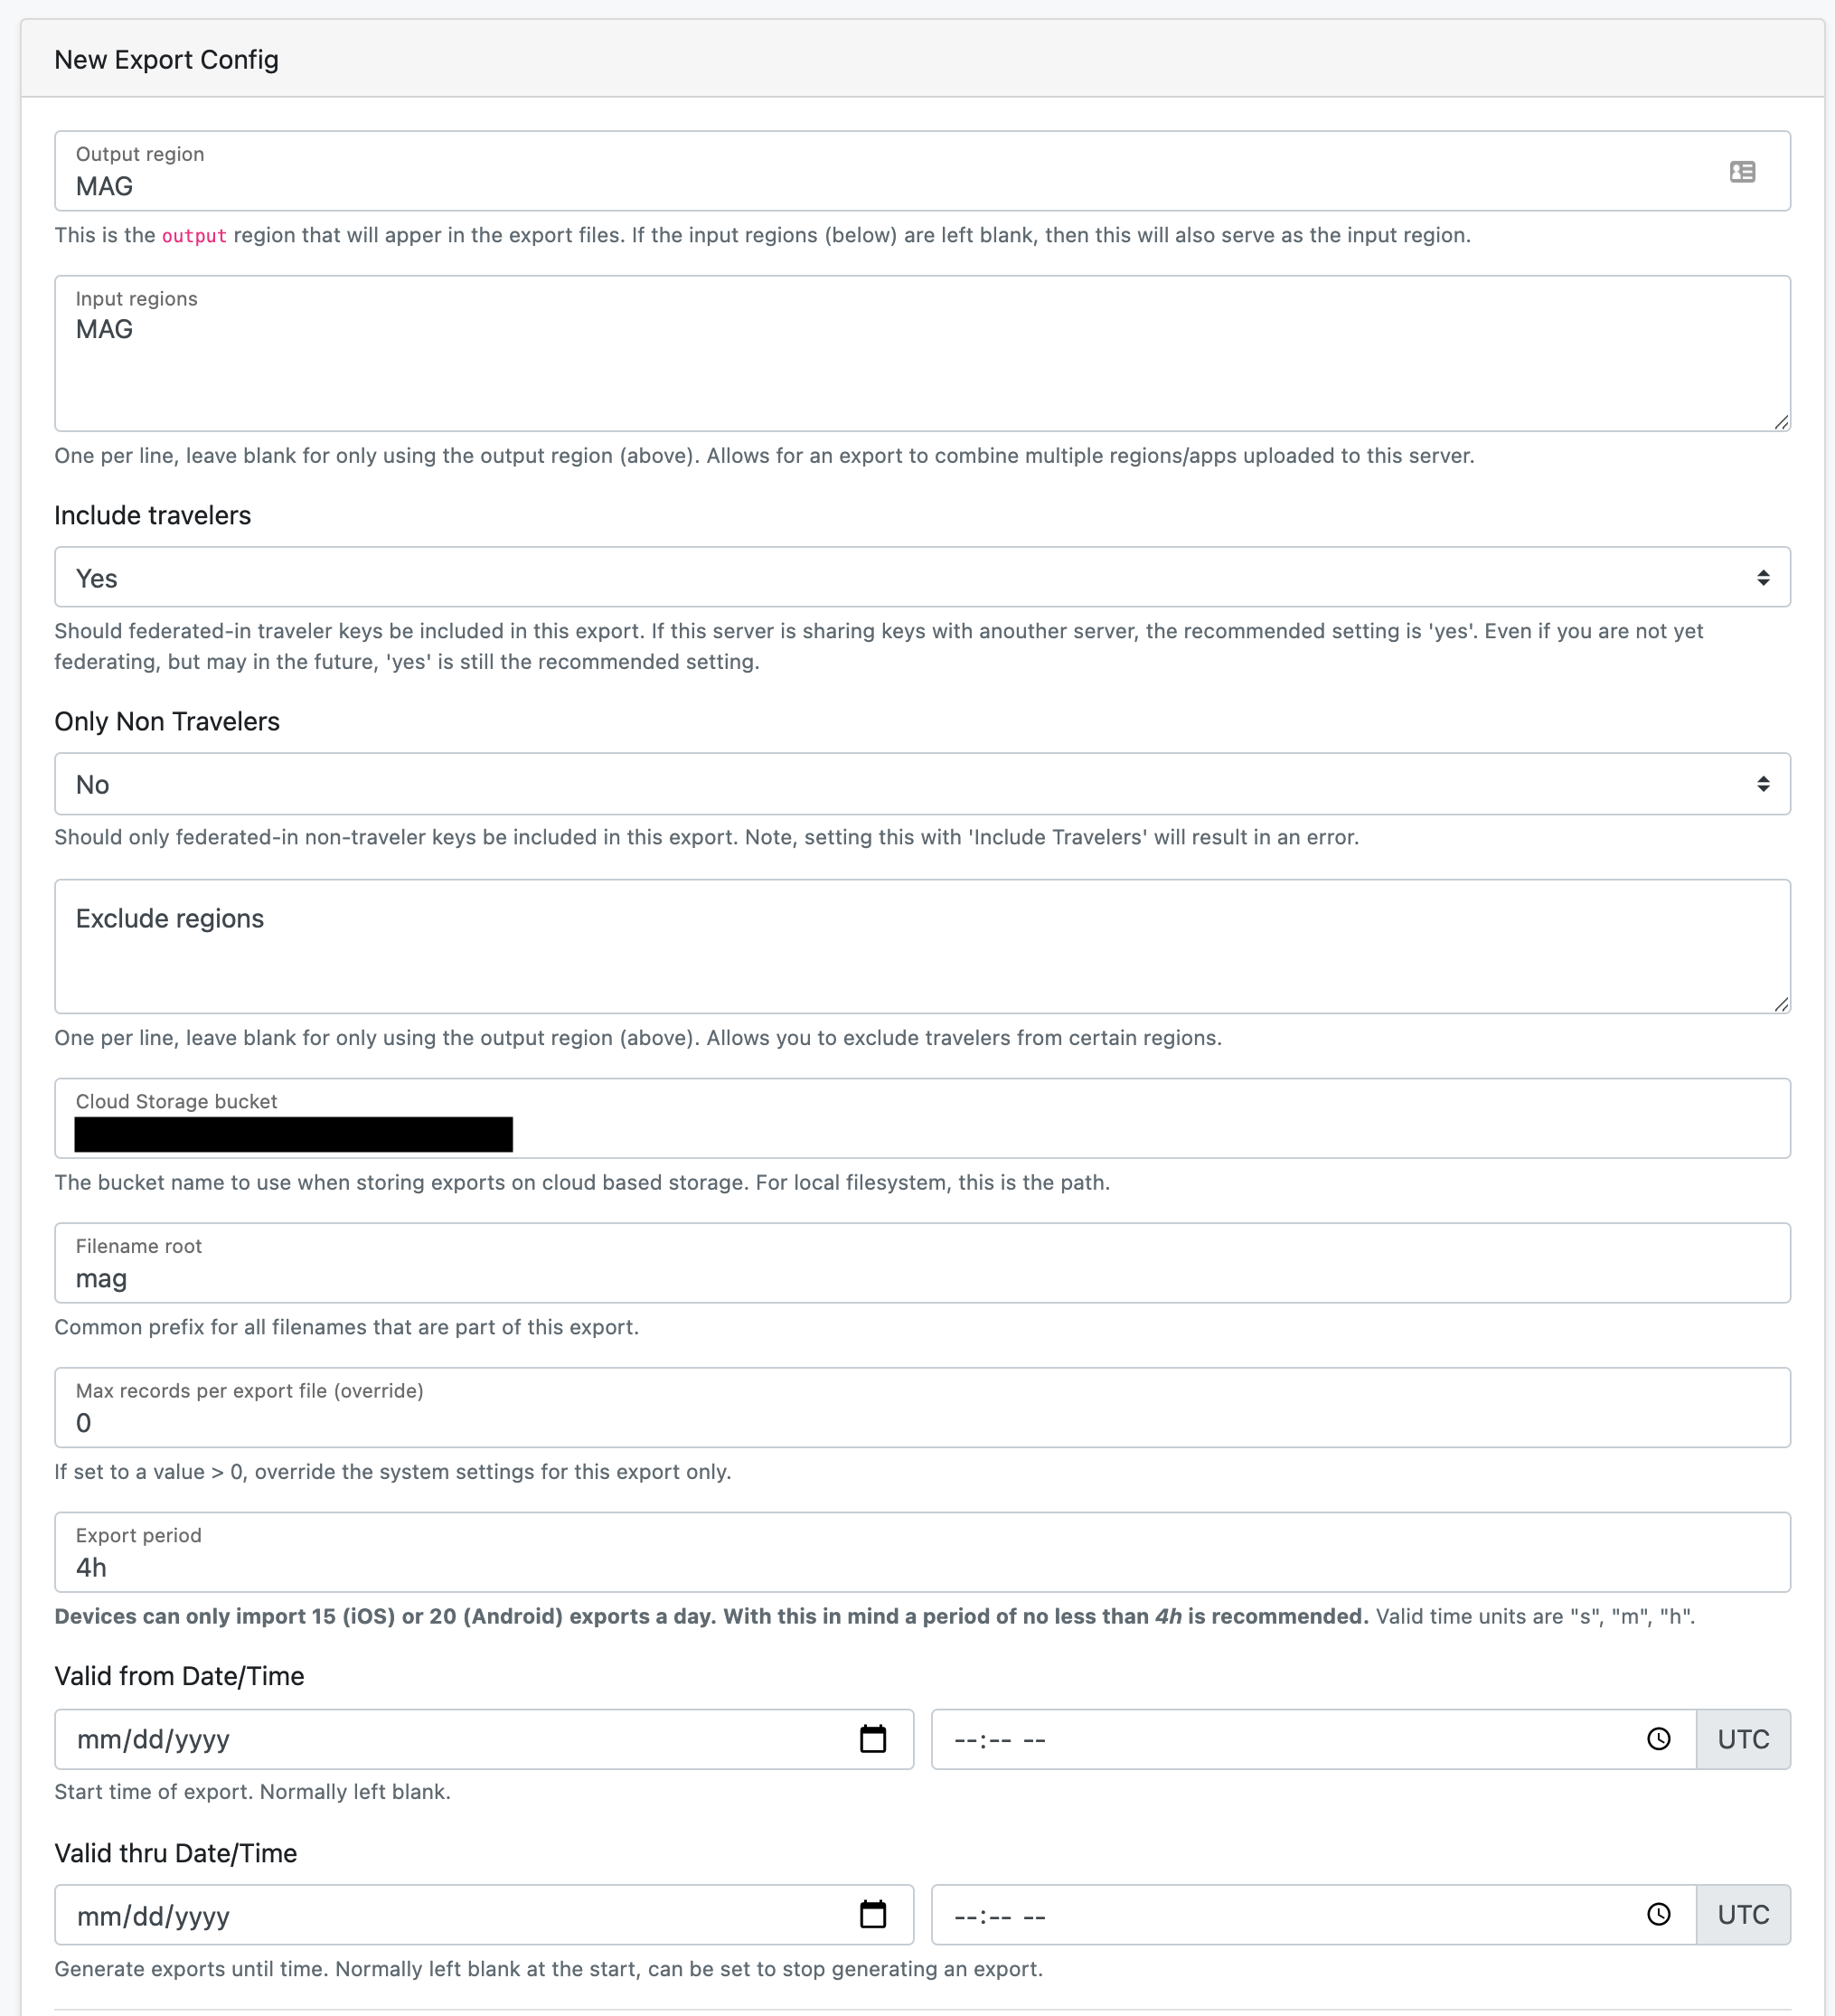
Create new Export Config button, and fill out the form:
- Output region, your ISO region used before
- Input region, same, your ISO region
- Include travelers, set to
Noif this is a single tenant server, otherwiseYesis recommended - Cloud Storage bucket, fill in with the value we discovered earlier.
Example:
In the lower half of the form, select the signing key that we just configured. This will ensure that your exports are correctly signed.

This will make the export files available at
https://export.key.YOURDOMAIN/REGION/index.txt
In our example, this is
https://export.key.exposure-notifications-test.org/mag/index.txt
Please see the key processing guide for information on how to download export files.
This completes the the server configurations.
Next Steps
Your application will need to know the correct URLs for the verification server APIs and key server publish APIs. In our example domains, the following URLs are relevant.
- verify API:
https://apiserver.exposure-notifications-test.org/api/verify - certificate API:
https://apiserver.exposure-notifications-test.org/api/certificate - publish API:
https://exposure.key.exposure-notifications-test.org/v1/publish
For export files to be successfully processed, the export signing key information needs to be shared with both Apple and Google.
Edit this page