歡迎參加 Comprehensive Rust 🦀 課程


這個免費的 Rust 課程是由 Google 的 Android 團隊負責開發。本課程涵蓋 Rust 的全部內容,從基礎語法到進階主題 (泛型和錯誤處理等),應有盡有。
如需最新版課程,請造訪 https://google.github.io/comprehensive-rust/。假如您是在其他網址閱讀課程資料,別忘了查看這個連結的內容是否有更新。
The course is also available as a PDF.
本課程旨在教授 Rust 的知識。我們會假設您是從零開始學習 Rust,希望能夠:
- 讓您對 Rust 語法和語言有全面的認識。
- 讓您學會在 Rust 中修改現有程式及編寫新程式。
- 向您介紹常見的 Rust 慣用語法。
We call the first four course days Rust Fundamentals.
在此基礎上,我們將誠摯邀請您深入探討一或多個專題:
- Android:這是半天的課程,會說明如何針對 Android 平台開發作業 (Android 開放原始碼計畫) 使用 Rust,並介紹與 C、C++ 和 Java 的互通性。
- Chromium: a half-day course on using Rust within Chromium based browsers. This includes interoperability with C++ and how to include third-party crates in Chromium.
- Bare-metal:這是半天的課程,會說明如何使用 Rust 在 bare-metal (嵌入式系統) 上台開發。課程內容包含微控制器和處理器。
- 並行:這個全天課程著重於 Rust 中的並行問題。我們將探討傳統並行 (使用執行緒和互斥鎖進行先占式排程) 以及 async/await 並行 (使用 future 進行合作多工處理)。
非課程目標
Rust 是大型的程式語言,無法在幾天內就介紹完畢。因此,本課程不包含下列內容:
- 學習如何開發巨集 (macro)。請直接閱讀 Rust Book 的 Chapter 19.5 和 Rust by Example.
課程要求
本課程假設您已瞭解如何設計程式。Rust 是一種靜態的程式設計類型,我們有時會將其與 C 和 C++ 比較,以便進一步解釋或凸顯 Rust 做法上的差別。
如果您知道如何以 Python 或 JavaScript 等動態程式語言編寫程式,也很適合跟著我們學習 Rust。
這是「演講者備忘稿」的範例。我們會透過這些備忘稿補充投影片中未提到的資訊。這可能包括老師應提及的重點,以及課堂上典型問題的解答。
講授課程
本頁面的適用對象為課程講師。
以下提供一些背景資訊,說明 Google 內部近期採用的授課方式。
We typically run classes from 9:00 am to 4:00 pm, with a 1 hour lunch break in the middle. This leaves 3 hours for the morning class and 3 hours for the afternoon class. Both sessions contain multiple breaks and time for students to work on exercises.
在講授課程前,建議您注意下列事項:
-
請熟悉課程教材。我們已附上演講者備忘稿,協助突顯重點,也請您不吝提供更多演講者備忘稿內容!分享螢幕畫面時,請務必在彈出式視窗中開啟演講者備忘稿 (按一下「Speaker Notes」旁小箭頭的連結)。如此一來,您就能在課堂上分享簡潔的螢幕畫面。
-
Decide on the dates. Since the course takes four days, we recommend that you schedule the days over two weeks. Course participants have said that they find it helpful to have a gap in the course since it helps them process all the information we give them.
-
找到可容納現場參與者的場地。建議的開班人數為 15 至 25 人。這樣的小班制教學可讓學員自在地提問,講師也有時間可以回答問題。請確認上課場地有_書桌_,可供講師和學員使用:您們都會需要能坐著使用筆電。 講師尤其會需要現場編寫許多程式碼,因此使用講台可能會造成不便。
-
在講課當天提早到上課場地完成設定。建議您直接在筆電上執行
mdbook serve分享螢幕畫面 (請參閱安裝操作說明)。這可確保提供最佳效能,不會在您切換頁面時發生延遲。使用筆電也可讓您修正自己或課程參與者發現的錯字。 -
讓學員獨自或分成小組做習題。我們通常會在早上和下午各安排 30 至 45 分鐘的時間做習題,這包含檢討解題方式的時間。請務必詢問學員是否遇到難題,或需要您的協助。如果發現多位學員遇到相同問題,請向全班說明該問題,並提供解決方式:例如示範如何在標準程式庫 (The Rust Standard Library) 找到相關資訊。
以上為所有注意事項,祝您授課順利,並和我們一樣樂在其中!
請在授課後提供意見回饋,協助我們持續改善課程。您可以與我們分享您滿意的部分,以及值得改善的地方。也歡迎您的學生提供意見回饋!
課程架構
本頁面的適用對象為課程講師。
Rust 基礎知識
The first four days make up Rust Fundamentals. The days are fast paced and we cover a lot of ground!
Course schedule:
- 第 1 天上午 (2 小時 10 分鐘,含休息)
| Segment | Duration |
|---|---|
| 歡迎 | 5 minutes |
| Hello, World | 15 minutes |
| 型別和值 | 45 minutes |
| 基本的控制流程概念 | 40 minutes |
- 第 1 天下午 (2 小時 15 分鐘,含休息)
| Segment | Duration |
|---|---|
| 元組和陣列 | 35 minutes |
| 參照 | 35 minutes |
| 使用者定義的型別 | 50 minutes |
- 第 2 天上午 (2 小時 50 分鐘,含休息)
| Segment | Duration |
|---|---|
| 歡迎 | 3 minutes |
| 模式配對 | 1 hour |
| Read 和 Write | 45 minutes |
| 泛型 | 40 minutes |
- 第 2 天下午 (3 小時 10 分鐘,含休息)
| Segment | Duration |
|---|---|
| 標準函式庫 | 1 hour and 20 minutes |
| 標準函式庫 | 1 hour and 40 minutes |
- 第 3 天上午 (2 小時 20 分鐘,含休息)
| Segment | Duration |
|---|---|
| 歡迎 | 3 minutes |
| 記憶體管理 | 1 hour |
| 智慧指標 | 55 minutes |
- 第 3 天下午 (2 小時 10 分鐘,含休息)
| Segment | Duration |
|---|---|
| 借用 | 50 minutes |
| 生命週期 | 1 hour and 10 minutes |
- 第 4 天上午 (2 小時 40 分鐘,含休息)
| Segment | Duration |
|---|---|
| 歡迎 | 3 minutes |
| 疊代器 | 45 minutes |
| 模組 | 40 minutes |
| 測試 | 45 minutes |
- 第 4 天下午 (2 小時 10 分鐘,含休息)
| Segment | Duration |
|---|---|
| 錯誤處理 | 55 minutes |
| 不安全的 Rust | 1 hour and 5 minutes |
深入探索
In addition to the 4-day class on Rust Fundamentals, we cover some more specialized topics:
Rust in Android
Android 中的 Rust是半天的課程,會說明如何針對 Android 平台開發作業使用 Rust,以及與 C、C++ 和 Java 的互通性。
您會需要檢出 (checkout) AOSP (Android 開放原始碼專案)。請檢查課程存放區上相同的機器,並將 src/android/ 目錄移至檢出的 AOSP 根目錄下。這可確保 Android 建構系統能夠在 src/android/ 中看到 Android.bp 的檔案。
請確保 adb sync 可與模擬器或實際裝置搭配使用,並運用 src/android/build_all.sh 預先建構所有 Android 範例。請閱讀指令碼,瞭解指令碼執行的指令,並確保可以手動執行指令。
Rust in Chromium
Chromium 中的 Rust 是半天的深入探索課程,會說明如何在 Chromium 瀏覽器中使用 Rust。這包括在 Chromium 的 gn 建構系統中使用 Rust,以提供與第三方程式庫 (「Crate」) 和 C++ 的互通性。
您需具備 Chromium 的建構知識。我們建議使用偵錯元件版本來加快執行速度,但其他版本也適用。請確保您能夠執行所建構的 Chromium 瀏覽器。
Bare-Metal Rust
The Bare-Metal Rust deep dive is a full day class on using Rust for bare-metal (embedded) development. Both microcontrollers and application processors are covered.
針對微控制器,您會需要預先購買 BBC micro:bit 第 2 版開發板。此外,所有人都需要按照歡迎頁面上的指示安裝多種套件。
Concurrency in Rust
The Concurrency in Rust deep dive is a full day class on classical as well as async/await concurrency.
您會需要設定新的 Crate,然後下載並準備執行依附元件。接著就能將範例複製貼上至 src/main.rs,使用這些範例進行實驗:
cargo init concurrency
cd concurrency
cargo add tokio --features full
cargo run
形式
本課程極具互動性,因此建議您根據各項疑問,帶領學員瞭解 Rust!
鍵盤快速鍵
以下為 mdBook 中實用的鍵盤快速鍵:
- Arrow-Left: Navigate to the previous page.
- Arrow-Right: Navigate to the next page.
- Ctrl + Enter: Execute the code sample that has focus.
- s: Activate the search bar.
翻譯
本課程已由一群優秀的志工翻譯成其他語言:
- Brazilian Portuguese by @rastringer, @hugojacob, @joaovicmendes, and @henrif75.
- 中文 (簡體)譯者:@suetfei、@wnghl、@anlunx、@kongy、[@noahdragon](https://github.com/noahdragon、@superwhd、@SketchK 和 @nodmp .com/nodmp)。
- Chinese (Traditional) by @hueich, @victorhsieh, @mingyc, @kuanhungchen, and @johnathan79717.
- Korean by @keispace, @jiyongp, @jooyunghan, and @namhyung.
- Spanish by @deavid.
使用右上角的語言選單即可切換語言。
不完整翻譯
目前有許多正在翻譯的語言版本。以下連結為最近更新的翻譯:
- Bengali by @raselmandol.
- 法文譯者:@KookaS 和 @vcaen。
- 德文譯者:@Throvn和 @ronaldfw。
- 日文譯者:[@] CoinEZ-JPN] 和 @momotaro1105。
- Italian by @henrythebuilder and @detro.
如果想協助翻譯,請參閱[操作說明],瞭解如何開始翻譯。譯者可以在[問題追蹤工具]上討論及統整翻譯。
使用 Cargo
您開始閱讀 Rust 內容後,很快就會認識 Cargo,這是在 Rust 生態系統中使用的標準工具,用於建構及執行 Rust 應用程式。以下簡要介紹 Cargo,以及如何在更廣大的生態系統和本訓練課程中運用 Cargo。
安裝
請按照 https://rustup.rs/ 中的指示操作。
This will give you the Cargo build tool (cargo) and the Rust compiler (rustc). You will also get rustup, a command line utility that you can use to install to different compiler versions.
安裝 Rust 後,您應設定編輯器或 IDE,以便與 Rust 搭配使用。為此,大多數編輯器會與 rust-analyzer 通訊,後者提供適用於 VS Code、Emacs、Vim/Neovim 等的自動完成和跳至定義功能。此外,您也可以使用稱做 RustRover 的不同 IDE。
-
On Debian/Ubuntu, you can also install Cargo, the Rust source and the Rust formatter via
apt. However, this gets you an outdated rust version and may lead to unexpected behavior. The command would be:sudo apt install cargo rust-src rustfmt
Rust 生態系統
Rust 生態系統包含多項工具,以下列出主要工具:
-
rustc:Rust 編譯器,可將.rs檔案轉換成二進位檔和其他中繼格式。 -
cargo: the Rust dependency manager and build tool. Cargo knows how to download dependencies, usually hosted on https://crates.io, and it will pass them torustcwhen building your project. Cargo also comes with a built-in test runner which is used to execute unit tests. -
rustup: the Rust toolchain installer and updater. This tool is used to install and updaterustcandcargowhen new versions of Rust are released. In addition,rustupcan also download documentation for the standard library. You can have multiple versions of Rust installed at once andrustupwill let you switch between them as needed.
重要須知:
-
Rust 的發布時程相當緊湊,每六週就會推出新版本。新版本可與舊版本回溯相容,且會啟用新功能。
-
發布版本 (release channel) 分為三種:「穩定版」、「Beta 版」和「Nightly 版」。
-
「Nightly 版」會用於測試新功能,「Beta 版」則會每六週成為「穩定版」。
-
您也可以透過其他註冊資料庫、git、資料夾等管道解析依附元件。
-
Rust 還具有[版本] (edition):目前版本為 Rust 2021。先前版本為 Rust 2015 和 Rust 2018。
-
這些版本可針對語言進行回溯不相容的變更。
-
為避免破壞程式碼,版本皆為自行選擇採用:您可以透過
Cargo.toml檔案選擇所需版本。 -
為避免分割生態系統,Rust 編譯器可混合寫給不同版本的程式碼。
-
請說明很少會略過
cargo直接使用編譯器,大部分使用者都不會這麼做。 -
It might be worth alluding that Cargo itself is an extremely powerful and comprehensive tool. It is capable of many advanced features including but not limited to:
- 專案/套件結構
- [工作區]
- 開發人員依附元件和執行階段依附元件管理/快取
- [建構指令碼]
- [全域安裝]
- 此外,還可以擴充使用子指令外掛程式,例如 cargo clippy
-
詳情請參閱[官方的 Cargo 手冊]。
-
本訓練課程的程式碼範例
在本訓練課程中,我們主要會透過範例瞭解 Rust 語言,這些範例可在瀏覽器中執行。這麼做可讓設定程序更輕鬆,並確保所有人獲得一致的體驗。
我們仍建議安裝 Cargo,方便您更輕鬆做習題。在最後一天,我們會做規模較大的習題,讓您瞭解如何使用依附元件,而這需要使用 Cargo。
本課程的程式碼區塊皆完全為互動式:
fn main() {
    println!("Edit me!");
}
You can use Ctrl + Enter to execute the code when focus is in the text box.
大部分程式碼範例都可供編輯,如上所示。有些程式碼範例無法編輯,原因如下:
-
嵌入式遊樂場無法執行單元測試。請複製貼上程式碼,然後在實際的 Playground 中開啟,即可示範單元測試。
-
當您一離開頁面,嵌入式遊樂場就會失去目前狀態!因此,學生應使用本機 Rust 安裝項目或透過 Playground 來做習題。
使用 Cargo 在本機執行程式碼
如果想在自己的系統上進行程式碼實驗,您會需要先安裝 Rust。請按照 Rust 手冊中的指示操作。您應會獲得正常運作的 rustc 和 cargo。截至本文撰寫時間,最新的 Rust 穩定版具有下列版本編號:
% rustc --version
rustc 1.69.0 (84c898d65 2023-04-16)
% cargo --version
cargo 1.69.0 (6e9a83356 2023-04-12)
由於 Rust 保有回溯相容性,您也可以使用任何後續版本。
完成上述步驟後,請按照下列步驟操作,在本訓練課程的任一範例中建構 Rust 二進位檔:
-
在要複製的範例中,按一下「Copy to clipboard」按鈕。
-
使用
cargo new exercise,為程式碼建立新的exercise/目錄:$ cargo new exercise Created binary (application) `exercise` package -
前往
exercise/,使用cargo run建構並執行二進位檔:$ cd exercise $ cargo run Compiling exercise v0.1.0 (/home/mgeisler/tmp/exercise) Finished dev [unoptimized + debuginfo] target(s) in 0.75s Running `target/debug/exercise` Hello, world! -
將
src/main.rs中的樣板程式碼替換為自己的程式碼。以上一頁的範例為例,替換後的src/main.rs會類似如下:fn main() { println!("Edit me!"); } -
使用
cargo run建構並執行更新版二進位檔:$ cargo run Compiling exercise v0.1.0 (/home/mgeisler/tmp/exercise) Finished dev [unoptimized + debuginfo] target(s) in 0.24s Running `target/debug/exercise` Edit me! -
使用
cargo check快速檢查專案中是否有錯誤,並使用cargo build在不執行的情況下編譯專案。您會在target/debug/中看到一般偵錯版本的輸出內容。使用cargo build --release,在target/release/中產生經過最佳化的發布子版本。 -
只要編輯
Cargo.toml,即可為專案新增依附元件。執行cargo指令時,系統會自動下載及編譯缺少的依附元件。
建議您鼓勵課程參與者安裝 Cargo 及使用本機編輯器。這麼做能提供正常的開發環境,降低操作難度。
歡迎參加第 1 天課程
今天是學習 Rust 基礎知識的第一天,我們會探討許多內容:
- 基本的 Rust 語法:變數、純量和複合型別、列舉、結構體、參照、函式和方法。
- Types and type inference.
- 控制流程結構:迴圈、條件式等。
- 使用者定義的型別:結構體和列舉。
- 模式配對:解構列舉、結構和陣列。
課程時間表
Including 10 minute breaks, this session should take about 2 hours and 10 minutes. It contains:
| Segment | Duration |
|---|---|
| 歡迎 | 5 minutes |
| Hello, World | 15 minutes |
| 型別和值 | 45 minutes |
| 基本的控制流程概念 | 40 minutes |
請提醒學生以下事項:
- 應該一有問題就提問,不要留到最後。
- 本課程的宗旨是互動,非常鼓勵大家討論!
- As an instructor, you should try to keep the discussions relevant, i.e., keep the discussions related to how Rust does things vs some other language. It can be hard to find the right balance, but err on the side of allowing discussions since they engage people much more than one-way communication.
- 我們討論的議題,可能會超前投影片進度。
- 這完全沒問題!複習是學習的重要一環。請記得,投影片只是輔助,您可以視情況略過不需要的部分。
第一天的規畫是說明 Rust 中能夠直接對應到其他語言的「基礎」概念。後續幾天則會介紹更進階的部分。
如果您是在教室授課,就很適合參考這裡的時間表。請注意,每個主題結束後都有練習,然後才是休息時間。請規劃在休息後講解練習的解決方案。此處列出的時程建議是要確保課程進度。您可以視需要彈性調整!
Hello, World
This segment should take about 15 minutes. It contains:
| Slide | Duration |
|---|---|
| 什麼是 Rust? | 10 minutes |
| Rust 的優點 | 3 minutes |
| Playground | 2 minutes |
什麼是 Rust?
Rust 是一款新的程式設計語言,在 2015 年推出 1.0 版:
- Rust 是靜態編譯的程式語言,功能與 C++ 類似
rustc使用 LLVM 做為後端。
- Rust 支援許多平台和架構:
- x86、ARM、WebAssembly…
- Linux、Mac、Windows…
- Rust 適用於多種裝置:
- 韌體和啟動載入器
- 智慧螢幕、
- 手機、
- 電腦、
- 伺服器。
Rust 適合用於與 C++ 同樣的領域,且具有以下特色:
- 高靈活性。
- 提供高度主控權。
- 可縮減到十分受限的裝置規模,例如微控制器。
- 沒有執行階段,也不使用垃圾收集機制。
- 著重可靠性和安全性,但不犧牲效能。
Rust 的優點
Rust 的幾個獨特賣點如下:
-
「編譯期的記憶體安全性」 - 在編譯期間就能避免各類記憶體錯誤
- 不會產生未初始化的變數。
- 不會導致重複釋放記憶體。
- 不會使用已釋放的記憶體。
- 不會產生
NULL指標。 - 不會產生忘記鎖定的互斥鎖。
- 執行緒之間不會發生資料競爭。
- 不會發生疊代器無效的情形。
-
「不會出現未定義的執行階段行為 (undefined runtime behavior)」 - Rust 陳述式的行為一律會有定義
- 陣列存取行為會經過邊界檢查。
- 整數溢位的行為是明確的 (恐慌或迴繞)。
-
「現代化的語言特徵」 - 具表現力且符合人因工程學的高階語言
- 列舉和模式配對。
- 泛型。
- 沒有 FFI 負擔。
- 零成本的抽象化機制。
- 更好的編譯錯誤描述。
- 內建依附元件管理工具。
- 內建測試支援。
- 卓越的語言伺服器通訊協定支援。
這裡不要花太多時間。這幾點稍後全都會深入介紹。
請務必詢問全班同學,瞭解他們具備哪些語言的使用經驗。根據學生答覆,您可以強調不同的 Rust 功能:
-
具備 C 或 C++ 經驗:Rust 會透過借用檢查器,徹底刪除一整類的「執行階段錯誤」。這不僅可讓您獲得像是 C 和 C++ 的效能,也不會造成記憶體安全問題。此外,您還能取得具備模式配對、內建依附元件管理機制等結構的新型語言。
-
具備 Java、Go、Python、JavaScript…經驗:Rust 能讓您享有與這些語言相同的記憶體安全性,而且還可帶來使用類似高階語言的感受。此外,您也能獲得像 C 和 C++ 一樣快速可預期的成效 (無垃圾收集器),以及低階硬體的存取權限 (如有需要)。
Playground
Rust Playground 支援以簡便方式執行精簡的 Rust 程式,也是本課程中範例和練習的基礎。不妨試著執行 Rust Playground 開頭的「hello-world」程式。Playground 兼具以下幾項便利功能:
-
在「Tools」下方點選「
rustfmt」選項,以「標準」方式設定程式碼格式。 -
Rust 有兩個主要的「設定檔」可產生程式碼,分別是「Debug」(加強執行階段檢查,最佳化程度較低) 和「Release」(減少執行階段檢查,大規模最佳化)。這些設定檔位於頂端的「Debug」下方。
-
感興趣的話,不妨點選「…」下的「ASM」查看產生的組語程式碼。
學員準備休息時,請鼓勵他們開啟 Playground 略微試驗一下。在剩餘的課堂時間,建議他們持續開啟 Playground 分頁嘗試操作。如果學生程度較高,想進一步瞭解 Rust 的最佳化作業或產生的組語,就特別適合採用這個授課方式。
型別和值
This segment should take about 45 minutes. It contains:
| Slide | Duration |
|---|---|
| Hello, World | 5 minutes |
| 變數 | 5 minutes |
| 值 | 5 minutes |
| 算術 | 3 minutes |
| 字串 (String) | 5 minutes |
| 型別推斷 | 3 minutes |
| 練習:費波那契數列 | 15 minutes |
Hello, World
我們直接來看看最簡單的 Rust 程式吧,也就是經典的 Hello World 程式:
fn main() {
    println!("Hello 🌍!");
}
您會看到:
- 函式是以
fn導入。 - 區塊會用大括號分隔,這跟在 C 和 C++ 一樣。
main函式是程式的進入點。- Rust 含有衛生巨集,例如
println!。 - Rust 字串採用 UTF-8 編碼,可包含任何萬國碼字元。
我們會藉由這張投影片,試著讓學生熟悉 Rust 程式碼。在接下來的四天裡,他們會大量接觸到這些內容,所以我們得從他們熟悉的小地方著手。
重要須知:
-
Rust 與 C/C++/Java 傳統中的其他語言非常相似。它是指令式的程式語言,除非絕對必要,否則不會嘗試改編任何內容。
-
Rust 是現代的程式語言,可完整支援萬國碼等等。
-
Rust uses macros for situations where you want to have a variable number of arguments (no function overloading).
-
所謂「衛生」巨集,是指這類巨集不會誤從自身所用於的範圍內擷取 ID。Rust 巨集實際上只能算是部分衛生的巨集。
-
Rust 是多範式的語言。舉例來說,它具備強大的物件導向程式設計功能,雖然並非函式語言,卻涉及各式各樣的函式概念。
變數
Rust provides type safety via static typing. Variable bindings are made with let:
fn main() {
    let x: i32 = 10;
    println!("x: {x}");
    // x = 20;
    // println!("x: {x}");
}-
取消註解
x = 20,證明變數預設為不可變動。如要允許變更,請加入mut關鍵字。 -
這裡的
i32是變數型別。這是編譯器必須在編譯期間掌握的資訊,但透過型別推斷 (稍後會說明),程式設計師在許多情況下都能省略其型別宣告。
值
以下列出一些基本的內建型別,以及適用於各型的字面常量的語法。
| 類型 | 常值 | |
|---|---|---|
| 帶號整數 | i8、i16、i32、i64、i128、isize | -10、0、1_000、123_i64 |
| 非帶號整數 | u8、u16、u32、u64、u128、usize | 0、123、10_u16 |
| 浮點數 | f32、f64 | 3.14、-10.0e20、2_f32 |
| 萬國碼純量值 | char | 'a'、'α'、'∞' |
| 布林值 | bool | true、false |
型別的寬度如下:
iN、uN和fN的寬度為 N 位元isize和usize等同於指標的寬度char寬度為 32 位元bool寬度為 8 位元
除此之外,還有一些其他語法:
- 數字中的底線全都可以省略,寫出來只是為了方便閱讀。換句話說,
1_000可以寫成1000(或10_00),而123_i64則可寫成123i64。
算術
fn interproduct(a: i32, b: i32, c: i32) -> i32 {
    return a * b + b * c + c * a;
}

fn main() {
    println!("result: {}", interproduct(120, 100, 248));
}這是我們第一次看到 main 以外的函式,但此函式的含意應該很清楚,那就是它需要三個整數,且會傳回整數。我們稍後會詳細說明函式的細節。
在其他語言中,算數的方法非常相似,運算的優先順序也雷同。
那麼整數溢位現象呢?在 C 和 C++ 中,「有號」整數的溢位現象實際上並未定義,而且在不同的平台或編譯器上可能有不同行為。但在 Rust 中,整數溢位會經過定義。
將 i32 變更為 i16,即可查看整數溢位現象,這在偵錯版本中會造成恐慌 (checked),並納入發布子版本中。此外,Rust 還提供溢位、飽和與進位等其他選項,可透過方法語法存取,例如 (a * b).saturating_add(b * c).saturating_add(c * a)。
事實上,編譯器會偵測常數運算式的溢位,這也是本例中需要另一個函式的原因。
字串 (String)
Rust 用來代表字串的型別有兩種,稍後會深入介紹。兩者「一律」都儲存 UTF-8 編碼字串。
String- a modifiable, owned string.&str- 這是唯讀字串。字串常量會採用此型別。
fn main() {
    let greeting: &str = "Greetings";
    let planet: &str = "🪐";
    let mut sentence = String::new();
    sentence.push_str(greeting);
    sentence.push_str(", ");
    sentence.push_str(planet);
    println!("final sentence: {}", sentence);
    println!("{:?}", &sentence[0..5]);
    //println!("{:?}", &sentence[12..13]);
}這張投影片用於介紹字串。我們稍後會深入介紹此處提及的所有內容,但目前這些就已足夠用於後續的投影片和使用字串的練習題中。
-
字串中的無效 UTF-8 屬於 UB,而安全的 Rust 環境不允許此行為。
-
String是使用者定義的型別,具備建構函式 (::new()) 和s.push_str(..)等方法。 -
&str中的&表示這是參照。我們稍後會講解何謂參照,因此現在只需將&str視為代表「唯讀字串」的單位就行了。 -
被註解掉的那行程式碼會按照位元組位置建立索引到字串中。
12..13的結尾不是字元邊界,因此程式會發生恐慌。請根據錯誤訊息,將其調整至結尾為字元邊界的範圍。 -
原形字串可讓您建立停用逸出功能的
&str值:r"\n" == "\\n"。只要在引號兩側使用等量的#,即可嵌入雙引號:fn main() { println!(r#"<a href="link.html">link</a>"#); println!("<a href=\"link.html\">link</a>"); } -
Using
{:?}is a convenient way to print array/vector/struct of values for debugging purposes, and it’s commonly used in code.
型別推斷
Rust 會觀察變數的「使用」方式,藉此判斷型別:
fn takes_u32(x: u32) {
    println!("u32: {x}");
}

fn takes_i8(y: i8) {
    println!("i8: {y}");
}

fn main() {
    let x = 10;
    let y = 20;

    takes_u32(x);
    takes_i8(y);
    // takes_u32(y);
}這張投影片展示了 Rust 編譯器如何根據變數宣告和用法設下的限制來推斷型別。
請務必強調,以這種方式宣告的變數,並非「任一型別」這類可存放任何資料的動態型別。此類宣告產生的機器碼與型別的明確宣告相同。編譯器會替我們執行工作,並協助編寫更精簡的程式碼。
當整數常量的型別無任何限制時,Rust 會預設使用 i32。這有時會在錯誤訊息中顯示為「{integer}」。同樣地,浮點常量會預設為 f64。
fn main() {
    let x = 3.14;
    let y = 20;
    assert_eq!(x, y);
    // ERROR: no implementation for `{float} == {integer}`
}
練習:費波那契數列
第一和第二個費波那契數都是 1。當 n>2 時,第 n 個費波那契數會以遞迴方式計算為第 n-1 和第 n-2 個費波那契數的和。
編寫用於計算第 n 個費波那契數的 fib(n) 函式。這個函式何時會發生恐慌?
fn fib(n: u32) -> u32 {
    if n <= 2 {
        // The base case.
        todo!("Implement this")
    } else {
        // The recursive case.
        todo!("Implement this")
    }
}

fn main() {
    let n = 20;
    println!("fib(n) = {}", fib(n));
}
解決方案
fn fib(n: u32) -> u32 {
    if n <= 2 {
        return 1;
    } else {
        return fib(n - 1) + fib(n - 2);
    }
}

fn main() {
    let n = 20;
    println!("fib(n) = {}", fib(n));
}
基本的控制流程概念
This segment should take about 40 minutes. It contains:
| Slide | Duration |
|---|---|
| if 表達式 | 4 minutes |
| for 迴圈 | 5 minutes |
| break 和 continue | 4 minutes |
| 區塊 (block) 和範疇 (scope) | 5 minutes |
| 函式 | 3 minutes |
| 巨集 | 2 minutes |
| 練習:考拉茲序列 | 15 minutes |
if 表達式
你可以像在其他語言中使用 if 陳述式那樣地使用 if 表達式:
fn main() {
    let x = 10;
    if x == 0 {
        println!("zero!");
    } else if x < 100 {
        println!("biggish");
    } else {
        println!("huge");
    }
}
此外,你也可以將 if 當作表達式使用。每個區塊中的最後一行式子將成為 if 表達式的賦值:
fn main() {
    let x = 10;
    let size = if x < 20 { "small" } else { "large" };
    println!("number size: {}", size);
}Because if is an expression and must have a particular type, both of its branch blocks must have the same type. Show what happens if you add ; after "small" in the second example.
在運算式中使用 if 時,運算式須有 ;,才能與下一個陳述式分隔。移除 println! 前的 ; 即可查看編譯器錯誤。
for 迴圈
Rust 中有三個迴圈關鍵字:while、loop 和 for:
while
while 關鍵字的運作方式與其他語言非常相似:
fn main() {
    let mut x = 200;
    while x >= 10 {
        x = x / 2;
    }
    println!("Final x: {x}");
}
for
The for loop iterates over ranges of values or the items in a collection:
fn main() {
    for x in 1..5 {
        println!("x: {x}");
    }

    for elem in [1, 2, 3, 4, 5] {
        println!("elem: {elem}");
    }
}- Under the hood
forloops use a concept called “iterators” to handle iterating over different kinds of ranges/collections. Iterators will be discussed in more detail later. - 請注意,
for迴圈只會疊代至4。您可以示範1..=5語法,這代表含頭尾的範圍。
loop 迴圈
The loop statement just loops forever, until a break.
fn main() {
    let mut i = 0;
    loop {
        i += 1;
        println!("{i}");
        if i > 100 {
            break;
        }
    }
}
break 和 continue
如果你想立即進入下一次迭代,可以使用 continue。
If you want to exit any kind of loop early, use break. For loop, this can take an optional expression that becomes the value of the loop expression.
fn main() {
    let mut i = 0;
    loop {
        i += 1;
        if i > 5 {
            break;
        }
        if i % 2 == 0 {
            continue;
        }
        println!("{}", i);
    }
}
標籤
continue 以及 break 都可以選擇性地接收一個迴圈標籤,用來跳出巢狀迴圈中的某一層:
fn main() {
    let s = [[5, 6, 7], [8, 9, 10], [21, 15, 32]];
    let mut elements_searched = 0;
    let target_value = 10;
    'outer: for i in 0..=2 {
        for j in 0..=2 {
            elements_searched += 1;
            if s[i][j] == target_value {
                break 'outer;
            }
        }
    }
    print!("elements searched: {elements_searched}");
}- 請注意,
loop是唯一會傳回重要值的迴圈結構。這是因為系統保證至少會輸入一次此迴圈結構,這一點不同於while和for迴圈。
區塊 (block) 和範疇 (scope)
區塊
A block in Rust contains a sequence of expressions, enclosed by braces {}. Each block has a value and a type, which are those of the last expression of the block:
fn main() {
    let z = 13;
    let x = {
        let y = 10;
        println!("y: {y}");
        z - y
    };
    println!("x: {x}");
}
If the last expression ends with ;, then the resulting value and type is ().
- 你可以藉由改變區塊中的最後一行來觀察區塊數值的變化。舉例來說,新增或刪除一個分號,或者使用
return。
範圍和遮蔽
變數的有效範疇受限於封閉其變數的區塊。
您可以遮蔽變量,包括來自外部範圍以及來自同一範圍的變量:
fn main() {
    let a = 10;
    println!("before: {a}");
    {
        let a = "hello";
        println!("inner scope: {a}");

        let a = true;
        println!("shadowed in inner scope: {a}");
    }

    println!("after: {a}");
}- 請說明變數的範疇受到限制,做法是在最後一個範例的內部區塊中新增
b,然後嘗試在該區塊外部存取b。 - Shadowing is different from mutation, because after shadowing both variable’s memory locations exist at the same time. Both are available under the same name, depending where you use it in the code.
- A shadowing variable can have a different type.
- 遮蔽一開始看起來模糊不清,但對於保留
.unwrap()之後的值很方便。
函式
fn gcd(a: u32, b: u32) -> u32 {
    if b > 0 {
        gcd(b, a % b)
    } else {
        a
    }
}

fn main() {
    println!("gcd: {}", gcd(143, 52));
}- 宣告參數後面接有型別 (與某些程式設計語言相反),然後才是傳回型別。
- The last expression in a function body (or any block) becomes the return value. Simply omit the
;at the end of the expression. Thereturnkeyword can be used for early return, but the “bare value” form is idiomatic at the end of a function (refactorgcdto use areturn). - 某些函式沒有回傳值,會傳回
()這個「單位型別」。如果省略-> ()傳回型別,編譯器則會推斷出這點。 - Overloading is not supported – each function has a single implementation.
- 請一律採用定量參數。系統不支援預設引數。如要支援可變參數函式,請使用巨集。
- Always takes a single set of parameter types. These types can be generic, which will be covered later.
巨集
巨集會在編譯期間展開為 Rust 程式碼,並可接受可變數量的引數。我們可透過結尾的 ! 來辨別巨集。Rust 標準程式庫包含各式實用巨集。
println!(format, ..)prints a line to standard output, applying formatting described instd::fmt.format!(format, ..)的運作方式與println!類似,但會以字串形式傳回結果。dbg!(expression)會記錄並傳回運算式的值。todo!()可將一小段程式碼標示為尚未實作,但執行後會發生恐慌。unavailable!()可將一小段程式碼標示為無法存取,但執行後會發生恐慌。
fn factorial(n: u32) -> u32 {
    let mut product = 1;
    for i in 1..=n {
        product *= dbg!(i);
    }
    product
}

fn fizzbuzz(n: u32) -> u32 {
    todo!()
}

fn main() {
    let n = 4;
    println!("{n}! = {}", factorial(n));
}本節的重點在於,上述的便利性不僅常見,而且確實存在,學員需瞭解如何運用。至於為何將便利性定義為巨集,以及巨集展開後會變成什麼內容,則沒有那麼重要。
本課程不會探討如何定義巨集,但後續章節將說明衍生巨集的用法。
練習:考拉茲序列
The Collatz Sequence is defined as follows, for an arbitrary n1 greater than zero:
- If ni is 1, then the sequence terminates at ni.
- If ni is even, then ni+1 = ni / 2.
- If ni is odd, then ni+1 = 3 * ni + 1.
For example, beginning with n1 = 3:
- 3 is odd, so n2 = 3 * 3 + 1 = 10;
- 10 is even, so n3 = 10 / 2 = 5;
- 5 is odd, so n4 = 3 * 5 + 1 = 16;
- 16 is even, so n5 = 16 / 2 = 8;
- 8 is even, so n6 = 8 / 2 = 4;
- 4 is even, so n7 = 4 / 2 = 2;
- 2 is even, so n8 = 1; and
- 序列就會終止。
給定初始 n,請編寫一個函式來計算考拉茲序列的長度。
/// Determine the length of the collatz sequence beginning at `n`.
fn collatz_length(mut n: i32) -> u32 {
  todo!("Implement this")
}

fn main() {
  todo!("Implement this")
}
解決方案
/// Determine the length of the collatz sequence beginning at `n`.
fn collatz_length(mut n: i32) -> u32 {
    let mut len = 1;
    while n > 1 {
        n = if n % 2 == 0 { n / 2 } else { 3 * n + 1 };
        len += 1;
    }
    len
}

#[test]
fn test_collatz_length() {
    assert_eq!(collatz_length(11), 15);
}

fn main() {
    println!("Length: {}", collatz_length(11));
}
Welcome Back
Including 10 minute breaks, this session should take about 2 hours and 15 minutes. It contains:
| Segment | Duration |
|---|---|
| 元組和陣列 | 35 minutes |
| 參照 | 35 minutes |
| 使用者定義的型別 | 50 minutes |
元組和陣列
This segment should take about 35 minutes. It contains:
| Slide | Duration |
|---|---|
| 陣列 | 5 minutes |
| 元組 | 5 minutes |
| 疊代器 | 3 minutes |
| 模式配對 | 5 minutes |
| 練習:巢狀陣列 | 15 minutes |
陣列
fn main() {
    let mut a: [i8; 10] = [42; 10];
    a[5] = 0;
    println!("a: {a:?}");
}-
A value of the array type
[T; N]holdsN(a compile-time constant) elements of the same typeT. Note that the length of the array is part of its type, which means that[u8; 3]and[u8; 4]are considered two different types. Slices, which have a size determined at runtime, are covered later. -
請嘗試存取超出範圍的陣列元素。系統會在執行階段檢查存取陣列的行為。Rust 通常可對這類檢查進行最佳化處理,避免使用不安全的 Rust 執行這些檢查。
-
我們可以使用常值將值指派給陣列。
-
The
println!macro asks for the debug implementation with the?format parameter:{}gives the default output,{:?}gives the debug output. Types such as integers and strings implement the default output, but arrays only implement the debug output. This means that we must use debug output here. -
加入
#(例如{a:#?}) 可叫用方便閱讀的「美化排版」格式。
元組
fn main() {
    let t: (i8, bool) = (7, true);
    println!("t.0: {}", t.0);
    println!("t.1: {}", t.1);
}-
和陣列一樣,元組有固定的長度。
-
元組會將不同型別的值組成複合型別。
-
元組的欄位可透過點號和值的索引存取,例如
t.0、t.1。 -
The empty tuple
()is referred to as the “unit type” and signifies absence of a return value, akin tovoidin other languages.
疊代器
for 陳述式支援對陣列進行疊代 (對元組則不支援)。
fn main() {
    let primes = [2, 3, 5, 7, 11, 13, 17, 19];
    for prime in primes {
        for i in 2..prime {
            assert_ne!(prime % i, 0);
        }
    }
}這項功能使用 IntoIterator 特徵,但這部分我們尚未介紹。
assert_ne! 是這裡的新巨集。此外還有 assert_eq! 和 assert! 巨集。系統一律會檢查這些巨集,但如果是 debug_assert! 這類僅供偵錯的變體,在發布子版本中會編譯為空白內容。
模式配對
When working with tuples and other structured values it’s common to want to extract the inner values into local variables. This can be done manually by directly accessing the inner values:
fn print_tuple(tuple: (i32, i32)) {
    let left = tuple.0;
    let right = tuple.1;
    println!("left: {left}, right: {right}");
}
However, Rust also supports using pattern matching to destructure a larger value into its constituent parts:
fn print_tuple(tuple: (i32, i32)) {
    let (left, right) = tuple;
    println!("left: {left}, right: {right}");
}
This works with any kind of structured value:
struct Foo {
    a: i32,
    b: bool,
}

fn print_foo(foo: Foo) {
    let Foo { a, b } = foo;
    println!("a: {a}, b: {b}");
}- The patterns used here are “irrefutable”, meaning that the compiler can statically verify that the value on the right of
=has the same structure as the pattern. - A variable name is an irrefutable pattern that always matches any value, hence why we can also use
letto declare a single variable. - Rust also supports using patterns in conditionals, allowing for equality comparison and destructuring to happen at the same time. This form of pattern matching will be discussed in more detail later.
- Edit the examples above to show the compiler error when the pattern doesn’t match the value being matched on.
練習:巢狀陣列
陣列可包含其他陣列:
#![allow(unused)]
fn main() {
let array = [[1, 2, 3], [4, 5, 6], [7, 8, 9]];
}
What is the type of this variable?
Use an array such as the above to write a function transpose which will transpose a matrix (turn rows into columns):
為這兩個函式進行硬式編碼,以便在 3 × 3 矩陣上執行。
將下方程式碼複製到 https://play.rust-lang.org/,並實作函式:
// TODO: remove this when you're done with your implementation.
#![allow(unused_variables, dead_code)]

fn transpose(matrix: [[i32; 3]; 3]) -> [[i32; 3]; 3] {
    unimplemented!()
}

#[test]
fn test_transpose() {
    let matrix = [
        [101, 102, 103], //
        [201, 202, 203],
        [301, 302, 303],
    ];
    let transposed = transpose(matrix);
    assert_eq!(
        transposed,
        [
            [101, 201, 301], //
            [102, 202, 302],
            [103, 203, 303],
        ]
    );
}

fn main() {
    let matrix = [
        [101, 102, 103], // <-- the comment makes rustfmt add a newline
        [201, 202, 203],
        [301, 302, 303],
    ];

    println!("matrix: {:#?}", matrix);
    let transposed = transpose(matrix);
    println!("transposed: {:#?}", transposed);
}
解決方案
fn transpose(matrix: [[i32; 3]; 3]) -> [[i32; 3]; 3] {
    let mut result = [[0; 3]; 3];
    for i in 0..3 {
        for j in 0..3 {
            result[j][i] = matrix[i][j];
        }
    }
    result
}

#[test]
fn test_transpose() {
    let matrix = [
        [101, 102, 103], //
        [201, 202, 203],
        [301, 302, 303],
    ];
    let transposed = transpose(matrix);
    assert_eq!(
        transposed,
        [
            [101, 201, 301], //
            [102, 202, 302],
            [103, 203, 303],
        ]
    );
}

fn main() {
    let matrix = [
        [101, 102, 103], // <-- the comment makes rustfmt add a newline
        [201, 202, 203],
        [301, 302, 303],
    ];

    println!("matrix: {:#?}", matrix);
    let transposed = transpose(matrix);
    println!("transposed: {:#?}", transposed);
}
參照
This segment should take about 35 minutes. It contains:
| Slide | Duration |
|---|---|
| 共用列舉 | 10 minutes |
| 迷途參照 | 10 minutes |
| 練習:幾何圖形 | 15 minutes |
共用列舉
所謂參照,是一種可存取另一值而不對該值負責的方法,也稱為「借用 (borrowing)」。共用的參照僅供唯讀,且其參照的資料無法變更。
fn main() {
    let a = 'A';
    let b = 'B';
    let mut r: &char = &a;
    println!("r: {}", *r);
    r = &b;
    println!("r: {}", *r);
}
如果是對 T 型別的共用參照,就屬於 &T 型別。系統會使用 & 運算子建立參照值。* 運算子則用於將參照「解除參照」,產生參照的值。
Rust 會以靜態方式禁止迷途參照:
fn x_axis(x: i32) -> &(i32, i32) {
    let point = (x, 0);
    return &point;
}-
參照可說是「借用」自身參照的值,對不熟悉指標的學生而言,這是不錯的模型,因為程式碼可以使用參照來存取值,但仍歸原始的變數所「擁有」。本課程將在第 3 天進一步說明擁有權。
-
參照需以指標的形式實作,主要優點是大小會比指向的目標小得多。熟悉 C 或 C++ 的學生會覺得參照很像指標。在稍後的課程中,我們將介紹 Rust 如何避免使用原始指標導致的記憶體安全錯誤。
-
Rust 不會自動為您建立參照,一律須使用
&。 -
Rust will auto-dereference in some cases, in particular when invoking methods (try
r.is_ascii()). There is no need for an->operator like in C++. -
這個範例中的
r可變動,因此可以重新指派 (r = &b)。請注意,這會重新繫結r,因此會參照其他內容。此方式與 C++ 不同,在 C++ 中,對參照的賦值會變更參照的值。 -
共用參照不允許修改其參照的值,即使該值可變動也一樣。請嘗試使用
*r = 'X'。 -
Rust 會追蹤所有參照的生命週期,確保其存留時間夠長。在安全的 Rust 中不會發生迷途參照。
x_axis會傳回對point的參照,但在函式傳回時會釋放point,因此不會編譯。 -
我們會在講到擁有權時進一步探討「借用」。
迷途參照
專屬參照 (也稱做可變動參照) 允許變更自身參照的值。這類參照屬於 &mut T 型別。
fn main() {
    let mut point = (1, 2);
    let x_coord = &mut point.0;
    *x_coord = 20;
    println!("point: {point:?}");
}重要須知:
-
「專屬」表示只有這個參照可用來存取值。任何其他參照 (不論是共用或專屬參照) 都不可以同時存在,此外,在專屬參照存在的情況下,就無法存取參照的值。請嘗試在
x_coord運作時建立&point.0或變更point.0。 -
Be sure to note the difference between
let mut x_coord: &i32andlet x_coord: &mut i32. The first one represents a shared reference which can be bound to different values, while the second represents an exclusive reference to a mutable value.
練習:幾何圖形
我們會建立幾個 3D 幾何圖形的公用函式,將點表示為 [f64;3]。函式簽章則由您自行決定。
// Calculate the magnitude of a vector by summing the squares of its coordinates
// and taking the square root. Use the `sqrt()` method to calculate the square
// root, like `v.sqrt()`.


fn magnitude(...) -> f64 {
    todo!()
}

// Normalize a vector by calculating its magnitude and dividing all of its
// coordinates by that magnitude.


fn normalize(...) {
    todo!()
}

// Use the following `main` to test your work.

fn main() {
    println!("Magnitude of a unit vector: {}", magnitude(&[0.0, 1.0, 0.0]));

    let mut v = [1.0, 2.0, 9.0];
    println!("Magnitude of {v:?}: {}", magnitude(&v));
    normalize(&mut v);
    println!("Magnitude of {v:?} after normalization: {}", magnitude(&v));
}
解決方案
/// Calculate the magnitude of the given vector.
fn magnitude(vector: &[f64; 3]) -> f64 {
    let mut mag_squared = 0.0;
    for coord in vector {
        mag_squared += coord * coord;
    }
    mag_squared.sqrt()
}

/// Change the magnitude of the vector to 1.0 without changing its direction.
fn normalize(vector: &mut [f64; 3]) {
    let mag = magnitude(vector);
    for item in vector {
        *item /= mag;
    }
}

fn main() {
    println!("Magnitude of a unit vector: {}", magnitude(&[0.0, 1.0, 0.0]));

    let mut v = [1.0, 2.0, 9.0];
    println!("Magnitude of {v:?}: {}", magnitude(&v));
    normalize(&mut v);
    println!("Magnitude of {v:?} after normalization: {}", magnitude(&v));
}
使用者定義的型別
This segment should take about 50 minutes. It contains:
| Slide | Duration |
|---|---|
| 結構體 | 10 minutes |
| 元組結構體 | 10 minutes |
| 列舉 | 5 minutes |
| 靜態和常數 | 5 minutes |
| 型別別名 | 2 minutes |
| 練習:電梯事件 | 15 minutes |
結構體
與 C 和 C++ 一樣,Rust 支援自訂結構體:
struct Person {
    name: String,
    age: u8,
}

fn describe(person: &Person) {
    println!("{} is {} years old", person.name, person.age);
}

fn main() {
    let mut peter = Person { name: String::from("Peter"), age: 27 };
    describe(&peter);

    peter.age = 28;
    describe(&peter);

    let name = String::from("Avery");
    let age = 39;
    let avery = Person { name, age };
    describe(&avery);

    let jackie = Person { name: String::from("Jackie"), ..avery };
    describe(&jackie);
}重點:
- 結構體的運作方式與在 C 或 C++ 中類似。
- 不需要 typedef 即可定義型別。這與 C++ 類似,但與 C 不同。
- 與 C++ 不同的是,結構體之間沒有繼承關係。
- This may be a good time to let people know there are different types of structs.
- Zero-sized structs (e.g.
struct Foo;) might be used when implementing a trait on some type but don’t have any data that you want to store in the value itself. - 在下一張投影片中,我們會介紹元組結構體,可於欄位名稱不重要時使用。
- Zero-sized structs (e.g.
- If you already have variables with the right names, then you can create the struct using a shorthand.
- The syntax
..averyallows us to copy the majority of the fields from the old struct without having to explicitly type it all out. It must always be the last element.
元組結構體
如果欄位名稱不重要,您可以使用元組結構體:
struct Point(i32, i32);

fn main() {
    let p = Point(17, 23);
    println!("({}, {})", p.0, p.1);
}
這通常用於單一欄位的包裝函式 (稱為 newtypes):
struct PoundsOfForce(f64);
struct Newtons(f64);

fn compute_thruster_force() -> PoundsOfForce {
    todo!("Ask a rocket scientist at NASA")
}

fn set_thruster_force(force: Newtons) {
    // ...
}

fn main() {
    let force = compute_thruster_force();
    set_thruster_force(force);
}- 如要對原始型別中值的額外資訊進行編碼,Newtypes 是絕佳的方式,舉例來說:
- 此數字會採用某些測量單位:在上例中為
Newtons。 - The value passed some validation when it was created, so you no longer have to validate it again at every use:
PhoneNumber(String)orOddNumber(u32).
- 此數字會採用某些測量單位:在上例中為
- 示範如何透過存取 newtype 中的單一欄位,將 “f64” 值新增至
Newtons類型。- Rust 通常不太能接受不明確的內容,例如自動展開或使用布林值做為整數。
- 運算子超載會在第 3 天 (泛型) 討論。
- 此範例巧妙地以 Mars Climate Orbiter 的失敗經驗做為參照。
列舉
enum 關鍵字可建立具有幾個不同變體的型別:
#[derive(Debug)]
enum Direction {
    Left,
    Right,
}

#[derive(Debug)]
enum PlayerMove {
    Pass,                        // Simple variant
    Run(Direction),              // Tuple variant
    Teleport { x: u32, y: u32 }, // Struct variant
}

fn main() {
    let m: PlayerMove = PlayerMove::Run(Direction::Left);
    println!("On this turn: {:?}", m);
}重點:
- Enumerations allow you to collect a set of values under one type.
Direction是含變體的型別,有Direction::Left和Direction::Right這兩個值。PlayerMove是含三種變體的型別。除了酬載之外,Rust 還會儲存判別值,以便在執行階段瞭解哪個變體屬於PlayerMove值。- This might be a good time to compare structs and enums:
- In both, you can have a simple version without fields (unit struct) or one with different types of fields (variant payloads).
- You could even implement the different variants of an enum with separate structs but then they wouldn’t be the same type as they would if they were all defined in an enum.
- Rust 會以最少的空間來儲存判別值。
-
如有需要,Rust 會儲存最小所需大小的整數
-
如果允許的變體值未涵蓋所有位元模式,Rust 會使用無效的位元模式來編碼判別值 (即「區位最佳化」)。舉例來說,
Option<&u8>可儲存指向整數的指標,也可儲存None變體適用的NULL。 -
您可以視需要控制判別值,例如為了與 C 相容:
#[repr(u32)]
enum Bar {
    A, // 0
    B = 10000,
    C, // 10001
}

fn main() {
    println!("A: {}", Bar::A as u32);
    println!("B: {}", Bar::B as u32);
    println!("C: {}", Bar::C as u32);
}
如果沒有
repr,判別值型別會需要 2 個位元組,因為 10001 適合 2 個位元組。
-
探索更多內容
Rust 支援多種最佳化做法,可用於縮減列舉占用的空間。
-
空值指標最佳化:針對部分型別,Rust 保證
size_of::<T>()等於size_of::<Option<T>>().如果想示範位元表示法實際運作時「可能」的樣子,可以使用下列範例程式碼。請務必注意,編譯器並無對這個表示法提供保證,因此這完全不安全。
use std::mem::transmute;

macro_rules! dbg_bits {
    ($e:expr, $bit_type:ty) => {
        println!("- {}: {:#x}", stringify!($e), transmute::<_, $bit_type>($e));
    };
}

fn main() {
    unsafe {
        println!("bool:");
        dbg_bits!(false, u8);
        dbg_bits!(true, u8);

        println!("Option<bool>:");
        dbg_bits!(None::<bool>, u8);
        dbg_bits!(Some(false), u8);
        dbg_bits!(Some(true), u8);

        println!("Option<Option<bool>>:");
        dbg_bits!(Some(Some(false)), u8);
        dbg_bits!(Some(Some(true)), u8);
        dbg_bits!(Some(None::<bool>), u8);
        dbg_bits!(None::<Option<bool>>, u8);

        println!("Option<&i32>:");
        dbg_bits!(None::<&i32>, usize);
        dbg_bits!(Some(&0i32), usize);
    }
}
靜態和常數
Static and constant variables are two different ways to create globally-scoped values that cannot be moved or reallocated during the execution of the program.
const
常數變數會在編譯期間評估,且無論用於何處,其值都會內嵌:
const DIGEST_SIZE: usize = 3;
const ZERO: Option<u8> = Some(42);

fn compute_digest(text: &str) -> [u8; DIGEST_SIZE] {
    let mut digest = [ZERO.unwrap_or(0); DIGEST_SIZE];
    for (idx, &b) in text.as_bytes().iter().enumerate() {
        digest[idx % DIGEST_SIZE] = digest[idx % DIGEST_SIZE].wrapping_add(b);
    }
    digest
}

fn main() {
    let digest = compute_digest("Hello");
    println!("digest: {digest:?}");
}根據《Rust RFC 手冊》所述,這類值會在使用時內嵌。
您只能在編譯期間呼叫標示為 const 的函式,以便產生 const 值,但可以在執行階段呼叫 const 函式。
static
靜態變數會在程式的整個執行過程中持續運作,因此不會移動:
static BANNER: &str = "Welcome to RustOS 3.14";

fn main() {
    println!("{BANNER}");
}
As noted in the Rust RFC Book, these are not inlined upon use and have an actual associated memory location. This is useful for unsafe and embedded code, and the variable lives through the entirety of the program execution. When a globally-scoped value does not have a reason to need object identity, const is generally preferred.
- 別忘了提到
const的行為在語意上與 C++ 的constexpr相似。 - 另一方面,
static則更類似於 C++ 中的const或可變動的全域變數。 static提供物件識別子,也就是記憶體中的位址,和具有內部可變動性型別 (例如Mutex<T>) 所需的狀態。- 需要在執行階段評估常數的情況雖不常見,但這會比使用靜態項目更有用且安全。
屬性表:
| 資源 | 靜態 | 常數 |
|---|---|---|
| 具備記憶體中的位址 | 是 | 否 (已內嵌) |
| 在整個程式執行期間持續存在 | 是 | 否 |
| 可變動 | 是 (不安全) | 否 |
| Evaluated at compile time | 是 (已在編譯時初始化) | 是 |
| 無論在何處使用都會內嵌 | 否 | 是 |
探索更多內容
Because static variables are accessible from any thread, they must be Sync. Interior mutability is possible through a Mutex, atomic or similar.
Thread-local data can be created with the macro std::thread_local.
型別別名
型別別名會為另一型別建立名稱。這兩種型別可以交替使用。
enum CarryableConcreteItem {
    Left,
    Right,
}

type Item = CarryableConcreteItem;

// Aliases are more useful with long, complex types:
use std::cell::RefCell;
use std::sync::{Arc, RwLock};
type PlayerInventory = RwLock<Vec<Arc<RefCell<Item>>>>;別名在 C 語言的程式設計師眼中類似於 typedef。
練習:電梯事件
我們會建立資料結構,用來代表電梯控制系統中的事件。您可以自行定義類型和函式,建構各種事件。請使用 #[derive(Debug)] 來允許型別採用 {:?} 的格式。
這項練習只需建立及填入資料結構,main 就能在不發生錯誤的情況下執行。本課程的下一部分將介紹如何從這些結構中取得資料。
#[derive(Debug)]
/// An event in the elevator system that the controller must react to.
enum Event {
    // TODO: add required variants
}

/// A direction of travel.
#[derive(Debug)]
enum Direction {
    Up,
    Down,
}

/// The car has arrived on the given floor.
fn car_arrived(floor: i32) -> Event {
    todo!()
}

/// The car doors have opened.
fn car_door_opened() -> Event {
    todo!()
}

/// The car doors have closed.
fn car_door_closed() -> Event {
    todo!()
}

/// A directional button was pressed in an elevator lobby on the given floor.
fn lobby_call_button_pressed(floor: i32, dir: Direction) -> Event {
    todo!()
}

/// A floor button was pressed in the elevator car.
fn car_floor_button_pressed(floor: i32) -> Event {
    todo!()
}

fn main() {
    println!(
        "A ground floor passenger has pressed the up button: {:?}",
        lobby_call_button_pressed(0, Direction::Up)
    );
    println!("The car has arrived on the ground floor: {:?}", car_arrived(0));
    println!("The car door opened: {:?}", car_door_opened());
    println!(
        "A passenger has pressed the 3rd floor button: {:?}",
        car_floor_button_pressed(3)
    );
    println!("The car door closed: {:?}", car_door_closed());
    println!("The car has arrived on the 3rd floor: {:?}", car_arrived(3));
}
解決方案
#[derive(Debug)]
/// An event in the elevator system that the controller must react to.
enum Event {
    /// A button was pressed.
    ButtonPressed(Button),

    /// The car has arrived at the given floor.
    CarArrived(Floor),

    /// The car's doors have opened.
    CarDoorOpened,

    /// The car's doors have closed.
    CarDoorClosed,
}

/// A floor is represented as an integer.
type Floor = i32;

/// A direction of travel.
#[derive(Debug)]
enum Direction {
    Up,
    Down,
}

/// A user-accessible button.
#[derive(Debug)]
enum Button {
    /// A button in the elevator lobby on the given floor.
    LobbyCall(Direction, Floor),

    /// A floor button within the car.
    CarFloor(Floor),
}

/// The car has arrived on the given floor.
fn car_arrived(floor: i32) -> Event {
    Event::CarArrived(floor)
}

/// The car doors have opened.
fn car_door_opened() -> Event {
    Event::CarDoorOpened
}

/// The car doors have closed.
fn car_door_closed() -> Event {
    Event::CarDoorClosed
}

/// A directional button was pressed in an elevator lobby on the given floor.
fn lobby_call_button_pressed(floor: i32, dir: Direction) -> Event {
    Event::ButtonPressed(Button::LobbyCall(dir, floor))
}

/// A floor button was pressed in the elevator car.
fn car_floor_button_pressed(floor: i32) -> Event {
    Event::ButtonPressed(Button::CarFloor(floor))
}

fn main() {
    println!(
        "A ground floor passenger has pressed the up button: {:?}",
        lobby_call_button_pressed(0, Direction::Up)
    );
    println!("The car has arrived on the ground floor: {:?}", car_arrived(0));
    println!("The car door opened: {:?}", car_door_opened());
    println!(
        "A passenger has pressed the 3rd floor button: {:?}",
        car_floor_button_pressed(3)
    );
    println!("The car door closed: {:?}", car_door_closed());
    println!("The car has arrived on the 3rd floor: {:?}", car_arrived(3));
}
歡迎參加第 2 天課程
Now that we have seen a fair amount of Rust, today will focus on Rust’s type system:
- Pattern matching: extracting data from structures.
- 方法:將函式與型別建立關聯。
- 特徵:由多種型別共用的行為。
- 泛型:在其他型別上將型別參數化。
- 標準程式庫的型別和特徵:一覽 Rust 豐富的標準程式庫。
課程時間表
Including 10 minute breaks, this session should take about 2 hours and 50 minutes. It contains:
| Segment | Duration |
|---|---|
| 歡迎 | 3 minutes |
| 模式配對 | 1 hour |
| Read 和 Write | 45 minutes |
| 泛型 | 40 minutes |
模式配對
This segment should take about 1 hour. It contains:
| Slide | Duration |
|---|---|
| Matching Values | 10 minutes |
| 解構列舉 | 10 minutes |
| 控制流程 | 10 minutes |
| 練習:運算式求值 | 30 minutes |
Matching Values
The match keyword lets you match a value against one or more patterns. The comparisons are done from top to bottom and the first match wins.
模式可以是簡單的值,類似 C 和 C++ 中的 switch:
#[rustfmt::skip]
fn main() {
    let input = 'x';
    match input {
        'q'                       => println!("Quitting"),
        'a' | 's' | 'w' | 'd'     => println!("Moving around"),
        '0'..='9'                 => println!("Number input"),
        key if key.is_lowercase() => println!("Lowercase: {key}"),
        _                         => println!("Something else"),
    }
}
The _ pattern is a wildcard pattern which matches any value. The expressions must be exhaustive, meaning that it covers every possibility, so _ is often used as the final catch-all case.
Match can be used as an expression. Just like if, each match arm must have the same type. The type is the last expression of the block, if any. In the example above, the type is ().
A variable in the pattern (key in this example) will create a binding that can be used within the match arm.
A match guard causes the arm to match only if the condition is true.
重點:
-
建議您特別指出某些特定字元在模式中的使用方式
|可做為or..可以視需要展開1..=5代表含頭尾的範圍_是萬用字元
-
有些概念比模式本身所允許的更加複雜,如果我們希望簡要地表達這些想法,就必須把配對守衛視為獨立的語法功能。
-
這與配對分支內的個別
if運算式不同。分支區塊中的if運算式 (位於=>之後) 會在選取配對分支後發生。即使該區塊內的if條件失敗,系統也不會考量原始match運算式的其他分支。 -
只要運算式隸屬於具備
|的模式之中,就會套用守衛定義的條件。
解構列舉
就像元組,結構體和列舉也可透過配對來解構:
結構體
struct Foo {
    x: (u32, u32),
    y: u32,
}

#[rustfmt::skip]
fn main() {
    let foo = Foo { x: (1, 2), y: 3 };
    match foo {
        Foo { x: (1, b), y } => println!("x.0 = 1, b = {b}, y = {y}"),
        Foo { y: 2, x: i }   => println!("y = 2, x = {i:?}"),
        Foo { y, .. }        => println!("y = {y}, other fields were ignored"),
    }
}
列舉
模式也可用來將變數綁定至值的某些部分。您可以透過這個方式檢查型別的結構。首先從簡單的 enum 型別開始吧:
enum Result {
    Ok(i32),
    Err(String),
}

fn divide_in_two(n: i32) -> Result {
    if n % 2 == 0 {
        Result::Ok(n / 2)
    } else {
        Result::Err(format!("cannot divide {n} into two equal parts"))
    }
}

fn main() {
    let n = 100;
    match divide_in_two(n) {
        Result::Ok(half) => println!("{n} divided in two is {half}"),
        Result::Err(msg) => println!("sorry, an error happened: {msg}"),
    }
}這裡我們利用分支來「解構」Result 值。在第一個分支中,half 會與 Ok 變體中的值綁定。在第二個分支中,msg 會綁定至錯誤訊息。
結構體
- 請變更
foo中的常值,與其他模式配對。 - 在
Foo中新增一個欄位,並視需要變更模式。 - 捕獲和常數運算式之間的區別可能不容易發現。請嘗試將第二個分支的
2變更為變數,您會發現它幾乎無法運作。現在將其變更為const,您會看到它再次運作。
列舉
重要須知:
if/else運算式會傳回列舉,之後列舉會透過match解除封裝。- 您可以嘗試在列舉定義中加入第三個變體,並在執行程式碼時顯示錯誤。請向學員指出程式碼現在有哪些地方還不詳盡,並說明編譯器會如何嘗試給予提示。
- The values in the enum variants can only be accessed after being pattern matched.
- Demonstrate what happens when the search is inexhaustive. Note the advantage the Rust compiler provides by confirming when all cases are handled.
- 將
divide_in_two的結果儲存在result變數中,並在迴圈中match結果。由於配對符合時會耗用msg,因此這麼做並不會執行編譯。如要修正此問題,請配對&result,而非result。這會讓msg成為參照,因此就不會遭到耗用。這個「人因工程學的配對」功能已於 Rust 2018 推出。如要支援舊版 Rust,請在模式中將msg替換成ref msg。
控制流程
Rust 的某些控制流程結構與其他程式語言不同。這些結構會用於模式配對:
if let運算式while let運算式match運算式
if let 運算式
if let 運算式可讓您根據值是否符合模式,執行不同的程式碼:
fn sleep_for(secs: f32) {
    let dur = if let Ok(dur) = std::time::Duration::try_from_secs_f32(secs) {
        dur
    } else {
        std::time::Duration::from_millis(500)
    };
    std::thread::sleep(dur);
    println!("slept for {:?}", dur);
}

fn main() {
    sleep_for(-10.0);
    sleep_for(0.8);
}
let else 運算式
如果是要配對模式並從函式傳回的常見情況,請使用 let else。如果是「其他」情況,則必須發散 (return、break 或恐慌,也就是落在區塊結尾之外的任何情況)。
fn hex_or_die_trying(maybe_string: Option<String>) -> Result<u32, String> {
    let s = if let Some(s) = maybe_string {
        s
    } else {
        return Err(String::from("got None"));
    };

    let first_byte_char = if let Some(first_byte_char) = s.chars().next() {
        first_byte_char
    } else {
        return Err(String::from("got empty string"));
    };

    if let Some(digit) = first_byte_char.to_digit(16) {
        Ok(digit)
    } else {
        Err(String::from("not a hex digit"))
    }
}

fn main() {
    println!("result: {:?}", hex_or_die_trying(Some(String::from("foo"))));
}
和 if let 的情況一樣,有一個 while let 變數可針對模式重複測試值:
fn main() {
    let mut name = String::from("Comprehensive Rust 🦀");
    while let Some(c) = name.pop() {
        println!("character: {c}");
    }
    // (There are more efficient ways to reverse a string!)
}
Here String::pop returns Some(c) until the string is empty, after which it will return None. The while let lets us keep iterating through all items.
if-let
- Unlike
match,if letdoes not have to cover all branches. This can make it more concise thanmatch. - 常見用途是在使用
Option時處理Some值。 - 與
match不同,if let不會為模式比對支援成立條件子句。
let-else
如上所示,if-let 可能會越加越多。let-else 結構支援壓平合併這個巢狀程式碼。請為學生重新編寫這個冗長的版本,讓他們見識改寫的效果。
重新編寫的版本如下:
#![allow(unused)]
fn main() {
fn hex_or_die_trying(maybe_string: Option<String>) -> Result<u32, String> {
    let Some(s) = maybe_string else {
        return Err(String::from("got None"));
    };

    let Some(first_byte_char) = s.chars().next() else {
        return Err(String::from("got empty string"));
    };

    let Some(digit) = first_byte_char.to_digit(16) else {
        return Err(String::from("not a hex digit"));
    };

    return Ok(digit);
}
}
while-let
- 請指出只要值符合模式,
while let迴圈就會持續運作。 - You could rewrite the
while letloop as an infinite loop with an if statement that breaks when there is no value to unwrap forname.pop(). Thewhile letprovides syntactic sugar for the above scenario.
練習:運算式求值
我們現在要為算術運算式編寫簡單的遞迴評估器。
這裡的 Box 型別是一種智慧指標,我們會在本課程的後續部分詳細說明。如測試中所示,運算式可被 Box::new「裝箱」。如要求裝箱運算式的值,請使用 deref 運算子 (*) 來「開箱」:eval(*boxed_expr)。
部分運算式無法求值,且會傳回錯誤。標準 Result<Value, String> 型別是一種列舉,用於表示成功值 (Ok(Value) )) 或錯誤 (Err(String))。我們稍後會詳細說明這種型別。
請複製程式碼並貼到 Rust Playground,然後開始實作 eval。最終成品應會通過測試。使用 todo!() 讓測試逐一通過可能有所幫助,但您也可以使用 #[ignore] 暫時略過測試:
#[test]
#[ignore]
fn test_value() { .. }
如果您提前完成操作,不妨試著編寫一個以零為除數或會整數溢位的測試。該如何利用 Result (而非恐慌) 處理這種情況?
#![allow(unused)]
fn main() {
/// An operation to perform on two subexpressions.
#[derive(Debug)]
enum Operation {
    Add,
    Sub,
    Mul,
    Div,
}

/// An expression, in tree form.
#[derive(Debug)]
enum Expression {
    /// An operation on two subexpressions.
    Op { op: Operation, left: Box<Expression>, right: Box<Expression> },

    /// A literal value
    Value(i64),
}

fn eval(e: Expression) -> Result<i64, String> {
    todo!()
}

#[test]
fn test_value() {
    assert_eq!(eval(Expression::Value(19)), Ok(19));
}

#[test]
fn test_sum() {
    assert_eq!(
        eval(Expression::Op {
            op: Operation::Add,
            left: Box::new(Expression::Value(10)),
            right: Box::new(Expression::Value(20)),
        }),
        Ok(30)
    );
}

#[test]
fn test_recursion() {
    let term1 = Expression::Op {
        op: Operation::Mul,
        left: Box::new(Expression::Value(10)),
        right: Box::new(Expression::Value(9)),
    };
    let term2 = Expression::Op {
        op: Operation::Mul,
        left: Box::new(Expression::Op {
            op: Operation::Sub,
            left: Box::new(Expression::Value(3)),
            right: Box::new(Expression::Value(4)),
        }),
        right: Box::new(Expression::Value(5)),
    };
    assert_eq!(
        eval(Expression::Op {
            op: Operation::Add,
            left: Box::new(term1),
            right: Box::new(term2),
        }),
        Ok(85)
    );
}

#[test]
fn test_error() {
    assert_eq!(
        eval(Expression::Op {
            op: Operation::Div,
            left: Box::new(Expression::Value(99)),
            right: Box::new(Expression::Value(0)),
        }),
        Err(String::from("division by zero"))
    );
}
}
解決方案
/// An operation to perform on two subexpressions.
#[derive(Debug)]
enum Operation {
    Add,
    Sub,
    Mul,
    Div,
}

/// An expression, in tree form.
#[derive(Debug)]
enum Expression {
    /// An operation on two subexpressions.
    Op { op: Operation, left: Box<Expression>, right: Box<Expression> },

    /// A literal value
    Value(i64),
}

fn eval(e: Expression) -> Result<i64, String> {
    match e {
        Expression::Op { op, left, right } => {
            let left = match eval(*left) {
                Ok(v) => v,
                e @ Err(_) => return e,
            };
            let right = match eval(*right) {
                Ok(v) => v,
                e @ Err(_) => return e,
            };
            Ok(match op {
                Operation::Add => left + right,
                Operation::Sub => left - right,
                Operation::Mul => left * right,
                Operation::Div => {
                    if right == 0 {
                        return Err(String::from("division by zero"));
                    } else {
                        left / right
                    }
                }
            })
        }
        Expression::Value(v) => Ok(v),
    }
}

#[test]
fn test_value() {
    assert_eq!(eval(Expression::Value(19)), Ok(19));
}

#[test]
fn test_sum() {
    assert_eq!(
        eval(Expression::Op {
            op: Operation::Add,
            left: Box::new(Expression::Value(10)),
            right: Box::new(Expression::Value(20)),
        }),
        Ok(30)
    );
}

#[test]
fn test_recursion() {
    let term1 = Expression::Op {
        op: Operation::Mul,
        left: Box::new(Expression::Value(10)),
        right: Box::new(Expression::Value(9)),
    };
    let term2 = Expression::Op {
        op: Operation::Mul,
        left: Box::new(Expression::Op {
            op: Operation::Sub,
            left: Box::new(Expression::Value(3)),
            right: Box::new(Expression::Value(4)),
        }),
        right: Box::new(Expression::Value(5)),
    };
    assert_eq!(
        eval(Expression::Op {
            op: Operation::Add,
            left: Box::new(term1),
            right: Box::new(term2),
        }),
        Ok(85)
    );
}

#[test]
fn test_error() {
    assert_eq!(
        eval(Expression::Op {
            op: Operation::Div,
            left: Box::new(Expression::Value(99)),
            right: Box::new(Expression::Value(0)),
        }),
        Err(String::from("division by zero"))
    );
}

fn main() {
    let expr = Expression::Op {
        op: Operation::Sub,
        left: Box::new(Expression::Value(20)),
        right: Box::new(Expression::Value(10)),
    };
    println!("expr: {:?}", expr);
    println!("result: {:?}", eval(expr));
}
Read 和 Write
This segment should take about 45 minutes. It contains:
| Slide | Duration |
|---|---|
| 方法 | 10 minutes |
| 特徵 | 10 minutes |
| 衍生特徵 | 3 minutes |
| 練習:泛型 Logger | 20 minutes |
方法
Rust 可讓您將函式與新型別建立關聯。您可以使用 impl 區塊來執行這項操作:
#[derive(Debug)]
struct Race {
    name: String,
    laps: Vec<i32>,
}

impl Race {
    // No receiver, a static method
    fn new(name: &str) -> Self {
        Self { name: String::from(name), laps: Vec::new() }
    }

    // Exclusive borrowed read-write access to self
    fn add_lap(&mut self, lap: i32) {
        self.laps.push(lap);
    }

    // Shared and read-only borrowed access to self
    fn print_laps(&self) {
        println!("Recorded {} laps for {}:", self.laps.len(), self.name);
        for (idx, lap) in self.laps.iter().enumerate() {
            println!("Lap {idx}: {lap} sec");
        }
    }

    // Exclusive ownership of self
    fn finish(self) {
        let total: i32 = self.laps.iter().sum();
        println!("Race {} is finished, total lap time: {}", self.name, total);
    }
}

fn main() {
    let mut race = Race::new("Monaco Grand Prix");
    race.add_lap(70);
    race.add_lap(68);
    race.print_laps();
    race.add_lap(71);
    race.print_laps();
    race.finish();
    // race.add_lap(42);
}
The self arguments specify the “receiver” - the object the method acts on. There are several common receivers for a method:
&self:使用共用且不可變動的參照,從呼叫端借用物件。之後可以再次使用該物件。&mut self:使用不重複且可變動的參照,從呼叫端借用物件。之後可以再次使用該物件。self:取得物件擁有權,並將其移出呼叫端。方法會成為物件的擁有者。系統會在方法傳回時捨棄物件 (取消分配),但如果其擁有權已明確傳送的情況例外。具備完整擁有權,不自動等同於具備可變動性。mut self: same as above, but the method can mutate the object.- 沒有接收器:這會成為結構體上的靜態方法,通常用於建立依慣例稱為
new的建構函式。
重點:
- 導入方法時,若將方法比做函式,會很有幫助。
- 系統會在型別的執行個體 (例如結構體或列舉) 上呼叫方法,第一個參數以
self代表執行個體。 - 開發人員可以選擇透過方法來充分利用方法接收器語法,以更有條理的方式進行整理。藉由使用方法,我們可以將所有實作程式碼存放在可預測的位置。
- 系統會在型別的執行個體 (例如結構體或列舉) 上呼叫方法,第一個參數以
- 指出我們會使用關鍵字
self,也就是方法接收器。- 說明
self是self: Self的縮寫,或許也能示範結構體名稱的可能用法。 - 講解
Self是impl區塊所屬型別的型別別名,可用於該區塊的其他位置。 - 提醒學員如何以類似於其他結構體的方式來使用
self,並指出點標記法可用來參照個別欄位, - This might be a good time to demonstrate how the
&selfdiffers fromselfby trying to runfinishtwice. - 除了
self的變體以外,您還可以使用特殊的包裝函式型別做為接收器型別,例如Box<Self>。
- 說明
特徵
Rust 可讓您依據特徵對型別進行抽象化處理,這與介面相似:
trait Pet {
    /// Return a sentence from this pet.
    fn talk(&self) -> String;

    /// Print a string to the terminal greeting this pet.
    fn greet(&self);
}-
特徵用於定義型別必須具有哪幾個方法,才能實作該特徵。
-
In the “Generics” segment, next, we will see how to build functionality that is generic over all types implementing a trait.
Implementing Traits
trait Pet {
    fn talk(&self) -> String;

    fn greet(&self) {
        println!("Oh you're a cutie! What's your name? {}", self.talk());
    }
}

struct Dog {
    name: String,
    age: i8,
}

impl Pet for Dog {
    fn talk(&self) -> String {
        format!("Woof, my name is {}!", self.name)
    }
}

fn main() {
    let fido = Dog { name: String::from("Fido"), age: 5 };
    fido.greet();
}-
To implement
TraitforType, you use animpl Trait for Type { .. }block. -
Unlike Go interfaces, just having matching methods is not enough: a
Cattype with atalk()method would not automatically satisfyPetunless it is in animpl Petblock. -
Traits may provide default implementations of some methods. Default implementations can rely on all the methods of the trait. In this case,
greetis provided, and relies ontalk.
Associated Types
Associated types allow are placeholder types which are filled in by the trait implementation.
#[derive(Debug)]
struct Meters(i32);
#[derive(Debug)]
struct MetersSquared(i32);

trait Multiply {
    type Output;
    fn multiply(&self, other: &Self) -> Self::Output;
}

impl Multiply for Meters {
    type Output = MetersSquared;
    fn multiply(&self, other: &Self) -> Self::Output {
        MetersSquared(self.0 * other.0)
    }
}

fn main() {
    println!("{:?}", Meters(10).multiply(&Meters(20)));
}-
Associated types are sometimes also called “output types”. The key observation is that the implementer, not the caller, chooses this type.
-
Many standard library traits have associated types, including arithmetic operators and
Iterator.
衍生特徵
系統會自動為您的自訂型別實作支援的特徵,如下所示:
#[derive(Debug, Clone, Default)]
struct Player {
    name: String,
    strength: u8,
    hit_points: u8,
}

fn main() {
    let p1 = Player::default(); // Default trait adds `default` constructor.
    let mut p2 = p1.clone(); // Clone trait adds `clone` method.
    p2.name = String::from("EldurScrollz");
    // Debug trait adds support for printing with `{:?}`.
    println!("{:?} vs. {:?}", p1, p2);
}衍生會透過巨集實作,許多 Crate 都提供實用的衍生巨集,以便新增實用功能。例如,serde 可以使用 #[derive(Serialize)],為結構體衍生序列化支援。
練習:泛型 Logger
我們來設計一個簡單的記錄公用程式,使用 Logger 特徵搭配 log 方法。如果程式碼可能會記錄相關進度,就可以採用 &impl Logger。在測試過程中,這可能會將訊息置於測試記錄檔中;而在實際版本中,則會將訊息傳送至記錄伺服器。
不過,下方的 StderrLogger 會記錄詳細程度不限的所有訊息。您的任務是編寫 VerbosityFilter 型別,忽略超出詳細程度上限的訊息。
以下是常見模式:結構體包裝一個特徵實作項目,並實作該相同特徵,在程序中加入行為。想一想,還有哪些其他類型的包裝函式可能在記錄公用程式中派上用場?
use std::fmt::Display;

pub trait Logger {
    /// Log a message at the given verbosity level.
    fn log(&self, verbosity: u8, message: impl Display);
}

struct StderrLogger;

impl Logger for StderrLogger {
    fn log(&self, verbosity: u8, message: impl Display) {
        eprintln!("verbosity={verbosity}: {message}");
    }
}

fn do_things(logger: &impl Logger) {
    logger.log(5, "FYI");
    logger.log(2, "Uhoh");
}

// TODO: Define and implement `VerbosityFilter`.

fn main() {
    let l = VerbosityFilter { max_verbosity: 3, inner: StderrLogger };
    do_things(&l);
}
解決方案
use std::fmt::Display;

pub trait Logger {
    /// Log a message at the given verbosity level.
    fn log(&self, verbosity: u8, message: impl Display);
}

struct StderrLogger;

impl Logger for StderrLogger {
    fn log(&self, verbosity: u8, message: impl Display) {
        eprintln!("verbosity={verbosity}: {message}");
    }
}

fn do_things(logger: &impl Logger) {
    logger.log(5, "FYI");
    logger.log(2, "Uhoh");
}

/// Only log messages up to the given verbosity level.
struct VerbosityFilter<L: Logger> {
    max_verbosity: u8,
    inner: L,
}

impl<L: Logger> Logger for VerbosityFilter<L> {
    fn log(&self, verbosity: u8, message: impl Display) {
        if verbosity <= self.max_verbosity {
            self.inner.log(verbosity, message);
        }
    }
}

fn main() {
    let l = VerbosityFilter { max_verbosity: 3, inner: StderrLogger };
    do_things(&l);
}
泛型
This segment should take about 40 minutes. It contains:
| Slide | Duration |
|---|---|
| Extern 函式 | 5 minutes |
| 泛型資料型別 | 10 minutes |
| 特徵界限 | 10 minutes |
| impl Trait | 5 minutes |
| 練習:泛型 min | 10 minutes |
Extern 函式
Rust supports generics, which lets you abstract algorithms or data structures (such as sorting or a binary tree) over the types used or stored.
/// Pick `even` or `odd` depending on the value of `n`.
fn pick<T>(n: i32, even: T, odd: T) -> T {
    if n % 2 == 0 {
        even
    } else {
        odd
    }
}

fn main() {
    println!("picked a number: {:?}", pick(97, 222, 333));
    println!("picked a tuple: {:?}", pick(28, ("dog", 1), ("cat", 2)));
}-
Rust 會根據引數型別和傳回的值來推斷 T 的型別。
-
這與 C++ 模板 (template) 類似,但 Rust 會立即對泛型函式進行部分編譯,因此函式必須適用於所有符合限制條件的型別。舉例來說,如果
n == 0,請嘗試修改pick以傳回even + odd。即使只使用具有整數的pick建立例項,Rust 仍會將其視為無效。但 C++ 就能讓您這麼做。 -
Generic code is turned into non-generic code based on the call sites. This is a zero-cost abstraction: you get exactly the same result as if you had hand-coded the data structures without the abstraction.
泛型資料型別
你可以使用泛型將具體的欄位型別抽象化:
#[derive(Debug)]
struct Point<T> {
    x: T,
    y: T,
}

impl<T> Point<T> {
    fn coords(&self) -> (&T, &T) {
        (&self.x, &self.y)
    }

    // fn set_x(&mut self, x: T)
}

fn main() {
    let integer = Point { x: 5, y: 10 };
    let float = Point { x: 1.0, y: 4.0 };
    println!("{integer:?} and {float:?}");
    println!("coords: {:?}", integer.coords());
}-
問題: 為什麼
T在impl<T> Point<T> {}中重複出現了兩次?- 因為這是一個泛型型別
T的Point實作,而Point的型別為泛型T。它們是各自獨立的泛型。 - 這表示這個方法是為了任意型別
T而定義的。 - It is possible to write
impl Point<u32> { .. }.- 由於
Point仍然是泛型型別,你可以使用Point<f64>,但這個方法將只適用於Point<u32>。
- 由於
- 因為這是一個泛型型別
-
請嘗試宣告新變數
let p = Point { x: 5, y: 10.0 };。您可以使用兩種型別變數來更新程式碼,允許含有不同型別元素的點,例如:T和U。
特徵界限
使用泛型時,您通常會需要該型別實作 某些特徵,這樣才能呼叫該特徵的方法。
您可以使用 T: Trait 或 impl Trait 執行此操作:
fn duplicate<T: Clone>(a: T) -> (T, T) {
    (a.clone(), a.clone())
}

// struct NotClonable;

fn main() {
    let foo = String::from("foo");
    let pair = duplicate(foo);
    println!("{pair:?}");
}-
請嘗試建立
NonClonable並將其傳送至duplicate。 -
如果需要多個特徵,請使用
+彙整特徵。 -
顯示
where子句,學生在閱讀程式碼時會看到此內容。fn duplicate<T>(a: T) -> (T, T) where T: Clone, { (a.clone(), a.clone()) }- 如果您有多個參數,這個子句可以整理函式簽名。
- 這個子句具有額外功能,因此效能也更強大。
- 如果有人提問,請說明額外功能是指 “:” 左側的類別可為任意值,例如
Option<T>。
- 如果有人提問,請說明額外功能是指 “:” 左側的類別可為任意值,例如
-
請注意,Rust 尚不支援特化。舉例來說,對於原始的
duplicate,您無法新增特化的duplicate(a: u32)。
impl Trait
與特徵界限類似,impl Trait 語法可用於 函式引數和回傳值中:
// Syntactic sugar for:
//   fn add_42_millions<T: Into<i32>>(x: T) -> i32 {
fn add_42_millions(x: impl Into<i32>) -> i32 {
    x.into() + 42_000_000
}

fn pair_of(x: u32) -> impl std::fmt::Debug {
    (x + 1, x - 1)
}

fn main() {
    let many = add_42_millions(42_i8);
    println!("{many}");
    let many_more = add_42_millions(10_000_000);
    println!("{many_more}");
    let debuggable = pair_of(27);
    println!("debuggable: {debuggable:?}");
}impl Trait allows you to work with types which you cannot name. The meaning of impl Trait is a bit different in the different positions.
-
對參數來說,
impl Trait就像是具有特徵界限的匿名泛型參數。 -
對回傳型別來說,
impl Trait代表回傳型別就是實作特徵的 某些具體型別,因而不必指名特定型別。如果您不想在公用 API 中公開具體型別, 這就非常有用。在回傳位置進行推論並不容易。回傳
impl Foo的函式 會挑選自身回傳的具體型別,而不必在來源中寫出此資訊。回傳泛型型別 (例如collect<B>() -> B) 的函式則可回傳 符合B的任何型別 ,而呼叫端可能需要選擇一個型別,例如使用let x: Vec<_> = foo.collect()或 Turbofish:foo.collect::<Vec<_>>()。
思考一下,debuggable 的型別為何?您可以嘗試使用 let debuggable: () = .. 查看錯誤訊息顯示的內容。
練習:泛型 min
在這個簡短練習中,您將使用 LessThan 特徵實作泛型 min 函式,藉此判定兩個值中的最小值。
trait LessThan {
    /// Return true if self is less than other.
    fn less_than(&self, other: &Self) -> bool;
}

#[derive(Debug, PartialEq, Eq, Clone, Copy)]
struct Citation {
    author: &'static str,
    year: u32,
}

impl LessThan for Citation {
    fn less_than(&self, other: &Self) -> bool {
        if self.author < other.author {
            true
        } else if self.author > other.author {
            false
        } else {
            self.year < other.year
        }
    }
}

// TODO: implement the `min` function used in `main`.

fn main() {
    let cit1 = Citation { author: "Shapiro", year: 2011 };
    let cit2 = Citation { author: "Baumann", year: 2010 };
    let cit3 = Citation { author: "Baumann", year: 2019 };
    debug_assert_eq!(min(cit1, cit2), cit2);
    debug_assert_eq!(min(cit2, cit3), cit2);
    debug_assert_eq!(min(cit1, cit3), cit3);
}
解決方案
trait LessThan {
    /// Return true if self is less than other.
    fn less_than(&self, other: &Self) -> bool;
}

#[derive(Debug, PartialEq, Eq, Clone, Copy)]
struct Citation {
    author: &'static str,
    year: u32,
}

impl LessThan for Citation {
    fn less_than(&self, other: &Self) -> bool {
        if self.author < other.author {
            true
        } else if self.author > other.author {
            false
        } else {
            self.year < other.year
        }
    }
}

fn min<T: LessThan>(l: T, r: T) -> T {
    if l.less_than(&r) {
        l
    } else {
        r
    }
}

fn main() {
    let cit1 = Citation { author: "Shapiro", year: 2011 };
    let cit2 = Citation { author: "Baumann", year: 2010 };
    let cit3 = Citation { author: "Baumann", year: 2019 };
    debug_assert_eq!(min(cit1, cit2), cit2);
    debug_assert_eq!(min(cit2, cit3), cit2);
    debug_assert_eq!(min(cit1, cit3), cit3);
}
Welcome Back
Including 10 minute breaks, this session should take about 3 hours and 10 minutes. It contains:
| Segment | Duration |
|---|---|
| 標準函式庫 | 1 hour and 20 minutes |
| 標準函式庫 | 1 hour and 40 minutes |
標準函式庫
This segment should take about 1 hour and 20 minutes. It contains:
| Slide | Duration |
|---|---|
| 標準函式庫 | 3 minutes |
| 說明文件測試 | 5 minutes |
| Option | 10 minutes |
| Result | 10 minutes |
| String | 10 minutes |
| Vec | 10 minutes |
| HashMap | 10 minutes |
| 練習:計數器 | 20 minutes |
請針對這節的每張投影片,花點時間帶學員詳讀說明文件頁面,並向他們強調一些較常見的方法。
標準函式庫
Rust comes with a standard library which helps establish a set of common types used by Rust libraries and programs. This way, two libraries can work together smoothly because they both use the same String type.
In fact, Rust contains several layers of the Standard Library: core, alloc and std.
coreincludes the most basic types and functions that don’t depend onlibc, allocator or even the presence of an operating system.alloc包括需要全域堆積配置器的型別,例如Vec、Box和Arc。- 嵌入式 Rust 應用程式通常只使用
core,偶爾會使用alloc。
說明文件測試
Rust 說明文件的主題涵蓋甚廣,包括:
- All of the details about loops.
- 基本型別,例如
u8。 - Standard library types like
OptionorBinaryHeap.
您其實可以將程式碼記錄下來:
/// Determine whether the first argument is divisible by the second argument.
///
/// If the second argument is zero, the result is false.
fn is_divisible_by(lhs: u32, rhs: u32) -> bool {
    if rhs == 0 {
        return false;
    }
    lhs % rhs == 0
}
系統會將內容視為 Markdown。所有已發布的 Rust 程式庫 Crate,都會使用 rustdoc 工具自動記錄於 docs.rs 中。這種記錄 API 中所有公開項目的模式是慣用做法。
如要從項目內部 (例如在模組內) 記錄項目,請使用 //! 或 /*! .. */,這也稱做「內部文件註解」:
//! This module contains functionality relating to divisibility of integers.- Show students the generated docs for the
randcrate at https://docs.rs/rand.
Option
我們已看過 Option<T> 的某些用法,包括儲存型別為 T 的值,或不儲存任何東西。舉例來說,String::find 會傳回 Option<usize>。
fn main() {
    let name = "Löwe 老虎 Léopard Gepardi";
    let mut position: Option<usize> = name.find('é');
    println!("find returned {position:?}");
    assert_eq!(position.unwrap(), 14);
    position = name.find('Z');
    println!("find returned {position:?}");
    assert_eq!(position.expect("Character not found"), 0);
}Optionis widely used, not just in the standard library.unwrap會在Option或恐慌中傳回值。expect也類似,但會收到錯誤訊息。- 您可以讓程式在 None 發生恐慌,但不能「因錯而」忘記檢查 None。
- 如果是要設計某些臨時程式,通常會在各處
unwrap/expect,但實際運作的程式碼一般會以較好的方式處理None。
- 所謂區位最佳化,代表
Option<T>的記憶體大小通常與T相同。
Result
Result 和 Option 類似,但會指出作業成功或失敗,且各自都有不同的型別。雖然和運算式練習中定義的 Res 很像,但這屬於泛型,也就是 Result<T, E>,其中 T 用於 Ok 變體,而 E 則會出現在 Err 變數中。
use std::fs::File;
use std::io::Read;

fn main() {
    let file: Result<File, std::io::Error> = File::open("diary.txt");
    match file {
        Ok(mut file) => {
            let mut contents = String::new();
            if let Ok(bytes) = file.read_to_string(&mut contents) {
                println!("Dear diary: {contents} ({bytes} bytes)");
            } else {
                println!("Could not read file content");
            }
        }
        Err(err) => {
            println!("The diary could not be opened: {err}");
        }
    }
}- 就跟使用
Option一樣,成功的值會在 Result 內部,這會強制開發人員明確擷取該值,進而有利於檢查錯誤。在應該絕對不會發生錯誤的情況下,可以呼叫unwrap()或expect(),這也是開發人員意圖的訊號。 Resultdocumentation is a recommended read. Not during the course, but it is worth mentioning. It contains a lot of convenience methods and functions that help functional-style programming.Result是實作錯誤處理的標準型別,我們將在第 3 天的課程中介紹。
String
String 是標準堆積配置的可成長 UTF-8 字串緩衝區:
fn main() {
    let mut s1 = String::new();
    s1.push_str("Hello");
    println!("s1: len = {}, capacity = {}", s1.len(), s1.capacity());

    let mut s2 = String::with_capacity(s1.len() + 1);
    s2.push_str(&s1);
    s2.push('!');
    println!("s2: len = {}, capacity = {}", s2.len(), s2.capacity());

    let s3 = String::from("🇨🇭");
    println!("s3: len = {}, number of chars = {}", s3.len(), s3.chars().count());
}
String 會實作 Deref<Target = str>。也就是說,您可以在 String 上呼叫所有 str 方法。
String::new會傳回新的空白字串,如果您知道要向字串推送多少資料,請使用String::with_capacity。String::len會傳回String的大小 (以位元組為單位,可能與以字元為單位的長度不同)。String::chars會傳回實際字元的疊代器。請注意,由於字形叢集的關係,char和一般人所認為的「字元」可能不同。- 提到字串時,一般人可能是指
&str或String。 - 當型別實作
Deref<Target = T>時,編譯器可讓您以公開透明的方式呼叫T中的方法。- 我們尚未討論
Deref特徵,因此目前主要會講解說明文件中的側欄結構。 String會實作Deref<Target = str>,後者能以公開透明的方式授予前者str方法的存取權。- Write and compare
let s3 = s1.deref();andlet s3 = &*s1;.
- 我們尚未討論
String是以包裝函式的形式在位元組向量的四周實作,許多在向量上支援的作業也適用於String,但需要某些額外保證。- 請比較各種為
String建立索引的方法:- 使用
s3.chars().nth(i).unwrap()變為字元,其中i代表是否出界。 - 使用
s3[0..4]變為子字串,其中該切片會位於字元邊界上,也可能不會。
- 使用
- Many types can be converted to a string with the
to_stringmethod. This trait is automatically implemented for all types that implementDisplay, so anything that can be formatted can also be converted to a string.
Vec
Vec 是可調整大小的標準堆積配置緩衝區:
fn main() {
    let mut v1 = Vec::new();
    v1.push(42);
    println!("v1: len = {}, capacity = {}", v1.len(), v1.capacity());

    let mut v2 = Vec::with_capacity(v1.len() + 1);
    v2.extend(v1.iter());
    v2.push(9999);
    println!("v2: len = {}, capacity = {}", v2.len(), v2.capacity());

    // Canonical macro to initialize a vector with elements.
    let mut v3 = vec![0, 0, 1, 2, 3, 4];

    // Retain only the even elements.
    v3.retain(|x| x % 2 == 0);
    println!("{v3:?}");

    // Remove consecutive duplicates.
    v3.dedup();
    println!("{v3:?}");
}
Vec 會實作 Deref<Target = [T]>。也就是說,您可以在 Vec 上呼叫切片方法。
Vecis a type of collection, along withStringandHashMap. The data it contains is stored on the heap. This means the amount of data doesn’t need to be known at compile time. It can grow or shrink at runtime.- 請留意
Vec<T>也能做為泛型型別,但您不必明確指定T。和往常的 Rust 型別推論一樣,系統會在第一次push呼叫期間建立T。 vec![...]是用於取代Vec::new()的標準巨集,且支援在向量中加入初始元素。- 如要為向量建立索引,請使用
[],但如果超出範圍會引發恐慌。或者,使用get則可傳回Option。pop函式會移除最後一個元素。 - 我們會在第 3 天談到切片。現階段,學生只需知道
Vec型別的值也能存取所有記錄下來的切片方法。
HashMap
標準雜湊映射,可防範 HashDoS 攻擊:
use std::collections::HashMap;

fn main() {
    let mut page_counts = HashMap::new();
    page_counts.insert("Adventures of Huckleberry Finn".to_string(), 207);
    page_counts.insert("Grimms' Fairy Tales".to_string(), 751);
    page_counts.insert("Pride and Prejudice".to_string(), 303);

    if !page_counts.contains_key("Les Misérables") {
        println!(
            "We know about {} books, but not Les Misérables.",
            page_counts.len()
        );
    }

    for book in ["Pride and Prejudice", "Alice's Adventure in Wonderland"] {
        match page_counts.get(book) {
            Some(count) => println!("{book}: {count} pages"),
            None => println!("{book} is unknown."),
        }
    }

    // Use the .entry() method to insert a value if nothing is found.
    for book in ["Pride and Prejudice", "Alice's Adventure in Wonderland"] {
        let page_count: &mut i32 = page_counts.entry(book.to_string()).or_insert(0);
        *page_count += 1;
    }

    println!("{page_counts:#?}");
}-
我們一開始並未定義
HashMap,因此現在需要將其納入課程範圍。 -
請嘗試使用以下幾行程式碼。第一行會查看書籍是否在雜湊表中,如果不在,系統會傳回替代值。如果系統找不到書籍,第二行會在雜湊表中插入替代值。
let pc1 = page_counts .get("Harry Potter and the Sorcerer's Stone") .unwrap_or(&336); let pc2 = page_counts .entry("The Hunger Games".to_string()) .or_insert(374); -
可惜的是,並沒有所謂標準的
hashmap!巨集。這點與vec!不同。-
不過,自 Rust 1.56 起,HashMap 會實作
From<[(K, V); N]>,以便讓我們能從常值陣列初始化雜湊映射:let page_counts = HashMap::from([ ("Harry Potter and the Sorcerer's Stone".to_string(), 336), ("The Hunger Games".to_string(), 374), ]);
-
-
或者,您也可以透過任何能產生鍵/值元組的
Iterator建立 HashMap。 -
我們示範的是
HashMap<String, i32>,請避免使用 `&str 做為鍵,讓範例變得更簡單。當然,也可以在集合中使用參照,但這可能會使借用檢查器變得複雜。- 請嘗試從上述範例中移除
to_string(),看看是否仍可編譯。您認為我們可能會在哪裡遇到問題?
- 請嘗試從上述範例中移除
-
這個型別有多個「方法專屬」的傳回型別,例如
std::collections::hash_map::Keys。這些型別經常會在 Rust 文件的搜尋結果中出現。請向學生展示這個型別的文件,以及可返回keys方法的實用連結。
練習:計數器
在本練習中,您要使用非常簡單的資料結構並將其設為泛型。此結構會使用 std::collections::HashMap 追蹤出現過的值和出現次數。
Counter 的初始版本經過硬式編碼,僅適用於 u32 值。請設法讓結構體和相應的方法成為泛型,而非所追蹤值的型別,這樣 Counter 就可以追蹤任何型別的值。
如果您提前完成操作,不妨試著使用 entry 方法將實作 count 方法所需的雜湊查詢數量減半。
use std::collections::HashMap;

/// Counter counts the number of times each value of type T has been seen.
struct Counter {
    values: HashMap<u32, u64>,
}

impl Counter {
    /// Create a new Counter.
    fn new() -> Self {
        Counter {
            values: HashMap::new(),
        }
    }

    /// Count an occurrence of the given value.
    fn count(&mut self, value: u32) {
        if self.values.contains_key(&value) {
            *self.values.get_mut(&value).unwrap() += 1;
        } else {
            self.values.insert(value, 1);
        }
    }

    /// Return the number of times the given value has been seen.
    fn times_seen(&self, value: u32) -> u64 {
        self.values.get(&value).copied().unwrap_or_default()
    }
}

fn main() {
    let mut ctr = Counter::new();
    ctr.count(13);
    ctr.count(14);
    ctr.count(16);
    ctr.count(14);
    ctr.count(14);
    ctr.count(11);

    for i in 10..20 {
        println!("saw {} values equal to {}", ctr.times_seen(i), i);
    }

    let mut strctr = Counter::new();
    strctr.count("apple");
    strctr.count("orange");
    strctr.count("apple");
    println!("got {} apples", strctr.times_seen("apple"));
}
解決方案
use std::collections::HashMap;
use std::hash::Hash;

/// Counter counts the number of times each value of type T has been seen.
struct Counter<T: Eq + Hash> {
    values: HashMap<T, u64>,
}

impl<T: Eq + Hash> Counter<T> {
    /// Create a new Counter.
    fn new() -> Self {
        Counter { values: HashMap::new() }
    }

    /// Count an occurrence of the given value.
    fn count(&mut self, value: T) {
        *self.values.entry(value).or_default() += 1;
    }

    /// Return the number of times the given value has been seen.
    fn times_seen(&self, value: T) -> u64 {
        self.values.get(&value).copied().unwrap_or_default()
    }
}

fn main() {
    let mut ctr = Counter::new();
    ctr.count(13);
    ctr.count(14);
    ctr.count(16);
    ctr.count(14);
    ctr.count(14);
    ctr.count(11);

    for i in 10..20 {
        println!("saw {} values equal to {}", ctr.times_seen(i), i);
    }

    let mut strctr = Counter::new();
    strctr.count("apple");
    strctr.count("orange");
    strctr.count("apple");
    println!("got {} apples", strctr.times_seen("apple"));
}
標準函式庫
This segment should take about 1 hour and 40 minutes. It contains:
| Slide | Duration |
|---|---|
| 比較 | 10 minutes |
| 疊代器 | 10 minutes |
| From 和 Into | 10 minutes |
| 測試 | 5 minutes |
| Read 和 Write | 10 minutes |
| Default (結構體更新語法) | 5 minutes |
| 閉包 | 20 minutes |
| 練習:ROT13 (迴轉13位) | 30 minutes |
和標準程式庫型別一樣,請花時間詳閱每種特徵的說明文件。
這節課時間很長,在中間休息片刻吧。
比較
以下特徵可用於比較不同的值。如果欄位會實作這些特徵,您可以針對含有這類欄位的型別衍生所有特徵。
PartialEq 和 Eq
PartialEq 代表部分對等關係,具有必要方法 eq 和提供的方法 ne。== 和 != 運算子會呼叫這些方法。
struct Key {
    id: u32,
    metadata: Option<String>,
}
impl PartialEq for Key {
    fn eq(&self, other: &Self) -> bool {
        self.id == other.id
    }
}
Eq 代表完整對等關係 (自反、對稱和傳遞性),並且隱含 PartialEq。需要完整對等關係的函式會使用 Eq 做為特徵界線。
PartialOrd 和 Ord
PartialOrd 會透過 partial_cmp 方法定義偏序,可用於實作 <、<=、>= 和 > 運算子。
use std::cmp::Ordering;
#[derive(Eq, PartialEq)]
struct Citation {
    author: String,
    year: u32,
}
impl PartialOrd for Citation {
    fn partial_cmp(&self, other: &Self) -> Option<Ordering> {
        match self.author.partial_cmp(&other.author) {
            Some(Ordering::Equal) => self.year.partial_cmp(&other.year),
            author_ord => author_ord,
        }
    }
}
Ord 是全序,其中 cmp 會傳回 Ordering。
PartialEq 可以在不同的型別之間實作,但具有自反性的 Eq 無法:
struct Key {
    id: u32,
    metadata: Option<String>,
}
impl PartialEq<u32> for Key {
    fn eq(&self, other: &u32) -> bool {
        self.id == *other
    }
}
實務上一般會衍生這些特徵,但鮮少會實作這些特徵。
疊代器
運算子超載會透過 std::ops: 內的特徵實作:
#[derive(Debug, Copy, Clone)]
struct Point {
    x: i32,
    y: i32,
}

impl std::ops::Add for Point {
    type Output = Self;

    fn add(self, other: Self) -> Self {
        Self { x: self.x + other.x, y: self.y + other.y }
    }
}

fn main() {
    let p1 = Point { x: 10, y: 20 };
    let p2 = Point { x: 100, y: 200 };
    println!("{:?} + {:?} = {:?}", p1, p2, p1 + p2);
}討論要點:
- You could implement
Addfor&Point. In which situations is that useful?- 回答:
Add:add會耗用self。如果您要超載運算子的型別T不是Copy,建議您一併為&T超載運算子。這可避免呼叫點中出現不必要 的複製作業。
- 回答:
- 為什麼
Output是關聯型別?可將其用做方法的型別參數嗎?- Short answer: Function type parameters are controlled by the caller, but associated types (like
Output) are controlled by the implementer of a trait.
- Short answer: Function type parameters are controlled by the caller, but associated types (like
- 您可以針對兩種不同型別實作
Add,舉例來說,impl Add<(i32, i32)> for Point會將元組新增至Point。
From 和 Into
fn main() {
    let s = String::from("hello");
    let addr = std::net::Ipv4Addr::from([127, 0, 0, 1]);
    let one = i16::from(true);
    let bigger = i32::from(123_i16);
    println!("{s}, {addr}, {one}, {bigger}");
}fn main() {
let s: String = "hello".into();
let addr: std::net::Ipv4Addr = [127, 0, 0, 1].into();
let one: i16 = true.into();
let bigger: i32 = 123_i16.into();
println!("{s}, {addr}, {one}, {bigger}");
}- 這就是為什麼通常只需實作
From,因為型別也會實作Into。 - 如要宣告函式引數輸入型別 (例如「任何可轉換成
String的型別」),規則便會相反,此時請使用Into。 您的函式會接受實作From的型別,以及「僅」實作Into的型別。
測試
Rust 沒有「隱含」型別的轉換,但支援使用 as 明確轉換。後者通常會遵循定義前者時所用的 C 語意。
fn main() {
    let value: i64 = 1000;
    println!("as u16: {}", value as u16);
    println!("as i16: {}", value as i16);
    println!("as u8: {}", value as u8);
}
在 Rust 中,as 的結果「一律」會經過定義,且在不同平台間保持一致。這可能不符合您變更符號或轉換到較小型別時的直觀做法,請檢查文件並加註說明內容。
雖然使用 as 進行型別相當簡單,但是非常容易出錯;舉例來說,如果往後的維護作業改變了所用型別或型別中值的範圍,這常常就是某些細微錯誤的來源。只有在意圖用於指明無條件截斷時,我們才建議使用型別轉換。舉例來說,如果無論高位元中的內容為何,您都只需要 u64 的底部 32 位元,就可以使用 as u32。
如果是 u32 到 u64 這類絕對無誤的型別轉換,適合先使用 From 或 Into (而非 as) 確認轉換確實無誤。對於容易出錯的轉換,如果您想以不同的方式處理,可以使用 TryFrom 和 TryInto。
建議在講解完這張投影片後休息片刻。
as 類似於 C++ 的靜態轉換。一般不建議在資料可能遺失的情況下使用 as,如果要用,也至少要提供說明註解。
這在將整數轉換為 usize 以用做索引時很常見。
Read 和 Write
使用 Read 和 BufRead 即可對 u8 來源進行抽象化處理:
use std::io::{BufRead, BufReader, Read, Result};

fn count_lines<R: Read>(reader: R) -> usize {
    let buf_reader = BufReader::new(reader);
    buf_reader.lines().count()
}

fn main() -> Result<()> {
    let slice: &[u8] = b"foo\nbar\nbaz\n";
    println!("lines in slice: {}", count_lines(slice));

    let file = std::fs::File::open(std::env::current_exe()?)?;
    println!("lines in file: {}", count_lines(file));
    Ok(())
}同樣地,Write 則可讓您將 u8 接收器抽象化:
use std::io::{Result, Write};

fn log<W: Write>(writer: &mut W, msg: &str) -> Result<()> {
    writer.write_all(msg.as_bytes())?;
    writer.write_all("\n".as_bytes())
}

fn main() -> Result<()> {
    let mut buffer = Vec::new();
    log(&mut buffer, "Hello")?;
    log(&mut buffer, "World")?;
    println!("Logged: {:?}", buffer);
    Ok(())
}
Default 特徵
Default 特徵會產生型別的預設值。
#[derive(Debug, Default)]
struct Derived {
    x: u32,
    y: String,
    z: Implemented,
}

#[derive(Debug)]
struct Implemented(String);

impl Default for Implemented {
    fn default() -> Self {
        Self("John Smith".into())
    }
}

fn main() {
    let default_struct = Derived::default();
    println!("{default_struct:#?}");

    let almost_default_struct =
        Derived { y: "Y is set!".into(), ..Derived::default() };
    println!("{almost_default_struct:#?}");

    let nothing: Option<Derived> = None;
    println!("{:#?}", nothing.unwrap_or_default());
}- 這可以直接實作,也可以透過
#[derive(Default)]衍生得出。 - A derived implementation will produce a value where all fields are set to their default values.
- 也就是說,該結構體中的所有型別也都必須實作
Default。
- 也就是說,該結構體中的所有型別也都必須實作
- 標準的 Rust 型別通常會以合理的值 (例如
0、""等等) 實作Default。 - The partial struct initialization works nicely with default.
- The Rust standard library is aware that types can implement
Defaultand provides convenience methods that use it. - The
..syntax is called struct update syntax.
閉包
無論是閉包還是 lambda 運算式,都含有無法命名的型別。不過,這兩者 都會實作特殊的 Fn、 FnMut 和 FnOnce 特徵:
fn apply_with_log(func: impl FnOnce(i32) -> i32, input: i32) -> i32 {
    println!("Calling function on {input}");
    func(input)
}

fn main() {
    let add_3 = |x| x + 3;
    println!("add_3: {}", apply_with_log(add_3, 10));
    println!("add_3: {}", apply_with_log(add_3, 20));

    let mut v = Vec::new();
    let mut accumulate = |x: i32| {
        v.push(x);
        v.iter().sum::<i32>()
    };
    println!("accumulate: {}", apply_with_log(&mut accumulate, 4));
    println!("accumulate: {}", apply_with_log(&mut accumulate, 5));

    let multiply_sum = |x| x * v.into_iter().sum::<i32>();
    println!("multiply_sum: {}", apply_with_log(multiply_sum, 3));
}Fn (例如 add_3) 既不會耗用也不會修改擷取的值,或許 也可說是不會擷取任何值,因此可以多次並行呼叫。
FnMut (例如 accumulate) 可能會修改擷取的值,因此可以多次呼叫 (但不得並行呼叫)。
如果是 FnOnce (例如multiply_sum),也許就只能呼叫一次,因為這可能會耗用 擷取的值。
FnMut 是 FnOnce 的子型別,而 Fn 是 FnMut 和 FnOnce 的子型別。換句話說,您可以在任何需要呼叫 FnOnce 的地方使用 FnMut,而在任何需要呼叫 FnMut 或 FnOnce 的地方 使用 Fn。
定義可接受閉包的函式時,您應盡量採用 FnOnce (也就是只呼叫一次),其次是 FnMut,最後則是 Fn。這種做法可讓呼叫端享有最大彈性。
相反地,當有閉包時,最有彈性的就是 Fn (可以在任何地方傳遞)、其次是 FnMut,最後是 FnOnce。
編譯器也會根據閉包擷取到的內容來推論 Copy (例如針對 add_3) 和 Clone (例如 multiply_sum).
根據預設,閉包會依據參照來擷取內容 (如果可行的話)。move 關鍵字則可讓閉包根據值 來擷取內容。
fn make_greeter(prefix: String) -> impl Fn(&str) {
    return move |name| println!("{} {}", prefix, name);
}

fn main() {
    let hi = make_greeter("Hi".to_string());
    hi("Greg");
}
練習:ROT13 (迴轉13位)
在這個範例中,您將實作傳統的「ROT13」加密方式。請將此程式碼複製到 Playground,並實作缺少的位元。記得僅能旋轉 ASCII 字母字元,確保結果仍為有效的 UTF-8。
use std::io::Read;

struct RotDecoder<R: Read> {
    input: R,
    rot: u8,
}

// Implement the `Read` trait for `RotDecoder`.

fn main() {
    let mut rot =
        RotDecoder { input: "Gb trg gb gur bgure fvqr!".as_bytes(), rot: 13 };
    let mut result = String::new();
    rot.read_to_string(&mut result).unwrap();
    println!("{}", result);
}

#[cfg(test)]
mod test {
    use super::*;

    #[test]
    fn joke() {
        let mut rot =
            RotDecoder { input: "Gb trg gb gur bgure fvqr!".as_bytes(), rot: 13 };
        let mut result = String::new();
        rot.read_to_string(&mut result).unwrap();
        assert_eq!(&result, "To get to the other side!");
    }

    #[test]
    fn binary() {
        let input: Vec<u8> = (0..=255u8).collect();
        let mut rot = RotDecoder::<&[u8]> { input: input.as_ref(), rot: 13 };
        let mut buf = [0u8; 256];
        assert_eq!(rot.read(&mut buf).unwrap(), 256);
        for i in 0..=255 {
            if input[i] != buf[i] {
                assert!(input[i].is_ascii_alphabetic());
                assert!(buf[i].is_ascii_alphabetic());
            }
        }
    }
}
如果將兩個 RotDecoder 例項鏈結在一起,每個都以 13 個字元旋轉,會怎麼樣?
解決方案
use std::io::Read;

struct RotDecoder<R: Read> {
    input: R,
    rot: u8,
}

impl<R: Read> Read for RotDecoder<R> {
    fn read(&mut self, buf: &mut [u8]) -> std::io::Result<usize> {
        let size = self.input.read(buf)?;
        for b in &mut buf[..size] {
            if b.is_ascii_alphabetic() {
                let base = if b.is_ascii_uppercase() { 'A' } else { 'a' } as u8;
                *b = (*b - base + self.rot) % 26 + base;
            }
        }
        Ok(size)
    }
}

fn main() {
    let mut rot =
        RotDecoder { input: "Gb trg gb gur bgure fvqr!".as_bytes(), rot: 13 };
    let mut result = String::new();
    rot.read_to_string(&mut result).unwrap();
    println!("{}", result);
}

#[cfg(test)]
mod test {
    use super::*;

    #[test]
    fn joke() {
        let mut rot =
            RotDecoder { input: "Gb trg gb gur bgure fvqr!".as_bytes(), rot: 13 };
        let mut result = String::new();
        rot.read_to_string(&mut result).unwrap();
        assert_eq!(&result, "To get to the other side!");
    }

    #[test]
    fn binary() {
        let input: Vec<u8> = (0..=255u8).collect();
        let mut rot = RotDecoder::<&[u8]> { input: input.as_ref(), rot: 13 };
        let mut buf = [0u8; 256];
        assert_eq!(rot.read(&mut buf).unwrap(), 256);
        for i in 0..=255 {
            if input[i] != buf[i] {
                assert!(input[i].is_ascii_alphabetic());
                assert!(buf[i].is_ascii_alphabetic());
            }
        }
    }
}
歡迎參加第 3 天課程
今天我們將講解以下內容:
- 記憶體管理、生命週期和借用檢查器:Rust 如何確保記憶體安全。
- 智慧指標:標準程式庫指標型別。
課程時間表
Including 10 minute breaks, this session should take about 2 hours and 20 minutes. It contains:
| Segment | Duration |
|---|---|
| 歡迎 | 3 minutes |
| 記憶體管理 | 1 hour |
| 智慧指標 | 55 minutes |
記憶體管理
This segment should take about 1 hour. It contains:
| Slide | Duration |
|---|---|
| 檢查程式記憶體 | 5 minutes |
| 自動記憶體管理 | 10 minutes |
| 所有權 | 5 minutes |
| 移動語意 | 5 minutes |
| Clone | 2 minutes |
| Copy 型別 | 5 minutes |
| Drop | 10 minutes |
| 練習:建構工具型別 | 20 minutes |
檢查程式記憶體
程式分配記憶體的方式有兩種:
-
堆疊 (Stack):本機變數的連續記憶體區域。
- 值在編譯期間具有已知的固定大小。
- 相當快速:只需移動堆疊指標。
- 易於管理:追蹤函式呼叫。
- 良好的記憶體區域性。
-
堆積 (Heap):函式呼叫外的值儲存空間。
- 值在執行階段中以動態方式判斷大小。
- 速度稍慢於堆疊:需要作一些記錄。
- 不保證記憶體區域性。
範例
Creating a String puts fixed-sized metadata on the stack and dynamically sized data, the actual string, on the heap:
fn main() {
    let s1 = String::from("Hello");
}-
請說明
String是由Vec支援,因此具有容量和長度,而且還能成長 (前提是可透過堆積上的重新配置作業進行變動)。 -
如有學員問起,您可以說明基礎記憶體是使用[系統配置器]配置的堆積,而自訂配置器可以使用[配置器 API] 實作。
探索更多內容
We can inspect the memory layout with unsafe Rust. However, you should point out that this is rightfully unsafe!
fn main() {
    let mut s1 = String::from("Hello");
    s1.push(' ');
    s1.push_str("world");
    // DON'T DO THIS AT HOME! For educational purposes only.
    // String provides no guarantees about its layout, so this could lead to
    // undefined behavior.
    unsafe {
        let (capacity, ptr, len): (usize, usize, usize) = std::mem::transmute(s1);
        println!("capacity = {capacity}, ptr = {ptr:#x}, len = {len}");
    }
}
自動記憶體管理
傳統上,語言大致可分為兩種:
- 透過手動管理記憶體,取得完整掌控權:C、C++、Pascal…
- 程式設計師會決定何時分配或釋出堆積記憶體。
- 程式設計師必須判斷指標是否仍指向有效記憶體。
- 研究顯示,程式設計師難免會出錯。
- 透過在執行階段中自動管理記憶體,取得完整安全性:Java、Python、Go、Haskell…
- 執行階段系統會確保在可以參照記憶體之後,才釋出記憶體。
- 通常透過參照計算、垃圾收集或 RAII 的方式實作。
Rust 則融合這兩種做法:
透過正確的記憶體管理編譯時間強制執行措施,「同時」取得完整的掌控權和安全性。
Rust 運用明確所有權的概念實現這一點。
這張投影片的目的,在於協助其他語言的學員瞭解 Rust。
-
如果是 C 語言,必須透過
malloc和free手動管理堆積。常見的錯誤包括忘記呼叫free、針對同一指標多次呼叫free,或在其指向的記憶體釋出後取消參照指標。 -
C++ 提供智慧指標 (
unique_ptr、shared_ptr) 等工具,可利用有關呼叫解構函式的語言保證,確保在函式傳回時釋出記憶體。但這些工具仍很容易遭到濫用,並且會產生類似 C 語言中的那些錯誤。 -
Java、Go 和 Python 會利用垃圾收集器來識別並捨棄無法再存取的記憶體。這能確保任何指標都可以取消參照,進而消除 UAF (使用已釋放記憶體)和其他類別的錯誤。不過,GC 會耗費執行階段成本,且很難正確調整。
在許多情況下,Rust 的擁有權和借用模型效能都能媲美 C 語言,並在必要處精準分配及釋放,達成零成本作業。Rust 也提供類似 C++ 智慧指標的工具。如有需要,您還可以使用參照計數等其他選項,而且甚至還有第三方 Crate,可支援執行階段的垃圾收集作業 (本課程不會討論這部分)。
所有權
所有變數繫結都會在特定「範圍」內有效,在範圍外使用變數會是錯誤:
struct Point(i32, i32);

fn main() {
    {
        let p = Point(3, 4);
        println!("x: {}", p.0);
    }
    println!("y: {}", p.1);
}
We say that the variable owns the value. Every Rust value has precisely one owner at all times.
At the end of the scope, the variable is dropped and the data is freed. A destructor can run here to free up resources.
熟悉垃圾回收實作的學員會知道,垃圾回收器是從一組「根」開始尋找所有可存取的記憶體。Rust 的「單一擁有者」原則也是類似的概念。
移動語意
An assignment will transfer ownership between variables:
fn main() {
    let s1: String = String::from("Hello!");
    let s2: String = s1;
    println!("s2: {s2}");
    // println!("s1: {s1}");
}- 將
s1指派給s2會轉移所有權。 - When
s1goes out of scope, nothing happens: it does not own anything. - 當
s2超出範圍時,系統會釋放字串資料。
移至 s2 前:
移至 s2 後:
將值傳遞至函式時,該值會指派給函式參數。這麼做會轉移所有權:
fn say_hello(name: String) {
    println!("Hello {name}")
}

fn main() {
    let name = String::from("Alice");
    say_hello(name);
    // say_hello(name);
}-
請說明這與 C++ 中的預設情形相反:您必須使用
std::move,且已定義移動建構函式,系統才會根據值進行複製。 -
只有擁有權才會轉移。是否產生任何機器碼來操控資料本身是一個最優化問題,而系統會主動將這些副本最優化。
-
簡單的值 (例如整數) 可標示為
Copy(請參閱後續投影片)。 -
在 Rust 中,克隆作業皆為明確設定,方法為使用
clone。
在 say_hello 範例中:
- 首次呼叫
say_hello時,main會放棄name的所有權。之後,name就無法在main內使用。 - 為
name配置的堆積記憶體會在say_hello函式結束時釋放。 - 如果
main以參照的形式傳送name(&name),且say_hello能以參數的形式接受參照,main就可以保留所有權。 - 另外,
main可在首次呼叫 (name.clone()) 中傳遞name的克隆。 - 在 Rust 中,移動語意為預設做法,且強制規定程式設計師必須明確設定克隆,因此不小心建立副本的可能性就會低於在 C++ 中。
探索更多內容
Defensive Copies in Modern C++
現代 C++ 可使用不同方式解決這個問題:
std::string s1 = "Cpp";
std::string s2 = s1;  // Duplicate the data in s1.
s1的堆積資料會重複,s2會取得專屬的獨立副本。- 當
s1和s2超出範圍時,皆會釋放自己的記憶體。
複製指派前:
複製指派後:
重要須知:
-
C++ 提供的選擇與 Rust 略有不同。由於
=會複製資料,所以字串資料一定要完成複製。否則,假如其中任一字串超出範圍,就會導致重複釋放的結果。 -
C++ 也提供
std::move,用於指出何時可以轉移特定值。例如假設是s2 = std::move(s1),就不會發生堆積分配的情形。轉移之後,s1會處於有效但未指定的狀態。與 Rust 不同的是,程式設計師可以繼續使用s1。 -
C++ 中的
=可以依照要複製或轉移的型別來執行任何程式碼,這點與 Rust 不同。
Clone
有時候,您可能會「想要」複製一個值。Clone 特徵可完成這項作業。
#[derive(Default)]
struct Backends {
    hostnames: Vec<String>,
    weights: Vec<f64>,
}

impl Backends {
    fn set_hostnames(&mut self, hostnames: &Vec<String>) {
        self.hostnames = hostnames.clone();
        self.weights = hostnames.iter().map(|_| 1.0).collect();
    }
}Clone 的概念是要輕鬆找出堆積分配量的發生位置。請尋找 .clone() 和 Vec::new 或 Box::new 等其他字詞。
我們往往會使用借用檢查器「複製解決問題的方法」,稍後再回來試著將這些複製內容最佳化。
Copy 型別
雖然移動語意是預設做法,但某些型別的預設做法為複製:
fn main() {
    let x = 42;
    let y = x;
    println!("x: {x}"); // would not be accessible if not Copy
    println!("y: {y}");
}
這些型別會實作 Copy 特徵。
您可以自行選擇加入型別,使用複製語意的做法:
#[derive(Copy, Clone, Debug)]
struct Point(i32, i32);

fn main() {
    let p1 = Point(3, 4);
    let p2 = p1;
    println!("p1: {p1:?}");
    println!("p2: {p2:?}");
}- 指派後,
p1和p2都會擁有自己的資料。 - 我們也能使用
p1.clone()明確複製資料。
複製和克隆並不相同:
- 複製是指記憶體區域的按位元複製作業,不適用於任意物件。
- 複製不允許用於自訂邏輯,這與 C++ 中的複製建構函式不同。
- 克隆是較廣泛的作業,而且只要實作
Clone特徵,即允許用於自訂行為。 - 複製不適用於實作
Drop特徵的型別。
在上述範例中,請嘗試下列操作:
- 將
String欄位新增至struct Point。由於String不屬於Copy型別,因此不會編譯。 - Remove
Copyfrom thederiveattribute. The compiler error is now in theprintln!forp1. - 示範如果改為克隆
p1,就能正常運作。
Drop 特徵
如果值實作了 Drop,即可在超出範圍時指定要執行哪個程式碼:
struct Droppable {
    name: &'static str,
}

impl Drop for Droppable {
    fn drop(&mut self) {
        println!("Dropping {}", self.name);
    }
}

fn main() {
    let a = Droppable { name: "a" };
    {
        let b = Droppable { name: "b" };
        {
            let c = Droppable { name: "c" };
            let d = Droppable { name: "d" };
            println!("Exiting block B");
        }
        println!("Exiting block A");
    }
    drop(a);
    println!("Exiting main");
}- 請注意,
std::mem::drop和std::ops::Drop::drop不同。 - 值超出範圍時,系統會自動捨棄。
- 捨棄值時,如果值實作的是
std::ops::Drop,系統會呼叫值的Drop::drop實作。 - 如此一來,無論值是否實作
Drop,系統都會一併捨棄值的所有欄位。 std::mem::drop只是一個可接受任何值的空白函式。此函式之所以重要,是能夠取得值的擁有權,因此在其範圍結束時會遭到捨棄。這有利於在值超出範圍之前,明確捨棄這些值。- 如果物件會對
drop執行某些工作 (例如釋放鎖、關閉檔案等),這就相當實用。
- 如果物件會對
討論要點:
- 為什麼
Drop::drop不使用self?- 簡答:如果這樣的話,系統會在 區塊結尾呼叫
std::mem::drop,進而觸發另一個對Drop::drop的呼叫並造成堆疊 溢位!
- 簡答:如果這樣的話,系統會在 區塊結尾呼叫
- 請嘗試將
drop(a)替換為a.drop()。
練習:建構工具型別
在本範例中,我們將實作一個包含自身所有資料的複雜資料型別。透過「建構工具模式」,我們會以便利函式逐段建構新值。
請填補缺漏的片段。
#[derive(Debug)]
enum Language {
    Rust,
    Java,
    Perl,
}

#[derive(Clone, Debug)]
struct Dependency {
    name: String,
    version_expression: String,
}

/// A representation of a software package.
#[derive(Debug)]
struct Package {
    name: String,
    version: String,
    authors: Vec<String>,
    dependencies: Vec<Dependency>,
    language: Option<Language>,
}

impl Package {
    /// Return a representation of this package as a dependency, for use in
    /// building other packages.
    fn as_dependency(&self) -> Dependency {
        todo!("1")
    }
}

/// A builder for a Package. Use `build()` to create the `Package` itself.
struct PackageBuilder(Package);

impl PackageBuilder {
    fn new(name: impl Into<String>) -> Self {
        todo!("2")
    }

    /// Set the package version.
    fn version(mut self, version: impl Into<String>) -> Self {
        self.0.version = version.into();
        self
    }

    /// Set the package authors.
    fn authors(mut self, authors: Vec<String>) -> Self {
        todo!("3")
    }

    /// Add an additional dependency.
    fn dependency(mut self, dependency: Dependency) -> Self {
        todo!("4")
    }

    /// Set the language. If not set, language defaults to None.
    fn language(mut self, language: Language) -> Self {
        todo!("5")
    }

    fn build(self) -> Package {
        self.0
    }
}

fn main() {
    let base64 = PackageBuilder::new("base64").version("0.13").build();
    println!("base64: {base64:?}");
    let log =
        PackageBuilder::new("log").version("0.4").language(Language::Rust).build();
    println!("log: {log:?}");
    let serde = PackageBuilder::new("serde")
        .authors(vec!["djmitche".into()])
        .version(String::from("4.0"))
        .dependency(base64.as_dependency())
        .dependency(log.as_dependency())
        .build();
    println!("serde: {serde:?}");
}
解決方案
#[derive(Debug)]
enum Language {
    Rust,
    Java,
    Perl,
}

#[derive(Clone, Debug)]
struct Dependency {
    name: String,
    version_expression: String,
}

/// A representation of a software package.
#[derive(Debug)]
struct Package {
    name: String,
    version: String,
    authors: Vec<String>,
    dependencies: Vec<Dependency>,
    language: Option<Language>,
}

impl Package {
    /// Return a representation of this package as a dependency, for use in
    /// building other packages.
    fn as_dependency(&self) -> Dependency {
        Dependency {
            name: self.name.clone(),
            version_expression: self.version.clone(),
        }
    }
}

/// A builder for a Package. Use `build()` to create the `Package` itself.
struct PackageBuilder(Package);

impl PackageBuilder {
    fn new(name: impl Into<String>) -> Self {
        Self(Package {
            name: name.into(),
            version: "0.1".into(),
            authors: vec![],
            dependencies: vec![],
            language: None,
        })
    }

    /// Set the package version.
    fn version(mut self, version: impl Into<String>) -> Self {
        self.0.version = version.into();
        self
    }

    /// Set the package authors.
    fn authors(mut self, authors: Vec<String>) -> Self {
        self.0.authors = authors;
        self
    }

    /// Add an additional dependency.
    fn dependency(mut self, dependency: Dependency) -> Self {
        self.0.dependencies.push(dependency);
        self
    }

    /// Set the language. If not set, language defaults to None.
    fn language(mut self, language: Language) -> Self {
        self.0.language = Some(language);
        self
    }

    fn build(self) -> Package {
        self.0
    }
}

fn main() {
    let base64 = PackageBuilder::new("base64").version("0.13").build();
    println!("base64: {base64:?}");
    let log =
        PackageBuilder::new("log").version("0.4").language(Language::Rust).build();
    println!("log: {log:?}");
    let serde = PackageBuilder::new("serde")
        .authors(vec!["djmitche".into()])
        .version(String::from("4.0"))
        .dependency(base64.as_dependency())
        .dependency(log.as_dependency())
        .build();
    println!("serde: {serde:?}");
}
智慧指標
This segment should take about 55 minutes. It contains:
| Slide | Duration |
|---|---|
| Box | 10 minutes |
| Rc | 5 minutes |
| 特徵物件 | 10 minutes |
| 練習:二元樹 | 30 minutes |
Box<T>
Box 是具有所有權的指向堆積上的資料的指標:
fn main() {
    let five = Box::new(5);
    println!("five: {}", *five);
}Box<T> 會實作 Deref<Target = T>。也就是說,您可以直接在 Box<T> 上透過 T 呼叫方法。
遞迴資料型別或含有動態大小的資料型別必須使用 Box:
#[derive(Debug)]
enum List<T> {
    /// A non-empty list: first element and the rest of the list.
    Element(T, Box<List<T>>),
    /// An empty list.
    Nil,
}

fn main() {
    let list: List<i32> =
        List::Element(1, Box::new(List::Element(2, Box::new(List::Nil))));
    println!("{list:?}");
}-
Boxis likestd::unique_ptrin C++, except that it’s guaranteed to be not null. -
在以下情況下,您可以使用
Box:- 編譯時遇到不知道大小為何的型別,但 Rust 編譯器需要知道確切大小。
- 想要轉移大量資料的所有權。為避免在堆疊上複製大量資料,請改將資料儲存在
Box的堆積上,這樣系統就只會移動指標。
-
If
Boxwas not used and we attempted to embed aListdirectly into theList, the compiler would not be able to compute a fixed size for the struct in memory (theListwould be of infinite size). -
Box大小與一般指標相同,並且只會指向堆積中的下一個List元素,因此可以解決這個問題。 -
Remove the
Boxin the List definition and show the compiler error. We get the message “recursive without indirection”, because for data recursion, we have to use indirection, aBoxor reference of some kind, instead of storing the value directly.
探索更多內容
區位最佳化
#[derive(Debug)]
enum List<T> {
    Element(T, Box<List<T>>),
    Nil,
}

fn main() {
    let list: List<i32> =
        List::Element(1, Box::new(List::Element(2, Box::new(List::Nil))));
    println!("{list:?}");
}
Box 不能空白,因此指標會一律有效,而且不會是 null。這樣一來,編譯器可以將記憶體配置最佳化:
Rc
Rc 是參考計數的共用指標。如要在多個位置參考相同的資料,可以使用這個指標:
use std::rc::Rc;

fn main() {
    let a = Rc::new(10);
    let b = Rc::clone(&a);

    println!("a: {a}");
    println!("b: {b}");
}Rc的計數可確保只要有參考,內含的值就會保持有效。- Rust 中的
Rc就像 C++ 中的std::shared_ptr一樣。 Rc::clone的成本很低:這個做法會建立指向相同配置的指標,並增加參考計數,而不會產生深克隆,尋找程式碼效能問題時通常可以忽略。make_mut實際上會在必要時克隆內部值 (「clone-on-write」),並回傳可變動的參考。- 使用
Rc::strong_count可查看參考計數。 Rc::downgrade提供的「弱參考計數」物件,建立之後會適當捨棄的循環 (可能會搭配RefCell)。
特徵物件
特徵物件可接受不同型別的值,舉例來說,在集合中會是這樣:
struct Dog {
    name: String,
    age: i8,
}
struct Cat {
    lives: i8,
}

trait Pet {
    fn talk(&self) -> String;
}

impl Pet for Dog {
    fn talk(&self) -> String {
        format!("Woof, my name is {}!", self.name)
    }
}

impl Pet for Cat {
    fn talk(&self) -> String {
        String::from("Miau!")
    }
}

fn main() {
    let pets: Vec<Box<dyn Pet>> = vec![
        Box::new(Cat { lives: 9 }),
        Box::new(Dog { name: String::from("Fido"), age: 5 }),
    ];
    for pet in pets {
        println!("Hello, who are you? {}", pet.talk());
    }
}
以下是配置 pets 後的記憶體配置:
- Types that implement a given trait may be of different sizes. This makes it impossible to have things like
Vec<dyn Pet>in the example above. - 可透過
dyn Pet這個方法向編譯器告知實作Pet的動態大小型別。 - 在本例中,
pets和向量資料分別在堆疊和堆積上分配。這兩個向量元素都是「虛指標」:- A fat pointer is a double-width pointer. It has two components: a pointer to the actual object and a pointer to the virtual method table (vtable) for the
Petimplementation of that particular object. - 名為 Fido 的
Dog資料是name和age欄位。Cat則有lives欄位。
- A fat pointer is a double-width pointer. It has two components: a pointer to the actual object and a pointer to the virtual method table (vtable) for the
- 比較上述範例的輸出內容:
println!("{} {}", std::mem::size_of::<Dog>(), std::mem::size_of::<Cat>());
println!("{} {}", std::mem::size_of::<&Dog>(), std::mem::size_of::<&Cat>());
println!("{}", std::mem::size_of::<&dyn Pet>());
println!("{}", std::mem::size_of::<Box<dyn Pet>>());
練習:二元樹
二元樹是一種樹狀資料結構,其中每個節點都有左右兩個子節點。我們會建立每個節點都儲存一個值的樹狀結構。以指定節點 N 來說,N 左側子樹狀結構中的所有節點都包含較小的值,而 N 右側子樹狀結構中的所有節點都含有較大的值。
請實作以下型別,讓指定的測試通過。
加分題:在二元數上實作疊代器,依序傳回值。
/// A node in the binary tree.
#[derive(Debug)]
struct Node<T: Ord> {
    value: T,
    left: Subtree<T>,
    right: Subtree<T>,
}

/// A possibly-empty subtree.
#[derive(Debug)]
struct Subtree<T: Ord>(Option<Box<Node<T>>>);

/// A container storing a set of values, using a binary tree.
///
/// If the same value is added multiple times, it is only stored once.
#[derive(Debug)]
pub struct BinaryTree<T: Ord> {
    root: Subtree<T>,
}

// Implement `new`, `insert`, `len`, and `has`.

#[cfg(test)]
mod tests {
    use super::*;

    #[test]
    fn len() {
        let mut tree = BinaryTree::new();
        assert_eq!(tree.len(), 0);
        tree.insert(2);
        assert_eq!(tree.len(), 1);
        tree.insert(1);
        assert_eq!(tree.len(), 2);
        tree.insert(2); // not a unique item
        assert_eq!(tree.len(), 2);
    }

    #[test]
    fn has() {
        let mut tree = BinaryTree::new();
        fn check_has(tree: &BinaryTree<i32>, exp: &[bool]) {
            let got: Vec<bool> =
                (0..exp.len()).map(|i| tree.has(&(i as i32))).collect();
            assert_eq!(&got, exp);
        }

        check_has(&tree, &[false, false, false, false, false]);
        tree.insert(0);
        check_has(&tree, &[true, false, false, false, false]);
        tree.insert(4);
        check_has(&tree, &[true, false, false, false, true]);
        tree.insert(4);
        check_has(&tree, &[true, false, false, false, true]);
        tree.insert(3);
        check_has(&tree, &[true, false, false, true, true]);
    }

    #[test]
    fn unbalanced() {
        let mut tree = BinaryTree::new();
        for i in 0..100 {
            tree.insert(i);
        }
        assert_eq!(tree.len(), 100);
        assert!(tree.has(&50));
    }
}
解決方案
use std::cmp::Ordering;

/// A node in the binary tree.
#[derive(Debug)]
struct Node<T: Ord> {
    value: T,
    left: Subtree<T>,
    right: Subtree<T>,
}

/// A possibly-empty subtree.
#[derive(Debug)]
struct Subtree<T: Ord>(Option<Box<Node<T>>>);

/// A container storing a set of values, using a binary tree.
///
/// If the same value is added multiple times, it is only stored once.
#[derive(Debug)]
pub struct BinaryTree<T: Ord> {
    root: Subtree<T>,
}

impl<T: Ord> BinaryTree<T> {
    fn new() -> Self {
        Self { root: Subtree::new() }
    }

    fn insert(&mut self, value: T) {
        self.root.insert(value);
    }

    fn has(&self, value: &T) -> bool {
        self.root.has(value)
    }

    fn len(&self) -> usize {
        self.root.len()
    }
}

impl<T: Ord> Subtree<T> {
    fn new() -> Self {
        Self(None)
    }

    fn insert(&mut self, value: T) {
        match &mut self.0 {
            None => self.0 = Some(Box::new(Node::new(value))),
            Some(n) => match value.cmp(&n.value) {
                Ordering::Less => n.left.insert(value),
                Ordering::Equal => {}
                Ordering::Greater => n.right.insert(value),
            },
        }
    }

    fn has(&self, value: &T) -> bool {
        match &self.0 {
            None => false,
            Some(n) => match value.cmp(&n.value) {
                Ordering::Less => n.left.has(value),
                Ordering::Equal => true,
                Ordering::Greater => n.right.has(value),
            },
        }
    }

    fn len(&self) -> usize {
        match &self.0 {
            None => 0,
            Some(n) => 1 + n.left.len() + n.right.len(),
        }
    }
}

impl<T: Ord> Node<T> {
    fn new(value: T) -> Self {
        Self { value, left: Subtree::new(), right: Subtree::new() }
    }
}

fn main() {
    let mut tree = BinaryTree::new();
    tree.insert("foo");
    assert_eq!(tree.len(), 1);
    tree.insert("bar");
    assert!(tree.has(&"foo"));
}

#[cfg(test)]
mod tests {
    use super::*;

    #[test]
    fn len() {
        let mut tree = BinaryTree::new();
        assert_eq!(tree.len(), 0);
        tree.insert(2);
        assert_eq!(tree.len(), 1);
        tree.insert(1);
        assert_eq!(tree.len(), 2);
        tree.insert(2); // not a unique item
        assert_eq!(tree.len(), 2);
    }

    #[test]
    fn has() {
        let mut tree = BinaryTree::new();
        fn check_has(tree: &BinaryTree<i32>, exp: &[bool]) {
            let got: Vec<bool> =
                (0..exp.len()).map(|i| tree.has(&(i as i32))).collect();
            assert_eq!(&got, exp);
        }

        check_has(&tree, &[false, false, false, false, false]);
        tree.insert(0);
        check_has(&tree, &[true, false, false, false, false]);
        tree.insert(4);
        check_has(&tree, &[true, false, false, false, true]);
        tree.insert(4);
        check_has(&tree, &[true, false, false, false, true]);
        tree.insert(3);
        check_has(&tree, &[true, false, false, true, true]);
    }

    #[test]
    fn unbalanced() {
        let mut tree = BinaryTree::new();
        for i in 0..100 {
            tree.insert(i);
        }
        assert_eq!(tree.len(), 100);
        assert!(tree.has(&50));
    }
}
Welcome Back
Including 10 minute breaks, this session should take about 2 hours and 10 minutes. It contains:
| Segment | Duration |
|---|---|
| 借用 | 50 minutes |
| 生命週期 | 1 hour and 10 minutes |
借用
This segment should take about 50 minutes. It contains:
| Slide | Duration |
|---|---|
| 借用 | 10 minutes |
| 借用 | 10 minutes |
| 內部可變性 (Interior Mutability) | 10 minutes |
| 練習:衛生統計資料 | 20 minutes |
借用
As we saw before, instead of transferring ownership when calling a function, you can let a function borrow the value:
#[derive(Debug)]
struct Point(i32, i32);

fn add(p1: &Point, p2: &Point) -> Point {
    Point(p1.0 + p2.0, p1.1 + p2.1)
}

fn main() {
    let p1 = Point(3, 4);
    let p2 = Point(10, 20);
    let p3 = add(&p1, &p2);
    println!("{p1:?} + {p2:?} = {p3:?}");
}add函式會「借用」兩個點,並傳回新的點。- 呼叫端會保留輸入內容的所有權。
這張投影片會複習第 1 天講解過的參照,並略微延伸討論何謂函式引數和回傳值。
探索更多內容
有關堆疊回傳的注意事項:
-
Demonstrate that the return from
addis cheap because the compiler can eliminate the copy operation. Change the above code to print stack addresses and run it on the Playground or look at the assembly in Godbolt. In the “DEBUG” optimization level, the addresses should change, while they stay the same when changing to the “RELEASE” setting:#[derive(Debug)] struct Point(i32, i32); fn add(p1: &Point, p2: &Point) -> Point { let p = Point(p1.0 + p2.0, p1.1 + p2.1); println!("&p.0: {:p}", &p.0); p } pub fn main() { let p1 = Point(3, 4); let p2 = Point(10, 20); let p3 = add(&p1, &p2); println!("&p3.0: {:p}", &p3.0); println!("{p1:?} + {p2:?} = {p3:?}"); } -
Rust 編譯器可以執行回傳值最佳化 (RVO)。
-
In C++, copy elision has to be defined in the language specification because constructors can have side effects. In Rust, this is not an issue at all. If RVO did not happen, Rust will always perform a simple and efficient
memcpycopy.
借用
Rust’s borrow checker puts constraints on the ways you can borrow values. For a given value, at any time:
- You can have one or more shared references to the value, or
- You can have exactly one exclusive reference to the value.
fn main() {
    let mut a: i32 = 10;
    let b: &i32 = &a;

    {
        let c: &mut i32 = &mut a;
        *c = 20;
    }

    println!("a: {a}");
    println!("b: {b}");
}- 請注意,這裡的規定是同一點上不得「存在」衝突的參照,在何處解除參照並不重要。
- 上述程式碼不會編譯,因為系統會同時透過
c和b,以可變動項和不可變動項的格式借用a。 - 請將
b的println!陳述式移到導入c的範圍前,即可編譯程式碼。 - 經過該變更後,編譯器會發現系統使用
b的時間,只會在新可變動項透過c借用a之前。這是借用檢查器中的功能,稱為「非詞彙生命週期」(non-lexical lifetimes)。 - 專屬參照的約束力很強。Rust 會利用這類參照,確保資料競爭的情形不會發生;此外,也會「透過」這項約束,將程式碼最佳化。舉例來說,共用參照背後的值可以在該參照的生命週期內,安全地快取到暫存器中。
- 借用檢查器在設計上考量了許多常見模式,例如同時對結構體中的不同欄位進行專屬參照。但檢查器也可能無法完全「理解」某些的情況,這通常會導致「與借用檢查器衝突」。
內部可變性 (Interior Mutability)
在某些情況下,您必須修改共用 (唯讀) 參照背後的資料:比方說,共用的資料結構可能含有內部快取,並想透過唯讀方法更新該快取。
「內部可變動性」模式可以在共用參照背後提供專屬 (可變動的) 存取權。標準程式庫支援以多種方式執行此操作,同時仍可確保安全,做法通常是執行執行階段檢查。
RefCell
use std::cell::RefCell;
use std::rc::Rc;

#[derive(Debug, Default)]
struct Node {
    value: i64,
    children: Vec<Rc<RefCell<Node>>>,
}

impl Node {
    fn new(value: i64) -> Rc<RefCell<Node>> {
        Rc::new(RefCell::new(Node { value, ..Node::default() }))
    }

    fn sum(&self) -> i64 {
        self.value + self.children.iter().map(|c| c.borrow().sum()).sum::<i64>()
    }
}

fn main() {
    let root = Node::new(1);
    root.borrow_mut().children.push(Node::new(5));
    let subtree = Node::new(10);
    subtree.borrow_mut().children.push(Node::new(11));
    subtree.borrow_mut().children.push(Node::new(12));
    root.borrow_mut().children.push(subtree);

    println!("graph: {root:#?}");
    println!("graph sum: {}", root.borrow().sum());
}
Cell
Cell 會納入值,並允許取得或設定該值,即使具有對 Cell 的共用參照也一樣。但是,它不允許對該值進行任何參照。由於沒有參照,因此借用規則不得違反。
這張投影片的重點是 Rust 提供「安全的」方法,可讓您修改共用參照背後的資料。要確保安全性有許多方式,而 RefCell 和 Cell 是其中兩種方法。
-
RefCell會透過執行階段檢查,強制使用 Rust 的一般借用規則 (多個共用參照或單一專屬參照)。在本例中,所有借用都非常短暫且永遠不會重疊,因此檢查一律會成功。 -
Rc只允許對自身內容的共用 (唯讀) 存取行為,因為允許 (並計算) 多個參照才是它的用途。但是,由於我們要修改這個值,因此內部可變動性不可或缺。 -
如要確保安全,
Cell是較簡單的做法,因為其中的set方法可接受&self。這無需動用執行階段檢查,但需要移動值,因此可能有其相應成本。 -
Demonstrate that reference loops can be created by adding
roottosubtree.children. -
如要演示執行階段發生的恐慌情形,請新增
fn inc(&mut self),這可讓self.value遞增,並在其子項呼叫相同的方法。在有參照迴圈的情況下,這會引發恐慌,其中的thread 'main' 會因 'already borrowed: BorrowMutError'而恐慌。
練習:衛生統計資料
您正在實作健康監控系統,因此須追蹤使用者的健康統計資料。
You’ll start with a stubbed function in an impl block as well as a User struct definition. Your goal is to implement the stubbed out method on the User struct defined in the impl block.
Copy the code below to https://play.rust-lang.org/ and fill in the missing method:
// TODO: remove this when you're done with your implementation.
#![allow(unused_variables, dead_code)]


#![allow(dead_code)]
pub struct User {
    name: String,
    age: u32,
    height: f32,
    visit_count: usize,
    last_blood_pressure: Option<(u32, u32)>,
}

pub struct Measurements {
    height: f32,
    blood_pressure: (u32, u32),
}

pub struct HealthReport<'a> {
    patient_name: &'a str,
    visit_count: u32,
    height_change: f32,
    blood_pressure_change: Option<(i32, i32)>,
}

impl User {
    pub fn new(name: String, age: u32, height: f32) -> Self {
        Self { name, age, height, visit_count: 0, last_blood_pressure: None }
    }

    pub fn visit_doctor(&mut self, measurements: Measurements) -> HealthReport {
        todo!("Update a user's statistics based on measurements from a visit to the doctor")
    }
}

fn main() {
    let bob = User::new(String::from("Bob"), 32, 155.2);
    println!("I'm {} and my age is {}", bob.name, bob.age);
}

#[test]
fn test_visit() {
    let mut bob = User::new(String::from("Bob"), 32, 155.2);
    assert_eq!(bob.visit_count, 0);
    let report =
        bob.visit_doctor(Measurements { height: 156.1, blood_pressure: (120, 80) });
    assert_eq!(report.patient_name, "Bob");
    assert_eq!(report.visit_count, 1);
    assert_eq!(report.blood_pressure_change, None);

    let report =
        bob.visit_doctor(Measurements { height: 156.1, blood_pressure: (115, 76) });

    assert_eq!(report.visit_count, 2);
    assert_eq!(report.blood_pressure_change, Some((-5, -4)));
}
解決方案
#![allow(dead_code)]
pub struct User {
    name: String,
    age: u32,
    height: f32,
    visit_count: usize,
    last_blood_pressure: Option<(u32, u32)>,
}

pub struct Measurements {
    height: f32,
    blood_pressure: (u32, u32),
}

pub struct HealthReport<'a> {
    patient_name: &'a str,
    visit_count: u32,
    height_change: f32,
    blood_pressure_change: Option<(i32, i32)>,
}

impl User {
    pub fn new(name: String, age: u32, height: f32) -> Self {
        Self { name, age, height, visit_count: 0, last_blood_pressure: None }
    }

    pub fn visit_doctor(&mut self, measurements: Measurements) -> HealthReport {
        self.visit_count += 1;
        let bp = measurements.blood_pressure;
        let report = HealthReport {
            patient_name: &self.name,
            visit_count: self.visit_count as u32,
            height_change: measurements.height - self.height,
            blood_pressure_change: match self.last_blood_pressure {
                Some(lbp) => {
                    Some((bp.0 as i32 - lbp.0 as i32, bp.1 as i32 - lbp.1 as i32))
                }
                None => None,
            },
        };
        self.height = measurements.height;
        self.last_blood_pressure = Some(bp);
        report
    }
}

fn main() {
    let bob = User::new(String::from("Bob"), 32, 155.2);
    println!("I'm {} and my age is {}", bob.name, bob.age);
}

#[test]
fn test_visit() {
    let mut bob = User::new(String::from("Bob"), 32, 155.2);
    assert_eq!(bob.visit_count, 0);
    let report =
        bob.visit_doctor(Measurements { height: 156.1, blood_pressure: (120, 80) });
    assert_eq!(report.patient_name, "Bob");
    assert_eq!(report.visit_count, 1);
    assert_eq!(report.blood_pressure_change, None);

    let report =
        bob.visit_doctor(Measurements { height: 156.1, blood_pressure: (115, 76) });

    assert_eq!(report.visit_count, 2);
    assert_eq!(report.blood_pressure_change, Some((-5, -4)));
}
生命週期
This segment should take about 1 hour and 10 minutes. It contains:
| Slide | Duration |
|---|---|
| Slices: &[T] | 10 minutes |
| 迷途參照 | 10 minutes |
| 函式呼叫中的生命週期 | 10 minutes |
| 生命週期 | 5 minutes |
| 生命週期 | 5 minutes |
| 練習:Protobuf 剖析 | 30 minutes |
切片
切片能讓您查看更大的集合:
fn main() {
    let mut a: [i32; 6] = [10, 20, 30, 40, 50, 60];
    println!("a: {a:?}");

    let s: &[i32] = &a[2..4];

    println!("s: {s:?}");
}- 切片會從切片型別借用資料。
- 問題:如果在輸出
s前修改a[3],會有什麼影響?
-
我們會建立一個切片,方法是先借用
a,然後在括號中指定起始和結束索引。 -
如果切片從索引 0 開始,Rust 的範圍語法可允許我們捨棄起始索引,也就是說,
&a[0..a.len()]和&a[..a.len()]意思相同。 -
同理,最後一個索引也是如此,因此
&a[2..a.len()]和&a[2..]意思相同。 -
因此,為了輕鬆建立完整陣列的切片,我們可以使用
&a[..]。 -
s是對i32s 切片的參照。請注意,s(&[i32]) 的型別不再提及陣列長度,這有利於我們對不同大小的切片執行運算。 -
Slices always borrow from another object. In this example,
ahas to remain ‘alive’ (in scope) for at least as long as our slice. -
The question about modifying
a[3]can spark an interesting discussion, but the answer is that for memory safety reasons you cannot do it throughaat this point in the execution, but you can read the data from bothaandssafely. It works before you created the slice, and again after theprintln, when the slice is no longer used.
迷途參照
我們現在可以瞭解 Rust 中有兩種字串型別,&str 幾近於 &[char],但其資料是以可變長度編碼 (UTF-8) 儲存。
fn main() {
    let s1: &str = "World";
    println!("s1: {s1}");

    let mut s2: String = String::from("Hello ");
    println!("s2: {s2}");
    s2.push_str(s1);
    println!("s2: {s2}");

    let s3: &str = &s2[6..];
    println!("s3: {s3}");
}
以 Rust 術語來說會是這樣:
&str是對字串切片的不可變參照。String是可變動的字串緩衝區。
-
&strintroduces a string slice, which is an immutable reference to UTF-8 encoded string data stored in a block of memory. String literals (”Hello”), are stored in the program’s binary. -
Rust 的
String型別是位元組向量的包裝函式。就像使用Vec<T>一樣,該型別有專屬的擁有者。 -
As with many other types
String::from()creates a string from a string literal;String::new()creates a new empty string, to which string data can be added using thepush()andpush_str()methods. -
The
format!()macro is a convenient way to generate an owned string from dynamic values. It accepts the same format specification asprintln!(). -
您可以透過
&str和可選的範圍選項,從String借用&str切片。如果所選位元組範圍未與字元邊界對齊,運算式會發生恐慌。比起嘗試設定正確的字元邊界,建議優先使用會對字元進行疊代的chars疊代器。 -
For C++ programmers: think of
&strasstd::string_viewfrom C++, but the one that always points to a valid string in memory. RustStringis a rough equivalent ofstd::stringfrom C++ (main difference: it can only contain UTF-8 encoded bytes and will never use a small-string optimization). -
Byte strings literals allow you to create a
&[u8]value directly:fn main() { println!("{:?}", b"abc"); println!("{:?}", &[97, 98, 99]); }
函式呼叫中的生命週期
參照的「生命週期」不得「超過」其所參照的值。此由借用檢查器負責驗證。
按照我們目前所見,生命週期可以隱晦表示。不過,&'a Point、&'document str 也可以明確表示生命週期。生命週期的開頭為 ',一般預設名稱為 'a``。請將 &’a Point讀做「至少對生命週期a有效的借用Point`」。
Lifetimes are always inferred by the compiler: you cannot assign a lifetime yourself. Explicit lifetime annotations create constraints where there is ambiguity; the compiler verifies that there is a valid solution.
在考慮與函式間傳遞值時,生命週期會變得比較複雜。
#[derive(Debug)]
struct Point(i32, i32);

fn left_most(p1: &Point, p2: &Point) -> &Point {
    if p1.0 < p2.0 {
        p1
    } else {
        p2
    }
}

fn main() {
    let p1: Point = Point(10, 10);
    let p2: Point = Point(20, 20);
    let p3 = left_most(&p1, &p2); // What is the lifetime of p3?
    println!("p3: {p3:?}");
}在本例中,編譯器無法堆論出 p3 到底有多長的生命週期。查看函式主體內部後顯示,編譯器只有把握假設 p3 的生命週期是 p1 和 p2 中的較短那個。但就像型別一樣,Rust 規定要對函式引數和回傳值的生命週期加上明確註解。
請將 'a 妥善新增至 left_most:
fn left_most<'a>(p1: &'a Point, p2: &'a Point) -> &'a Point {這表示,「假設 p1 和 p2 都比 'a 長」,回傳值的生命週期至少會為 'a。
一般情況下可以省略生命週期,詳情請見下一張投影片。
函式呼叫中的生命週期
Lifetimes for function arguments and return values must be fully specified, but Rust allows lifetimes to be elided in most cases with a few simple rules. This is not inference – it is just a syntactic shorthand.
- 凡是沒有生命週期註解的引數都會獲得一個註解。
- 如果只有一個引數生命週期,則會提供給所有未加註的回傳值。
- 如果有多個引數生命週期,但第一個是要給
self,這個生命週期會提供給所有未加註的回傳值。
#[derive(Debug)]
struct Point(i32, i32);

fn cab_distance(p1: &Point, p2: &Point) -> i32 {
    (p1.0 - p2.0).abs() + (p1.1 - p2.1).abs()
}

fn nearest<'a>(points: &'a [Point], query: &Point) -> Option<&'a Point> {
    let mut nearest = None;
    for p in points {
        if let Some((_, nearest_dist)) = nearest {
            let dist = cab_distance(p, query);
            if dist < nearest_dist {
                nearest = Some((p, dist));
            }
        } else {
            nearest = Some((p, cab_distance(p, query)));
        };
    }
    nearest.map(|(p, _)| p)
}

fn main() {
    println!(
        "{:?}",
        nearest(
            &[Point(1, 0), Point(1, 0), Point(-1, 0), Point(0, -1),],
            &Point(0, 2)
        )
    );
}您可看到本例中隨意省略了 cab_distance。
nearest 函式提供另一個函式範例,其引數具有多個需要明確註解的參照。
請試著調整簽章,「謊報」傳回的生命週期:
fn nearest<'a, 'q>(points: &'a [Point], query: &'q Point) -> Option<&'q Point> {由於這不會執行編譯,表示編譯器已檢查註解是否有效。請注意,原始指標 (不安全) 的情況並非如此,這是不安全 Rust 的常見錯誤來源。
學生可能會詢問何時該使用生命週期。Rust 的借用「一律」具有生命週期。在大多數情況下,如果採取省略和型別推論的方式,表示您不必編寫這些內容。但在較複雜的情況下,生命週期註解可以協助解決模稜兩可的情況。一般而言,只要在有必要時複製值,即可輕鬆處理所擁有的資料,特別是在原型設計階段更是如此。
資料結構中的生命週期
如果資料型別會儲存借用的資料,則必須使用生命週期註解:
#[derive(Debug)]
struct Highlight<'doc>(&'doc str);

fn erase(text: String) {
    println!("Bye {text}!");
}

fn main() {
    let text = String::from("The quick brown fox jumps over the lazy dog.");
    let fox = Highlight(&text[4..19]);
    let dog = Highlight(&text[35..43]);
    // erase(text);
    println!("{fox:?}");
    println!("{dog:?}");
}- 在上述範例中,
Highlight的註解會強制執行以下規定:若是包含在內的&str的基礎資料,留存時間應至少和使用該資料的所有Highlight例項一樣長。 - 如果在
fox(或dog) 的生命週期結束前消耗text,借用檢查器會擲回錯誤。 - 含有借用資料的型別會強制要求使用者保留原始資料。這在建立輕量檢視畫面可能很實用,但通常也會增加使用難度。
- 請盡可能讓資料結構直接擁有資料。
- 某些內含多個參照的結構體可擁有多個生命週期註解。如果除了結構體的生命週期之外,還需要描述參照之間的生命週期關係,就可能有必要擁有多個生命週期註解。那些是相當進階的用途。
練習:Protobuf 剖析
在本練習中,您將建構 protobuf 二進位編碼的剖析器。請放心,這比看起來容易!這個練習也會舉例說明常見的剖析模式,也就是傳遞資料切片。基礎資料本身一律不會複製。
如要完整剖析 protobuf 訊息,您必須瞭解欄位型別,這會依欄位編號建立索引,通常位於 proto 檔案內。在本練習中,我們會在針對各欄位呼叫的函式中,將該資訊編碼為 match 陳述式。
我們將使用以下 proto:
message PhoneNumber {
  optional string number = 1;
  optional string type = 2;
}

message Person {
  optional string name = 1;
  optional int32 id = 2;
  repeated PhoneNumber phones = 3;
}
proto 訊息會編碼為一系列的欄位,一個接著一個。每個欄位都以後方加上值的「標記」形式實作。此標記含有欄位編號 (例如 Person 訊息的 id 欄位編號是 2) 以及有線型別,後者負責定義應如何從位元組資料流中決定酬載。
整數 (包含標記) 會以稱為 VARINT 的可變長度編碼表示。好消息是,以下程式碼已為您定義 parse_varint。該程式碼也定義了回呼,藉此處理 Person 和 PhoneNumber 欄位,並將訊息剖析為對這些回呼的一系列呼叫。
您剩下的就只是為 Person 和 PhoneNumber 實作 parse_field 函式和 ProtoMessage 特徵即可。
use std::convert::TryFrom;
use thiserror::Error;

#[derive(Debug, Error)]
enum Error {
    #[error("Invalid varint")]
    InvalidVarint,
    #[error("Invalid wire-type")]
    InvalidWireType,
    #[error("Unexpected EOF")]
    UnexpectedEOF,
    #[error("Invalid length")]
    InvalidSize(#[from] std::num::TryFromIntError),
    #[error("Unexpected wire-type)")]
    UnexpectedWireType,
    #[error("Invalid string (not UTF-8)")]
    InvalidString,
}

/// A wire type as seen on the wire.
enum WireType {
    /// The Varint WireType indicates the value is a single VARINT.
    Varint,
    //I64,  -- not needed for this exercise
    /// The Len WireType indicates that the value is a length represented as a
    /// VARINT followed by exactly that number of bytes.
    Len,
    /// The I32 WireType indicates that the value is precisely 4 bytes in
    /// little-endian order containing a 32-bit signed integer.
    I32,
}

#[derive(Debug)]
/// A field's value, typed based on the wire type.
enum FieldValue<'a> {
    Varint(u64),
    //I64(i64),  -- not needed for this exercise
    Len(&'a [u8]),
    I32(i32),
}

#[derive(Debug)]
/// A field, containing the field number and its value.
struct Field<'a> {
    field_num: u64,
    value: FieldValue<'a>,
}

trait ProtoMessage<'a>: Default + 'a {
    fn add_field(&mut self, field: Field<'a>) -> Result<(), Error>;
}

impl TryFrom<u64> for WireType {
    type Error = Error;

    fn try_from(value: u64) -> Result<WireType, Error> {
        Ok(match value {
            0 => WireType::Varint,
            //1 => WireType::I64,  -- not needed for this exercise
            2 => WireType::Len,
            5 => WireType::I32,
            _ => return Err(Error::InvalidWireType),
        })
    }
}

impl<'a> FieldValue<'a> {
    fn as_string(&self) -> Result<&'a str, Error> {
        let FieldValue::Len(data) = self else {
            return Err(Error::UnexpectedWireType);
        };
        std::str::from_utf8(data).map_err(|_| Error::InvalidString)
    }

    fn as_bytes(&self) -> Result<&'a [u8], Error> {
        let FieldValue::Len(data) = self else {
            return Err(Error::UnexpectedWireType);
        };
        Ok(data)
    }

    fn as_u64(&self) -> Result<u64, Error> {
        let FieldValue::Varint(value) = self else {
            return Err(Error::UnexpectedWireType);
        };
        Ok(*value)
    }
}

/// Parse a VARINT, returning the parsed value and the remaining bytes.
fn parse_varint(data: &[u8]) -> Result<(u64, &[u8]), Error> {
    for i in 0..7 {
        let Some(b) = data.get(i) else {
            return Err(Error::InvalidVarint);
        };
        if b & 0x80 == 0 {
            // This is the last byte of the VARINT, so convert it to
            // a u64 and return it.
            let mut value = 0u64;
            for b in data[..=i].iter().rev() {
                value = (value << 7) | (b & 0x7f) as u64;
            }
            return Ok((value, &data[i + 1..]));
        }
    }

    // More than 7 bytes is invalid.
    Err(Error::InvalidVarint)
}

/// Convert a tag into a field number and a WireType.
fn unpack_tag(tag: u64) -> Result<(u64, WireType), Error> {
    let field_num = tag >> 3;
    let wire_type = WireType::try_from(tag & 0x7)?;
    Ok((field_num, wire_type))
}


/// Parse a field, returning the remaining bytes
fn parse_field(data: &[u8]) -> Result<(Field, &[u8]), Error> {
    let (tag, remainder) = parse_varint(data)?;
    let (field_num, wire_type) = unpack_tag(tag)?;
    let (fieldvalue, remainder) = match wire_type {
        _ => todo!("Based on the wire type, build a Field, consuming as many bytes as necessary.")
    };
    todo!("Return the field, and any un-consumed bytes.")
}

/// Parse a message in the given data, calling `T::add_field` for each field in
/// the message.
///
/// The entire input is consumed.
fn parse_message<'a, T: ProtoMessage<'a>>(mut data: &'a [u8]) -> Result<T, Error> {
    let mut result = T::default();
    while !data.is_empty() {
        let parsed = parse_field(data)?;
        result.add_field(parsed.0)?;
        data = parsed.1;
    }
    Ok(result)
}

#[derive(Debug, Default)]
struct PhoneNumber<'a> {
    number: &'a str,
    type_: &'a str,
}

#[derive(Debug, Default)]
struct Person<'a> {
    name: &'a str,
    id: u64,
    phone: Vec<PhoneNumber<'a>>,
}

// TODO: Implement ProtoMessage for Person and PhoneNumber.

fn main() {
    let person: Person = parse_message(&[
        0x0a, 0x07, 0x6d, 0x61, 0x78, 0x77, 0x65, 0x6c, 0x6c, 0x10, 0x2a, 0x1a,
        0x16, 0x0a, 0x0e, 0x2b, 0x31, 0x32, 0x30, 0x32, 0x2d, 0x35, 0x35, 0x35,
        0x2d, 0x31, 0x32, 0x31, 0x32, 0x12, 0x04, 0x68, 0x6f, 0x6d, 0x65, 0x1a,
        0x18, 0x0a, 0x0e, 0x2b, 0x31, 0x38, 0x30, 0x30, 0x2d, 0x38, 0x36, 0x37,
        0x2d, 0x35, 0x33, 0x30, 0x38, 0x12, 0x06, 0x6d, 0x6f, 0x62, 0x69, 0x6c,
        0x65,
    ])
    .unwrap();
    println!("{:#?}", person);
}
解決方案
use std::convert::TryFrom;
use thiserror::Error;

#[derive(Debug, Error)]
enum Error {
    #[error("Invalid varint")]
    InvalidVarint,
    #[error("Invalid wire-type")]
    InvalidWireType,
    #[error("Unexpected EOF")]
    UnexpectedEOF,
    #[error("Invalid length")]
    InvalidSize(#[from] std::num::TryFromIntError),
    #[error("Unexpected wire-type)")]
    UnexpectedWireType,
    #[error("Invalid string (not UTF-8)")]
    InvalidString,
}

/// A wire type as seen on the wire.
enum WireType {
    /// The Varint WireType indicates the value is a single VARINT.
    Varint,
    //I64,  -- not needed for this exercise
    /// The Len WireType indicates that the value is a length represented as a
    /// VARINT followed by exactly that number of bytes.
    Len,
    /// The I32 WireType indicates that the value is precisely 4 bytes in
    /// little-endian order containing a 32-bit signed integer.
    I32,
}

#[derive(Debug)]
/// A field's value, typed based on the wire type.
enum FieldValue<'a> {
    Varint(u64),
    //I64(i64),  -- not needed for this exercise
    Len(&'a [u8]),
    I32(i32),
}

#[derive(Debug)]
/// A field, containing the field number and its value.
struct Field<'a> {
    field_num: u64,
    value: FieldValue<'a>,
}

trait ProtoMessage<'a>: Default + 'a {
    fn add_field(&mut self, field: Field<'a>) -> Result<(), Error>;
}

impl TryFrom<u64> for WireType {
    type Error = Error;

    fn try_from(value: u64) -> Result<WireType, Error> {
        Ok(match value {
            0 => WireType::Varint,
            //1 => WireType::I64,  -- not needed for this exercise
            2 => WireType::Len,
            5 => WireType::I32,
            _ => return Err(Error::InvalidWireType),
        })
    }
}

impl<'a> FieldValue<'a> {
    fn as_string(&self) -> Result<&'a str, Error> {
        let FieldValue::Len(data) = self else {
            return Err(Error::UnexpectedWireType);
        };
        std::str::from_utf8(data).map_err(|_| Error::InvalidString)
    }

    fn as_bytes(&self) -> Result<&'a [u8], Error> {
        let FieldValue::Len(data) = self else {
            return Err(Error::UnexpectedWireType);
        };
        Ok(data)
    }

    fn as_u64(&self) -> Result<u64, Error> {
        let FieldValue::Varint(value) = self else {
            return Err(Error::UnexpectedWireType);
        };
        Ok(*value)
    }
}

/// Parse a VARINT, returning the parsed value and the remaining bytes.
fn parse_varint(data: &[u8]) -> Result<(u64, &[u8]), Error> {
    for i in 0..7 {
        let Some(b) = data.get(i) else {
            return Err(Error::InvalidVarint);
        };
        if b & 0x80 == 0 {
            // This is the last byte of the VARINT, so convert it to
            // a u64 and return it.
            let mut value = 0u64;
            for b in data[..=i].iter().rev() {
                value = (value << 7) | (b & 0x7f) as u64;
            }
            return Ok((value, &data[i + 1..]));
        }
    }

    // More than 7 bytes is invalid.
    Err(Error::InvalidVarint)
}

/// Convert a tag into a field number and a WireType.
fn unpack_tag(tag: u64) -> Result<(u64, WireType), Error> {
    let field_num = tag >> 3;
    let wire_type = WireType::try_from(tag & 0x7)?;
    Ok((field_num, wire_type))
}

/// Parse a field, returning the remaining bytes
fn parse_field(data: &[u8]) -> Result<(Field, &[u8]), Error> {
    let (tag, remainder) = parse_varint(data)?;
    let (field_num, wire_type) = unpack_tag(tag)?;
    let (fieldvalue, remainder) = match wire_type {
        WireType::Varint => {
            let (value, remainder) = parse_varint(remainder)?;
            (FieldValue::Varint(value), remainder)
        }
        WireType::Len => {
            let (len, remainder) = parse_varint(remainder)?;
            let len: usize = len.try_into()?;
            if remainder.len() < len {
                return Err(Error::UnexpectedEOF);
            }
            let (value, remainder) = remainder.split_at(len);
            (FieldValue::Len(value), remainder)
        }
        WireType::I32 => {
            if remainder.len() < 4 {
                return Err(Error::UnexpectedEOF);
            }
            let (value, remainder) = remainder.split_at(4);
            // Unwrap error because `value` is definitely 4 bytes long.
            let value = i32::from_le_bytes(value.try_into().unwrap());
            (FieldValue::I32(value), remainder)
        }
    };
    Ok((Field { field_num, value: fieldvalue }, remainder))
}

/// Parse a message in the given data, calling `T::add_field` for each field in
/// the message.
///
/// The entire input is consumed.
fn parse_message<'a, T: ProtoMessage<'a>>(mut data: &'a [u8]) -> Result<T, Error> {
    let mut result = T::default();
    while !data.is_empty() {
        let parsed = parse_field(data)?;
        result.add_field(parsed.0)?;
        data = parsed.1;
    }
    Ok(result)
}

#[derive(Debug, Default)]
struct PhoneNumber<'a> {
    number: &'a str,
    type_: &'a str,
}

#[derive(Debug, Default)]
struct Person<'a> {
    name: &'a str,
    id: u64,
    phone: Vec<PhoneNumber<'a>>,
}

impl<'a> ProtoMessage<'a> for Person<'a> {
    fn add_field(&mut self, field: Field<'a>) -> Result<(), Error> {
        match field.field_num {
            1 => self.name = field.value.as_string()?,
            2 => self.id = field.value.as_u64()?,
            3 => self.phone.push(parse_message(field.value.as_bytes()?)?),
            _ => {} // skip everything else
        }
        Ok(())
    }
}

impl<'a> ProtoMessage<'a> for PhoneNumber<'a> {
    fn add_field(&mut self, field: Field<'a>) -> Result<(), Error> {
        match field.field_num {
            1 => self.number = field.value.as_string()?,
            2 => self.type_ = field.value.as_string()?,
            _ => {} // skip everything else
        }
        Ok(())
    }
}

fn main() {
    let person: Person = parse_message(&[
        0x0a, 0x07, 0x6d, 0x61, 0x78, 0x77, 0x65, 0x6c, 0x6c, 0x10, 0x2a, 0x1a,
        0x16, 0x0a, 0x0e, 0x2b, 0x31, 0x32, 0x30, 0x32, 0x2d, 0x35, 0x35, 0x35,
        0x2d, 0x31, 0x32, 0x31, 0x32, 0x12, 0x04, 0x68, 0x6f, 0x6d, 0x65, 0x1a,
        0x18, 0x0a, 0x0e, 0x2b, 0x31, 0x38, 0x30, 0x30, 0x2d, 0x38, 0x36, 0x37,
        0x2d, 0x35, 0x33, 0x30, 0x38, 0x12, 0x06, 0x6d, 0x6f, 0x62, 0x69, 0x6c,
        0x65,
    ])
    .unwrap();
    println!("{:#?}", person);
}

#[cfg(test)]
mod test {
    use super::*;

    #[test]
    fn as_string() {
        assert!(FieldValue::Varint(10).as_string().is_err());
        assert!(FieldValue::I32(10).as_string().is_err());
        assert_eq!(FieldValue::Len(b"hello").as_string().unwrap(), "hello");
    }

    #[test]
    fn as_bytes() {
        assert!(FieldValue::Varint(10).as_bytes().is_err());
        assert!(FieldValue::I32(10).as_bytes().is_err());
        assert_eq!(FieldValue::Len(b"hello").as_bytes().unwrap(), b"hello");
    }

    #[test]
    fn as_u64() {
        assert_eq!(FieldValue::Varint(10).as_u64().unwrap(), 10u64);
        assert!(FieldValue::I32(10).as_u64().is_err());
        assert!(FieldValue::Len(b"hello").as_u64().is_err());
    }
}
歡迎參加第 4 天課程
Today we will cover topics relating to building large-scale software in Rust:
- 疊代器:深入探討
Iterator特徵。 - 模組和可見性。
- 測試。
- 錯誤處理:恐慌、
Result,以及 try 運算子?。 - 不安全的 Rust:不能寫出安全的 Rust 時的應急方法。
課程時間表
Including 10 minute breaks, this session should take about 2 hours and 40 minutes. It contains:
| Segment | Duration |
|---|---|
| 歡迎 | 3 minutes |
| 疊代器 | 45 minutes |
| 模組 | 40 minutes |
| 測試 | 45 minutes |
疊代器
This segment should take about 45 minutes. It contains:
| Slide | Duration |
|---|---|
| Iterator | 5 minutes |
| IntoIterator | 5 minutes |
| FromIterator | 5 minutes |
| 練習:疊代器方法鏈結 | 30 minutes |
Iterator
Iterator 特徵可讓您對集合中的值進行疊代作業。這需要用到 next 方法,且會提供大量方法。許多標準程式庫型別都能實作 Iterator,而您也可以自行實作:
struct Fibonacci {
    curr: u32,
    next: u32,
}

impl Iterator for Fibonacci {
    type Item = u32;

    fn next(&mut self) -> Option<Self::Item> {
        let new_next = self.curr + self.next;
        self.curr = self.next;
        self.next = new_next;
        Some(self.curr)
    }
}

fn main() {
    let fib = Fibonacci { curr: 0, next: 1 };
    for (i, n) in fib.enumerate().take(5) {
        println!("fib({i}): {n}");
    }
}-
The
Iteratortrait implements many common functional programming operations over collections (e.g.map,filter,reduce, etc). This is the trait where you can find all the documentation about them. In Rust these functions should produce the code as efficient as equivalent imperative implementations. -
IntoIterator是迫使 for 迴圈運作的特徵。此特徵由集合型別(例如Vec<T>) 和相關參照 (&Vec<T>與&[T]) 實作而成。此外,範圍也會實作這項特徵。 這就說明了您為何可以透過for i in some_vec { .. }對向量進行疊代,即使沒有some_vec.next()也無妨。
IntoIterator
The Iterator trait tells you how to iterate once you have created an iterator. The related trait IntoIterator defines how to create an iterator for a type. It is used automatically by the for loop.
struct Grid {
    x_coords: Vec<u32>,
    y_coords: Vec<u32>,
}

impl IntoIterator for Grid {
    type Item = (u32, u32);
    type IntoIter = GridIter;
    fn into_iter(self) -> GridIter {
        GridIter { grid: self, i: 0, j: 0 }
    }
}

struct GridIter {
    grid: Grid,
    i: usize,
    j: usize,
}

impl Iterator for GridIter {
    type Item = (u32, u32);

    fn next(&mut self) -> Option<(u32, u32)> {
        if self.i >= self.grid.x_coords.len() {
            self.i = 0;
            self.j += 1;
            if self.j >= self.grid.y_coords.len() {
                return None;
            }
        }
        let res = Some((self.grid.x_coords[self.i], self.grid.y_coords[self.j]));
        self.i += 1;
        res
    }
}

fn main() {
    let grid = Grid { x_coords: vec![3, 5, 7, 9], y_coords: vec![10, 20, 30, 40] };
    for (x, y) in grid {
        println!("point = {x}, {y}");
    }
}Click through to the docs for IntoIterator. Every implementation of IntoIterator must declare two types:
Item: the type to iterate over, such asi8,IntoIter:into_iter方法傳回的Iterator型別。
請注意,IntoIter 和 Item 已建立連結:疊代器必須具有相同的 Item 型別,表示會傳回 Option<Item>。
此範例會對 x 和 y 座標的所有組合進行疊代。
請嘗試在 main 中對格線疊代兩次。想想為什麼這樣會失敗?請注意,IntoIterator::into_iter 會取得 self 的擁有權。
如要修正此問題,請針對 &Grid 實作 IntoIterator,並將 Grid 的參照儲存在 GridIter 中。
標準程式庫型別可能會發生同樣的問題,也就是 for e in some_vector 會取得 some_vector 的擁有權,並對該向量內擁有的元素進行疊代。因此,請改用 for e in &some_vector 疊代處理對 some_vector 元素的參照。
FromIterator
FromIterator 可讓您透過 Iterator 建構集合。
fn main() {
    let primes = vec![2, 3, 5, 7];
    let prime_squares = primes.into_iter().map(|p| p * p).collect::<Vec<_>>();
    println!("prime_squares: {prime_squares:?}");
}Iterator implements
fn collect<B>(self) -> B
where
    B: FromIterator<Self::Item>,
    Self: Sized
您可以透過兩種方式為這個方法指定 B:
- 依指示使用「turbofish」:
some_iterator.collect::<COLLECTION_TYPE>()。在這裡使用_簡寫,可讓 Rust 推論Vec元素的型別。 - 使用型別推論:
let prime_squares: Vec<_> = some_iterator.collect()。請重新編寫這個例子,採用這個形式。
There are basic implementations of FromIterator for Vec, HashMap, etc. There are also more specialized implementations which let you do cool things like convert an Iterator<Item = Result<V, E>> into a Result<Vec<V>, E>.
練習:疊代器方法鏈結
In this exercise, you will need to find and use some of the provided methods in the Iterator trait to implement a complex calculation.
Copy the following code to https://play.rust-lang.org/ and make the tests pass. Use an iterator expression and collect the result to construct the return value.
#![allow(unused)]
fn main() {
/// Calculate the differences between elements of `values` offset by `offset`,
/// wrapping around from the end of `values` to the beginning.
///
/// Element `n` of the result is `values[(n+offset)%len] - values[n]`.
fn offset_differences<N>(offset: usize, values: Vec<N>) -> Vec<N>
where
    N: Copy + std::ops::Sub<Output = N>,
{
    unimplemented!()
}

#[test]
fn test_offset_one() {
    assert_eq!(offset_differences(1, vec![1, 3, 5, 7]), vec![2, 2, 2, -6]);
    assert_eq!(offset_differences(1, vec![1, 3, 5]), vec![2, 2, -4]);
    assert_eq!(offset_differences(1, vec![1, 3]), vec![2, -2]);
}

#[test]
fn test_larger_offsets() {
    assert_eq!(offset_differences(2, vec![1, 3, 5, 7]), vec![4, 4, -4, -4]);
    assert_eq!(offset_differences(3, vec![1, 3, 5, 7]), vec![6, -2, -2, -2]);
    assert_eq!(offset_differences(4, vec![1, 3, 5, 7]), vec![0, 0, 0, 0]);
    assert_eq!(offset_differences(5, vec![1, 3, 5, 7]), vec![2, 2, 2, -6]);
}

#[test]
fn test_custom_type() {
    assert_eq!(
        offset_differences(1, vec![1.0, 11.0, 5.0, 0.0]),
        vec![10.0, -6.0, -5.0, 1.0]
    );
}

#[test]
fn test_degenerate_cases() {
    assert_eq!(offset_differences(1, vec![0]), vec![0]);
    assert_eq!(offset_differences(1, vec![1]), vec![0]);
    let empty: Vec<i32> = vec![];
    assert_eq!(offset_differences(1, empty), vec![]);
}
}
解決方案
/// Calculate the differences between elements of `values` offset by `offset`,
/// wrapping around from the end of `values` to the beginning.
///
/// Element `n` of the result is `values[(n+offset)%len] - values[n]`.
fn offset_differences<N>(offset: usize, values: Vec<N>) -> Vec<N>
where
    N: Copy + std::ops::Sub<Output = N>,
{
    let a = (&values).into_iter();
    let b = (&values).into_iter().cycle().skip(offset);
    a.zip(b).map(|(a, b)| *b - *a).collect()
}

#[test]
fn test_offset_one() {
    assert_eq!(offset_differences(1, vec![1, 3, 5, 7]), vec![2, 2, 2, -6]);
    assert_eq!(offset_differences(1, vec![1, 3, 5]), vec![2, 2, -4]);
    assert_eq!(offset_differences(1, vec![1, 3]), vec![2, -2]);
}

#[test]
fn test_larger_offsets() {
    assert_eq!(offset_differences(2, vec![1, 3, 5, 7]), vec![4, 4, -4, -4]);
    assert_eq!(offset_differences(3, vec![1, 3, 5, 7]), vec![6, -2, -2, -2]);
    assert_eq!(offset_differences(4, vec![1, 3, 5, 7]), vec![0, 0, 0, 0]);
    assert_eq!(offset_differences(5, vec![1, 3, 5, 7]), vec![2, 2, 2, -6]);
}

#[test]
fn test_custom_type() {
    assert_eq!(
        offset_differences(1, vec![1.0, 11.0, 5.0, 0.0]),
        vec![10.0, -6.0, -5.0, 1.0]
    );
}

#[test]
fn test_degenerate_cases() {
    assert_eq!(offset_differences(1, vec![0]), vec![0]);
    assert_eq!(offset_differences(1, vec![1]), vec![0]);
    let empty: Vec<i32> = vec![];
    assert_eq!(offset_differences(1, empty), vec![]);
}

fn main() {}
模組
This segment should take about 40 minutes. It contains:
| Slide | Duration |
|---|---|
| 模組 | 3 minutes |
| 檔案系統階層 | 5 minutes |
| 能見度 | 5 minutes |
| use、super、self | 10 minutes |
| 練習:GUI 程式庫的模組 | 15 minutes |
模組
我們已介紹 impl 區塊如何讓我們將函式的命名空間建立為型別。
同樣地,mod 可讓我們建立型別和函式的命名空間:
mod foo {
    pub fn do_something() {
        println!("In the foo module");
    }
}

mod bar {
    pub fn do_something() {
        println!("In the bar module");
    }
}

fn main() {
    foo::do_something();
    bar::do_something();
}- 套件會提供功能,並收錄
Cargo.toml檔案,用於說明如何建構含有超過 1 個 Crate 的組合。 - Crate 是模組的樹狀結構,其中二進位檔 Crate 會建立執行檔,而程式庫 Crate 則會編譯至程式庫。
- 模組不僅會定義組織、範圍,同時也是本節重點。
檔案系統階層
如果您省略模組內容,系統會指示 Rust 在其他檔案中尋找該內容:
mod garden;這會讓 Rust 知道 garden 模組內容是在 src/garden.rs 中找到的。同樣地,garden::vegetables 模組可在 src/garden/vegetables.rs 中找到。
crate 根層級位於:
src/lib.rs(適用於程式庫 Crate)src/main.rs(適用於二進位檔 Crate)
您也可以使用 “inner doc comments” 記錄檔案中定義的模組。這些會記錄包含它們的項目,在本例中就是模組。
//! This module implements the garden, including a highly performant germination
//! implementation.

// Re-export types from this module.
pub use garden::Garden;
pub use seeds::SeedPacket;

/// Sow the given seed packets.
pub fn sow(seeds: Vec<SeedPacket>) {
    todo!()
}

/// Harvest the produce in the garden that is ready.
pub fn harvest(garden: &mut Garden) {
    todo!()
}-
在 Rust 2018 之前,模組需位於
module/mod.rs而非module.rs中,這仍然是 2018 後續版本的可行替代方案。 -
導入
filename.rs做為filename/mod.rs的替代方案,主要是因為許多名為mod.rs的檔案在 IDE 中很難區分。 -
更深層的巢狀結構可以使用資料夾,即使主要模組為檔案也一樣:
src/ ├── main.rs ├── top_module.rs └── top_module/ └── sub_module.rs -
Rust 尋找模組的位置可透過編譯器指令變更:
#[path = "some/path.rs"]
mod some_module;
舉例來說,如果您想將模組的測試放在名為
some_module_test.rs的檔案中 (類似 Go 中的慣例),這就會很實用。
能見度
我們可將模組視為隱私邊界:
- 模組項目預設為不公開 (會隱藏實作詳細資料)。
- 父項和同層項目一律會顯示。
- 換句話說,如果項目顯示在
foo模組中,則會出現在foo的所有子系中。
mod outer {
    fn private() {
        println!("outer::private");
    }

    pub fn public() {
        println!("outer::public");
    }

    mod inner {
        fn private() {
            println!("outer::inner::private");
        }

        pub fn public() {
            println!("outer::inner::public");
            super::private();
        }
    }
}

fn main() {
    outer::public();
}- 使用
pub關鍵字將模組設為公開。
此外,您也可以使用進階的 pub(...) 指定碼來限制公開的瀏覽權限範圍。
- 請參閱 Rust 參考資料。
- 設定
pub(crate)瀏覽權限是一種常見模式。 - 您也可以授予特定路徑的瀏覽權限,但這較不常見。
- 無論如何,都請務必將瀏覽權限授予祖系模組 (及其所有子系)。
use、super、self
模組可以使用 use 將其他模組的符號帶進範圍內。您通常會在每個模組的頂端看到類似下方的內容:
use std::collections::HashSet;
use std::process::abort;
路徑
路徑的解析方式包括:
-
做為相對路徑:
foo或self::foo是指目前模組中的foo。super::foo是指父項模組中的foo。
-
做為絕對路徑:
crate::foo是指目前 Crate 根目錄中的foo。bar::foo是指barCrate 中的foo。
-
常見的方式是在較短的路徑上「重新導出」符號。舉例來說,Crate 中的頂層
lib.rs可能有mod storage; pub use storage::disk::DiskStorage; pub use storage::network::NetworkStorage;透過便捷的短路徑,向其他 Crate 提供
DiskStorage和NetworkStorage。 -
在大部分情況下,只有顯示在模組中的項目需要
use。但是,如要呼叫特徵的任何方法,該特徵必須處於範圍之內,即使實作該特徵的型別已在範圍內也一樣。舉例來說,如要在實作Read特徵的型別上使用read_to_string方法,您需要use std::io::Read。 -
use陳述式可能包含萬用字元,例如use std::io::*。不過,這不是建議的做法,因為我們無法確定匯入了哪些項目,而且這些項目可能隨著時間改變。
練習:GUI 程式庫的模組
在本練習中,您將重新編排小型的 GUI 程式庫實作項目。這個程式庫定義了 Widget 特徵、該特徵的幾個實作項目,以及 main 函式。
通常,每種型別 (或一組密切相關的型別) 會放入各自的模組中,因此每個小工具型別應該都有自己的模組。
Cargo Setup
Rust Playground 僅支援一個檔案,因此您需要在本機檔案系統中建立 Cargo 專案:
cargo init gui-modules
cd gui-modules
cargo run
請編輯產生的 src/main.rs,新增 mod 陳述式並在 src 目錄中新增其他檔案。
來源
以下是 GUI 程式庫的單一模組實作項目:
pub trait Widget {
    /// Natural width of `self`.
    fn width(&self) -> usize;

    /// Draw the widget into a buffer.
    fn draw_into(&self, buffer: &mut dyn std::fmt::Write);

    /// Draw the widget on standard output.
    fn draw(&self) {
        let mut buffer = String::new();
        self.draw_into(&mut buffer);
        println!("{buffer}");
    }
}

pub struct Label {
    label: String,
}

impl Label {
    fn new(label: &str) -> Label {
        Label { label: label.to_owned() }
    }
}

pub struct Button {
    label: Label,
}

impl Button {
    fn new(label: &str) -> Button {
        Button { label: Label::new(label) }
    }
}

pub struct Window {
    title: String,
    widgets: Vec<Box<dyn Widget>>,
}

impl Window {
    fn new(title: &str) -> Window {
        Window { title: title.to_owned(), widgets: Vec::new() }
    }

    fn add_widget(&mut self, widget: Box<dyn Widget>) {
        self.widgets.push(widget);
    }

    fn inner_width(&self) -> usize {
        std::cmp::max(
            self.title.chars().count(),
            self.widgets.iter().map(|w| w.width()).max().unwrap_or(0),
        )
    }
}

impl Widget for Window {
    fn width(&self) -> usize {
        // Add 4 paddings for borders
        self.inner_width() + 4
    }

    fn draw_into(&self, buffer: &mut dyn std::fmt::Write) {
        let mut inner = String::new();
        for widget in &self.widgets {
            widget.draw_into(&mut inner);
        }

        let inner_width = self.inner_width();

        // TODO: Change draw_into to return Result<(), std::fmt::Error>. Then use the
        // ?-operator here instead of .unwrap().
        writeln!(buffer, "+-{:-<inner_width$}-+", "").unwrap();
        writeln!(buffer, "| {:^inner_width$} |", &self.title).unwrap();
        writeln!(buffer, "+={:=<inner_width$}=+", "").unwrap();
        for line in inner.lines() {
            writeln!(buffer, "| {:inner_width$} |", line).unwrap();
        }
        writeln!(buffer, "+-{:-<inner_width$}-+", "").unwrap();
    }
}

impl Widget for Button {
    fn width(&self) -> usize {
        self.label.width() + 8 // add a bit of padding
    }

    fn draw_into(&self, buffer: &mut dyn std::fmt::Write) {
        let width = self.width();
        let mut label = String::new();
        self.label.draw_into(&mut label);

        writeln!(buffer, "+{:-<width$}+", "").unwrap();
        for line in label.lines() {
            writeln!(buffer, "|{:^width$}|", &line).unwrap();
        }
        writeln!(buffer, "+{:-<width$}+", "").unwrap();
    }
}

impl Widget for Label {
    fn width(&self) -> usize {
        self.label.lines().map(|line| line.chars().count()).max().unwrap_or(0)
    }

    fn draw_into(&self, buffer: &mut dyn std::fmt::Write) {
        writeln!(buffer, "{}", &self.label).unwrap();
    }
}

fn main() {
    let mut window = Window::new("Rust GUI Demo 1.23");
    window.add_widget(Box::new(Label::new("This is a small text GUI demo.")));
    window.add_widget(Box::new(Button::new("Click me!")));
    window.draw();
}請鼓勵學生以自在的方式分割程式碼,習慣必要的 mod、use 和 pub 宣告。之後,討論哪些組織結構最為慣用。
解決方案
src
├── main.rs
├── widgets
│   ├── button.rs
│   ├── label.rs
│   └── window.rs
└── widgets.rs
// ---- src/widgets.rs ----
mod button;
mod label;
mod window;

pub trait Widget {
    /// Natural width of `self`.
    fn width(&self) -> usize;

    /// Draw the widget into a buffer.
    fn draw_into(&self, buffer: &mut dyn std::fmt::Write);

    /// Draw the widget on standard output.
    fn draw(&self) {
        let mut buffer = String::new();
        self.draw_into(&mut buffer);
        println!("{buffer}");
    }
}

pub use button::Button;
pub use label::Label;
pub use window::Window;
// ---- src/widgets/label.rs ----
use super::Widget;
pub struct Label {
label: String,
}
impl Label {
pub fn new(label: &str) -> Label {
Label { label: label.to_owned() }
}
}
impl Widget for Label {
fn width(&self) -> usize {
// ANCHOR_END: Label-width
self.label.lines().map(|line| line.chars().count()).max().unwrap_or(0)
}
// ANCHOR: Label-draw_into
fn draw_into(&self, buffer: &mut dyn std::fmt::Write) {
// ANCHOR_END: Label-draw_into
writeln!(buffer, "{}", &self.label).unwrap();
}
}// ---- src/widgets/button.rs ----
use super::{Label, Widget};
pub struct Button {
label: Label,
}
impl Button {
pub fn new(label: &str) -> Button {
Button { label: Label::new(label) }
}
}
impl Widget for Button {
fn width(&self) -> usize {
// ANCHOR_END: Button-width
self.label.width() + 8 // add a bit of padding
}
// ANCHOR: Button-draw_into
fn draw_into(&self, buffer: &mut dyn std::fmt::Write) {
// ANCHOR_END: Button-draw_into
let width = self.width();
let mut label = String::new();
self.label.draw_into(&mut label);
writeln!(buffer, "+{:-<width$}+", "").unwrap();
for line in label.lines() {
writeln!(buffer, "|{:^width$}|", &line).unwrap();
}
writeln!(buffer, "+{:-<width$}+", "").unwrap();
}
}// ---- src/widgets/window.rs ----
use super::Widget;
pub struct Window {
title: String,
widgets: Vec<Box<dyn Widget>>,
}
impl Window {
pub fn new(title: &str) -> Window {
Window { title: title.to_owned(), widgets: Vec::new() }
}
pub fn add_widget(&mut self, widget: Box<dyn Widget>) {
self.widgets.push(widget);
}
fn inner_width(&self) -> usize {
std::cmp::max(
self.title.chars().count(),
self.widgets.iter().map(|w| w.width()).max().unwrap_or(0),
)
}
}
impl Widget for Window {
fn width(&self) -> usize {
// ANCHOR_END: Window-width
// Add 4 paddings for borders
self.inner_width() + 4
}
// ANCHOR: Window-draw_into
fn draw_into(&self, buffer: &mut dyn std::fmt::Write) {
// ANCHOR_END: Window-draw_into
let mut inner = String::new();
for widget in &self.widgets {
widget.draw_into(&mut inner);
}
let inner_width = self.inner_width();
// TODO: after learning about error handling, you can change
// draw_into to return Result<(), std::fmt::Error>. Then use
// the ?-operator here instead of .unwrap().
writeln!(buffer, "+-{:-<inner_width$}-+", "").unwrap();
writeln!(buffer, "| {:^inner_width$} |", &self.title).unwrap();
writeln!(buffer, "+={:=<inner_width$}=+", "").unwrap();
for line in inner.lines() {
writeln!(buffer, "| {:inner_width$} |", line).unwrap();
}
writeln!(buffer, "+-{:-<inner_width$}-+", "").unwrap();
}
}// ---- src/main.rs ----
mod widgets;
use widgets::Widget;
fn main() {
let mut window = widgets::Window::new("Rust GUI Demo 1.23");
window
.add_widget(Box::new(widgets::Label::new("This is a small text GUI demo.")));
window.add_widget(Box::new(widgets::Button::new("Click me!")));
window.draw();
}測試
This segment should take about 45 minutes. It contains:
| Slide | Duration |
|---|---|
| 測試模組 | 5 minutes |
| 其他資源 | 5 minutes |
| 編譯器檢查 (Lint) 和 Clippy | 3 minutes |
| 盧恩演算法 | 30 minutes |
單元測試
Rust 和 Cargo 提供了一個簡單的單元測試 (unit test) 框架:
-
在你的程式碼的任何地方都可添加單元測試。
-
整合測試 (integration test) 則可放置在
tests/資料夾下。
測試會以 #[test] 標示。單元測試通常會位於巢狀的 tests 模組中,使用 #[cfg(test)] 可有條件地編譯測試 (僅限在建構測試時)。
fn first_word(text: &str) -> &str {
    match text.find(' ') {
        Some(idx) => &text[..idx],
        None => &text,
    }
}

#[cfg(test)]
mod tests {
    use super::*;

    #[test]
    fn test_empty() {
        assert_eq!(first_word(""), "");
    }

    #[test]
    fn test_single_word() {
        assert_eq!(first_word("Hello"), "Hello");
    }

    #[test]
    fn test_multiple_words() {
        assert_eq!(first_word("Hello World"), "Hello");
    }
}- 這有助於您對私人輔助程式進行單元測試。
- 只有在執行
cargo test時,#[cfg(test)]屬性才會生效。
請在 Playground 中執行測試以顯示結果。
其他資源
整合測試
如果您要以用戶端身分測試程式庫,請採用整合測試。
在 tests/ 之下建立一個 .rs 檔案:
// tests/my_library.rs
use my_library::init;

#[test]
fn test_init() {
    assert!(init().is_ok());
}
這些測試只能存取 crate 的公用 API。
說明文件測試
Rust 內建說明文件測試相關支援:
#![allow(unused)]
fn main() {
/// Shortens a string to the given length.
///
/// ```
/// # use playground::shorten_string;
/// assert_eq!(shorten_string("Hello World", 5), "Hello");
/// assert_eq!(shorten_string("Hello World", 20), "Hello World");
/// ```
pub fn shorten_string(s: &str, length: usize) -> &str {
    &s[..std::cmp::min(length, s.len())]
}
}- 系統會自動將
///註解中的程式碼區塊視為 Rust 程式碼。 - 系統會編譯程式碼,執行
cargo test時會一併執行這些程式碼。 - 程式碼中新增
#後,即可從文件中隱藏,但仍會編譯/執行。 - 請在 Rust Playground 上測試上述程式碼。
編譯器檢查 (Lint) 和 Clippy
Rust 編譯器會產生高品質的錯誤訊息,以及實用的內建 Lint。Clippy 則提供更多 Lint,且會整理成可供每個專案啟用的群組。
#[deny(clippy::cast_possible_truncation)]
fn main() {
    let x = 3;
    while (x < 70000) {
        x *= 2;
    }
    println!("X probably fits in a u16, right? {}", x as u16);
}請執行程式碼範例並查看錯誤訊息。雖然這裡也能看到 Lint,但程式碼開始編譯後,Lint 就不會再顯示。因此若要查看這些 Lint,請改用 Playground 網站。
解析 Lint 後,請在 Playground 網站上執行 clippy,顯示 clippy 警告。Clippy 提供大量 Lint 說明文件,且會一直添加新的 Lint (包括預設拒絕的 Lint)。
請注意,您可以使用 cargo fix 或編輯器,修正含有 help: ... 的錯誤或警告。
盧恩演算法
盧恩演算法
盧恩演算法可用於驗證信用卡號碼。這個演算法會將字串做為輸入內容,並執行下列操作來驗證信用卡號碼:
-
Ignore all spaces. Reject number with fewer than two digits.
-
從右到左,將偶數位的數字乘二。以數字
1234為例,請將3和1乘二;若為數字98765,請將6和8乘二。 -
將數字乘二後,如果結果大於 9,請將每位數字相加。所以,
7乘二等於14,那麼也就是1 + 4 = 5。 -
將所有數字 (無論是否已乘二) 相加。
-
如果加總所得數字的末位是
0,代表信用卡卡號有效。
這裡提供的程式碼是盧恩演算法的錯誤實作示例,另外還有兩個基本單元測試,用於確認大部分演算法已正確實作。
Copy the code below to https://play.rust-lang.org/ and write additional tests to uncover bugs in the provided implementation, fixing any bugs you find.
#![allow(unused)]
fn main() {
pub fn luhn(cc_number: &str) -> bool {
    let mut sum = 0;
    let mut double = false;

    for c in cc_number.chars().rev() {
        if let Some(digit) = c.to_digit(10) {
            if double {
                let double_digit = digit * 2;
                sum +=
                    if double_digit > 9 { double_digit - 9 } else { double_digit };
            } else {
                sum += digit;
            }
            double = !double;
        } else {
            continue;
        }
    }

    sum % 10 == 0
}

#[cfg(test)]
mod test {
    use super::*;

    #[test]
    fn test_valid_cc_number() {
        assert!(luhn("4263 9826 4026 9299"));
        assert!(luhn("4539 3195 0343 6467"));
        assert!(luhn("7992 7398 713"));
    }

    #[test]
    fn test_invalid_cc_number() {
        assert!(!luhn("4223 9826 4026 9299"));
        assert!(!luhn("4539 3195 0343 6476"));
        assert!(!luhn("8273 1232 7352 0569"));
    }
}
}
解決方案
// This is the buggy version that appears in the problem.
#[cfg(never)]
pub fn luhn(cc_number: &str) -> bool {
    let mut sum = 0;
    let mut double = false;

    for c in cc_number.chars().rev() {
        if let Some(digit) = c.to_digit(10) {
            if double {
                let double_digit = digit * 2;
                sum +=
                    if double_digit > 9 { double_digit - 9 } else { double_digit };
            } else {
                sum += digit;
            }
            double = !double;
        } else {
            continue;
        }
    }

    sum % 10 == 0
}

// This is the solution and passes all of the tests below.
pub fn luhn(cc_number: &str) -> bool {
    let mut sum = 0;
    let mut double = false;
    let mut digits = 0;

    for c in cc_number.chars().rev() {
        if let Some(digit) = c.to_digit(10) {
            digits += 1;
            if double {
                let double_digit = digit * 2;
                sum +=
                    if double_digit > 9 { double_digit - 9 } else { double_digit };
            } else {
                sum += digit;
            }
            double = !double;
        } else if c.is_whitespace() {
            continue;
        } else {
            return false;
        }
    }

    digits >= 2 && sum % 10 == 0
}

fn main() {
    let cc_number = "1234 5678 1234 5670";
    println!(
        "Is {cc_number} a valid credit card number? {}",
        if luhn(cc_number) { "yes" } else { "no" }
    );
}

#[cfg(test)]
mod test {
    use super::*;

    #[test]
    fn test_valid_cc_number() {
        assert!(luhn("4263 9826 4026 9299"));
        assert!(luhn("4539 3195 0343 6467"));
        assert!(luhn("7992 7398 713"));
    }

    #[test]
    fn test_invalid_cc_number() {
        assert!(!luhn("4223 9826 4026 9299"));
        assert!(!luhn("4539 3195 0343 6476"));
        assert!(!luhn("8273 1232 7352 0569"));
    }

    #[test]
    fn test_non_digit_cc_number() {
        assert!(!luhn("foo"));
        assert!(!luhn("foo 0 0"));
    }

    #[test]
    fn test_empty_cc_number() {
        assert!(!luhn(""));
        assert!(!luhn(" "));
        assert!(!luhn("  "));
        assert!(!luhn("    "));
    }

    #[test]
    fn test_single_digit_cc_number() {
        assert!(!luhn("0"));
    }

    #[test]
    fn test_two_digit_cc_number() {
        assert!(luhn(" 0 0 "));
    }
}
Welcome Back
Including 10 minute breaks, this session should take about 2 hours and 10 minutes. It contains:
| Segment | Duration |
|---|---|
| 錯誤處理 | 55 minutes |
| 不安全的 Rust | 1 hour and 5 minutes |
錯誤處理
This segment should take about 55 minutes. It contains:
| Slide | Duration |
|---|---|
| 恐慌 | 3 minutes |
| 疊代器 | 5 minutes |
| 隱含轉換 | 5 minutes |
| Drop 特徵 | 5 minutes |
| From 和 Into | 5 minutes |
| 使用 Result 進行結構化錯誤處理 | 30 minutes |
恐慌
Rust 會透過「恐慌」來處理嚴重錯誤。
如果執行階段發生重大錯誤,Rust 就會觸發恐慌:
fn main() {
    let v = vec![10, 20, 30];
    println!("v[100]: {}", v[100]);
}- 恐慌代表發生無法復原的非預期錯誤。
- 恐慌可以反映程式中的錯誤。
- 執行階段失敗 (例如失敗的邊界檢查) 可能會觸發恐慌
- 斷言 (例如
assert!) 會在失敗時發生恐慌 - 針對特定用途的恐慌可以使用
panic!巨集。
- 恐慌會「解開」堆疊,此行為捨棄值的方式就像函式已傳回一樣。
- 如果無法接受程式崩潰,請使用不會觸發恐慌的 API,例如
Vec::get。
根據預設,恐慌會造成解開堆疊。您可以擷取這類動作:
use std::panic;

fn main() {
    let result = panic::catch_unwind(|| "No problem here!");
    println!("{result:?}");

    let result = panic::catch_unwind(|| {
        panic!("oh no!");
    });
    println!("{result:?}");
}- 捕獲是異常行為;請勿嘗試以
catch_unwind實作例外狀況! - 如果伺服器需要持續運作 (即使有單一要求崩潰也不例外),這種做法就能派上用場。
- 如果您在
Cargo.toml中設定panic = 'abort',就無法採取此做法。
疊代器
連線遭拒或找不到檔案等執行階段錯誤,都是透過 Result 型別來處理,但每次呼叫時都比對此類型可能相當麻煩。try 運算子 ? 的用途是將錯誤傳回呼叫端,可讓您將下列常見的程式碼
match some_expression {
    Ok(value) => value,
    Err(err) => return Err(err),
}
轉換成以下較簡潔的程式碼:
some_expression?We can use this to simplify our error handling code:
use std::io::Read;
use std::{fs, io};

fn read_username(path: &str) -> Result<String, io::Error> {
    let username_file_result = fs::File::open(path);
    let mut username_file = match username_file_result {
        Ok(file) => file,
        Err(err) => return Err(err),
    };

    let mut username = String::new();
    match username_file.read_to_string(&mut username) {
        Ok(_) => Ok(username),
        Err(err) => Err(err),
    }
}

fn main() {
    //fs::write("config.dat", "alice").unwrap();
    let username = read_username("config.dat");
    println!("username or error: {username:?}");
}請簡化 read_username 函式,以便使用 ?。
重要須知:
username變數可以是Ok(string)或Err(error)。- 請使用
fs::write呼叫來測試以下不同情況:沒有檔案、空白檔案、含使用者名稱的檔案。 - 請注意,只要
main實作std::process:Termination,便可傳回Result<(), E>。實務上,這表示E會實作Debug。執行檔將顯示Err變體,並在發生錯誤時傳回非零的結束狀態。
隱含轉換
比起先前提到的下列程式碼,? 的有效擴展稍微更複雜一點:
expression?運作方式與以下程式碼相同:
match expression {
    Ok(value) => value,
    Err(err)  => return Err(From::from(err)),
}
The From::from call here means we attempt to convert the error type to the type returned by the function. This makes it easy to encapsulate errors into higher-level errors.
範例
use std::error::Error;
use std::fmt::{self, Display, Formatter};
use std::fs::File;
use std::io::{self, Read};

#[derive(Debug)]
enum ReadUsernameError {
    IoError(io::Error),
    EmptyUsername(String),
}

impl Error for ReadUsernameError {}

impl Display for ReadUsernameError {
    fn fmt(&self, f: &mut Formatter) -> fmt::Result {
        match self {
            Self::IoError(e) => write!(f, "IO error: {e}"),
            Self::EmptyUsername(path) => write!(f, "Found no username in {path}"),
        }
    }
}

impl From<io::Error> for ReadUsernameError {
    fn from(err: io::Error) -> Self {
        Self::IoError(err)
    }
}

fn read_username(path: &str) -> Result<String, ReadUsernameError> {
    let mut username = String::with_capacity(100);
    File::open(path)?.read_to_string(&mut username)?;
    if username.is_empty() {
        return Err(ReadUsernameError::EmptyUsername(String::from(path)));
    }
    Ok(username)
}

fn main() {
    //fs::write("config.dat", "").unwrap();
    let username = read_username("config.dat");
    println!("username or error: {username:?}");
}? 運算子必須傳回與函式傳回類型相容的值。如果是 Result,表示錯誤類型必須相容。如果是傳回 Result<T, ErrorOuter> 的函式,當 ErrorOuter 和 ErrorInner 的型別相同、或者 ErrorOuter 實作 From<ErrorInner> 時,就只能在 Result<U, ErrorInner> 型別的值上使用 ?。
From 實作的常見的替代方案是 Result::map_err,特別是當轉換只在單一位置發生時更是如此。
Option 並沒有相容性規定。如果函式會傳回 Option<T>,可以在 Option<U> 上將 ? 運算子用於任意的 T 和 U 型別。
傳回 Result 的函式無法在 Option 上使用 ?,反之亦然。不過,Option::ok_or 會將 Option 轉換為 Result,而 Result::ok 則將 Result 轉換為 Option。
動態錯誤型別
Sometimes we want to allow any type of error to be returned without writing our own enum covering all the different possibilities. The std::error::Error trait makes it easy to create a trait object that can contain any error.
use std::error::Error;
use std::fs;
use std::io::Read;

fn read_count(path: &str) -> Result<i32, Box<dyn Error>> {
    let mut count_str = String::new();
    fs::File::open(path)?.read_to_string(&mut count_str)?;
    let count: i32 = count_str.parse()?;
    Ok(count)
}

fn main() {
    fs::write("count.dat", "1i3").unwrap();
    match read_count("count.dat") {
        Ok(count) => println!("Count: {count}"),
        Err(err) => println!("Error: {err}"),
    }
}read_count 函式可以傳回 std::io::Error (透過檔案作業) 或 std::num::ParseIntError (透過 String::parse)。
Boxing errors saves on code, but gives up the ability to cleanly handle different error cases differently in the program. As such it’s generally not a good idea to use Box<dyn Error> in the public API of a library, but it can be a good option in a program where you just want to display the error message somewhere.
定義自訂錯誤型別時,請務必實作 std::error::Error 特徵,這樣才能裝箱。不過,如果您需要支援 no_std 屬性,請留意 std::error::Error 特徵目前僅與每夜版中的 no_std 相容。
thiserror and anyhow
The thiserror and anyhow crates are widely used to simplify error handling.
thiserror經常在程式庫中使用,目的是建立可實作From<T>的自訂錯誤型別。anyhow經常由應用程式使用,目的是協助函式中的錯誤處理機制,包括為錯誤加上背景資訊。
use anyhow::{bail, Context, Result};
use std::fs;
use std::io::Read;
use thiserror::Error;

#[derive(Clone, Debug, Eq, Error, PartialEq)]
#[error("Found no username in {0}")]
struct EmptyUsernameError(String);

fn read_username(path: &str) -> Result<String> {
    let mut username = String::with_capacity(100);
    fs::File::open(path)
        .with_context(|| format!("Failed to open {path}"))?
        .read_to_string(&mut username)
        .context("Failed to read")?;
    if username.is_empty() {
        bail!(EmptyUsernameError(path.to_string()));
    }
    Ok(username)
}

fn main() {
    //fs::write("config.dat", "").unwrap();
    match read_username("config.dat") {
        Ok(username) => println!("Username: {username}"),
        Err(err) => println!("Error: {err:?}"),
    }
}thiserror
Error衍生巨集是由thiserror提供,附有許多實用的屬性,有助於以精簡方式定義錯誤型別。std::error::Error特徵會自動衍生。#[error]的訊息則用於衍生Display特徵。
anyhow
anyhow::Error基本上是Box<dyn Error>周遭的包裝函式。因此,通常也是不建議程式庫的公用 API 使用,但可在應用程式中廣泛使用。anyhow::Result<V>是Result<V, anyhow::Error>的型別別名。- 必要時,可以擷取其中的實際錯誤類型進行檢查。
- Go 開發人員可能會覺得
anyhow::Result<T>提供的功能似曾相識,因為該功能提供了與 Go 中的(T, error)類似的使用模式和人體工學。 anyhow::Context是針對標準Result和Option型別實作的特徵。如要啟用這些型別的.context()和.with_context(),就必須使用 anyhow::Context。
使用 Result 進行結構化錯誤處理
以下程式碼實作一個非常簡單的運算式語言剖析器,但會藉由恐慌來處理錯誤。請重新編寫,改用慣用的錯誤處理機制,並將錯誤傳播至 main 的回傳陳述式。您可以自由使用 thiserror 和 anyhow。
提示:首先請修正 parse 函式中的錯誤處理機制。確認一切正常運作後,更新 Tokenizer 即可實作 Iterator<Item=Result<Token, TokenizerError>>,並在剖析器中處理。
use std::iter::Peekable;
use std::str::Chars;

/// An arithmetic operator.
#[derive(Debug, PartialEq, Clone, Copy)]
enum Op {
    Add,
    Sub,
}

/// A token in the expression language.
#[derive(Debug, PartialEq)]
enum Token {
    Number(String),
    Identifier(String),
    Operator(Op),
}

/// An expression in the expression language.
#[derive(Debug, PartialEq)]
enum Expression {
    /// A reference to a variable.
    Var(String),
    /// A literal number.
    Number(u32),
    /// A binary operation.
    Operation(Box<Expression>, Op, Box<Expression>),
}

fn tokenize(input: &str) -> Tokenizer {
    return Tokenizer(input.chars().peekable());
}

struct Tokenizer<'a>(Peekable<Chars<'a>>);

impl<'a> Iterator for Tokenizer<'a> {
    type Item = Token;

    fn next(&mut self) -> Option<Token> {
        let c = self.0.next()?;
        match c {
            '0'..='9' => {
                let mut num = String::from(c);
                while let Some(c @ '0'..='9') = self.0.peek() {
                    num.push(*c);
                    self.0.next();
                }
                Some(Token::Number(num))
            }
            'a'..='z' => {
                let mut ident = String::from(c);
                while let Some(c @ ('a'..='z' | '_' | '0'..='9')) = self.0.peek() {
                    ident.push(*c);
                    self.0.next();
                }
                Some(Token::Identifier(ident))
            }
            '+' => Some(Token::Operator(Op::Add)),
            '-' => Some(Token::Operator(Op::Sub)),
            _ => panic!("Unexpected character {c}"),
        }
    }
}

fn parse(input: &str) -> Expression {
    let mut tokens = tokenize(input);

    fn parse_expr<'a>(tokens: &mut Tokenizer<'a>) -> Expression {
        let Some(tok) = tokens.next() else {
            panic!("Unexpected end of input");
        };
        let expr = match tok {
            Token::Number(num) => {
                let v = num.parse().expect("Invalid 32-bit integer'");
                Expression::Number(v)
            }
            Token::Identifier(ident) => Expression::Var(ident),
            Token::Operator(_) => panic!("Unexpected token {tok:?}"),
        };
        // Look ahead to parse a binary operation if present.
        match tokens.next() {
            None => expr,
            Some(Token::Operator(op)) => Expression::Operation(
                Box::new(expr),
                op,
                Box::new(parse_expr(tokens)),
            ),
            Some(tok) => panic!("Unexpected token {tok:?}"),
        }
    }

    parse_expr(&mut tokens)
}

fn main() {
    let expr = parse("10+foo+20-30");
    println!("{expr:?}");
}
解決方案
use thiserror::Error;
use std::iter::Peekable;
use std::str::Chars;

/// An arithmetic operator.
#[derive(Debug, PartialEq, Clone, Copy)]
enum Op {
    Add,
    Sub,
}

/// A token in the expression language.
#[derive(Debug, PartialEq)]
enum Token {
    Number(String),
    Identifier(String),
    Operator(Op),
}

/// An expression in the expression language.
#[derive(Debug, PartialEq)]
enum Expression {
    /// A reference to a variable.
    Var(String),
    /// A literal number.
    Number(u32),
    /// A binary operation.
    Operation(Box<Expression>, Op, Box<Expression>),
}

fn tokenize(input: &str) -> Tokenizer {
    return Tokenizer(input.chars().peekable());
}

#[derive(Debug, Error)]
enum TokenizerError {
    #[error("Unexpected character '{0}' in input")]
    UnexpectedCharacter(char),
}

struct Tokenizer<'a>(Peekable<Chars<'a>>);

impl<'a> Iterator for Tokenizer<'a> {
    type Item = Result<Token, TokenizerError>;

    fn next(&mut self) -> Option<Result<Token, TokenizerError>> {
        let c = self.0.next()?;
        match c {
            '0'..='9' => {
                let mut num = String::from(c);
                while let Some(c @ '0'..='9') = self.0.peek() {
                    num.push(*c);
                    self.0.next();
                }
                Some(Ok(Token::Number(num)))
            }
            'a'..='z' => {
                let mut ident = String::from(c);
                while let Some(c @ ('a'..='z' | '_' | '0'..='9')) = self.0.peek() {
                    ident.push(*c);
                    self.0.next();
                }
                Some(Ok(Token::Identifier(ident)))
            }
            '+' => Some(Ok(Token::Operator(Op::Add))),
            '-' => Some(Ok(Token::Operator(Op::Sub))),
            _ => Some(Err(TokenizerError::UnexpectedCharacter(c))),
        }
    }
}

#[derive(Debug, Error)]
enum ParserError {
    #[error("Tokenizer error: {0}")]
    TokenizerError(#[from] TokenizerError),
    #[error("Unexpected end of input")]
    UnexpectedEOF,
    #[error("Unexpected token {0:?}")]
    UnexpectedToken(Token),
    #[error("Invalid number")]
    InvalidNumber(#[from] std::num::ParseIntError),
}

fn parse(input: &str) -> Result<Expression, ParserError> {
    let mut tokens = tokenize(input);

    fn parse_expr<'a>(
        tokens: &mut Tokenizer<'a>,
    ) -> Result<Expression, ParserError> {
        let tok = tokens.next().ok_or(ParserError::UnexpectedEOF)??;
        let expr = match tok {
            Token::Number(num) => {
                let v = num.parse()?;
                Expression::Number(v)
            }
            Token::Identifier(ident) => Expression::Var(ident),
            Token::Operator(_) => return Err(ParserError::UnexpectedToken(tok)),
        };
        // Look ahead to parse a binary operation if present.
        Ok(match tokens.next() {
            None => expr,
            Some(Ok(Token::Operator(op))) => Expression::Operation(
                Box::new(expr),
                op,
                Box::new(parse_expr(tokens)?),
            ),
            Some(Err(e)) => return Err(e.into()),
            Some(Ok(tok)) => return Err(ParserError::UnexpectedToken(tok)),
        })
    }

    parse_expr(&mut tokens)
}

fn main() -> anyhow::Result<()> {
    let expr = parse("10+foo+20-30")?;
    println!("{expr:?}");
    Ok(())
}
不安全的 Rust
This segment should take about 1 hour and 5 minutes. It contains:
| Slide | Duration |
|---|---|
| 不安全的 Rust | 5 minutes |
| 對裸指標解參考 | 10 minutes |
| 可變的靜態變數 | 5 minutes |
| 聯合體 | 5 minutes |
| 呼叫不安全的函式 | 5 minutes |
| 實作不安全的特徵 | 5 minutes |
| 練習:封裝外部函式介面 (FFI) | 30 minutes |
不安全的 Rust
Rust 語言包含兩個部分:
- **安全的 Rust:**可確保記憶體安全,無法觸發未定義的行為。
- **不安全的 Rust:**如果違反先決條件,便可能觸發未定義的行為。
We saw mostly safe Rust in this course, but it’s important to know what Unsafe Rust is.
不安全的程式碼通常都很簡短、受到隔離,而且封裝在安全的抽象層中。您應該仔細記錄這類程式碼的正確性。
透過不安全的 Rust,可以使用五項新功能:
- 對裸指標解參考。
- 存取或修改可變的靜態變數。
- 存取
union欄位。 - 呼叫
unsafe函式 (包括extern函式)。 - 實作
unsafe特徵。
接下來將簡單介紹不安全的功能。如需瞭解詳情,請參閱 Rust Book 的第 19.1 章,以及 Rustonomicon。
Unsafe Rust does not mean the code is incorrect. It means that developers have turned off some compiler safety features and have to write correct code by themselves. It means the compiler no longer enforces Rust’s memory-safety rules.
對裸指標解參考
建立指標相當安全,不過對指標解參考就需要使用 unsafe:
fn main() {
    let mut s = String::from("careful!");

    let r1 = &mut s as *mut String;
    let r2 = r1 as *const String;

    // Safe because r1 and r2 were obtained from references and so are
    // guaranteed to be non-null and properly aligned, the objects underlying
    // the references from which they were obtained are live throughout the
    // whole unsafe block, and they are not accessed either through the
    // references or concurrently through any other pointers.
    unsafe {
        println!("r1 is: {}", *r1);
        *r1 = String::from("uhoh");
        println!("r2 is: {}", *r2);
    }

    // NOT SAFE. DO NOT DO THIS.
    /*
    let r3: &String = unsafe { &*r1 };
    drop(s);
    println!("r3 is: {}", *r3);
    */
}It is good practice (and required by the Android Rust style guide) to write a comment for each unsafe block explaining how the code inside it satisfies the safety requirements of the unsafe operations it is doing.
In the case of pointer dereferences, this means that the pointers must be valid, i.e.:
- The pointer must be non-null.
- The pointer must be dereferenceable (within the bounds of a single allocated object).
- The object must not have been deallocated.
- There must not be concurrent accesses to the same location.
- If the pointer was obtained by casting a reference, the underlying object must be live and no reference may be used to access the memory.
In most cases the pointer must also be properly aligned.
「NOT SAFE」部分提供了常見的 UB 錯誤示例:*r1 具有 'static 生命週期,因此 r3 具有 &'static String 這個型別,從而會超過 s。從指標建立參照需要「格外謹慎」__。
可變的靜態變數
您可以放心讀取不可變的靜態變數:
static HELLO_WORLD: &str = "Hello, world!";

fn main() {
    println!("HELLO_WORLD: {HELLO_WORLD}");
}
不過,讀取並寫入可變的靜態變數並不安全,因為可能發生資料競爭:
static mut COUNTER: u32 = 0;

fn add_to_counter(inc: u32) {
    unsafe {
        COUNTER += inc;
    }
}

fn main() {
    add_to_counter(42);

    unsafe {
        println!("COUNTER: {COUNTER}");
    }
}-
這裡的程式採用單一執行緒,因此安全無虞。不過,Rust 編譯器較為保守,會設想最糟的情況。請嘗試移除
unsafe,看看編譯器如何解釋為什麼從多個執行緒變更 static,屬於未定義的行為。 -
Using a mutable static is generally a bad idea, but there are some cases where it might make sense in low-level
no_stdcode, such as implementing a heap allocator or working with some C APIs.
聯合體
聯合體和列舉很像,但您需要自行追蹤可用欄位:
#[repr(C)]
union MyUnion {
    i: u8,
    b: bool,
}

fn main() {
    let u = MyUnion { i: 42 };
    println!("int: {}", unsafe { u.i });
    println!("bool: {}", unsafe { u.b }); // Undefined behavior!
}Unions are very rarely needed in Rust as you can usually use an enum. They are occasionally needed for interacting with C library APIs.
If you just want to reinterpret bytes as a different type, you probably want std::mem::transmute or a safe wrapper such as the zerocopy crate.
呼叫不安全的函式
呼叫不安全的函式
如果函式或方法具有額外先決條件,而您必須遵循這些條件才能避免未定義的行為,那麼就可以將該函式或方法標示為 unsafe:
extern "C" {
    fn abs(input: i32) -> i32;
}

fn main() {
    let emojis = "🗻∈🌏";

    // Safe because the indices are in the correct order, within the bounds of
    // the string slice, and lie on UTF-8 sequence boundaries.
    unsafe {
        println!("emoji: {}", emojis.get_unchecked(0..4));
        println!("emoji: {}", emojis.get_unchecked(4..7));
        println!("emoji: {}", emojis.get_unchecked(7..11));
    }

    println!("char count: {}", count_chars(unsafe { emojis.get_unchecked(0..7) }));

    unsafe {
        // Undefined behavior if abs misbehaves.
        println!("Absolute value of -3 according to C: {}", abs(-3));
    }

    // Not upholding the UTF-8 encoding requirement breaks memory safety!
    // println!("emoji: {}", unsafe { emojis.get_unchecked(0..3) });
    // println!("char count: {}", count_chars(unsafe {
    // emojis.get_unchecked(0..3) }));
}

fn count_chars(s: &str) -> usize {
    s.chars().count()
}
編寫不安全的函式
如果您的函式必須滿足特定條件才能避免未定義的行為,您可以將其標示為 unsafe。
/// Swaps the values pointed to by the given pointers.
///
/// # Safety
///
/// The pointers must be valid and properly aligned.
unsafe fn swap(a: *mut u8, b: *mut u8) {
    let temp = *a;
    *a = *b;
    *b = temp;
}

fn main() {
    let mut a = 42;
    let mut b = 66;

    // Safe because ...
    unsafe {
        swap(&mut a, &mut b);
    }

    println!("a = {}, b = {}", a, b);
}呼叫不安全的函式
get_unchecked, like most _unchecked functions, is unsafe, because it can create UB if the range is incorrect. abs is incorrect for a different reason: it is an external function (FFI). Calling external functions is usually only a problem when those functions do things with pointers which might violate Rust’s memory model, but in general any C function might have undefined behaviour under any arbitrary circumstances.
此例中的 "C" 為 ABI;您也可以使用其他 ABI。
編寫不安全的函式
We wouldn’t actually use pointers for a swap function - it can be done safely with references.
Note that unsafe code is allowed within an unsafe function without an unsafe block. We can prohibit this with #[deny(unsafe_op_in_unsafe_fn)]. Try adding it and see what happens. This will likely change in a future Rust edition.
實作不安全的特徵
與函式類似,如果實作程序必須保證符合特定條件才能避免未定義的行為,您可以將特徵標示為 unsafe。
舉例來說,zerocopy crate 就具有不安全的特徵,如這個頁面所示:
use std::mem::size_of_val;
use std::slice;

/// ...
/// # Safety
/// The type must have a defined representation and no padding.
pub unsafe trait AsBytes {
    fn as_bytes(&self) -> &[u8] {
        unsafe {
            slice::from_raw_parts(
                self as *const Self as *const u8,
                size_of_val(self),
            )
        }
    }
}

// Safe because u32 has a defined representation and no padding.
unsafe impl AsBytes for u32 {}There should be a # Safety section on the Rustdoc for the trait explaining the requirements for the trait to be safely implemented.
The actual safety section for AsBytes is rather longer and more complicated.
The built-in Send and Sync traits are unsafe.
安全的 FFI 包裝函式
Rust has great support for calling functions through a foreign function interface (FFI). We will use this to build a safe wrapper for the libc functions you would use from C to read the names of files in a directory.
建議您參閱以下手冊頁面:
建議您一併瀏覽 std::ffi 模組。其中會有練習需用到的幾個字串型別:
您將在以下所有型別之間轉換:
&str到CString:您需要為結尾的\0字元分配空間。CString到*const i8:您需要指標才能呼叫 C 函式。*const i8到&CStr:您需要一些可以找到結尾\0字元的內容。&CStrto&[u8]: a slice of bytes is the universal interface for “some unknown data”,&[u8]到&OsStr:&OsStr是通往OsString的一步,請以OsStrExt建立。&OsStr到OsString:您需複製&OsStr中的資料,才能傳回資料並再次呼叫readdir。
Nomicon 也有關於 FFI 的實用章節可供參閱。
請將以下程式碼複製到 https://play.rust-lang.org/,並填入缺少的函式和方法:
// TODO: remove this when you're done with your implementation.
#![allow(unused_imports, unused_variables, dead_code)]

mod ffi {
    use std::os::raw::{c_char, c_int};
    #[cfg(not(target_os = "macos"))]
    use std::os::raw::{c_long, c_uchar, c_ulong, c_ushort};

    // Opaque type. See https://doc.rust-lang.org/nomicon/ffi.html.
    #[repr(C)]
    pub struct DIR {
        _data: [u8; 0],
        _marker: core::marker::PhantomData<(*mut u8, core::marker::PhantomPinned)>,
    }

    // Layout according to the Linux man page for readdir(3), where ino_t and
    // off_t are resolved according to the definitions in
    // /usr/include/x86_64-linux-gnu/{sys/types.h, bits/typesizes.h}.
    #[cfg(not(target_os = "macos"))]
    #[repr(C)]
    pub struct dirent {
        pub d_ino: c_ulong,
        pub d_off: c_long,
        pub d_reclen: c_ushort,
        pub d_type: c_uchar,
        pub d_name: [c_char; 256],
    }

    // Layout according to the macOS man page for dir(5).
    #[cfg(all(target_os = "macos"))]
    #[repr(C)]
    pub struct dirent {
        pub d_fileno: u64,
        pub d_seekoff: u64,
        pub d_reclen: u16,
        pub d_namlen: u16,
        pub d_type: u8,
        pub d_name: [c_char; 1024],
    }

    extern "C" {
        pub fn opendir(s: *const c_char) -> *mut DIR;

        #[cfg(not(all(target_os = "macos", target_arch = "x86_64")))]
        pub fn readdir(s: *mut DIR) -> *const dirent;

        // See https://github.com/rust-lang/libc/issues/414 and the section on
        // _DARWIN_FEATURE_64_BIT_INODE in the macOS man page for stat(2).
        //
        // "Platforms that existed before these updates were available" refers
        // to macOS (as opposed to iOS / wearOS / etc.) on Intel and PowerPC.
        #[cfg(all(target_os = "macos", target_arch = "x86_64"))]
        #[link_name = "readdir$INODE64"]
        pub fn readdir(s: *mut DIR) -> *const dirent;

        pub fn closedir(s: *mut DIR) -> c_int;
    }
}

use std::ffi::{CStr, CString, OsStr, OsString};
use std::os::unix::ffi::OsStrExt;

#[derive(Debug)]
struct DirectoryIterator {
    path: CString,
    dir: *mut ffi::DIR,
}

impl DirectoryIterator {
    fn new(path: &str) -> Result<DirectoryIterator, String> {
        // Call opendir and return a Ok value if that worked,
        // otherwise return Err with a message.
        unimplemented!()
    }
}

impl Iterator for DirectoryIterator {
    type Item = OsString;
    fn next(&mut self) -> Option<OsString> {
        // Keep calling readdir until we get a NULL pointer back.
        unimplemented!()
    }
}

impl Drop for DirectoryIterator {
    fn drop(&mut self) {
        // Call closedir as needed.
        unimplemented!()
    }
}

fn main() -> Result<(), String> {
    let iter = DirectoryIterator::new(".")?;
    println!("files: {:#?}", iter.collect::<Vec<_>>());
    Ok(())
}
解決方案
mod ffi {
    use std::os::raw::{c_char, c_int};
    #[cfg(not(target_os = "macos"))]
    use std::os::raw::{c_long, c_uchar, c_ulong, c_ushort};

    // Opaque type. See https://doc.rust-lang.org/nomicon/ffi.html.
    #[repr(C)]
    pub struct DIR {
        _data: [u8; 0],
        _marker: core::marker::PhantomData<(*mut u8, core::marker::PhantomPinned)>,
    }

    // Layout according to the Linux man page for readdir(3), where ino_t and
    // off_t are resolved according to the definitions in
    // /usr/include/x86_64-linux-gnu/{sys/types.h, bits/typesizes.h}.
    #[cfg(not(target_os = "macos"))]
    #[repr(C)]
    pub struct dirent {
        pub d_ino: c_ulong,
        pub d_off: c_long,
        pub d_reclen: c_ushort,
        pub d_type: c_uchar,
        pub d_name: [c_char; 256],
    }

    // Layout according to the macOS man page for dir(5).
    #[cfg(all(target_os = "macos"))]
    #[repr(C)]
    pub struct dirent {
        pub d_fileno: u64,
        pub d_seekoff: u64,
        pub d_reclen: u16,
        pub d_namlen: u16,
        pub d_type: u8,
        pub d_name: [c_char; 1024],
    }

    extern "C" {
        pub fn opendir(s: *const c_char) -> *mut DIR;

        #[cfg(not(all(target_os = "macos", target_arch = "x86_64")))]
        pub fn readdir(s: *mut DIR) -> *const dirent;

        // See https://github.com/rust-lang/libc/issues/414 and the section on
        // _DARWIN_FEATURE_64_BIT_INODE in the macOS man page for stat(2).
        //
        // "Platforms that existed before these updates were available" refers
        // to macOS (as opposed to iOS / wearOS / etc.) on Intel and PowerPC.
        #[cfg(all(target_os = "macos", target_arch = "x86_64"))]
        #[link_name = "readdir$INODE64"]
        pub fn readdir(s: *mut DIR) -> *const dirent;

        pub fn closedir(s: *mut DIR) -> c_int;
    }
}

use std::ffi::{CStr, CString, OsStr, OsString};
use std::os::unix::ffi::OsStrExt;

#[derive(Debug)]
struct DirectoryIterator {
    path: CString,
    dir: *mut ffi::DIR,
}

impl DirectoryIterator {
    fn new(path: &str) -> Result<DirectoryIterator, String> {
        // Call opendir and return a Ok value if that worked,
        // otherwise return Err with a message.
        let path =
            CString::new(path).map_err(|err| format!("Invalid path: {err}"))?;
        // SAFETY: path.as_ptr() cannot be NULL.
        let dir = unsafe { ffi::opendir(path.as_ptr()) };
        if dir.is_null() {
            Err(format!("Could not open {:?}", path))
        } else {
            Ok(DirectoryIterator { path, dir })
        }
    }
}

impl Iterator for DirectoryIterator {
    type Item = OsString;
    fn next(&mut self) -> Option<OsString> {
        // Keep calling readdir until we get a NULL pointer back.
        // SAFETY: self.dir is never NULL.
        let dirent = unsafe { ffi::readdir(self.dir) };
        if dirent.is_null() {
            // We have reached the end of the directory.
            return None;
        }
        // SAFETY: dirent is not NULL and dirent.d_name is NUL
        // terminated.
        let d_name = unsafe { CStr::from_ptr((*dirent).d_name.as_ptr()) };
        let os_str = OsStr::from_bytes(d_name.to_bytes());
        Some(os_str.to_owned())
    }
}

impl Drop for DirectoryIterator {
    fn drop(&mut self) {
        // Call closedir as needed.
        if !self.dir.is_null() {
            // SAFETY: self.dir is not NULL.
            if unsafe { ffi::closedir(self.dir) } != 0 {
                panic!("Could not close {:?}", self.path);
            }
        }
    }
}

fn main() -> Result<(), String> {
    let iter = DirectoryIterator::new(".")?;
    println!("files: {:#?}", iter.collect::<Vec<_>>());
    Ok(())
}

#[cfg(test)]
mod tests {
    use super::*;
    use std::error::Error;

    #[test]
    fn test_nonexisting_directory() {
        let iter = DirectoryIterator::new("no-such-directory");
        assert!(iter.is_err());
    }

    #[test]
    fn test_empty_directory() -> Result<(), Box<dyn Error>> {
        let tmp = tempfile::TempDir::new()?;
        let iter = DirectoryIterator::new(
            tmp.path().to_str().ok_or("Non UTF-8 character in path")?,
        )?;
        let mut entries = iter.collect::<Vec<_>>();
        entries.sort();
        assert_eq!(entries, &[".", ".."]);
        Ok(())
    }

    #[test]
    fn test_nonempty_directory() -> Result<(), Box<dyn Error>> {
        let tmp = tempfile::TempDir::new()?;
        std::fs::write(tmp.path().join("foo.txt"), "The Foo Diaries\n")?;
        std::fs::write(tmp.path().join("bar.png"), "<PNG>\n")?;
        std::fs::write(tmp.path().join("crab.rs"), "//! Crab\n")?;
        let iter = DirectoryIterator::new(
            tmp.path().to_str().ok_or("Non UTF-8 character in path")?,
        )?;
        let mut entries = iter.collect::<Vec<_>>();
        entries.sort();
        assert_eq!(entries, &[".", "..", "bar.png", "crab.rs", "foo.txt"]);
        Ok(())
    }
}
歡迎在 Android 中使用 Rust
Android 的系統軟體支援 Rust。也就是說,您可以在 Rust 中編寫新的服務、程式庫、驅動程式,甚至是韌體,也可以視需要強化現有程式碼。
今天我們會嘗試在您擁有的其中一項專案中呼叫 Rust。因此,請盡量在程式碼集中找出一小段來改寫成 Rust。請注意,依附元件和「獨特」型別越少越好。理想情況是確保程式碼能剖析部分原始位元組。
由於 Rust 在 Android 中越來越廣為使用,講者可能可以提到以下議題:
-
服務範例:DNS_over_HTTP
-
程式庫:Rutabaga 虛擬繪圖介面
-
核心驅動程式:Binder
-
韌體:pKVM 韌體
設定
我們會使用 Cuttlefish Android 虛擬裝置來測試程式碼。請確認您可以存取這項裝置,或是使用下方程式碼建立新裝置:
source build/envsetup.sh
lunch aosp_cf_x86_64_phone-trunk_staging-userdebug
acloud create
詳情請參閱 Android 開發人員程式碼研究室。
重要須知:
-
Cuttlefish 是參考用的 Android 裝置,可在一般 Linux 電腦上運作。日後也計劃支援 MacOS。
-
Cuttlefish 系統映像檔能維持媲美實體裝置的高保真度,是可用於許多 Rust 用途的理想模擬器。
建構規則
Android 的建構系統 (Soong) 透過以下模組支援 Rust:
| 模組型態 | 敘述 |
|---|---|
rust_binary | 生成一個 Rust 執行檔。 |
rust_library | 生成一個 Rust 函式庫,及其對應的 rlib 和 dylib 變體。 |
rust_ffi | 生成一個可被 cc 模組使用的 Rust C 函式庫,及其對應的靜態和共享變體。 |
rust_proc_macro | 生成一個 proc-macro Rust 函式庫,類似於編譯器 擴充。 |
rust_test | 使用Rust自動化測試框架,生成一個 Rust 測試檔。 |
rust_fuzz | 生成一個使用 libfuzzer 的 Rust 模糊測試執行檔。 |
rust_protobuf | 生成對應 protobuf 介面的 Rust 原始碼及函式庫。 |
rust_bindgen | 生成用於連接 C 函式庫的 Rust 原始碼及函式庫。 |
接下來我們會探討 rust_binary 及 rust_library。
講者可以提及以下其他事項:
-
Cargo 未針對使用多種程式語言的倉儲進行最佳化調整,並且會從網際網路下載套件。
-
為了遵循常規並確保效能,Android 必須在自身專案內提供 Crate。此外,也必須保有與 C/C++/Java 程式碼的互通性。Soong 可以彌補這中間的落差。
-
Soong 與 Bazel 有許多相似之處,後者是 Blaze 的開放原始碼變化版本 (用於 google3)。
-
對所有 Rust OS 開發人員來說,學習類似 Bazel 的建構規則都能派上用場。
-
趣味小知識:《星艦迷航記》中的「百科 (Data)」是 Soong 型的仿生機器人 (android)。
Rust 二進位檔
我們從一個簡單的應用程式開始著手。請在 Android 開放原始碼計畫程式庫的根層級,建立下列檔案:
hello_rust/Android.bp:
rust_binary {
    name: "hello_rust",
    crate_name: "hello_rust",
    srcs: ["src/main.rs"],
}
hello_rust/src/main.rs:
//! Rust demo.

/// Prints a greeting to standard output.
fn main() {
    println!("Hello from Rust!");
}
您現在可以建構、推送及執行二進位檔:
m hello_rust
adb push "$ANDROID_PRODUCT_OUT/system/bin/hello_rust" /data/local/tmp
adb shell /data/local/tmp/hello_rust
Hello from Rust!
Rust 程式庫
您可以使用 rust_library 為 Android 建立一個新的 Rust 程式庫。
這裡,我們會宣告兩個需要依附的程式庫:
libgreeting(定義如下)libtextwrap(隨附於external/rust/crates/的 Crate 中)
hello_rust/Android.bp:
rust_binary {
    name: "hello_rust_with_dep",
    crate_name: "hello_rust_with_dep",
    srcs: ["src/main.rs"],
    rustlibs: [
        "libgreetings",
        "libtextwrap",
    ],
    prefer_rlib: true, // Need this to avoid dynamic link error.
}

rust_library {
    name: "libgreetings",
    crate_name: "greetings",
    srcs: ["src/lib.rs"],
}
hello_rust/src/main.rs:
//! Rust demo.

use greetings::greeting;
use textwrap::fill;

/// Prints a greeting to standard output.
fn main() {
    println!("{}", fill(&greeting("Bob"), 24));
}hello_rust/src/lib.rs:
//! Greeting library.

/// Greet `name`.
pub fn greeting(name: &str) -> String {
    format!("Hello {name}, it is very nice to meet you!")
}
請按照之前的方式,建構、推送及執行二進位檔:
m hello_rust_with_dep
adb push "$ANDROID_PRODUCT_OUT/system/bin/hello_rust_with_dep" /data/local/tmp
adb shell /data/local/tmp/hello_rust_with_dep
Hello Bob, it is very
nice to meet you!
AIDL
Rust 支援 Android 介面定義語言 (AIDL):
- Rust 程式碼可以呼叫現有的 AIDL 服務。
- 您可以在 Rust 中建立新的 AIDL 服務。
Birthday Service Tutorial
To illustrate how to use Rust with Binder, we’re going to walk through the process of creating a Binder interface. We’re then going to both implement the described service and write client code that talks to that service.
AIDL 介面
您可以使用 AIDL 介面宣告服務的 API:
birthday_service/aidl/com/example/birthdayservice/IBirthdayService.aidl:
/** Birthday service interface. */
interface IBirthdayService {
    /** Generate a Happy Birthday message. */
    String wishHappyBirthday(String name, int years);
}
birthday_service/aidl/Android.bp:
aidl_interface {
    name: "com.example.birthdayservice",
    srcs: ["com/example/birthdayservice/*.aidl"],
    unstable: true,
    backend: {
        rust: { // Rust is not enabled by default
            enabled: true,
        },
    },
}
- Note that the directory structure under the
aidl/directory needs to match the package name used in the AIDL file, i.e. the package iscom.example.birthdayserviceand the file is ataidl/com/example/IBirthdayService.aidl.
Generated Service API
Binder generates a trait corresponding to the interface definition. trait to talk to the service.
birthday_service/aidl/com/example/birthdayservice/IBirthdayService.aidl:
/** Birthday service interface. */
interface IBirthdayService {
    /** Generate a Happy Birthday message. */
    String wishHappyBirthday(String name, int years);
}
Generated trait:
trait IBirthdayService {
    fn wishHappyBirthday(&self, name: &str, years: i32) -> binder::Result<String>;
}
Your service will need to implement this trait, and your client will use this trait to talk to the service.
- The generated bindings can be found at
out/soong/.intermediates/<path to module>/. - Point out how the generated function signature, specifically the argument and return types, correspond the interface definition.
Stringfor an argument results in a different Rust type thanStringas a return type.
服務實作
我們現在可以實作 AIDL 服務了:
birthday_service/src/lib.rs:
use com_example_birthdayservice::aidl::com::example::birthdayservice::IBirthdayService::IBirthdayService;
use com_example_birthdayservice::binder;

/// The `IBirthdayService` implementation.
pub struct BirthdayService;

impl binder::Interface for BirthdayService {}

impl IBirthdayService for BirthdayService {
    fn wishHappyBirthday(&self, name: &str, years: i32) -> binder::Result<String> {
        Ok(format!("Happy Birthday {name}, congratulations with the {years} years!"))
    }
}birthday_service/Android.bp:
rust_library {
    name: "libbirthdayservice",
    srcs: ["src/lib.rs"],
    crate_name: "birthdayservice",
    rustlibs: [
        "com.example.birthdayservice-rust",
        "libbinder_rs",
    ],
}
- Point out the path to the generated
IBirthdayServicetrait, and explain why each of the segments is necessary. - TODO: What does the
binder::Interfacetrait do? Are there methods to override? Where source?
AIDL 伺服器
最後,我們可以建立伺服器來公開服務:
birthday_service/src/server.rs:
//! Birthday service.
use birthdayservice::BirthdayService;
use com_example_birthdayservice::aidl::com::example::birthdayservice::IBirthdayService::BnBirthdayService;
use com_example_birthdayservice::binder;

const SERVICE_IDENTIFIER: &str = "birthdayservice";

/// Entry point for birthday service.
fn main() {
    let birthday_service = BirthdayService;
    let birthday_service_binder = BnBirthdayService::new_binder(
        birthday_service,
        binder::BinderFeatures::default(),
    );
    binder::add_service(SERVICE_IDENTIFIER, birthday_service_binder.as_binder())
        .expect("Failed to register service");
    binder::ProcessState::join_thread_pool()
}birthday_service/Android.bp:
rust_binary {
    name: "birthday_server",
    crate_name: "birthday_server",
    srcs: ["src/server.rs"],
    rustlibs: [
        "com.example.birthdayservice-rust",
        "libbinder_rs",
        "libbirthdayservice",
    ],
    prefer_rlib: true, // To avoid dynamic link error.
}
The process for taking a user-defined service implementation (in this case the BirthdayService type, which implements the IBirthdayService) and starting it as a Binder service has multiple steps, and may appear more complicated than students are used to if they’ve used Binder from C++ or another language. Explain to students why each step is necessary.
- Create an instance of your service type (
BirthdayService). - Wrap the service object in corresponding
Bn*type (BnBirthdayServicein this case). This type is generated by Binder and provides the common Binder functionality that would be provided by theBnBinderbase class in C++. We don’t have inheritance in Rust, so instead we use composition, putting ourBirthdayServicewithin the generatedBnBinderService. - Call
add_service, giving it a service identifier and your service object (theBnBirthdayServiceobject in the example). - Call
join_thread_poolto add the current thread to Binder’s thread pool and start listening for connections.
部署
現在我們可以建構、推送及啟動服務:
m birthday_server
adb push "$ANDROID_PRODUCT_OUT/system/bin/birthday_server" /data/local/tmp
adb root
adb shell /data/local/tmp/birthday_server
在另一個終端機中,檢查服務是否能執行:
adb shell service check birthdayservice
Service birthdayservice: found
藉由 service call 呼叫,您也可以呼叫服務:
adb shell service call birthdayservice 1 s16 Bob i32 24
Result: Parcel(
0x00000000: 00000000 00000036 00610048 00700070 '....6...H.a.p.p.'
0x00000010: 00200079 00690042 00740072 00640068 'y. .B.i.r.t.h.d.'
0x00000020: 00790061 00420020 0062006f 0020002c 'a.y. .B.o.b.,. .'
0x00000030: 006f0063 0067006e 00610072 00750074 'c.o.n.g.r.a.t.u.'
0x00000040: 0061006c 00690074 006e006f 00200073 'l.a.t.i.o.n.s. .'
0x00000050: 00690077 00680074 00740020 00650068 'w.i.t.h. .t.h.e.'
0x00000060: 00320020 00200034 00650079 00720061 ' .2.4. .y.e.a.r.'
0x00000070: 00210073 00000000 's.!..... ')
AIDL 用戶端
最後,我們可以為新服務建立 Rust 用戶端。
birthday_service/src/client.rs:
use com_example_birthdayservice::aidl::com::example::birthdayservice::IBirthdayService::IBirthdayService;
use com_example_birthdayservice::binder;
const SERVICE_IDENTIFIER: &str = "birthdayservice";
/// Call the birthday service.
fn main() -> Result<(), Box<dyn Error>> {
let name = std::env::args().nth(1).unwrap_or_else(|| String::from("Bob"));
let years = std::env::args()
.nth(2)
.and_then(|arg| arg.parse::<i32>().ok())
.unwrap_or(42);
binder::ProcessState::start_thread_pool();
let service = binder::get_interface::<dyn IBirthdayService>(SERVICE_IDENTIFIER)
.map_err(|_| "Failed to connect to BirthdayService")?;
// Call the service.
let msg = service.wishHappyBirthday(&name, years)?;
println!("{msg}");
}birthday_service/Android.bp:
rust_binary {
name: "birthday_client",
crate_name: "birthday_client",
srcs: ["src/client.rs"],
rustlibs: [
"com.example.birthdayservice-rust",
"libbinder_rs",
],
prefer_rlib: true, // To avoid dynamic link error.
}
請注意,用戶端並不依賴 libbirthdayservice。
建構、推送及在裝置裡執行用戶端程式:
m birthday_client
adb push "$ANDROID_PRODUCT_OUT/system/bin/birthday_client" /data/local/tmp
adb shell /data/local/tmp/birthday_client Charlie 60
Happy Birthday Charlie, congratulations with the 60 years!
Strong<dyn IBirthdayService>is the trait object representing the service that the client has connected to.Strongis a custom smart pointer type for Binder. It handles both an in-process ref count for the service trait object, and the global Binder ref count that tracks how many processes have a reference to the object.- Note that the trait object that the client uses to talk to the service uses the exact same trait that the server implements. For a given Binder interface, there is a single Rust trait generated that both client and server use.
- Use the same service identifier used when registering the service. This should ideally be defined in a common crate that both the client and server can depend on.
改寫 API
讓我們為這個 API 擴充更多功能:我們想要讓用戶能在生日卡上指定幾行字:
package com.example.birthdayservice;
/** Birthday service interface. */
interface IBirthdayService {
/** Generate a Happy Birthday message. */
String wishHappyBirthday(String name, int years, in String[] text);
}
This results in an updated trait definition for IBirthdayService:
trait IBirthdayService {
fn wishHappyBirthday(
&self,
name: &str,
years: i32,
text: &[String],
) -> binder::Result<String>;
}- Note how the
String[]in the AIDL definition is translated as a&[String]in Rust, i.e. that idiomatic Rust types are used in the generated bindings wherever possible:inarray arguments are translated to slices.outandinoutargs are translated to&mut Vec<T>.- Return values are translated to returning a
Vec<T>.
Updating Client and Service
Update the client and server code to account for the new API.
birthday_service/src/lib.rs:
impl IBirthdayService for BirthdayService {
fn wishHappyBirthday(
&self,
name: &str,
years: i32,
text: &[String],
) -> binder::Result<String> {
let mut msg = format!(
"Happy Birthday {name}, congratulations with the {years} years!",
);
for line in text {
msg.push('\n');
msg.push_str(line);
}
Ok(msg)
}
}birthday_service/src/client.rs:
let msg = service.wishHappyBirthday(
&name,
years,
&[
String::from("Habby birfday to yuuuuu"),
String::from("And also: many more"),
],
)?;- TODO: Move code snippets into project files where they’ll actually be built?
Working With AIDL Types
AIDL types translate into the appropriate idiomatic Rust type:
- Primitive types map (mostly) to idiomatic Rust types.
- Collection types like slices,
Vecs and string types are supported. - References to AIDL objects and file handles can be sent between clients and services.
- File handles and parcelables are fully supported.
Primitive Types
Primitive types map (mostly) idiomatically:
| AIDL 型別 | Rust 型別 | Note |
|---|---|---|
boolean | bool | |
byte | i8 | Note that bytes are signed. |
char | u16 | Note the usage of u16, NOT u32. |
int | i32 | |
long | i64 | |
float | f32 | |
double | f64 | |
String | String |
陣列
The array types (T[], byte[], and List<T>) get translated to the appropriate Rust array type depending on how they are used in the function signature:
| Position | Rust 型別 |
|---|---|
in argument | &[T] |
out/inout argument | &mut Vec<T> |
| Return | Vec<T> |
- In Android 13 or higher, fixed-size arrays are supported, i.e.
T[N]becomes[T; N]. Fixed-size arrays can have multiple dimensions (e.g. int[3][4]). In the Java backend, fixed-size arrays are represented as array types. - Arrays in parcelable fields always get translated to
Vec<T>.
特徵物件
AIDL objects can be sent either as a concrete AIDL type or as the type-erased IBinder interface:
birthday_service/aidl/com/example/birthdayservice/IBirthdayInfoProvider.aidl:
package com.example.birthdayservice;
interface IBirthdayInfoProvider {
String name();
int years();
}
birthday_service/aidl/com/example/birthdayservice/IBirthdayService.aidl:
import com.example.birthdayservice.IBirthdayInfoProvider;
interface IBirthdayService {
/** The same thing, but using a binder object. */
String wishWithProvider(IBirthdayInfoProvider provider);
/** The same thing, but using `IBinder`. */
String wishWithErasedProvider(IBinder provider);
}
birthday_service/src/client.rs:
/// Rust struct implementing the `IBirthdayInfoProvider` interface.
struct InfoProvider {
name: String,
age: u8,
}
impl binder::Interface for InfoProvider {}
impl IBirthdayInfoProvider for InfoProvider {
fn name(&self) -> binder::Result<String> {
Ok(self.name.clone())
}
fn years(&self) -> binder::Result<i32> {
Ok(self.age as i32)
}
}
fn main() {
binder::ProcessState::start_thread_pool();
let service = connect().expect("Failed to connect to BirthdayService");
// Create a binder object for the `IBirthdayInfoProvider` interface.
let provider = BnBirthdayInfoProvider::new_binder(
InfoProvider { name: name.clone(), age: years as u8 },
BinderFeatures::default(),
);
// Send the binder object to the service.
service.wishWithProvider(&provider)?;
// Perform the same operation but passing the provider as an `SpIBinder`.
service.wishWithErasedProvider(&provider.as_binder())?;
}- Note the usage of
BnBirthdayInfoProvider. This serves the same purpose asBnBirthdayServicethat we saw previously.
變數
Binder for Rust supports sending parcelables directly:
birthday_service/aidl/com/example/birthdayservice/BirthdayInfo.aidl:
package com.example.birthdayservice;
parcelable BirthdayInfo {
String name;
int years;
}
birthday_service/aidl/com/example/birthdayservice/IBirthdayService.aidl:
import com.example.birthdayservice.BirthdayInfo;
interface IBirthdayService {
/** The same thing, but with a parcelable. */
String wishWithInfo(in BirthdayInfo info);
}
birthday_service/src/client.rs:
fn main() {
binder::ProcessState::start_thread_pool();
let service = connect().expect("Failed to connect to BirthdayService");
service.wishWithInfo(&BirthdayInfo { name: name.clone(), years })?;
}Sending Files
Files can be sent between Binder clients/servers using the ParcelFileDescriptor type:
birthday_service/aidl/com/example/birthdayservice/IBirthdayService.aidl:
interface IBirthdayService {
/** The same thing, but loads info from a file. */
String wishFromFile(in ParcelFileDescriptor infoFile);
}
birthday_service/src/client.rs:
fn main() {
binder::ProcessState::start_thread_pool();
let service = connect().expect("Failed to connect to BirthdayService");
// Open a file and put the birthday info in it.
let mut file = File::create("/data/local/tmp/birthday.info").unwrap();
writeln!(file, "{name}")?;
writeln!(file, "{years}")?;
// Create a `ParcelFileDescriptor` from the file and send it.
let file = ParcelFileDescriptor::new(file);
service.wishFromFile(&file)?;
}birthday_service/src/lib.rs:
impl IBirthdayService for BirthdayService {
fn wishFromFile(
&self,
info_file: &ParcelFileDescriptor,
) -> binder::Result<String> {
// Convert the file descriptor to a `File`. `ParcelFileDescriptor` wraps
// an `OwnedFd`, which can be cloned and then used to create a `File`
// object.
let mut info_file = info_file
.as_ref()
.try_clone()
.map(File::from)
.expect("Invalid file handle");
let mut contents = String::new();
info_file.read_to_string(&mut contents).unwrap();
let mut lines = contents.lines();
let name = lines.next().unwrap();
let years: i32 = lines.next().unwrap().parse().unwrap();
Ok(format!("Happy Birthday {name}, congratulations with the {years} years!"))
}
}ParcelFileDescriptorwraps anOwnedFd, and so can be created from aFile(or any other type that wraps anOwnedFd), and can be used to create a newFilehandle on the other side.- Other types of file descriptors can be wrapped and sent, e.g. TCP, UDP, and UNIX sockets.
Testing in Android
Building on Testing, we will now look at how unit tests work in AOSP. Use the rust_test module for your unit tests:
testing/Android.bp:
rust_library {
name: "libleftpad",
crate_name: "leftpad",
srcs: ["src/lib.rs"],
}
rust_test {
name: "libleftpad_test",
crate_name: "leftpad_test",
srcs: ["src/lib.rs"],
host_supported: true,
test_suites: ["general-tests"],
}
testing/src/lib.rs:
#![allow(unused)]
fn main() {
//! Left-padding library.
/// Left-pad `s` to `width`.
pub fn leftpad(s: &str, width: usize) -> String {
format!("{s:>width$}")
}
#[cfg(test)]
mod tests {
use super::*;
#[test]
fn short_string() {
assert_eq!(leftpad("foo", 5), " foo");
}
#[test]
fn long_string() {
assert_eq!(leftpad("foobar", 6), "foobar");
}
}
}You can now run the test with
atest --host libleftpad_test
The output looks like this:
INFO: Elapsed time: 2.666s, Critical Path: 2.40s
INFO: 3 processes: 2 internal, 1 linux-sandbox.
INFO: Build completed successfully, 3 total actions
//comprehensive-rust-android/testing:libleftpad_test_host PASSED in 2.3s
PASSED libleftpad_test.tests::long_string (0.0s)
PASSED libleftpad_test.tests::short_string (0.0s)
Test cases: finished with 2 passing and 0 failing out of 2 test cases
Notice how you only mention the root of the library crate. Tests are found recursively in nested modules.
GoogleTest
The GoogleTest crate allows for flexible test assertions using matchers:
use googletest::prelude::*;
#[googletest::test]
fn test_elements_are() {
let value = vec!["foo", "bar", "baz"];
expect_that!(value, elements_are!(eq("foo"), lt("xyz"), starts_with("b")));
}If we change the last element to "!", the test fails with a structured error message pin-pointing the error:
---- test_elements_are stdout ----
Value of: value
Expected: has elements:
0. is equal to "foo"
1. is less than "xyz"
2. starts with prefix "!"
Actual: ["foo", "bar", "baz"],
where element #2 is "baz", which does not start with "!"
at src/testing/googletest.rs:6:5
Error: See failure output above
-
GoogleTest is not part of the Rust Playground, so you need to run this example in a local environment. Use
cargo add googletestto quickly add it to an existing Cargo project. -
The
use googletest::prelude::*;line imports a number of commonly used macros and types. -
This just scratches the surface, there are many builtin matchers.
-
A particularly nice feature is that mismatches in multi-line strings are shown as a diff:
#[test]
fn test_multiline_string_diff() {
let haiku = "Memory safety found,\n\
Rust's strong typing guides the way,\n\
Secure code you'll write.";
assert_that!(
haiku,
eq("Memory safety found,\n\
Rust's silly humor guides the way,\n\
Secure code you'll write.")
);
}shows a color-coded diff (colors not shown here):
Value of: haiku
Expected: is equal to "Memory safety found,\nRust's silly humor guides the way,\nSecure code you'll write."
Actual: "Memory safety found,\nRust's strong typing guides the way,\nSecure code you'll write.",
which isn't equal to "Memory safety found,\nRust's silly humor guides the way,\nSecure code you'll write."
Difference(-actual / +expected):
Memory safety found,
-Rust's strong typing guides the way,
+Rust's silly humor guides the way,
Secure code you'll write.
at src/testing/googletest.rs:17:5
- The crate is a Rust port of GoogleTest for C++.
模擬 (Mocking)
For mocking, Mockall is a widely used library. You need to refactor your code to use traits, which you can then quickly mock:
use std::time::Duration;
#[mockall::automock]
pub trait Pet {
fn is_hungry(&self, since_last_meal: Duration) -> bool;
}
#[test]
fn test_robot_dog() {
let mut mock_dog = MockPet::new();
mock_dog.expect_is_hungry().return_const(true);
assert_eq!(mock_dog.is_hungry(Duration::from_secs(10)), true);
}-
Mockall is the recommended mocking library in Android (AOSP). There are other mocking libraries available on crates.io, in particular in the area of mocking HTTP services. The other mocking libraries work in a similar fashion as Mockall, meaning that they make it easy to get a mock implementation of a given trait.
-
Note that mocking is somewhat controversial: mocks allow you to completely isolate a test from its dependencies. The immediate result is faster and more stable test execution. On the other hand, the mocks can be configured wrongly and return output different from what the real dependencies would do.
If at all possible, it is recommended that you use the real dependencies. As an example, many databases allow you to configure an in-memory backend. This means that you get the correct behavior in your tests, plus they are fast and will automatically clean up after themselves.
Similarly, many web frameworks allow you to start an in-process server which binds to a random port on
localhost. Always prefer this over mocking away the framework since it helps you test your code in the real environment. -
Mockall is not part of the Rust Playground, so you need to run this example in a local environment. Use
cargo add mockallto quickly add Mockall to an existing Cargo project. -
Mockall has a lot more functionality. In particular, you can set up expectations which depend on the arguments passed. Here we use this to mock a cat which becomes hungry 3 hours after the last time it was fed:
#[test]
fn test_robot_cat() {
let mut mock_cat = MockPet::new();
mock_cat
.expect_is_hungry()
.with(mockall::predicate::gt(Duration::from_secs(3 * 3600)))
.return_const(true);
mock_cat.expect_is_hungry().return_const(false);
assert_eq!(mock_cat.is_hungry(Duration::from_secs(1 * 3600)), false);
assert_eq!(mock_cat.is_hungry(Duration::from_secs(5 * 3600)), true);
}- You can use
.times(n)to limit the number of times a mock method can be called ton— the mock will automatically panic when dropped if this isn’t satisfied.
記錄
您應使用 log Crate,自動將記錄印出到 logcat (裝置端) 或 stdout (主機端):
hello_rust_logs/Android.bp:
rust_binary {
name: "hello_rust_logs",
crate_name: "hello_rust_logs",
srcs: ["src/main.rs"],
rustlibs: [
"liblog_rust",
"liblogger",
],
host_supported: true,
}
hello_rust_logs/src/main.rs:
//! Rust logging demo.
use log::{debug, error, info};
/// Logs a greeting.
fn main() {
logger::init(
logger::Config::default()
.with_tag_on_device("rust")
.with_min_level(log::Level::Trace),
);
debug!("Starting program.");
info!("Things are going fine.");
error!("Something went wrong!");
}建構、推送及在裝置上執行二進位檔:
m hello_rust_logs
adb push "$ANDROID_PRODUCT_OUT/system/bin/hello_rust_logs" /data/local/tmp
adb shell /data/local/tmp/hello_rust_logs
記錄會顯示在 adb logcat 中:
adb logcat -s rust
09-08 08:38:32.454 2420 2420 D rust: hello_rust_logs: Starting program.
09-08 08:38:32.454 2420 2420 I rust: hello_rust_logs: Things are going fine.
09-08 08:38:32.454 2420 2420 E rust: hello_rust_logs: Something went wrong!
互通性
Rust 能充分支援與其他程式語言互通。也就是說,您可以:
- 透過其他語言呼叫 Rust 函式。
- 透過 Rust 呼叫以其他語言編寫的函式。
當您以其他語言呼叫函式時,我們稱之為使用「外部函式介面」,亦稱 FFI (Foreign Function Interface)。
與 C 的互通性
Rust 能完整支援以 C 語言的呼叫慣例來連結物件檔案。同樣地,您可以匯出 Rust 函式,然後透過 C 語言呼叫這些函式。
您可以視需要手動完成操作:
extern "C" {
fn abs(x: i32) -> i32;
}
fn main() {
let x = -42;
let abs_x = unsafe { abs(x) };
println!("{x}, {abs_x}");
}我們已在「安全的 FFI 包裝函式」練習中看過此例。
執行這項操作的前提是要充分瞭解目標平台。此法不建議用於正式環境。
我們接下來會討論更好的選項。
使用 Bindgen
bindgen 工具可從 C 標頭檔案自動產生繫結。
首先,請建立小型 C 程式庫:
__interoperability/bindgen/libbirthday.h:
typedef struct card {
const char* name;
int years;
} card;
void print_card(const card* card);
__interoperability/bindgen/libbirthday.c:
#include <stdio.h>
#include "libbirthday.h"
void print_card(const card* card) {
printf("+--------------\n");
printf("| Happy Birthday %s!\n", card->name);
printf("| Congratulations with the %i years!\n", card->years);
printf("+--------------\n");
}
請將以下內容加入 Android.bp 檔案:
__interoperability/bindgen/Android.bp:
cc_library {
name: "libbirthday",
srcs: ["libbirthday.c"],
}
為程式庫建立包裝函式標頭檔案 (在此範例中不一定需要):
__interoperability/bindgen/libbirthday_wrapper.h:
#include "libbirthday.h"
您現在可以自動產生繫結:
__interoperability/bindgen/Android.bp:
rust_bindgen {
name: "libbirthday_bindgen",
crate_name: "birthday_bindgen",
wrapper_src: "libbirthday_wrapper.h",
source_stem: "bindings",
static_libs: ["libbirthday"],
}
最後,我們可以在 Rust 程式中使用繫結:
__interoperability/bindgen/Android.bp:
rust_binary {
name: "print_birthday_card",
srcs: ["main.rs"],
rustlibs: ["libbirthday_bindgen"],
}
__interoperability/bindgen/main.rs:
//! Bindgen demo.
use birthday_bindgen::{card, print_card};
fn main() {
let name = std::ffi::CString::new("Peter").unwrap();
let card = card { name: name.as_ptr(), years: 42 };
// SAFETY: `print_card` is safe to call with a valid `card` pointer.
unsafe {
print_card(&card as *const card);
}
}建構、推送及在裝置上執行二進位檔:
m print_birthday_card
adb push "$ANDROID_PRODUCT_OUT/system/bin/print_birthday_card" /data/local/tmp
adb shell /data/local/tmp/print_birthday_card
最後,我們可以執行自動產生的測試,確保繫結正常運作:
__interoperability/bindgen/Android.bp:
rust_test {
name: "libbirthday_bindgen_test",
srcs: [":libbirthday_bindgen"],
crate_name: "libbirthday_bindgen_test",
test_suites: ["general-tests"],
auto_gen_config: true,
clippy_lints: "none", // Generated file, skip linting
lints: "none",
}
atest libbirthday_bindgen_test
呼叫 Rust
您可以輕鬆將 Rust 函式和型別匯出至 C:
__interoperability/rust/libanalyze/analyze.rs
//! Rust FFI demo.
#![deny(improper_ctypes_definitions)]
use std::os::raw::c_int;
/// Analyze the numbers.
#[no_mangle]
pub extern "C" fn analyze_numbers(x: c_int, y: c_int) {
if x < y {
println!("x ({x}) is smallest!");
} else {
println!("y ({y}) is probably larger than x ({x})");
}
}__interoperability/rust/libanalyze/analyze.h
#ifndef ANALYSE_H
#define ANALYSE_H
extern "C" {
void analyze_numbers(int x, int y);
}
#endif
__interoperability/rust/libanalyze/Android.bp
rust_ffi {
name: "libanalyze_ffi",
crate_name: "analyze_ffi",
srcs: ["analyze.rs"],
include_dirs: ["."],
}
我們現在可以從 C 二進位檔呼叫此介面:
__interoperability/rust/analyze/main.c
#include "analyze.h"
int main() {
analyze_numbers(10, 20);
analyze_numbers(123, 123);
return 0;
}
__interoperability/rust/analyze/Android.bp
cc_binary {
name: "analyze_numbers",
srcs: ["main.c"],
static_libs: ["libanalyze_ffi"],
}
建構、推送及在裝置上執行二進位檔:
m analyze_numbers
adb push "$ANDROID_PRODUCT_OUT/system/bin/analyze_numbers" /data/local/tmp
adb shell /data/local/tmp/analyze_numbers
#[no_mangle] 會停用 Rust 的一般名稱改編功能,因此匯出的符號將只是函式名稱。您也可以使用 #[export_name = "some_name"] 指定任何名稱。
與 C++ 的互通性
透過 CXX Crate,您可以在 Rust 和 C++ 之間實現安全的互通性。
整體方法大致如下:

測試模組
CXX 的運作需要依照函式的型別敘述。這些敘述定義了從一種語言公開至另一種語言的介面。您會在具有 #[cxx::bridge] 屬性巨集註解的 Rust 模組中,使用外部區塊提供這項說明。
#[allow(unsafe_op_in_unsafe_fn)]
#[cxx::bridge(namespace = "org::blobstore")]
mod ffi {
// Shared structs with fields visible to both languages.
struct BlobMetadata {
size: usize,
tags: Vec<String>,
}
// Rust types and signatures exposed to C++.
extern "Rust" {
type MultiBuf;
fn next_chunk(buf: &mut MultiBuf) -> &[u8];
}
// C++ types and signatures exposed to Rust.
unsafe extern "C++" {
include!("include/blobstore.h");
type BlobstoreClient;
fn new_blobstore_client() -> UniquePtr<BlobstoreClient>;
fn put(self: Pin<&mut BlobstoreClient>, parts: &mut MultiBuf) -> u64;
fn tag(self: Pin<&mut BlobstoreClient>, blobid: u64, tag: &str);
fn metadata(&self, blobid: u64) -> BlobMetadata;
}
}- 橋接器通常是在 Crate 中的
ffi模組中宣告。 - 透過在橋接模組中建立宣告,CXX 會產生相符的 Rust 和 C++ 型別/函式定義,以便向這兩種語言公開這些項目。
- 如要查看產生的 Rust 程式碼,請使用 cargo-expand 檢視已展開的程序巨集。在大多數範例中,您都會使用
cargo expand ::ffi,這樣就能只展開ffi模組 (但這不適用於 Android 專案)。 - 如要檢視產生的 C++ 程式碼,請查看
target/cxxbridge。
Rust 橋接器宣告
#[cxx::bridge]
mod ffi {
extern "Rust" {
type MyType; // Opaque type
fn foo(&self); // Method on `MyType`
fn bar() -> Box<MyType>; // Free function
}
}
struct MyType(i32);
impl MyType {
fn foo(&self) {
println!("{}", self.0);
}
}
fn bar() -> Box<MyType> {
Box::new(MyType(123))
}- 在
extern "Rust"參照項目中宣告的項目皆位於上層模組的範圍。 - CXX 程式碼產生器會使用您的
extern "Rust"區段,產生含有相對應 C++ 宣告的 C++ 標頭檔案。產生的標頭與包含橋接器的 Rust 來源檔案具有相同路徑,但副檔名為 .rs.h。
產生的 C++
#[cxx::bridge]
mod ffi {
// Rust types and signatures exposed to C++.
extern "Rust" {
type MultiBuf;
fn next_chunk(buf: &mut MultiBuf) -> &[u8];
}
}(大致) 產生下列 C++:
struct MultiBuf final : public ::rust::Opaque {
~MultiBuf() = delete;
private:
friend ::rust::layout;
struct layout {
static ::std::size_t size() noexcept;
static ::std::size_t align() noexcept;
};
};
::rust::Slice<::std::uint8_t const> next_chunk(::org::blobstore::MultiBuf &buf) noexcept;
C++ 橋接器宣告
#[cxx::bridge]
mod ffi {
// C++ types and signatures exposed to Rust.
unsafe extern "C++" {
include!("include/blobstore.h");
type BlobstoreClient;
fn new_blobstore_client() -> UniquePtr<BlobstoreClient>;
fn put(self: Pin<&mut BlobstoreClient>, parts: &mut MultiBuf) -> u64;
fn tag(self: Pin<&mut BlobstoreClient>, blobid: u64, tag: &str);
fn metadata(&self, blobid: u64) -> BlobMetadata;
}
}(大致) 產生下列 Rust:
#[repr(C)]
pub struct BlobstoreClient {
_private: ::cxx::private::Opaque,
}
pub fn new_blobstore_client() -> ::cxx::UniquePtr<BlobstoreClient> {
extern "C" {
#[link_name = "org$blobstore$cxxbridge1$new_blobstore_client"]
fn __new_blobstore_client() -> *mut BlobstoreClient;
}
unsafe { ::cxx::UniquePtr::from_raw(__new_blobstore_client()) }
}
impl BlobstoreClient {
pub fn put(&self, parts: &mut MultiBuf) -> u64 {
extern "C" {
#[link_name = "org$blobstore$cxxbridge1$BlobstoreClient$put"]
fn __put(
_: &BlobstoreClient,
parts: *mut ::cxx::core::ffi::c_void,
) -> u64;
}
unsafe {
__put(self, parts as *mut MultiBuf as *mut ::cxx::core::ffi::c_void)
}
}
}
// ...- 程式設計師不需要保證已輸入的簽章正確無誤。CXX 會執行靜態斷言,保證簽章與 C++ 中宣告的內容完全相符。
unsafe extern區塊可用來宣告能從 Rust 安全呼叫的 C++ 函式。
共用型別
#[cxx::bridge]
mod ffi {
#[derive(Clone, Debug, Hash)]
struct PlayingCard {
suit: Suit,
value: u8, // A=1, J=11, Q=12, K=13
}
enum Suit {
Clubs,
Diamonds,
Hearts,
Spades,
}
}- 只支援與 C 類似的 (單元) 列舉。
- 共用型別上的
#[derive()]只支援部分特徵。系統也會為 C++ 程式碼產生相對應的功能。舉例來說,如果衍生出Hash,也會為相應的 C++ 型別產生std::hash的實作項目。
共用列舉
#[cxx::bridge]
mod ffi {
enum Suit {
Clubs,
Diamonds,
Hearts,
Spades,
}
}產生的 Rust:
#![allow(unused)]
fn main() {
#[derive(Copy, Clone, PartialEq, Eq)]
#[repr(transparent)]
pub struct Suit {
pub repr: u8,
}
#[allow(non_upper_case_globals)]
impl Suit {
pub const Clubs: Self = Suit { repr: 0 };
pub const Diamonds: Self = Suit { repr: 1 };
pub const Hearts: Self = Suit { repr: 2 };
pub const Spades: Self = Suit { repr: 3 };
}
}產生的 C++:
enum class Suit : uint8_t {
Clubs = 0,
Diamonds = 1,
Hearts = 2,
Spades = 3,
};
- 在 Rust 端,為共用列舉產生的程式碼其實是包裝數值的結構體。這是因為在 C++ 中,列舉類別保留與所有所列變數不同的值並不屬於 UB,而 Rust 表示法需具有相同行為。
錯誤處理
#[cxx::bridge]
mod ffi {
extern "Rust" {
fn fallible(depth: usize) -> Result<String>;
}
}
fn fallible(depth: usize) -> anyhow::Result<String> {
if depth == 0 {
return Err(anyhow::Error::msg("fallible1 requires depth > 0"));
}
Ok("Success!".into())
}- 傳回
Result的 Rust 函式會轉譯為 C++ 端的例外狀況。 - 擲回的例外狀況一律屬於
rust::Error類型,這主要用來公開取得錯誤訊息字串的方法。錯誤訊息會來自錯誤類型的Display實作項目。 - 從 Rust 恐慌解開至 C++ 一律會導致程序立即終止。
錯誤處理
#[cxx::bridge]
mod ffi {
unsafe extern "C++" {
include!("example/include/example.h");
fn fallible(depth: usize) -> Result<String>;
}
}
fn main() {
if let Err(err) = ffi::fallible(99) {
eprintln!("Error: {}", err);
process::exit(1);
}
}- 所宣告用來傳回
Result的 C++ 函式會擷取 C++ 端的任何擲回例外狀況,並將其當做Err值傳回至發出呼叫的 Rust 函式。 - 假使例外狀況是從 CXX 橋接器未宣告的外部「C++」函式擲回,藉此傳回
Result,則程式會呼叫 C++ 的std::terminate。此行為等同於透過noexceptC++ 函式擲回的相同例外狀況。
其他型別
| Rust 型別 | C++ Type |
|---|---|
String | rust::String |
&str | rust::Str |
CxxString | std::string |
&[T]/&mut [T] | rust::Slice |
Box<T> | rust::Box<T> |
UniquePtr<T> | std::unique_ptr<T> |
Vec<T> | rust::Vec<T> |
CxxVector<T> | std::vector<T> |
- 這些型別可用於共用結構體的欄位,以及外部函式的引數和回傳內容。
- 請注意,Rust 的
String不會直接對應至std::string。以下列舉幾個原因:std::string不會維護String所需的 UTF-8 不變體。- 這兩種型別的內部記憶體結構不同,因此無法在語言之間直接傳遞。
std::string需要的移動建構函式與 Rust 的移動語意不相符,因此std::string無法透過值傳遞至 Rust。
在 Android 中建構
建立 cc_library_static 來建構 C++ 程式庫,包括 CXX 產生的標頭檔案和來源檔案。
cc_library_static {
name: "libcxx_test_cpp",
srcs: ["cxx_test.cpp"],
generated_headers: [
"cxx-bridge-header",
"libcxx_test_bridge_header"
],
generated_sources: ["libcxx_test_bridge_code"],
}
- 指出
libcxx_test_bridge_header 和libcxx_test_bridge_code` 是 CXX 產生的 C++ 繫結依附元件。下一張投影片將說明相關設定方法。 - 請注意,您也需要依賴
cxx-bridge-header程式庫,才能提取常見的 CXX 定義。 - 如需介紹如何在 Android 中使用 CXX 的完整文件,請參閱 Android 說明文件。您可以與全班分享該連結,這樣學生就知道以後能在哪裡找到這些說明。
在 Android 中建構
建立兩項 genrule,分別用來產生 CXX 標頭和 CXX 來源檔案。這些項目之後會用做 cc_library_static 的輸入內容。
// Generate a C++ header containing the C++ bindings
// to the Rust exported functions in lib.rs.
genrule {
name: "libcxx_test_bridge_header",
tools: ["cxxbridge"],
cmd: "$(location cxxbridge) $(in) --header > $(out)",
srcs: ["lib.rs"],
out: ["lib.rs.h"],
}
// Generate the C++ code that Rust calls into.
genrule {
name: "libcxx_test_bridge_code",
tools: ["cxxbridge"],
cmd: "$(location cxxbridge) $(in) > $(out)",
srcs: ["lib.rs"],
out: ["lib.rs.cc"],
}
cxxbridge是用來產生 C++ 端橋接模組的獨立工具,屬於 Android 的一部分,並以 Soong 工具的形式提供。- 按照慣例,如果 Rust 來源檔案是
lib.rs,標頭檔案會命名為lib.rs.h,來源檔案的名稱則是lib.rs.cc。不過,系統不會強制執行這項命名慣例。
在 Android 中建構
建立依附於 libcxx 和 cc_library_static 的 rust_binary`。
rust_binary {
name: "cxx_test",
srcs: ["lib.rs"],
rustlibs: ["libcxx"],
static_libs: ["libcxx_test_cpp"],
}
與 Java 的互通性
Java 可透過 Java 原生介面 (JNI) 載入共用物件。jni Crate 可用來建立相容的程式庫。
首先,要建立用來匯出至 Java 的 Rust 函式:
__interoperability/java/src/lib.rs:
#![allow(unused)]
fn main() {
//! Rust <-> Java FFI demo.
use jni::objects::{JClass, JString};
use jni::sys::jstring;
use jni::JNIEnv;
/// HelloWorld::hello method implementation.
#[no_mangle]
pub extern "system" fn Java_HelloWorld_hello(
env: JNIEnv,
_class: JClass,
name: JString,
) -> jstring {
let input: String = env.get_string(name).unwrap().into();
let greeting = format!("Hello, {input}!");
let output = env.new_string(greeting).unwrap();
output.into_inner()
}
}__interoperability/java/Android.bp:
rust_ffi_shared {
name: "libhello_jni",
crate_name: "hello_jni",
srcs: ["src/lib.rs"],
rustlibs: ["libjni"],
}
接著,我們會從 Java 呼叫這個函式:
__interoperability/java/HelloWorld.java:
class HelloWorld {
private static native String hello(String name);
static {
System.loadLibrary("hello_jni");
}
public static void main(String[] args) {
String output = HelloWorld.hello("Alice");
System.out.println(output);
}
}
__interoperability/java/Android.bp:
java_binary {
name: "helloworld_jni",
srcs: ["HelloWorld.java"],
main_class: "HelloWorld",
required: ["libhello_jni"],
}
最後,您可以建構、同步處理及執行二進位檔:
m helloworld_jni
adb sync # requires adb root && adb remount
adb shell /system/bin/helloworld_jni
練習
這是小組練習:我們會查看您的其中一項專案,嘗試將一些 Rust 整合至該專案。建議事項:
-
使用以 Rust 編寫的用戶端呼叫 AIDL 服務。
-
將函式從專案移至 Rust,並呼叫該函式。
這裡未提供解決方案,因為這是開放式練習:您需要使用班上同學的程式碼當場轉換為 Rust。
歡迎瞭解 Chromium 中的 Rust
Chromium 中的第三方程式庫支援 Rust,且有第一方黏合程式碼可連結 Rust 和現有的 Chromium C++ 程式碼。
今天我們會在 Rust 中用字串做些小事。如果您有一小部份的程式碼要向使用者顯示 UTF8 字串,您可以在自己的程式碼集內採用這個方案,不必採用我們所介紹的該部分程式碼集。
設定
請確認您可以建構並執行 Chromium。任何平台和建構標記組合都可以,只要程式碼相對較新即可 (提交位置在 1223636 之後,日期對應到 2023 年 11 月):
gn gen out/Debug
autoninja -C out/Debug chrome
out/Debug/chrome # or on Mac, out/Debug/Chromium.app/Contents/MacOS/Chromium
(如要達到最快的疊代速度,建議使用元件式及偵錯版本。這是預設情形!)
如果尚未這麼做,請查看建構 Chromium 的方法。提醒您,設定 Chromium 建構作業需要一段時間。
此外,也建議您安裝 Visual Studio Code。
關於練習
這部分的課程包含一系列連貫的練習。我們會在課程中穿插練習,而不是放到最後。如果沒時間完成某個部分也不必擔心,下次補上即可。
比較 Chromium 和 Cargo 的生態系統
Rust 社群一般使用 cargo 和 crates.io 的程式庫。Chromium 是以 gn 和 ninja 技術和一組精選的依附元件建構而成。
在 Rust 中編寫程式碼時,您有以下選擇:
- 藉助
//build/rust/*.gni中的範本 (例如rust_static_library,稍後會介紹),使用gn和ninja。這麼做會使用 Chromium 經稽核的工具鏈和 Crate。 - 使用
cargo,但限制自己使用 Chromium 經稽核的工具鏈和 Crate - 使用
cargo,信任工具鏈和/或從網際網路下載的 Crate
接下來的重點將放在 gn 和 ninja,因為這就是將 Rust 程式碼建構至 Chromium 瀏覽器中的方式。同時,Cargo 是 Rust 生態系統中重要的一環,因此您應該學會使用這項工具。
Mini exercise
請分成小組,按照下列指示開始練習:
- 發想各種
cargo可帶來優勢的情境,然後評估這些情境的風險狀況。 - 討論使用
gn和ninja、離線cargo等技術時,需要信任哪些工具、程式庫和人員。
請要求學生不要在完成練習前偷看演講者備忘稿。如果學生在彼此身邊,請要求他們分為 3 到 4 人一組一起討論。
與第一部分練習 (「Cargo 可帶來優勢的情境」) 相關的附註/提示:
-
很棒的是,在編寫工具或設計 Chromium 中某部分的原型時,開發人員可以存取 crates.io 程式庫豐富的生態系統。幾乎所有東西都有 Crate,而且使用方法通常很簡便 (用於指令列剖析的
clap、用於將各種格式序列化/反序列化的serde,以及與疊代器搭配使用的itertools等)。- 您可以透過
cargo輕鬆試用程式庫 (在Cargo.toml中新增一行程式碼,然後開始編寫程式碼即可) - 可考慮比較 CPAN 如何讓
perl成為熱門選擇,或是與python+pip比較。
- 您可以透過
-
之所以能實現優異的開發體驗,一來是因為有核心 Rust 工具,例如想測試的 Crate 需在每夜版、目前穩定版和較舊穩定版執行時,可使用
rustup切換至其他rustc版本。二來是因為有第三方工具的生態系統,例如 Mozilla 提供的cargo vet可簡化及分享安全性稽核作業,criterionCrate 則能簡化執行基準測試的方式。- 有了
cargo,您可以輕鬆透過cargo install --locked cargo-vet新增工具。 - 可考慮與 Chrome 擴充功能或 VScode 擴充功能比較。
- 有了
-
以下列出廣泛通用的專案範例,皆可能適合使用
cargo:- 或許令人意外的是,業界越來越廣泛使用 Rust 編寫指令列工具。Rust 程式庫在廣度和人因工程學方面與 Python 不相上下,又因為豐富的型別系統而更強健,就以編譯語言 (而非解譯語言) 來說,執行速度也更快。
- 如要參與 Rust 生態系統,必須使用 Cargo 等標準 Rust 工具。如果程式庫要取得外部貢獻,並用於 Chromium 以外的地方 (例如 Bazel 或 Android/Soong 建構環境),則大概應使用 Cargo。
-
cargo\ 式的 Chromium 相關專案範例:serde_json_lenient(在 Google 的其他部分中經過實驗,產生了一些可提升效能的 PR (Pull Request))font-types等字型程式庫gnrt工具 (課程稍後會介紹),這個工具需使用clap執行指令列剖析,並需使用toml處理設定檔。- 免責事項:使用
cargo的特別理由之一,是因為建構 Rust 工具鏈時,系統無法在建構和啟動 Rust 標準程式庫期間使用gn。 run_gnrt.py使用 Chromium 的cargo和rustc副本。gnrt依附於從網際網路下載的第三方程式庫,但run_gnrt.py透過Cargo.lock要求cargo只允許--locked內容。
- 免責事項:使用
學生可能會認為下列項目隱含或明確受信任:
rustc(Rust 編譯器) 依序依附於 LLVM 程式庫、Clang 編譯器、rustc原始碼 (從 GitHub 擷取,由 Rust 編譯器團隊審查)、為自舉而下載的二進位檔 Rust 編譯器rustup(可考慮告知學生rustup是 https://github.com/rust-lang/ 組織所開發的一系列項目之一,與rustc相同)cargo、rustfmt等- 各種內部基礎架構 (建構
rustc的機器人、將預建工具鏈發布給 Chromium 工程師的系統等) - Cargo 工具,例如
cargo audit、cargo vet等 - 供應至
//third_party/rust的 Rust 程式庫 (由 security@chromium.org 稽核) - 其他 Rust 程式庫 (有些很小眾,有些相當受歡迎也常用)
Chromium Rust 政策
Chromium 目前不支援第一方 Rust,除非是 Chromium 領域技術主管核准的少數情況。
Chromium 的第三方程式庫政策列載於這個頁面 - 第三方程式庫可在各種情況下使用 Rust,包括這些程式庫是效能或安全方面的最佳選擇時。
只有極少數的 Rust 程式庫會直接公開 C/C++ API,這表示幾乎所有這類程式庫都需要少量的第一方黏合程式碼。
特定第三方 Crate 的第一方 Rust 黏合程式碼通常應儲存在
third_party/rust/<crate>/<version>/wrapper。
因此,今天的課程會著重在以下層面:
- 導入第三方 Rust 程式庫 (「Crates」)
- 編寫黏合程式碼,以使用 Chromium C++ 中的 Crate。
如果本政策有所異動,課程內容也會隨之更新。
Build rules
Rust 程式碼通常是以 cargo 建構。為提升建構效率,Chromium 會使用 gn 和 ninja,因為 Chromium 的靜態規則允許最大程度的平行處理。Rust 也不例外。
將 Rust 程式碼新增至 Chromium
在某個現有的 Chromium BUILD.gn 檔案中,宣告 rust_static_library:
import("//build/rust/rust_static_library.gni")
rust_static_library("my_rust_lib") {
crate_root = "lib.rs"
sources = [ "lib.rs" ]
}
您也可以在其他 Rust 目標中新增 deps。稍後我們會使用此程式碼,依附於第三方程式碼。
您必須「同時」指定 Crate 根層級「以及」完整的來源清單。crate_root 是提供給 Rust 編譯器的檔案,代表編譯單元的根檔案 (通常是 lib.rs)。sources 是列出所有來源檔案的完整清單,ninja 判斷何時必須重建時,就需要使用此清單。
(並不存在 Rust 的 source_set 這種東西,因為在 Rust 中,整個 Crate 就是編譯單元。static_library 是最小單元。)
學生可能會想知道為何需要 gn 範本,而不是使用 gn 內建的 Rust 靜態程式庫支援功能。答案是這個範本可支援 CXX 互通性、Rust 功能和單元測試,其中一些項目稍後會用到。
包含 unsafe Rust 程式碼
根據預設,rust_static_library 中禁止使用不安全的 Rust 程式碼,系統也不會編譯這類程式碼。如果需要不安全的 Rust 程式碼,請在 gn 目標中加入 allow_unsafe = true (本課程稍後會說明必須這麼做的情況)。
import("//build/rust/rust_static_library.gni")
rust_static_library("my_rust_lib") {
crate_root = "lib.rs"
sources = [
"lib.rs",
"hippopotamus.rs"
]
allow_unsafe = true
}
在 Chromium C++ 中使用 Rust 程式碼
將上述目標新增至某個 Chromium C++ 目標的 deps 即可。
import("//build/rust/rust_static_library.gni")
rust_static_library("my_rust_lib") {
crate_root = "lib.rs"
sources = [ "lib.rs" ]
}
# 或 source_set, static_library 等等。
component("preexisting_cpp") {
deps = [ ":my_rust_lib" ]
}
Visual Studio Code
Rust 程式碼中省略了型別,因此相較於 C++ 而言,使用優質的 IDE 會更加有效。Visual Studio Code 很適合 Chromium 中的 Rust。使用方法:
- 確認 VSCode 具有
rust-analyzer擴充功能,而非舊版 Rust 支援功能 gn gen out/Debug --export-rust-project(或換成您的輸出目錄)ln -s out/Debug/rust-project.json rust-project.json
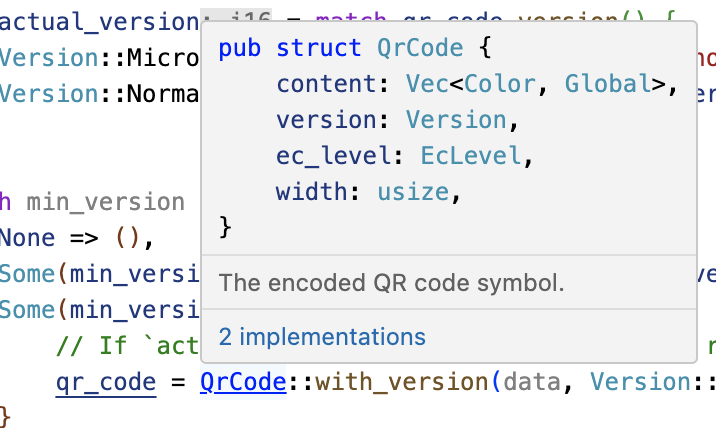
如果大家對 IDE 自然產生懷疑,示範 rust-analyzer 的一些程式碼註解和探索功能或許會有幫助。
下列步驟或許有助於示範 (不過您可以改用自己最熟悉的 Chromium 相關 Rust 程式碼):
- 開啟
components/qr_code_generator/qr_code_generator_ffi_glue.rs - 將游標移到 `qr_code_generator_ffi_glue.rs 中的
QrCode::new呼叫 (約在第 26 行)。 - 示範「顯示說明文件」(一般繫結:vscode = ctrl k i; vim/CoC = K)。
- 示範「前往定義」(一般繫結:vscode = F12; vim/CoC = g d)。(您將前往
//third_party/rust/.../qr_code-.../src/lib.rs)。 - 示範「大綱」,並前往
QrCode::with_bits方法 (約在 164 行;大綱位於 vscode 的檔案總管窗格;一般 vim/CoC 繫結 = 空格 o) - 示範「型別註解」(
QrCode::with_bits方法中引用了幾個不錯的範例)
可考慮指出在編輯 BUILD.gn 檔案之後,需要重新執行 gn gen ... --export-rust-project (我們會在本課程的練習中多次執行此操作)。
Build rules exercise
在您的 Chromium 版本中,將新的 Rust 目標加至 //ui/base/BUILD.gn,其中包含以下內容:
#![allow(unused)]
fn main() {
#[no_mangle]
pub extern "C" fn hello_from_rust() {
println!("Hello from Rust!")
}
}Important: note that no_mangle here is considered a type of unsafety by the Rust compiler, so you’ll need to allow unsafe code in your gn target.
將這個新的 Rust 目標新增為 //ui/base:base 的依附元件。在 ui/base/resource/resource_bundle.cc 頂端宣告此函式 (稍後會說明如何使用繫結產生工具自動執行此操作):
extern "C" void hello_from_rust();
從 ui/base/resource/resource_bundle.cc 的某處呼叫此函式,建議位置是 ResourceBundle::MaybeMangleLocalizedString 的頂端。建構及執行 Chromium,確認系統多次顯示「Hello from Rust!」。
如果使用 VSCode,現在請設定 Rust,讓 Rust 在 VSCode 中順利運作。這在後續練習中會很實用。如果您成功完成,就能在 println! 中以滑鼠右鍵按一下「Go to definition」。
如何找到說明
rust_static_librarygn 範本提供的選項#[no_mangle]相關資訊extern "C"相關資訊- gn 的
--export-rust-projectswitch 相關資訊 - 如何在 VSCode 中安裝 rust-analyzer
此範例會探究做為最小公因數的互通語言 C,因此很特別。C++ 和 Rust 都能以原生方式宣告及呼叫 C ABI 函式。本課程稍後會將 C++ 直接連結至 Rust。
這裡需要 allow_unsafe = true,因為 #[no_mangle] 可能會允許 Rust 產生兩個名稱相同的函式,Rust 就不再能保證系統會呼叫正確的函式。
如果需要純 Rust 執行檔,也可以使用 rust_executable gn 範本執行這項操作。
測試
Rust 社群撰寫單元測試的模組,通常會位在與所測試程式碼相同的來源檔案中。這種做法已在先前課程中介紹,如下所示:
#![allow(unused)]
fn main() {
#[cfg(test)]
mod tests {
#[test]
fn my_test() {
todo!()
}
}
}在 Chromium 中,我們將單元測試放在獨立的來源檔案中,而對 Rust 也繼續採取這項做法,這樣不僅能較一致地找到測試,也有助於避免在 test 設定中再次重新建構 .rs 檔案。
因此 Chromium 中有以下 Rust 程式碼測試選項:
- 原生 Rust 測試 (即
#[test])。不建議在//third_party/rust之外使用。 - 在 C++ 中編寫的
gtest測試,並透過 FFI 呼叫並執行 Rust。如果 Rust 程式碼只是精簡的 FFI 層,這麼做就夠充分,而現有的單元測試可為這項功能提供足夠的涵蓋率。 - 在 Rust 中編寫的
gtest測試,並透過公用 API 使用受測試的 Crate (視需要使用pub mod for_testing { ... })。這是接下來幾張投影片的主題。
請提及第三方 Crate 的原生 Rust 測試最終應由 Chromium 機器人執行 (這類測試極少需要執行,只有在新增或更新第三方 Crate 後才需要)。
以下範例或許有助說明 C++ gtest 和 Rust gtest 各自的使用時機:
-
QR 在第一方 Rust 層中的功用很少 (只是精簡的 FFI 黏合工具),因此會使用現有的 C++ 單元測試,測試 C++ 和 Rust 的實作項目 (將測試參數化,方便以
ScopedFeatureList啟用或停用 Rust)。 -
假設性/WIP PNG 整合可能需實作記憶體安全地像素轉換,這類像素轉換是由
libpng提供,但pngCrate 中缺少 (例如 RGBA => BGRA 或伽馬校正)。這類功能可能受益於在 Rust 中編寫的獨立測試。
rust_gtest_interop 程式庫
rust_gtest_interop 程式庫提供以下功能:
- 使用 Rust 函式做為
gtest測試案例 (使用#[gtest(...)]屬性) - 使用
expect_eq!和類似的巨集 (類似於assert_eq!,但不會導致恐慌,斷言失敗時也不會終止測試)。
Example:
use rust_gtest_interop::prelude::*;
#[gtest(MyRustTestSuite, MyAdditionTest)]
fn test_addition() {
expect_eq!(2 + 2, 4);
}Rust 測試適用的 GN 規則
如要建構 Rust gtest 測試,最簡單的方法就是將這些測試新增至已包含 C++ 測試的現有測試二進位檔,例如:
test("ui_base_unittests") {
...
sources += [ "my_rust_lib_unittest.rs" ]
deps += [ ":my_rust_lib" ]
}
也可以在單獨的 static_library 中編寫 Rust 測試,但必須手動宣告支援程式庫的依附元件:
rust_static_library("my_rust_lib_unittests") {
testonly = true
is_gtest_unittests = true
crate_root = "my_rust_lib_unittest.rs"
sources = [ "my_rust_lib_unittest.rs" ]
deps = [
":my_rust_lib",
"//testing/rust_gtest_interop",
]
}
test("ui_base_unittests") {
...
deps += [ ":my_rust_lib_unittests" ]
}
chromium::import! 巨集
將 :my_rust_lib 新增至 GN deps 之後,我們仍需瞭解如何從 my_rust_lib_unittest.rs 匯入及使用 my_rust_lib。我們尚未為 my_rust_lib 提供明確的 crate_name,因此系統會依據完整目標路徑和名稱來運算出 Crate 名稱。幸好,我們可從自動匯入的 chromium Crate 中使用 chromium::import! 巨集,避免採用這類不方便的名稱:
chromium::import! {
"//ui/base:my_rust_lib";
}
use my_rust_lib::my_function_under_test;在掩蓋之下,巨集會展開為類似如下的內容:
extern crate ui_sbase_cmy_urust_ulib as my_rust_lib;
use my_rust_lib::my_function_under_test;詳情請參閱 chromium::import 巨集的文件註解。
rust_static_library 支援透過 crate_name 屬性指定明確名稱,但不建議這麼做。不建議的原因是 Crate 名稱在全域範圍內不得重複。crates.io 可保證其 Crate 名稱不重複,因此 cargo_crate GN 目標會使用簡短的 Crate 名稱。此目標是由後續章節介紹的 gnrt 工具所產生。
測試練習
又到了練習時間!
在您的 Chromium 版本中:
- 在
hello_from_rust旁邊新增可測試的函式。建議措施:新增兩個以引數形式接收的整數、計算第 n 個費波那契數、加總切片中的整數等。 - 新增獨立的
..._unittest.rs檔案,內含新函式的測試。 - 將新測試新增至
BUILD.gn。 - 建構並執行測試,確認新測試能正常運作。
互通性
Rust 社群提供多個 C++/Rust 互通性選項,並且會持續開發新工具。目前 Chromium 使用的工具稱為 CXX。
您可以透過介面定義語言 (很類似 Rust) 描述整個語言邊界,然後 CXX 工具會為 Rust 和 C++ 中的函式和型別產生宣告。
如需完整的使用範例,請參閱 CXX 教學課程。
請完整講解圖表,說明背後的原理和先前的操作相同。請指出將程序自動化有以下優點:
- 這項工具會保證 C++ 和 Rust 端相符。舉例來說,當
#[cxx::bridge]與實際的 C++ 或 Rust 定義不相符,就會發生「編譯錯誤」,但如有未同步的手動繫結,則會發生「未定義的行為」 - 這項工具會自動為非 C 功能產生 FFI 替換程式 (與 C-ABI 相容的小型、可自由使用的函式),例如讓 FFI 呼叫 Rust 或 C++ 方法;手動繫結會需要手動編寫這類頂層的、可自由使用的函式
- 這項工具和程式庫可處理一組核心型別,例如:
&[T]傳遞時可以跨越 FFI 邊界,但無法保證任何特定 ABI 或記憶體布局。使用手動繫結時,std::span<T>/&[T]必須從一個指標和長度去手動解構並重新建構。這麼做很容易出錯,因為每種語言各以略微不同的方式表示空切片std::unique_ptr<T>、std::shared_ptr<T>和/或Box等智慧指標均可原生支援。使用手動繫結時,必須傳遞與 C-ABI 相容的原始指標,這可能會增加生命週期和記憶體安全風險。rust::String和CxxString型別可理解並維持各語言字串表示法的差異,例如rust::String::lossy可透過非 UTF8 輸入內容建構 Rust 字串,而rust::String::c_str可以空終止字串。
範例
CXX 要求在 .rs 原始碼的 cxx::bridge 模組中宣告整個 C++/Rust 邊界。
#[cxx::bridge]
mod ffi {
extern "Rust" {
type MultiBuf;
fn next_chunk(buf: &mut MultiBuf) -> &[u8];
}
unsafe extern "C++" {
include!("example/include/blobstore.h");
type BlobstoreClient;
fn new_blobstore_client() -> UniquePtr<BlobstoreClient>;
fn put(self: &BlobstoreClient, buf: &mut MultiBuf) -> Result<u64>;
}
}
// 這裡放 Rust 型別和函式的定義請說明以下事項:
- 雖然這看起來像一般的 Rust
mod,但#[cxx::bridge]程序巨集會對其執行複雜作業。產生的程式碼較為複雜,但仍會導致程式碼中出現名為ffi的mod。 - Rust 中對 C++
std::unique_ptr的原生支援 - C++ 中對 Rust 切片的原生支援
- 從 C++ 到 Rust 的呼叫,以及 Rust 型別 (頂部)
- 從 Rust 到 C++ 的呼叫,以及 C++ 型別 (底部)
常見誤解:它「看似」是由 Rust 剖析的 C++ 標頭,但這會造成誤導。這種標頭一律不會由 Rust 解譯,只是為了 C++ 編譯器的好處,而在產生的 C++ 程式碼中設為 #include。
CXX 的限制
CXX 的限制
使用 CXX 時,最實用的頁面是型別參照。
CXX 基本上適用下列情況:
- 您的 Rust-C++ 介面非常簡單,您可以宣告其中所有項目。
- 您只使用 CXX 已原生支援的型別,例如
std::unique_ptr、std::string、&[u8]等。
它有許多限制,例如不支援 Rust 的 Option 型別。
這些限制會導致我們只能在 Chromium 中將 Rust 用於妥善隔離的「葉節點」,而非用於任意 Rust-C++ 互通情形。考慮 Chromium 中 Rust 的用途時,建議先草擬語言邊界的 CXX 繫結,瞭解是否足夠簡單。
您也應討論一些 CXX 的其他棘手問題,例如:
- 其錯誤處理方式是以 C++ 例外狀況為根據 (請見下一張投影片)
- 函式指標不容易使用。
錯誤處理
CXX 的 Result<T,E> 支援功能依賴 C++ 例外狀況,因此無法用於 Chromium。替代方案:
-
Result<T, E>的T部分可以是以下情形之一:- 可透過傳出參數傳回,例如透過
&mut T。也就是說,T必須能跨越 FFI 界線傳遞,例如T必須符合下列條件:- 是基本型別 (例如
u32或usize) - 是
cxx原生支援的型別 (就像UniquePtr<T>),具有可在失敗情況下使用的適當預設值 (「不像」Box<T>)。
- 是基本型別 (例如
- 在 Rust 端保留,並透過參照公開。當
T是 Rust 型別,無法跨越 FFI 邊界傳遞,且無法儲存在UniquePtr<T>時,這就可能有必要。
- 可透過傳出參數傳回,例如透過
-
Result<T, E>的E部分可以是以下情形之一:- 傳回為布林值 (例如
true代表成功,false代表失敗) - 理論上可保留錯誤詳細資料,但目前在實際情況中並不需要。
- 傳回為布林值 (例如
CXX 錯誤處理:QR Code 範例
在 QR code 產生器這個範例中,布林值是用來表示成功與失敗,且成功結果可跨越 FFI 邊界傳遞:
#[cxx::bridge(namespace = "qr_code_generator")]
mod ffi {
extern "Rust" {
fn generate_qr_code_using_rust(
data: &[u8],
min_version: i16,
out_pixels: Pin<&mut CxxVector<u8>>,
out_qr_size: &mut usize,
) -> bool;
}
}學生可能會想瞭解 out_qr_size 輸出內容的語意。這不是向量大小,而是 QR code 的大小 (誠然有點多餘,因為這是向量大小的平方根)。
可考慮說明先初始化 out_qr_size 再呼叫 Rust 函式的重要性。建立指向未初始化記憶體的 Rust 參照時,會導致「未定義的行為」(不同的是,在 C++ 中只有解除參照這類記憶體時才會導致「未定義的行為」)。
如有學生詢問 Pin,請說明為何 CXX 需要這個項目來處理 C++ 資料的可變動參照:答案是因為 C++ 資料可能包含自我參照指標,無法像 Rust 資料一樣移動。
CXX 錯誤處理:PNG 範例
PNG 解碼器的原型可說明當成功的結果無法跨越 FFI 邊界時,可以執行哪些操作:
#[cxx::bridge(namespace = "gfx::rust_bindings")]
mod ffi {
extern "Rust" {
/// 這回傳一個 FFI 友好的型別,等同於 `Result<PngReader<'a>, ()>`.
fn new_png_reader<'a>(input: &'a [u8]) -> Box<ResultOfPngReader<'a>>;
/// `crate::png::ResultOfPngReader` 型別的 C++ 繫結:
type ResultOfPngReader<'a>;
fn is_err(self: &ResultOfPngReader) -> bool;
fn unwrap_as_mut<'a, 'b>(
self: &'b mut ResultOfPngReader<'a>,
) -> &'b mut PngReader<'a>;
/// `crate::png::PngReader` 型別的 C++ 繫結:
type PngReader<'a>;
fn height(self: &PngReader) -> u32;
fn width(self: &PngReader) -> u32;
fn read_rgba8(self: &mut PngReader, output: &mut [u8]) -> bool;
}
}PngReader 和 ResultOfPngReader 是 Rust 型別,這些型別的物件必須採用 Box<T> 的間接機制,才能跨越 FFI 邊界。我們無法使用 out_parameter: &mut PngReader,因為 CXX 不允許 C++ 依據值儲存 Rust 物件。
本範例說明即使 CXX 不支援任意泛型和範本,我們還是可以手動將這些範本特化/單型化為非泛型型別,傳遞到 FFI 邊界。在範例中,ResultOfPngReader 屬於非泛型型別,會轉送至適當的 Result<T, E> 方法,例如 is_err、unwrap 和/或 as_mut。
在 Chromium 中使用 CXX
在 Chromium 中使用 CXX
在 Chromium 中,我們會為每個要使用 Rust 的葉節點定義獨立的 #[cxx::bridge] mod。每個 rust_static_library 通常都需要一個值。只要將下列項目
cxx_bindings = [ "my_rust_file.rs" ]
# 含有 #[cxx::bridge] 的檔案列表,而非所有原始碼檔案
allow_unsafe = true
新增至現有的 rust_static_library 目標,並搭配 crate_root 和 sources。
C++ 標頭會在合理位置產生,因此您只需採用下列程式碼:
#include "ui/base/my_rust_file.rs.h"
您會在 //base 中發現一些公用函式,可將 Chromium C++ 型別轉換成 CXX Rust 型別,逆向轉換也可以,例如 SpanToRustSlice。
學生可能會問:為何仍需要 allow_unsafe = true?
籠統的答案是根據一般 Rust 標準,任何 C/C++ 程式碼都不「安全」。從 Rust 來回呼叫 C/C++ 可能會對記憶體執行任何作業,進而破壞 Rust 本身資料布局的安全性。在 C/C++ 互通性中如果出現「過多」unsafe 關鍵字,可能會傷害這類關鍵字的訊噪比,且具有爭議性,但嚴格來說,在 Rust 二進位檔中導入任何外來程式碼,都可能對 Rust 造成非預期行為。
詳細答案位於這個頁面頂端的圖表中:CXX 會在幕後產生 Rust unsafe 和 extern "C" 函式,如同前一節中的手動操作。
練習:與 C++ 的互通性
第一部分
- 在您先前建立的 Rust 檔案中新增
#[cxx::bridge],指定要從 C++ 呼叫的單一函式 (名為hello_from_rust),但不採用任何參數,也不會傳回值。 - 修改先前的
hello_from_rust函式,移除extern "C"和#[no_mangle]。現在這樣就只是標準的 Rust 函式。 - 修改
gn目標,建構這些繫結。 - 在 C++ 程式碼中,移除
hello_from_rust的前向宣告,改為納入產生的標頭檔案。 - 建構並執行!
第二部分
您可以試著玩玩 CXX,這有助於瞭解 Chromium 中的 Rust 有多靈活。
可嘗試的事項:
- 從 Rust 呼叫 C++。您會需要以下項目:
- 額外的標頭檔案,可從
cxx::bridge中include!。您會需要在新標頭檔案中宣告 C++ 函式。 - 用於呼叫這類函式的
unsafe區塊,或者可在#[cxx::bridge]中指定unsafe關鍵字,如這個頁面所述。 - 您可能也需要
#include "third_party/rust/cxx/v1/crate/include/cxx.h"
- 額外的標頭檔案,可從
- 將 C++ 字串從 C++ 傳遞至 Rust。
- 將 C++ 物件的參照傳遞至 Rust。
- 刻意從
#[cxx::bridge]中,取得不相符的 Rust 函式簽章,並熟悉看到的錯誤。 - 刻意從
#[cxx::bridge]中取得不相符的 C++ 函式簽章,並熟悉看到的錯誤。 - 將某些型別的
std::unique_ptr從 C++ 傳遞至 Rust,這樣 Rust 就能擁有某些 C++ 物件。 - 建立 Rust 物件並傳遞至 C++ 中,讓 C++ 擁有該物件 (提示:您需要
Box)。 - 在 C++ 型別上宣告一些方法,然後從 Rust 呼叫。
- 在 Rust 型別上宣告一些方法,然後從 C++ 呼叫。
第三部分
現在您已瞭解 CXX 互通性的優勢和限制,不妨思考一些 Chromium 中介面相當簡單的 Rust 用途。草擬定義該介面的方式。
如何找到說明
您可能會遇到以下問題:
- 當 X 和 Y 都是函式型別,初始化型別 X 的變數和型別 Y 時會發生問題。這是因為 C++ 函式與
cxx::bridge中的宣告不太相符。 - 我似乎可將 C++ 參照任意轉換為 Rust 參照。這樣不就可能造成 UB 嗎?若是 CXX 的「opaque」型別就不會,因為這種型別的大小為零。CXX 中的 trivial 型別則「有可能」造成 UB,雖然 CXX 的設計讓撰寫這類範例相當困難。
新增第三方 Crate
Rust 程式庫稱為「Crate」,位於 crates.io。Rust Crate「非常容易」互相依附,所以它們也確實常常這麼做!
| 資源 | C++ 函式庫 | Rust crate |
|---|---|---|
| 建構系統 | 非常多 | 一致:Cargo.toml |
| 一般程式庫大小 | 偏大 | 小 |
| 遞移依附元件 | 很少 | 非常多 |
對 Chromium 工程師來說,這有以下優缺點:
- 所有 Crate 都使用通用的建構系統,因此我們可以自動將其納入 Chromium…
- …但 Crate 通常具有遞移依附元件,因此可能需要導入多個程式庫。
我們將探討以下內容:
- 如何在 Chromium 原始碼樹中加入 Crate
- 如何為其建立
gn建構規則 - 如何稽核原始碼,確保足夠安全
設定 Cargo.toml 檔案以新增 Crate
Chromium 有一組集中管理的直接 Crate 依附元件。這些元件可透過單一 Cargo.toml 管理:
[dependencies]
bitflags = "1"
cfg-if = "1"
cxx = "1"
# 還有更多...
與任何其他 Cargo.toml 一樣,您可以指定依附元件的更多詳細資料。以最常見的情況來說,您會想在 Crate 中指定要啟用的 features。
將 Crate 新增至 Chromium 時,您通常需要在 gnrt_config.toml 這個額外檔案中提供額外資訊,這接下來會介紹。
設定 gnrt_config.toml
除了 Cargo.toml,還有 gnrt_config.toml。這包含用來處理 Crate 的 Chromium 專屬擴充功能。
新增 Crate 時,應至少指定 group,可以是以下其中一個:
# 'safe': The library satisfies the rule-of-2 and can be used in any process.
# 'sandbox': The library does not satisfy the rule-of-2 and must be used in
# a sandboxed process such as the renderer or a utility process.
# 'test': The library is only used in tests.
舉例來說:
[crate.my-new-crate]
group = 'test' # only used in test code
視 Crate 原始碼布局而定,您可能也需要使用這個檔案指定其 `LICENSE 檔案的位置。
稍後我們會看到一些其他您需在這個檔案中設定的項目,才能解決問題。
下載 Crate
gnrt 這項工具瞭解如何下載 Crate,以及如何產生 BUILD.gn 規則。
首先,請按照以下方式下載任何你想要的 Crate:
cd chromium/src
vpython3 tools/crates/run_gnrt.py -- vendor
雖然
gnrt工具屬於 Chromium 原始碼的一部分,但透過執行這項指令,您可以從crates.io下載並執行其依附元件。請參閱前面的章節中有關這項安全性決策的討論。
這項 vendor 指令可能會下載以下項目:
- 您的 Crate
- 直接依附元件和遞移依附元件
- 其他 Crate 的新版本。這是
cargo的要求,以便解析 Chromium 所需的完整 Crate 組合。
Chromium 會維護部分 Crate 的修補程式,保留在 //third_party/rust/chromium_crates_io/patches 中。系統會自動重新套用這些設定,但如果修補失敗,就可能需要手動操作。
產生 gn 建構規則
下載 Crate 後,請如下產生 BUILD.gn 檔案:
vpython3 tools/crates/run_gnrt.py -- gen
現在請執行 git status,您應會看到以下情形:
- 在
third_party/rust/chromium_crates_io/vendor中,至少有一個新的 Crate 原始碼 - 在
third_party/rust/<crate name>/v<major semver version>中,至少有一個新的BUILD.gn - 適當的
README.chromium
「major semver version」是 Rust「Semver」版本號碼.
請仔細查看,尤其是 third_party/rust 中產生的內容。
請稍微介紹一下 Semver,並具體說明在 Chromium 中,Semver 可允許多種不相容的 Crate 版本。這不是建議做法,但在 Cargo 生態系統中有時是必要的。
解決問題
如果建構失敗,可能是因為 build.rs,這類程式會在建構期間執行任意操作。根本而言,這不符合 gn 和 ninja 的設計,後者的目標是達成靜態的確定性建構規則,盡可能提高建構作業的平行處理程度和重複性。
有些 build.rs 動作可自動支援,有些則需要進一步操作:
| 建構指令碼效果 | gn 範本是否支援 | 您需要做的 |
|---|---|---|
| 檢查 rustc 版本,將功能設為開啟/關閉 | 是 | 無 |
| 檢查平台或 CPU,將功能設為開啟/關閉 | 是 | 無 |
| 產生程式碼 | 是 | 是 - 在 gnrt_config.toml 中指定 |
| 建構 C/C++ | 否 | 撰寫修補程式 |
| 任意其他動作 | 否 | 撰寫修補程式 |
幸運的是,大部分 Crate 均不包含建構指令碼,而大部分建構指令碼只會執行前兩項動作。
建構用於產生程式碼的指令碼
如果 ninja 抱怨缺少檔案,請查看 build.rs,確認是否寫入原始碼檔案。
如果是,請修改 gnrt_config.toml,將 build-script-outputs 新增至 Crate。若是遞移依附元件,也就是 Chromium 程式碼 不應直接依附的依附元件,請一併加上 allow-first-party-usage=false。該檔案中已有幾個範例:
[crate.unicode-linebreak]
allow-first-party-usage = false
build-script-outputs = ["tables.rs"]
現在請重新執行 gnrt.py -- gen,重新產生 BUILD.gn 檔案以通知 ninja 這個輸出檔案會輸入至後續建構步驟。
建構用於建立 C++ 或執行任意動作的指令碼
部分 Crate 使用 cc Crate 建構和連結 C/C++ 程式庫。其他 Crate 在建構指令碼中使用 bindgen 剖析 C/C++。Chromium 環境無法支援這些動作,因為我們的 gn、ninja 和 LLVM 建構系統特別要求明確表達建構動作之間的關係。
因此,您有以下選擇:
- 避開這類 Crate
- 將修補程式套用至 Crate。
修補程式應保留在 third_party/rust/chromium_crates_io/patches/<crate> 中,範例請見 [cxx Crate 的修補程式](https://source.chromium.org/chromium/chromium/src/+/main:third_party/rust/chromium_crates_io/patches/cxx。此外,在每次升級 Crate 時,修補補程式會由 gnrt 自動套用。
使用 Crate
新增第三方 Crate 並產生建構規則後,依附 Crate 就很簡單。請找出 rust_static_library 目標,然後在 Crate 的 :lib 目標中新增 dep。
Specifically,
舉例來說:
rust_static_library("my_rust_lib") {
crate_root = "lib.rs"
sources = [ "lib.rs" ]
deps = [ "//third_party/rust/example_rust_crate/v1:lib" ]
}
稽核第三方 Crate
新增程式庫時必須遵守 Chromium 的標準政策,不過當然也須接受安全性審查。您可能不只引入一個 Crate,還會傳入遞移依附元件,因此可能有許多程式碼需要審查。另一方面,安全的 Rust 程式碼不會產生多少負面副作用。應如何審查呢?
隨著時間推移,Chromium 的目標是移至以 cargo vet 為基礎的程序。
同時,我們會針對每個新增的 Crate 檢查以下項目:
- 瞭解使用各個 Crate 的原因。Crate 之間的關係為何?如果每個 Crate 的建構系統都包含
build.rs或程序巨集,請思考 Crate 的用途。這些 Crate 是否與 Chromium 平常的建構方式相容? - 檢查每個 Crate 的維護情況是否合理良好
- 使用
cd third-party/rust/chromium_crates_io; cargo audit檢查是否有已知的安全漏洞 (您首先需要執行cargo install cargo-audit,諷刺的是,這麼做需要從網際網路下載大量依附元件2) - 確保所有
unsafe程式碼都妥善符合兩個項目的規則 - 檢查是否使用
fs或netAPI - 請在足夠的層級閱讀所有程式碼,檢查是否出現任何可能是惡意插入的錯誤內容 (實務上很難達到 100% 完美的成果,畢竟通常會有太多程式碼。)
上述內容只是指南,請與 security@chromium.org 的審查人員合作,瞭解如何正確地確保 Crate 是可信的。
將 Crate 登錄為 Chromium 原始碼
git status 應會顯示以下內容:
//third_party/rust/chromium_crates_io中的 Crate 程式碼//third_party/rust/<crate>/<version>中的中繼資料 (BUILD.gn和README.chromium)
請一併在後者的位置中新增 OWNERS 檔案。
請務必在 Chromium 存放區中放入所有這些項目,以及 Cargo.toml 和 gnrt_config.toml 變更內容。
重要事項:請務必使用 git add -f,否則 .gitignore 檔案可能會導致某些檔案遭到略過。
這時,預先提交的檢查作業可能會因使用非包容性的語言而失敗。這是因為 Rust Crate 資料通常會包含 Git 分支版本的名稱,而許多專案仍使用非包容性的術語。因此,您可能需要執行以下項目:
infra/update_inclusive_language_presubmit_exempt_dirs.sh > infra/inclusive_language_presubmit_exempt_dirs.txt
git add -p infra/inclusive_language_presubmit_exempt_dirs.txt # add whatever changes are yours
保持 Crate 為最新版本
身為第三方 Chromium 依附元件的擁有者,您應確保該元件已採用任何最新的安全性修正項目。我們希望很快就能針對 Rust Crate 將這項作業自動化,但您目前仍須負責處理此事,如同使用其他第三方依附元件時一樣。
練習
在 Chromium 中新增 uwuify,關閉 Crate 的預設功能。假設提交 Chromium 時會使用這個 Crate,但不會用於處理不可靠的輸入資料。
(在下一項練習中,我們將使用 Chromium 的 uwuify,但您現在就可以跳過這部分,直接開始練習。或者,您可以建立使用 uwuify 的新 rust_executable 目標。)
學生需下載許多遞移依附元件。
以下為所有需要的 Crate:
instant,lock_api,parking_lot,parking_lot_core,redox_syscall,scopeguard,smallvec,以及uwuify。
如果學生下載的項目不只這些,可能是因為忘了關閉預設功能。
感謝 Daniel Liu 提供這個 Crate!
融會貫通 - 練習
在本練習中,您會加入全新的 Chromium 功能,一併應用目前學到的所有內容。
產品管理提要
我們在偏遠的雨林中發現一群精靈,務必盡快將精靈專用 Chromium 提供給他們。
目前要求是將所有 Chromium 的 UI 字串翻譯成精靈語。
現在沒時間取得適當的翻譯,但幸好精靈語非常接近英文,也找到能負責翻譯的 Rust Crate。
其實,您已經在先前的練習中匯入這個 Crate。
(想當然耳,實際翻譯 Chrome 時必須非常審慎認真。千萬別發布這些內容!)
步驟
修改 ResourceBundle::MaybeMangleLocalizedString,讓所有字串在顯示前 uwu 化。在這個特殊版本的 Chromium 中,無論 mangle_localized_strings_ 的設定為何,一律應執行這項轉換。
如果您順利完成所有練習,那麼恭喜您成功為精靈打造了 Chrome!

- UTF16 與 UTF8:學生應瞭解 Rust 字串一律為 UTF8,且可能判斷出較適合在 C++ 端使用
base::UTF16ToUTF8完成轉換再返回。 - 如果學生決定在 Rust 端完成轉換,就需考慮
String::from_utf16、錯誤處理方式,以及哪些 CXX 支援的型別可傳輸大量 u16。 - 學生可透過多種不同的方式設計 C++/Rust 界線,例如依值擷取及傳回字串,或是對字串採用可變動參照。如果使用可變動參照,CXX 可能會告知學生需使用
Pin。您可能需要說明Pin的功用,並解釋為何 CXX 需要它來處理 C++ 資料的可變動參照:答案是 C++ 資料無法像 Rust 資料一樣移動,因為該資料可能包含自我參照指標。 - 包含
ResourceBundle::MaybeMangleLocalizedString的 C++ 目標需依附於rust_static_library目標。學生可能已經這麼做。 rust_static_library目標需依附於//third_party/rust/uwuify/v0_2:lib。
練習題的參考答案
如需 Chromium 練習的解決方案,請參閱這個 CL 系列。
歡迎瞭解 Rust 裸機開發
這個為期一天的獨立課程會介紹 Rust 裸機開發,適合熟悉 Rust 基本概念的開發人員 (或許是完成 Comprehensive Rust 課程的學生),且最好具備一些 C 等其他語言的裸機程式設計經驗。
今天我們要介紹 Rust「裸機開發」:在執行 Rust 程式碼時不使用作業系統。這會分為以下幾個部分:
- 什麼是
no_stdRust? - 編寫微控制器的韌體。
- 編寫應用程式處理器的系統啟動載入程式/核心程式碼。
- 一些適用於 Rust 裸機開發的實用 Crate。
在本課程的微控制器部分,我們將使用 BBC micro:bit 第 2 版當做範例。這是以 Nordic nRF51822 微控制器為基礎的開發板,具備一些 LED 和按鈕、連接 I2C 的加速計和羅盤,以及內建的 SWD 偵錯工具。
如要開始使用,請先安裝稍後需使用的工具。使用 gLinux 或 Debian:
sudo apt install gcc-aarch64-linux-gnu gdb-multiarch libudev-dev picocom pkg-config qemu-system-arm
rustup update
rustup target add aarch64-unknown-none thumbv7em-none-eabihf
rustup component add llvm-tools-preview
cargo install cargo-binutils cargo-embed
為 plugdev 群組中的使用者授予 micro:bit 程式工具的存取權:
echo 'SUBSYSTEM=="usb", ATTR{idVendor}=="0d28", MODE="0664", GROUP="plugdev"' |\
sudo tee /etc/udev/rules.d/50-microbit.rules
sudo udevadm control --reload-rules
使用 MacOS:
xcode-select --install
brew install gdb picocom qemu
brew install --cask gcc-aarch64-embedded
rustup update
rustup target add aarch64-unknown-none thumbv7em-none-eabihf
rustup component add llvm-tools-preview
cargo install cargo-binutils cargo-embed
no_std
|
|
|
|
|---|---|---|
|
|
|
HashMap依附於 RNG。std會重新匯出core和alloc的內容。
最簡單的 no_std 程式
#![no_main]
#![no_std]
use core::panic::PanicInfo;
#[panic_handler]
fn panic(_panic: &PanicInfo) -> ! {
loop {}
}- 這會編譯為空白的二進位檔。
std提供恐慌處理常式。如果沒有,我們就須自行提供。- 也可以由其他 Crate 提供,例如
panic-halt。 - 視目標而定,編譯時可能需要使用
panic = "abort",以免發生eh_personality相關錯誤。 - 請注意,並沒有
main或任何其他進入點。您可以自行定義進入點。這通常涉及連結器指令碼和一些組語程式碼,以便準備好執行 Rust 程式碼。
alloc
如要使用 alloc,您必須實作全域 (堆積) 分配器。
#![no_main]
#![no_std]
extern crate alloc;
extern crate panic_halt as _;
use alloc::string::ToString;
use alloc::vec::Vec;
use buddy_system_allocator::LockedHeap;
#[global_allocator]
static HEAP_ALLOCATOR: LockedHeap<32> = LockedHeap::<32>::new();
static mut HEAP: [u8; 65536] = [0; 65536];
pub fn entry() {
// Safe because `HEAP` is only used here and `entry` is only called once.
unsafe {
// Give the allocator some memory to allocate.
HEAP_ALLOCATOR.lock().init(HEAP.as_mut_ptr() as usize, HEAP.len());
}
// Now we can do things that require heap allocation.
let mut v = Vec::new();
v.push("A string".to_string());
}buddy_system_allocator是實作基本夥伴系統分配器的第三方 Crate。也可以使用其他 Crate,或是自行撰寫或連結至現有分配器。LockedHeap的 const 參數是分配器最高的階,意即在本例中,它最多可分配 2**32 個位元組的區域。- 如果依附元件樹狀結構中有任何 Crate 依附於
alloc,您就必須在二進位檔中只定義一個全域分配器。通常是在頂層二進位檔 Crate 中定義。 - 務必使用
extern crate panic_halt as _,確保panic_haltCrate 已連結,讓我們能取得其恐慌處理常式。 - 這個範例將建構但不執行,因為沒有進入點。
微控制器
cortex_m_rt Crate 提供 Cortex M 微控制器的重設處理常式 (和其他項目)。
#![no_main]
#![no_std]
extern crate panic_halt as _;
mod interrupts;
use cortex_m_rt::entry;
#[entry]
fn main() -> ! {
loop {}
}接下來,我們要探討如何存取周邊裝置,會有愈來愈多層的抽象化。
cortex_m_rt::entry巨集規定函式必須具有fn() -> !型別,因為返回重設處理常式並不合理。- 使用
cargo embed --bin minimal執行範例
原始 MMIO
大多數微控制器會透過記憶體對映 IO 存取周邊裝置。請嘗試在 micro:bit 上開啟 LED:
#![no_main]
#![no_std]
extern crate panic_halt as _;
mod interrupts;
use core::mem::size_of;
use cortex_m_rt::entry;
/// GPIO port 0 peripheral address
const GPIO_P0: usize = 0x5000_0000;
// GPIO peripheral offsets
const PIN_CNF: usize = 0x700;
const OUTSET: usize = 0x508;
const OUTCLR: usize = 0x50c;
// PIN_CNF fields
const DIR_OUTPUT: u32 = 0x1;
const INPUT_DISCONNECT: u32 = 0x1 << 1;
const PULL_DISABLED: u32 = 0x0 << 2;
const DRIVE_S0S1: u32 = 0x0 << 8;
const SENSE_DISABLED: u32 = 0x0 << 16;
#[entry]
fn main() -> ! {
// Configure GPIO 0 pins 21 and 28 as push-pull outputs.
let pin_cnf_21 = (GPIO_P0 + PIN_CNF + 21 * size_of::<u32>()) as *mut u32;
let pin_cnf_28 = (GPIO_P0 + PIN_CNF + 28 * size_of::<u32>()) as *mut u32;
// Safe because the pointers are to valid peripheral control registers, and
// no aliases exist.
unsafe {
pin_cnf_21.write_volatile(
DIR_OUTPUT
| INPUT_DISCONNECT
| PULL_DISABLED
| DRIVE_S0S1
| SENSE_DISABLED,
);
pin_cnf_28.write_volatile(
DIR_OUTPUT
| INPUT_DISCONNECT
| PULL_DISABLED
| DRIVE_S0S1
| SENSE_DISABLED,
);
}
// Set pin 28 low and pin 21 high to turn the LED on.
let gpio0_outset = (GPIO_P0 + OUTSET) as *mut u32;
let gpio0_outclr = (GPIO_P0 + OUTCLR) as *mut u32;
// Safe because the pointers are to valid peripheral control registers, and
// no aliases exist.
unsafe {
gpio0_outclr.write_volatile(1 << 28);
gpio0_outset.write_volatile(1 << 21);
}
loop {}
}- GPIO 0 接腳 21 連接至 LED 矩陣的第一欄,接腳 28 則連接至第一列。
使用下列指令執行範例:
cargo embed --bin mmio
周邊裝置存取 Crate
svd2rust 會針對 CMSIS-SVD 檔案中記憶體對映周邊裝置,產生大多是安全的 Rust 包裝函式。
#![no_main]
#![no_std]
extern crate panic_halt as _;
use cortex_m_rt::entry;
use nrf52833_pac::Peripherals;
#[entry]
fn main() -> ! {
let p = Peripherals::take().unwrap();
let gpio0 = p.P0;
// Configure GPIO 0 pins 21 and 28 as push-pull outputs.
gpio0.pin_cnf[21].write(|w| {
w.dir().output();
w.input().disconnect();
w.pull().disabled();
w.drive().s0s1();
w.sense().disabled();
w
});
gpio0.pin_cnf[28].write(|w| {
w.dir().output();
w.input().disconnect();
w.pull().disabled();
w.drive().s0s1();
w.sense().disabled();
w
});
// Set pin 28 low and pin 21 high to turn the LED on.
gpio0.outclr.write(|w| w.pin28().clear());
gpio0.outset.write(|w| w.pin21().set());
loop {}
}- SVD (系統視圖說明) 檔案通常是晶片供應商提供的 XML 檔案,描述裝置的記憶體對映。
- 這種檔案的分類依據為周邊裝置、暫存器、欄位和值,具有名稱、說明、位址等資訊。
- SVD 檔案通常有很多錯誤且不完整,因此會使用各種專案修補錯誤、新增缺少的詳細資料,以及發布產生的 Crate。
cortex-m-rt提供向量表等內容。- 如果使用
cargo install cargo-binutils,則可以執行cargo objdump --bin pac -- -d --no-show-raw-insn,查看產生的二進位檔。
使用下列指令執行範例:
cargo embed --bin pac
HAL Crate
許多微控制器的 HAL Crate 能為各種周邊裝置提供包裝函式。這些項目通常會實作 embedded-hal 的特徵。
#![no_main]
#![no_std]
extern crate panic_halt as _;
use cortex_m_rt::entry;
use nrf52833_hal::gpio::{p0, Level};
use nrf52833_hal::pac::Peripherals;
use nrf52833_hal::prelude::*;
#[entry]
fn main() -> ! {
let p = Peripherals::take().unwrap();
// Create HAL wrapper for GPIO port 0.
let gpio0 = p0::Parts::new(p.P0);
// Configure GPIO 0 pins 21 and 28 as push-pull outputs.
let mut col1 = gpio0.p0_28.into_push_pull_output(Level::High);
let mut row1 = gpio0.p0_21.into_push_pull_output(Level::Low);
// Set pin 28 low and pin 21 high to turn the LED on.
col1.set_low().unwrap();
row1.set_high().unwrap();
loop {}
}set_low和set_high是embedded_halOutputPin特徵上的方法。- 許多 Cortex-M 和 RISC-V 裝置都有 HAL Crate,包括各種 STM32、GD32、nRF、NXP、MSP430、AVR 和 PIC 微控制器。
使用下列指令執行範例:
cargo embed --bin hal
開發板支援 Crate
為方便起見,開發板支援 Crate 可針對特定開發板提供進一步包裝。
#![no_main]
#![no_std]
extern crate panic_halt as _;
use cortex_m_rt::entry;
use microbit::hal::prelude::*;
use microbit::Board;
#[entry]
fn main() -> ! {
let mut board = Board::take().unwrap();
board.display_pins.col1.set_low().unwrap();
board.display_pins.row1.set_high().unwrap();
loop {}
}- 在本例中,開發板支援 Crate 只會提供更多實用名稱,以及一些初始化作業。
- 除了微控制器本身,Crate 或許也包含部分內建裝置的驅動程式。
microbit-v2包含 LED 矩陣的簡易驅動程式。
使用下列指令執行範例:
cargo embed --bin board_support
型別狀態模式
#[entry]
fn main() -> ! {
let p = Peripherals::take().unwrap();
let gpio0 = p0::Parts::new(p.P0);
let pin: P0_01<Disconnected> = gpio0.p0_01;
// let gpio0_01_again = gpio0.p0_01; // Error, moved.
let pin_input: P0_01<Input<Floating>> = pin.into_floating_input();
if pin_input.is_high().unwrap() {
// ...
}
let mut pin_output: P0_01<Output<OpenDrain>> = pin_input
.into_open_drain_output(OpenDrainConfig::Disconnect0Standard1, Level::Low);
pin_output.set_high().unwrap();
// pin_input.is_high(); // Error, moved.
let _pin2: P0_02<Output<OpenDrain>> = gpio0
.p0_02
.into_open_drain_output(OpenDrainConfig::Disconnect0Standard1, Level::Low);
let _pin3: P0_03<Output<PushPull>> =
gpio0.p0_03.into_push_pull_output(Level::Low);
loop {}
}- 接腳不會實作
Copy或Clone,因此每個項目只能有一個實例。一旦接腳從連接埠結構中移出,就無法再供使用。 - 變更接腳設定時會耗用舊的接腳例項,因此之後無法繼續使用舊的例項。
- 值的型別會指出其所處狀態,例如本例中 GPIO 接腳的設定狀態。這可將狀態機器編碼至型別系統,確保您不會在未事先適當設定時嘗試使用接腳。在編譯期間,系統會偵測非法的狀態轉換作業。
- 您可以對輸入接腳呼叫
is_high、對輸出接腳呼叫set_high,但不得反過來呼叫。 - 許多 HAL Crate 都遵循這個模式。
embedded-hal
embedded-hal Crate 提供多個特徵,涵蓋常見的微控制器周邊裝置。
- GPIO
- ADC
- I2C、SPI、UART、CAN
- RNG
- 計時器
- 看門狗計時器
其他 Crate 隨後會根據這些特徵實作驅動程式,例如加速計驅動程式可能需要實作 I2C 或 SPI 匯流排。
- 許多微控制器和其他平台 (例如 Raspberry Pi 上的 Linux) 都有相應的實作項目。
embedded-hal的async版本已在開發中,但尚未推出穩定版。
probe-rs and cargo-embed
probe-rs 是適用於嵌入式偵錯的實用工具組,就像 OpenOCD,但整合效果更好。
- 透過 CMSIS-DAP、ST-Link 和 J-Link 探測器執行 SWD (序列線偵錯) 和 JTAG
- GDB 虛設常式和 Microsoft DAP (偵錯轉接程式通訊協定) 伺服器
- Cargo 整合
cargo-embed 是 Cargo 子指令,用於建構和刷新二進位檔、記錄 RTT (即時傳輸)輸出內容,以及連結 GDB。這個指令是由專案目錄中的 Embed.toml 檔案來設定。
- CMSIS-DAP 是針對 USB 的 Arm 標準通訊協定,供電路內偵錯工具存取各種 Arm Cortex 處理器的 CoreSight 偵錯存取埠。這就是 BBC micro:bit 內建偵錯工具所使用的通訊協定。
- ST-Link 是 ST Microelectronics 推出的一系列電路內偵錯工具,J-Link 系列則來自 SEGGER。
- 偵錯存取埠通常是 5 接腳的 JTAG 介面或 2 接腳的序列線偵錯介面。
- 您可以視需要將 probe-rs 程式庫整合至自己的工具。
- Microsoft 偵錯轉接程式通訊協定允許在任何支援的微控制器上執行 VSCode 及其他 IDE 偵錯程式碼。
- cargo-embed 是使用 probe-rs 程式庫建構的二進位檔。
- RTT (即時傳輸) 這種機制是透過多個環形緩衝區,在偵錯主機和目標之間傳輸資料。
偵錯
Embed.toml:
[default.general]
chip = "nrf52833_xxAA"
[debug.gdb]
enabled = true
在 src/bare-metal/microcontrollers/examples/ 底下的一個終端機中:
cargo embed --bin board_support debug
在相同目錄的另一個終端機中:
使用 gLinux 或 Debian:
gdb-multiarch target/thumbv7em-none-eabihf/debug/board_support --eval-command="target remote :1337"
使用 MacOS:
arm-none-eabi-gdb target/thumbv7em-none-eabihf/debug/board_support --eval-command="target remote :1337"
在 GDB 中,嘗試執行下列指令:
b src/bin/board_support.rs:29
b src/bin/board_support.rs:30
b src/bin/board_support.rs:32
c
c
c
其他專案
- RTIC
- 「即時中斷驅動並行」
- 共用資源管理、訊息傳遞、工作排程、計時器佇列
- Embassy
- 具有優先順序、計時器、網路、USB 功能的
async執行器
- 具有優先順序、計時器、網路、USB 功能的
- TockOS
- 注重安全性的 RTOS,提供先占式排程功能,並支援記憶體保護單元
- Hubris
- Oxide Computer Company 的微核心 RTOS,提供記憶體防護、未具有特權的驅動程式、IPC
- FreeRTOS 繫結
- 部分平台提供
std實作項目,例如 esp-idf。
- RTIC 可視為 RTOS 或並行架構。
- 其中不包含任何 HAL。
- 排程時會使用 Cortex-M NVIC (巢狀虛擬中斷控制器),而不是使用適當的核心。
- 僅限 Cortex-M。
- Google 會針對 Titan 安全金鑰,在 Haven 微控制器上使用 TockOS。
- FreeRTOS 大部分以 C 語言編寫,但也有適合編寫應用程式的 Rust 繫結。
練習
我們將讀取 I2C 羅盤中的方向,並將讀數記錄到序列埠。
完成練習後,您可以看看我們提供的解決方案。
指南針
我們將讀取 I2C 羅盤上的方向,並將讀數記錄到序列埠。如有時間,可以試著顯示在 LED 上,或以某種方法使用按鈕。
提示:
- 參閱
lsm303agr和microbit-v2Crate 的說明文件,並瞭解 micro:bit 硬體。 - LSM303AGR 慣性測量單元已連接至內部 I2C 匯流排。
- TWI 是 I2C 的別名,所以 I2C 主周邊裝置的名稱是 TWIM。
- LSM303AGR 驅動程式需要某個實作
embedded_hal::blocking::i2c::WriteRead特徵的項目。microbit::hal::Twim結構體實作此特徵。 - 您有
microbit::Board結構體,其中包含各種接腳和周邊裝置的欄位。 - 您也可以視需要查看 nRF52833 規格書,但在這項練習中並非必要。
請下載練習範本,並在 compass 目錄中查看下列檔案。
src/main.rs:
#![no_main]
#![no_std]
extern crate panic_halt as _;
use core::fmt::Write;
use cortex_m_rt::entry;
use microbit::{hal::uarte::{Baudrate, Parity, Uarte}, Board};
#[entry]
fn main() -> ! {
let board = Board::take().unwrap();
// Configure serial port.
let mut serial = Uarte::new(
board.UARTE0,
board.uart.into(),
Parity::EXCLUDED,
Baudrate::BAUD115200,
);
// Use the system timer as a delay provider.
let mut delay = Delay::new(board.SYST);
// Set up the I2C controller and Inertial Measurement Unit.
// TODO
writeln!(serial, "Ready.").unwrap();
loop {
// Read compass data and log it to the serial port.
// TODO
}
}Cargo.toml (您應該不需要變更此項目):
[workspace]
[package]
name = "compass"
version = "0.1.0"
edition = "2021"
publish = false
[dependencies]
cortex-m-rt = "0.7.3"
embedded-hal = "1.0.0"
lsm303agr = "0.3.0"
microbit-v2 = "0.13.0"
panic-halt = "0.2.0"
Embed.toml (您應該不需要變更此項目):
[default.general]
chip = "nrf52833_xxAA"
[debug.gdb]
enabled = true
[debug.reset]
halt_afterwards = true
.cargo/config.toml (您應該不需要變更此項目):
[build]
target = "thumbv7em-none-eabihf" # Cortex-M4F
[target.'cfg(all(target_arch = "arm", target_os = "none"))']
rustflags = ["-C", "link-arg=-Tlink.x"]
使用下列指令在 Linux 查看序列輸出內容:
picocom --baud 115200 --imap lfcrlf /dev/ttyACM0
或在 macOS 上使用類似如下的指令 (裝置名稱可能略有不同):
picocom --baud 115200 --imap lfcrlf /dev/tty.usbmodem14502
按下 Ctrl + A、Ctrl + Q 鍵即可退出 picocom。
Rust 裸機開發:上午練習
指南針
(返回練習)
#![no_main]
#![no_std]
extern crate panic_halt as _;
use core::fmt::Write;
use cortex_m_rt::entry;
use core::cmp::{max, min};
use lsm303agr::{
AccelMode, AccelOutputDataRate, Lsm303agr, MagMode, MagOutputDataRate,
};
use microbit::display::blocking::Display;
use microbit::hal::prelude::*;
use microbit::hal::twim::Twim;
use microbit::hal::uarte::{Baudrate, Parity, Uarte};
use microbit::hal::{Delay, Timer};
use microbit::pac::twim0::frequency::FREQUENCY_A;
use microbit::Board;
const COMPASS_SCALE: i32 = 30000;
const ACCELEROMETER_SCALE: i32 = 700;
#[entry]
fn main() -> ! {
let board = Board::take().unwrap();
// Configure serial port.
let mut serial = Uarte::new(
board.UARTE0,
board.uart.into(),
Parity::EXCLUDED,
Baudrate::BAUD115200,
);
// Use the system timer as a delay provider.
let mut delay = Delay::new(board.SYST);
// Set up the I2C controller and Inertial Measurement Unit.
writeln!(serial, "Setting up IMU...").unwrap();
let i2c = Twim::new(board.TWIM0, board.i2c_internal.into(), FREQUENCY_A::K100);
let mut imu = Lsm303agr::new_with_i2c(i2c);
imu.init().unwrap();
imu.set_mag_mode_and_odr(
&mut delay,
MagMode::HighResolution,
MagOutputDataRate::Hz50,
)
.unwrap();
imu.set_accel_mode_and_odr(
&mut delay,
AccelMode::Normal,
AccelOutputDataRate::Hz50,
)
.unwrap();
let mut imu = imu.into_mag_continuous().ok().unwrap();
// Set up display and timer.
let mut timer = Timer::new(board.TIMER0);
let mut display = Display::new(board.display_pins);
let mut mode = Mode::Compass;
let mut button_pressed = false;
writeln!(serial, "Ready.").unwrap();
loop {
// Read compass data and log it to the serial port.
while !(imu.mag_status().unwrap().xyz_new_data()
&& imu.accel_status().unwrap().xyz_new_data())
{}
let compass_reading = imu.magnetic_field().unwrap();
let accelerometer_reading = imu.acceleration().unwrap();
writeln!(
serial,
"{},{},{}\t{},{},{}",
compass_reading.x_nt(),
compass_reading.y_nt(),
compass_reading.z_nt(),
accelerometer_reading.x_mg(),
accelerometer_reading.y_mg(),
accelerometer_reading.z_mg(),
)
.unwrap();
let mut image = [[0; 5]; 5];
let (x, y) = match mode {
Mode::Compass => (
scale(-compass_reading.x_nt(), -COMPASS_SCALE, COMPASS_SCALE, 0, 4)
as usize,
scale(compass_reading.y_nt(), -COMPASS_SCALE, COMPASS_SCALE, 0, 4)
as usize,
),
Mode::Accelerometer => (
scale(
accelerometer_reading.x_mg(),
-ACCELEROMETER_SCALE,
ACCELEROMETER_SCALE,
0,
4,
) as usize,
scale(
-accelerometer_reading.y_mg(),
-ACCELEROMETER_SCALE,
ACCELEROMETER_SCALE,
0,
4,
) as usize,
),
};
image[y][x] = 255;
display.show(&mut timer, image, 100);
// If button A is pressed, switch to the next mode and briefly blink all LEDs
// on.
if board.buttons.button_a.is_low().unwrap() {
if !button_pressed {
mode = mode.next();
display.show(&mut timer, [[255; 5]; 5], 200);
}
button_pressed = true;
} else {
button_pressed = false;
}
}
}
#[derive(Copy, Clone, Debug, Eq, PartialEq)]
enum Mode {
Compass,
Accelerometer,
}
impl Mode {
fn next(self) -> Self {
match self {
Self::Compass => Self::Accelerometer,
Self::Accelerometer => Self::Compass,
}
}
}
fn scale(value: i32, min_in: i32, max_in: i32, min_out: i32, max_out: i32) -> i32 {
let range_in = max_in - min_in;
let range_out = max_out - min_out;
cap(min_out + range_out * (value - min_in) / range_in, min_out, max_out)
}
fn cap(value: i32, min_value: i32, max_value: i32) -> i32 {
max(min_value, min(value, max_value))
}應用程式處理器
目前我們已介紹過微控制器,例如 Arm Cortex-M 系列產品,現在來試著為 Cortex-A 撰寫一些內容。為求簡單,我們會使用 QEMU 的 aarch64 ‘virt’ 開發板。
- 普遍來說,微控制器並沒有 MMU 或多個權限層級 (Arm CPU 上的例外狀況層級、x86 上的環),但應用程式處理器有。
- QEMU 可針對每個架構模擬不同的機器或開發板模型。‘virt’ 開發板並無對應至任何特定的真實硬體,而是專為虛擬機器設計。
準備使用 Rust
我們需要先完成一些初始化作業,才能開始執行 Rust 程式碼。
.section .init.entry, "ax"
.global entry
entry:
/*
* Load and apply the memory management configuration, ready to enable MMU and
* caches.
*/
adrp x30, idmap
msr ttbr0_el1, x30
mov_i x30, .Lmairval
msr mair_el1, x30
mov_i x30, .Ltcrval
/* Copy the supported PA range into TCR_EL1.IPS. */
mrs x29, id_aa64mmfr0_el1
bfi x30, x29, #32, #4
msr tcr_el1, x30
mov_i x30, .Lsctlrval
/*
* Ensure everything before this point has completed, then invalidate any
* potentially stale local TLB entries before they start being used.
*/
isb
tlbi vmalle1
ic iallu
dsb nsh
isb
/*
* Configure sctlr_el1 to enable MMU and cache and don't proceed until this
* has completed.
*/
msr sctlr_el1, x30
isb
/* Disable trapping floating point access in EL1. */
mrs x30, cpacr_el1
orr x30, x30, #(0x3 << 20)
msr cpacr_el1, x30
isb
/* Zero out the bss section. */
adr_l x29, bss_begin
adr_l x30, bss_end
0: cmp x29, x30
b.hs 1f
stp xzr, xzr, [x29], #16
b 0b
1: /* Prepare the stack. */
adr_l x30, boot_stack_end
mov sp, x30
/* Set up exception vector. */
adr x30, vector_table_el1
msr vbar_el1, x30
/* Call into Rust code. */
bl main
/* Loop forever waiting for interrupts. */
2: wfi
b 2b
- 這與使用 C 時相同:將處理器狀態初始化、將 BSS 設為零,以及設定堆疊指標。
- BSS (區塊起始符號,因歷史因素而存在) 是物件檔案的一部分,含有初始化為零的靜態分配變數。映像檔會省略這些變數,以免浪費空間儲存零。編譯器會假設由載入器負責將變數初始化為零。
- 視記憶體初始化及映像檔載入方式而定,BSS 可能已為零,但為了確定,我們會將它設為零。
- 我們需要啟用 MMU 和快取,才能讀取或寫入任何記憶體。如果不這樣做:
- 未對齊的存取會發生錯誤。我們是為
aarch64-unknown-none目標建構 Rust 程式碼,這會設定+strict-align,防止編譯器產生未對齊的存取,因此在本例中應該不會出錯,但這不一定是一般情況。 - 如果是在 VM 中執行,可能會導致快取一致性問題。問題在於 VM 會在快取已停用時直接存取記憶體,而主機具有相同記憶體的可快取別名。即使主機未明確存取記憶體,推測存取行為仍可能導致快取填補,而當快取遭到清理或 VM 啟用快取時,存取之間的變更就會遺失 (快取是以實體位址做為索引鍵,並非使用 VA 或 IPA)。
- 未對齊的存取會發生錯誤。我們是為
- 為求簡單,我們只使用寫死的分頁表 (見
idmap.S),其中前 1 GiB 的位址空間是對應至裝置、接下來 1 GiB 是對應至 DRAM,另外 1 GiB 以上則適用更多裝置。這符合 QEMU 使用的記憶體布局。 - 我們也會設定例外狀況向量 (
vbar_el1),稍後將進一步說明。 - 今天下午的所有例子都假設我們會在例外狀況層級 1 (EL1) 執行。如要在不同的例外狀況層級執行,就需據以修改
entry.S。
行內組語
有時候,我們需要使用組語,才能執行 Rust 程式碼無法執行的作業。舉例來說,如要發出 HVC (管理程序呼叫) 指示韌體關閉系統:
#![no_main]
#![no_std]
use core::arch::asm;
use core::panic::PanicInfo;
mod exceptions;
const PSCI_SYSTEM_OFF: u32 = 0x84000008;
#[no_mangle]
extern "C" fn main(_x0: u64, _x1: u64, _x2: u64, _x3: u64) {
// Safe because this only uses the declared registers and doesn't do
// anything with memory.
unsafe {
asm!("hvc #0",
inout("w0") PSCI_SYSTEM_OFF => _,
inout("w1") 0 => _,
inout("w2") 0 => _,
inout("w3") 0 => _,
inout("w4") 0 => _,
inout("w5") 0 => _,
inout("w6") 0 => _,
inout("w7") 0 => _,
options(nomem, nostack)
);
}
loop {}
}(如果您確實想執行這項操作,請使用 smccc Crate,其中包含所有這些函式的包裝函式。)
- PSCI 是 Arm 電源狀態協調介面,這組標準函式可管理系統和 CPU 電源狀態及其他項目,是由 EL3 韌體和管理程序在許多系統上實作。
0 => _語法是指在行內組語程式碼執行之前,將暫存器初始化為 0,之後就忽略其內容。我們需要使用inout(而非in),因為呼叫可能會破壞暫存器的內容。- 這個
main函式需為#[no_mangle]和extern "C",因為此函式是從entry.S的進入點呼叫。 _x0到_x3是暫存器x0到x3的值。按照慣例,系統啟動載入程式會使用這些值,將指標等項目傳遞給裝置樹狀結構。根據標準的 aarch64 呼叫慣例 (即extern "C"指定使用的項目),前 8 個傳遞至函式的引數會使用暫存器x0到x7,因此entry.S不需執行任何特殊操作,只要確保不會變更這些暫存器。- 使用
src/bare-metal/aps/examples下的make qemu_psci,在 QEMU 中執行範例。
MMIO 揮發性記憶體存取
- 使用
pointer::read_volatile和pointer::write_volatile。 - 請勿保留參照。
addr_of!可用來取得結構體的欄位,而不必建立中繼參照。
- 揮發性存取:讀取或寫入作業可能會有副作用,因此請避免編譯器或硬體遭到重新排序、複製或省略。
- 通常,如果您在寫入後讀取 (例如透過可變動參照),編譯器可能會假設讀取的值與剛寫入的值相同,而不實際讀取記憶體。
- 有些用於硬體揮發性存取的現有 Crate 確實會保留參照,但這樣不安全。每當有參照存在時,編譯器可能會選擇解除參照。
- 使用
addr_of!巨集,從結構體的指標取得結構體欄位指標。
編寫 UART 驅動程式
QEMU ‘virt’ 機器搭載 PL011 UART,所以我們要為此編寫驅動程式。
const FLAG_REGISTER_OFFSET: usize = 0x18;
const FR_BUSY: u8 = 1 << 3;
const FR_TXFF: u8 = 1 << 5;
/// Minimal driver for a PL011 UART.
#[derive(Debug)]
pub struct Uart {
base_address: *mut u8,
}
impl Uart {
/// Constructs a new instance of the UART driver for a PL011 device at the
/// given base address.
///
/// # Safety
///
/// The given base address must point to the 8 MMIO control registers of a
/// PL011 device, which must be mapped into the address space of the process
/// as device memory and not have any other aliases.
pub unsafe fn new(base_address: *mut u8) -> Self {
Self { base_address }
}
/// Writes a single byte to the UART.
pub fn write_byte(&self, byte: u8) {
// Wait until there is room in the TX buffer.
while self.read_flag_register() & FR_TXFF != 0 {}
// Safe because we know that the base address points to the control
// registers of a PL011 device which is appropriately mapped.
unsafe {
// Write to the TX buffer.
self.base_address.write_volatile(byte);
}
// Wait until the UART is no longer busy.
while self.read_flag_register() & FR_BUSY != 0 {}
}
fn read_flag_register(&self) -> u8 {
// Safe because we know that the base address points to the control
// registers of a PL011 device which is appropriately mapped.
unsafe { self.base_address.add(FLAG_REGISTER_OFFSET).read_volatile() }
}
}- 請注意,
Uart::new並不安全,其他方法則是安全的。這是因為只要Uart::new的呼叫端保證能滿足安全規定,也就是特定 UART 只有一個驅動程式例項,沒有其他項目定義其位址空間的別名,那麼稍後呼叫write_byte一律是安全的,因為我們可以假設必要的先決條件。 - 我們可以反過來操作,也就是讓
new安全,而write_byte不安全,但這樣的使用便利度低許多,因為每個呼叫write_byte的位置都需要分析安全性 - 這是為不安全程式碼撰寫安全包裝函式的常見模式:將證明安全性的負擔從大量位置移到少量位置。
其他特徵
我們衍生了 Debug 特徵。實作多一點特徵也會有幫助。
use core::fmt::{self, Write};
impl Write for Uart {
fn write_str(&mut self, s: &str) -> fmt::Result {
for c in s.as_bytes() {
self.write_byte(*c);
}
Ok(())
}
}
// Safe because it just contains a pointer to device memory, which can be
// accessed from any context.
unsafe impl Send for Uart {}- 實作
Write即可搭配Uart型別使用write!和writeln!巨集。 - 使用
src/bare-metal/aps/examples下的make qemu_minimal,在 QEMU 中執行範例。
經改良的 UART 驅動程式
PL011 實際上還有許多暫存器,若為了存取這些暫存器而將偏移值新增至建構指標,不僅容易發生錯誤,還難以讀取。此外,部分暫存器是位元欄位,適合以結構化方式存取。
| 偏移 | 暫存器名稱 | 寬度 |
|---|---|---|
| 0x00 | DR | 12 |
| 0x04 | RSR | 4 |
| 0x18 | FR | 9 |
| 0x20 | ILPR | 8 |
| 0x24 | IBRD | 16 |
| 0x28 | FBRD | 6 |
| 0x2c | LCR_H | 8 |
| 0x30 | CR | 16 |
| 0x34 | IFLS | 6 |
| 0x38 | IMSC | 11 |
| 0x3c | RIS | 11 |
| 0x40 | MIS | 11 |
| 0x44 | ICR | 11 |
| 0x48 | DMACR | 3 |
- 為求簡潔,還省略了一些 ID 暫存器。
Bitflags
bitflags Crate 適合用於 Bitflags。
use bitflags::bitflags;
bitflags! {
/// Flags from the UART flag register.
#[repr(transparent)]
#[derive(Copy, Clone, Debug, Eq, PartialEq)]
struct Flags: u16 {
/// Clear to send.
const CTS = 1 << 0;
/// Data set ready.
const DSR = 1 << 1;
/// Data carrier detect.
const DCD = 1 << 2;
/// UART busy transmitting data.
const BUSY = 1 << 3;
/// Receive FIFO is empty.
const RXFE = 1 << 4;
/// Transmit FIFO is full.
const TXFF = 1 << 5;
/// Receive FIFO is full.
const RXFF = 1 << 6;
/// Transmit FIFO is empty.
const TXFE = 1 << 7;
/// Ring indicator.
const RI = 1 << 8;
}
}bitflags!巨集會建立一個新型別 (例如Flags(u16)),以及一系列取得及設定標記的方法實作項目。
多個暫存器
我們可以使用結構體來表示 UART 暫存器的記憶體布局。
#[repr(C, align(4))]
struct Registers {
dr: u16,
_reserved0: [u8; 2],
rsr: ReceiveStatus,
_reserved1: [u8; 19],
fr: Flags,
_reserved2: [u8; 6],
ilpr: u8,
_reserved3: [u8; 3],
ibrd: u16,
_reserved4: [u8; 2],
fbrd: u8,
_reserved5: [u8; 3],
lcr_h: u8,
_reserved6: [u8; 3],
cr: u16,
_reserved7: [u8; 3],
ifls: u8,
_reserved8: [u8; 3],
imsc: u16,
_reserved9: [u8; 2],
ris: u16,
_reserved10: [u8; 2],
mis: u16,
_reserved11: [u8; 2],
icr: u16,
_reserved12: [u8; 2],
dmacr: u8,
_reserved13: [u8; 3],
}#[repr(C)]會指示編譯器依序排列結構體欄位,遵循與 C 相同的規則。以確保結構體具有可預測的布局,因為預設的 Rust 表示法允許編譯器依自身判斷重新排序欄位 (和執行其他操作)。
驅動程式
現在讓我們在驅動程式中使用新的 Registers 結構體。
/// Driver for a PL011 UART.
#[derive(Debug)]
pub struct Uart {
registers: *mut Registers,
}
impl Uart {
/// Constructs a new instance of the UART driver for a PL011 device at the
/// given base address.
///
/// # Safety
///
/// The given base address must point to the 8 MMIO control registers of a
/// PL011 device, which must be mapped into the address space of the process
/// as device memory and not have any other aliases.
pub unsafe fn new(base_address: *mut u32) -> Self {
Self { registers: base_address as *mut Registers }
}
/// Writes a single byte to the UART.
pub fn write_byte(&self, byte: u8) {
// Wait until there is room in the TX buffer.
while self.read_flag_register().contains(Flags::TXFF) {}
// Safe because we know that self.registers points to the control
// registers of a PL011 device which is appropriately mapped.
unsafe {
// Write to the TX buffer.
addr_of_mut!((*self.registers).dr).write_volatile(byte.into());
}
// Wait until the UART is no longer busy.
while self.read_flag_register().contains(Flags::BUSY) {}
}
/// Reads and returns a pending byte, or `None` if nothing has been
/// received.
pub fn read_byte(&self) -> Option<u8> {
if self.read_flag_register().contains(Flags::RXFE) {
None
} else {
let data = unsafe { addr_of!((*self.registers).dr).read_volatile() };
// TODO: Check for error conditions in bits 8-11.
Some(data as u8)
}
}
fn read_flag_register(&self) -> Flags {
// Safe because we know that self.registers points to the control
// registers of a PL011 device which is appropriately mapped.
unsafe { addr_of!((*self.registers).fr).read_volatile() }
}
}- 請注意,如果使用
addr_of!/addr_of_mut!取得個別欄位的指標,而不建立中繼參照,這種做法並不安全。
開始使用
讓我們編寫一個小程式,使用驅動程式寫入序列控制台,並回應傳入的位元組。
#![no_main]
#![no_std]
mod exceptions;
mod pl011;
use crate::pl011::Uart;
use core::fmt::Write;
use core::panic::PanicInfo;
use log::error;
use smccc::psci::system_off;
use smccc::Hvc;
/// Base address of the primary PL011 UART.
const PL011_BASE_ADDRESS: *mut u32 = 0x900_0000 as _;
#[no_mangle]
extern "C" fn main(x0: u64, x1: u64, x2: u64, x3: u64) {
// Safe because `PL011_BASE_ADDRESS` is the base address of a PL011 device,
// and nothing else accesses that address range.
let mut uart = unsafe { Uart::new(PL011_BASE_ADDRESS) };
writeln!(uart, "main({x0:#x}, {x1:#x}, {x2:#x}, {x3:#x})").unwrap();
loop {
if let Some(byte) = uart.read_byte() {
uart.write_byte(byte);
match byte {
b'\r' => {
uart.write_byte(b'\n');
}
b'q' => break,
_ => {}
}
}
}
writeln!(uart, "Bye!").unwrap();
system_off::<Hvc>().unwrap();
}- 就像在行內組語範例中,系統會從
entry.S的進入點程式碼呼叫這個main函式。詳情請參閱演講者備忘稿。 - 使用
src/bare-metal/aps/examples下的make qemu,在 QEMU 中執行範例。
記錄
建議使用 log Crate 中的記錄巨集。實作 Log 特徵即可使用該項目。
use crate::pl011::Uart;
use core::fmt::Write;
use log::{LevelFilter, Log, Metadata, Record, SetLoggerError};
use spin::mutex::SpinMutex;
static LOGGER: Logger = Logger { uart: SpinMutex::new(None) };
struct Logger {
uart: SpinMutex<Option<Uart>>,
}
impl Log for Logger {
fn enabled(&self, _metadata: &Metadata) -> bool {
true
}
fn log(&self, record: &Record) {
writeln!(
self.uart.lock().as_mut().unwrap(),
"[{}] {}",
record.level(),
record.args()
)
.unwrap();
}
fn flush(&self) {}
}
/// Initialises UART logger.
pub fn init(uart: Uart, max_level: LevelFilter) -> Result<(), SetLoggerError> {
LOGGER.uart.lock().replace(uart);
log::set_logger(&LOGGER)?;
log::set_max_level(max_level);
Ok(())
}- 在
log中取消包裝很安全,因為在呼叫set_logger之前,我們會將LOGGER初始化。
開始使用
我們需要先初始化 Logger,才能使用 Logger。
#![no_main]
#![no_std]
mod exceptions;
mod logger;
mod pl011;
use crate::pl011::Uart;
use core::panic::PanicInfo;
use log::{error, info, LevelFilter};
use smccc::psci::system_off;
use smccc::Hvc;
/// Base address of the primary PL011 UART.
const PL011_BASE_ADDRESS: *mut u32 = 0x900_0000 as _;
#[no_mangle]
extern "C" fn main(x0: u64, x1: u64, x2: u64, x3: u64) {
// Safe because `PL011_BASE_ADDRESS` is the base address of a PL011 device,
// and nothing else accesses that address range.
let uart = unsafe { Uart::new(PL011_BASE_ADDRESS) };
logger::init(uart, LevelFilter::Trace).unwrap();
info!("main({x0:#x}, {x1:#x}, {x2:#x}, {x3:#x})");
assert_eq!(x1, 42);
system_off::<Hvc>().unwrap();
}
#[panic_handler]
fn panic(info: &PanicInfo) -> ! {
error!("{info}");
system_off::<Hvc>().unwrap();
loop {}
}- 請注意,恐慌處理常式現在可以記錄恐慌的詳細資料。
- 使用
src/bare-metal/aps/examples下的make qemu_logger。在 QEMU 中執行範例。
例外狀況
AArch64 定義了包含 16 個項目的例外狀況向量表,適用於 4 種狀態的 4 種例外狀況,即同步、IRQ、FIQ、SError。4 種狀態則分別為目前 EL 搭配 SP0、目前 EL 搭配 SPx、較低 EL 使用 AArch64 和較低 EL 使用 AArch32。這是在組語中實作,以便在呼叫 Rust 程式碼之前,將揮發性暫存器儲存至堆疊:
use log::error;
use smccc::psci::system_off;
use smccc::Hvc;
#[no_mangle]
extern "C" fn sync_exception_current(_elr: u64, _spsr: u64) {
error!("sync_exception_current");
system_off::<Hvc>().unwrap();
}
#[no_mangle]
extern "C" fn irq_current(_elr: u64, _spsr: u64) {
error!("irq_current");
system_off::<Hvc>().unwrap();
}
#[no_mangle]
extern "C" fn fiq_current(_elr: u64, _spsr: u64) {
error!("fiq_current");
system_off::<Hvc>().unwrap();
}
#[no_mangle]
extern "C" fn serr_current(_elr: u64, _spsr: u64) {
error!("serr_current");
system_off::<Hvc>().unwrap();
}
#[no_mangle]
extern "C" fn sync_lower(_elr: u64, _spsr: u64) {
error!("sync_lower");
system_off::<Hvc>().unwrap();
}
#[no_mangle]
extern "C" fn irq_lower(_elr: u64, _spsr: u64) {
error!("irq_lower");
system_off::<Hvc>().unwrap();
}
#[no_mangle]
extern "C" fn fiq_lower(_elr: u64, _spsr: u64) {
error!("fiq_lower");
system_off::<Hvc>().unwrap();
}
#[no_mangle]
extern "C" fn serr_lower(_elr: u64, _spsr: u64) {
error!("serr_lower");
system_off::<Hvc>().unwrap();
}- EL 是指例外狀況層級,今天下午的所有範例都是在 EL1 執行。
- 為求簡單,我們不會針對目前 EL 例外狀況區分 SP0 和 SPx,也不會針對較低 EL 例外狀況區分 AArch32 和 AArch64。
- 在此範例中,我們只需記錄例外狀況並關機,因為我們並不預期會實際發生任何例外狀況。
- 例外狀況處理常式和主執行環境,其實可以約略視為不同執行緒。
Send和Sync會控管可在它們之間分享的內容,就像執行緒一樣。舉例來說,如要在例外狀況處理常式與程式其餘部分之間分享某個值,而且是Send(而非Sync),我們就需要將該值包裝在Mutex等項目中並放入靜態項目。
其他專案
- oreboot
- 「沒有 C 的 coreboot」
- 支援 x86、aarch64 和 RISC-V。
- 依賴 LinuxBoot,而非自身採用多個驅動程式。
- Rust RaspberryPi OS 教學課程
- 初始化、UART 驅動程式、簡易系統啟動載入程式、JTAG、例外狀況層級、例外狀況處理、分頁表
- Rust 中的快取維護和初始化存在疑慮,就正式版程式碼而言,不一定是值得複製的好範例。
cargo-call-stack- 靜態分析,用來判斷最大堆疊用量。
- RaspberryPi OS 教學課程會在啟用 MMU 和快取之前,執行 Rust 程式碼。這會讀取及寫入記憶體,例如堆疊。不過,請注意以下幾點:
- 如果沒有 MMU 和快取,未對齊的存取會發生錯誤。建構時使用的是
aarch64-unknown-none,這會設定+strict-align,防止編譯器產生未對齊的存取,因此應該不會出錯,但這不一定是一般情況。 - 如果是在 VM 中執行,可能會導致快取一致性問題。問題在於 VM 會在快取已停用時直接存取記憶體,而主機具有相同記憶體的可快取別名。即使主機未明確存取記憶體,推測存取行為仍可能導致快取填補,而存取之間的變更就會遺失。同樣地,這在本例中不成問題 (直接在硬體上執行,沒有管理程序),但一般不建議採用這種模式。
- 如果沒有 MMU 和快取,未對齊的存取會發生錯誤。建構時使用的是
實用的 Crate
以下將介紹幾個 Crate,可用來解決一些裸機程式設計的常見問題。
zerocopy
zerocopy Crate (來自 Fuchsia) 提供特徵和巨集,可在位元組序列和其他型別之間安全地轉換。
use zerocopy::AsBytes;
#[repr(u32)]
#[derive(AsBytes, Debug, Default)]
enum RequestType {
#[default]
In = 0,
Out = 1,
Flush = 4,
}
#[repr(C)]
#[derive(AsBytes, Debug, Default)]
struct VirtioBlockRequest {
request_type: RequestType,
reserved: u32,
sector: u64,
}
fn main() {
let request = VirtioBlockRequest {
request_type: RequestType::Flush,
sector: 42,
..Default::default()
};
assert_eq!(
request.as_bytes(),
&[4, 0, 0, 0, 0, 0, 0, 0, 42, 0, 0, 0, 0, 0, 0, 0]
);
}這不適合 MMIO (因為並非採用揮發性讀取和寫入方法),但很適合搭配使用與硬體共用的結構 (例如藉由 DMA),或透過外部介面傳送的結構。
FromBytes可針對任何位元組模式有效的型別實作,因此可從不受信任的位元組序列安全地完成轉換。- 嘗試衍生這些型別的
FromBytes會失敗,因為RequestType不會使用所有可能的 u32 值做為判別值,所以並非所有位元組模式都有效。 zerocopy::byteorder的型別適用於瞭解位元組順序的數值基元。- 使用
src/bare-metal/useful-crates/zerocopy-example/下的cargo run執行範例 (在 Playground 中,範例會因為 Crate 依附元件而無法執行)。
aarch64-paging
aarch64-paging Crate 可用來根據 AArch64 虛擬記憶體系統架構,建立分頁表。
use aarch64_paging::{
idmap::IdMap,
paging::{Attributes, MemoryRegion},
};
const ASID: usize = 1;
const ROOT_LEVEL: usize = 1;
// Create a new page table with identity mapping.
let mut idmap = IdMap::new(ASID, ROOT_LEVEL);
// Map a 2 MiB region of memory as read-only.
idmap.map_range(
&MemoryRegion::new(0x80200000, 0x80400000),
Attributes::NORMAL | Attributes::NON_GLOBAL | Attributes::READ_ONLY,
).unwrap();
// Set `TTBR0_EL1` to activate the page table.
idmap.activate();- 目前僅支援 EL1,但應該很容易新增其他例外狀況層級的支援功能。
- 這是用於 Android 中的受保護 VM 韌體。
- 執行這個範例並不容易,因為需要在實際硬體上執行,或是使用 QEMU。
buddy_system_allocator
buddy_system_allocator 是實作基本夥伴系統分配器的第三方 Crate。這可供 LockedHeap 實作 GlobalAlloc,以便使用標準 alloc Crate,如先前所見,或用來分配其他位址空間。例如,我們可能會想針對 PCI BAR 分配 MMIO 空間:
use buddy_system_allocator::FrameAllocator;
use core::alloc::Layout;
fn main() {
let mut allocator = FrameAllocator::<32>::new();
allocator.add_frame(0x200_0000, 0x400_0000);
let layout = Layout::from_size_align(0x100, 0x100).unwrap();
let bar = allocator
.alloc_aligned(layout)
.expect("Failed to allocate 0x100 byte MMIO region");
println!("Allocated 0x100 byte MMIO region at {:#x}", bar);
}- PCI BAR 的對齊情形一律會等於其大小。
- 使用
src/bare-metal/useful-crates/allocator-example/下的cargo run執行範例 (在 Playground 中,範例會因為 Crate 依附元件而無法執行)。
tinyvec
有時候,您會希望有項目可以像 Vec 一樣調整大小,但沒有堆積分配量。tinyvec 提供這項機制:這個向量由陣列或切片支援,能以靜態方式分配或置於堆疊,進而追蹤元素用量,以及因您嘗試使用的量超出分配量所導致的恐慌。
use tinyvec::{array_vec, ArrayVec};
fn main() {
let mut numbers: ArrayVec<[u32; 5]> = array_vec!(42, 66);
println!("{numbers:?}");
numbers.push(7);
println!("{numbers:?}");
numbers.remove(1);
println!("{numbers:?}");
}- 為初始化,
tinyvec規定元素型別須實作Default。 - Rust Playground 包含
tinyvec,因此這個範例可在行內執行。
spin
std::sync::Mutex 和其他來自 std::sync 的同步基元,都無法用於 core 或 alloc。我們能如何管理同步處理作業或內部可變動性 (例如為了在不同 CPU 之間共用狀態) 呢?
spin Crate 針對許多這類基元,提供以自旋鎖為基礎的同等項目。
use spin::mutex::SpinMutex;
static counter: SpinMutex<u32> = SpinMutex::new(0);
fn main() {
println!("count: {}", counter.lock());
*counter.lock() += 2;
println!("count: {}", counter.lock());
}- 如果在中斷處理常式使用了鎖,請務必小心避免死結。
spin也具備排號自旋鎖互斥實作項目;std::sync中RwLock、Barrier和Once的同等項目;以及用於延遲初始化的Lazy。once_cellCrate 也具備一些實用型別,適合用於晚期初始化,與spin::once::Once的做法略有不同。- Rust Playground 包含
spin,因此這個範例可在行內執行。
Android
如要在 Android 開放原始碼計畫中建構 Rust 裸機開發二進位檔,您需要使用 rust_ffi_static Soong 規則建構 Rust 程式碼,接著使用具有連接器指令碼的 cc_binary 產生二進位檔,並以 raw_binary 將 ELF 轉換為準備好執行的原始二進位檔。
rust_ffi_static {
name: "libvmbase_example",
defaults: ["vmbase_ffi_defaults"],
crate_name: "vmbase_example",
srcs: ["src/main.rs"],
rustlibs: [
"libvmbase",
],
}
cc_binary {
name: "vmbase_example",
defaults: ["vmbase_elf_defaults"],
srcs: [
"idmap.S",
],
static_libs: [
"libvmbase_example",
],
linker_scripts: [
"image.ld",
":vmbase_sections",
],
}
raw_binary {
name: "vmbase_example_bin",
stem: "vmbase_example.bin",
src: ":vmbase_example",
enabled: false,
target: {
android_arm64: {
enabled: true,
},
},
}
vmbase
針對在 aarch64 的 crosvm 下運作的 VM,vmbase 程式庫提供連接器指令碼和實用的建構規則預設值,以及進入點、UART 控制台記錄等。
#![no_main]
#![no_std]
use vmbase::{main, println};
main!(main);
pub fn main(arg0: u64, arg1: u64, arg2: u64, arg3: u64) {
println!("Hello world");
}main!巨集會標記主函式,方便從vmbase進入點呼叫。vmbase進入點會處理控制台初始化作業,並在主函式傳回時發出 PSCI_SYSTEM_OFF 來關閉 VM。
練習
我們將為 PL031 即時時鐘裝置編寫驅動程式。
完成練習後,您可以看看我們提供的解決方案。
RTC 驅動程式
QEMU aarch64 虛擬機器的 PL031 即時時鐘位於 0x9010000。在這個練習中,您應為該時鐘編寫驅動程式。
- 使用該時鐘將目前時間顯示至序列控制台。您可以使用
chronoCrate 設定日期/時間格式。 - 使用比對暫存器和原始中斷狀態,忙碌等待至指定時間,例如未來 3 秒 (呼叫迴圈中的
core::hint::spin_loop)。 - 擴充功能 (如有時間):啟用並處理因 RTC 比對而產生的中斷情形。您可以使用
arm-gicCrate 中提供的驅動程式,設定 Arm 泛型中斷控制器。- 使用做為
IntId::spi(2)有線連結至 GIC 的 RTC 中斷。 - 啟用中斷功能後,您可以透過
arm_gic::wfi()將核心設為休眠,這樣核心就會進入休眠狀態,直到遭中斷為止。
- 使用做為
請下載練習範本,並在 rtc 目錄中查看下列檔案。
src/main.rs:
#![no_main]
#![no_std]
mod exceptions;
mod logger;
mod pl011;
use crate::pl011::Uart;
use arm_gic::gicv3::GicV3;
use core::panic::PanicInfo;
use log::{error, info, trace, LevelFilter};
use smccc::psci::system_off;
use smccc::Hvc;
/// Base addresses of the GICv3.
const GICD_BASE_ADDRESS: *mut u64 = 0x800_0000 as _;
const GICR_BASE_ADDRESS: *mut u64 = 0x80A_0000 as _;
/// Base address of the primary PL011 UART.
const PL011_BASE_ADDRESS: *mut u32 = 0x900_0000 as _;
#[no_mangle]
extern "C" fn main(x0: u64, x1: u64, x2: u64, x3: u64) {
// Safe because `PL011_BASE_ADDRESS` is the base address of a PL011 device,
// and nothing else accesses that address range.
let uart = unsafe { Uart::new(PL011_BASE_ADDRESS) };
logger::init(uart, LevelFilter::Trace).unwrap();
info!("main({:#x}, {:#x}, {:#x}, {:#x})", x0, x1, x2, x3);
// Safe because `GICD_BASE_ADDRESS` and `GICR_BASE_ADDRESS` are the base
// addresses of a GICv3 distributor and redistributor respectively, and
// nothing else accesses those address ranges.
let mut gic = unsafe { GicV3::new(GICD_BASE_ADDRESS, GICR_BASE_ADDRESS) };
gic.setup();
// TODO: Create instance of RTC driver and print current time.
// TODO: Wait for 3 seconds.
system_off::<Hvc>().unwrap();
}
#[panic_handler]
fn panic(info: &PanicInfo) -> ! {
error!("{info}");
system_off::<Hvc>().unwrap();
loop {}
}src/exceptions.rs (您應該只需為練習的第 3 部分變更此項目):
#![allow(unused)]
fn main() {
// Copyright 2023 Google LLC
//
// Licensed under the Apache License, Version 2.0 (the "License");
// you may not use this file except in compliance with the License.
// You may obtain a copy of the License at
//
// http://www.apache.org/licenses/LICENSE-2.0
//
// Unless required by applicable law or agreed to in writing, software
// distributed under the License is distributed on an "AS IS" BASIS,
// WITHOUT WARRANTIES OR CONDITIONS OF ANY KIND, either express or implied.
// See the License for the specific language governing permissions and
// limitations under the License.
use arm_gic::gicv3::GicV3;
use log::{error, info, trace};
use smccc::psci::system_off;
use smccc::Hvc;
#[no_mangle]
extern "C" fn sync_exception_current(_elr: u64, _spsr: u64) {
error!("sync_exception_current");
system_off::<Hvc>().unwrap();
}
#[no_mangle]
extern "C" fn irq_current(_elr: u64, _spsr: u64) {
trace!("irq_current");
let intid =
GicV3::get_and_acknowledge_interrupt().expect("No pending interrupt");
info!("IRQ {intid:?}");
}
#[no_mangle]
extern "C" fn fiq_current(_elr: u64, _spsr: u64) {
error!("fiq_current");
system_off::<Hvc>().unwrap();
}
#[no_mangle]
extern "C" fn serr_current(_elr: u64, _spsr: u64) {
error!("serr_current");
system_off::<Hvc>().unwrap();
}
#[no_mangle]
extern "C" fn sync_lower(_elr: u64, _spsr: u64) {
error!("sync_lower");
system_off::<Hvc>().unwrap();
}
#[no_mangle]
extern "C" fn irq_lower(_elr: u64, _spsr: u64) {
error!("irq_lower");
system_off::<Hvc>().unwrap();
}
#[no_mangle]
extern "C" fn fiq_lower(_elr: u64, _spsr: u64) {
error!("fiq_lower");
system_off::<Hvc>().unwrap();
}
#[no_mangle]
extern "C" fn serr_lower(_elr: u64, _spsr: u64) {
error!("serr_lower");
system_off::<Hvc>().unwrap();
}
}src/logger.rs (您應該不需要變更此項目):
#![allow(unused)]
fn main() {
// Copyright 2023 Google LLC
//
// Licensed under the Apache License, Version 2.0 (the "License");
// you may not use this file except in compliance with the License.
// You may obtain a copy of the License at
//
// http://www.apache.org/licenses/LICENSE-2.0
//
// Unless required by applicable law or agreed to in writing, software
// distributed under the License is distributed on an "AS IS" BASIS,
// WITHOUT WARRANTIES OR CONDITIONS OF ANY KIND, either express or implied.
// See the License for the specific language governing permissions and
// limitations under the License.
// ANCHOR: main
use crate::pl011::Uart;
use core::fmt::Write;
use log::{LevelFilter, Log, Metadata, Record, SetLoggerError};
use spin::mutex::SpinMutex;
static LOGGER: Logger = Logger { uart: SpinMutex::new(None) };
struct Logger {
uart: SpinMutex<Option<Uart>>,
}
impl Log for Logger {
fn enabled(&self, _metadata: &Metadata) -> bool {
true
}
fn log(&self, record: &Record) {
writeln!(
self.uart.lock().as_mut().unwrap(),
"[{}] {}",
record.level(),
record.args()
)
.unwrap();
}
fn flush(&self) {}
}
/// Initialises UART logger.
pub fn init(uart: Uart, max_level: LevelFilter) -> Result<(), SetLoggerError> {
LOGGER.uart.lock().replace(uart);
log::set_logger(&LOGGER)?;
log::set_max_level(max_level);
Ok(())
}
}src/pl011.rs (您應該不需要變更此項目):
#![allow(unused)]
fn main() {
// Copyright 2023 Google LLC
//
// Licensed under the Apache License, Version 2.0 (the "License");
// you may not use this file except in compliance with the License.
// You may obtain a copy of the License at
//
// http://www.apache.org/licenses/LICENSE-2.0
//
// Unless required by applicable law or agreed to in writing, software
// distributed under the License is distributed on an "AS IS" BASIS,
// WITHOUT WARRANTIES OR CONDITIONS OF ANY KIND, either express or implied.
// See the License for the specific language governing permissions and
// limitations under the License.
#![allow(unused)]
use core::fmt::{self, Write};
use core::ptr::{addr_of, addr_of_mut};
// ANCHOR: Flags
use bitflags::bitflags;
bitflags! {
/// Flags from the UART flag register.
#[repr(transparent)]
#[derive(Copy, Clone, Debug, Eq, PartialEq)]
struct Flags: u16 {
/// Clear to send.
const CTS = 1 << 0;
/// Data set ready.
const DSR = 1 << 1;
/// Data carrier detect.
const DCD = 1 << 2;
/// UART busy transmitting data.
const BUSY = 1 << 3;
/// Receive FIFO is empty.
const RXFE = 1 << 4;
/// Transmit FIFO is full.
const TXFF = 1 << 5;
/// Receive FIFO is full.
const RXFF = 1 << 6;
/// Transmit FIFO is empty.
const TXFE = 1 << 7;
/// Ring indicator.
const RI = 1 << 8;
}
}
// ANCHOR_END: Flags
bitflags! {
/// Flags from the UART Receive Status Register / Error Clear Register.
#[repr(transparent)]
#[derive(Copy, Clone, Debug, Eq, PartialEq)]
struct ReceiveStatus: u16 {
/// Framing error.
const FE = 1 << 0;
/// Parity error.
const PE = 1 << 1;
/// Break error.
const BE = 1 << 2;
/// Overrun error.
const OE = 1 << 3;
}
}
// ANCHOR: Registers
#[repr(C, align(4))]
struct Registers {
dr: u16,
_reserved0: [u8; 2],
rsr: ReceiveStatus,
_reserved1: [u8; 19],
fr: Flags,
_reserved2: [u8; 6],
ilpr: u8,
_reserved3: [u8; 3],
ibrd: u16,
_reserved4: [u8; 2],
fbrd: u8,
_reserved5: [u8; 3],
lcr_h: u8,
_reserved6: [u8; 3],
cr: u16,
_reserved7: [u8; 3],
ifls: u8,
_reserved8: [u8; 3],
imsc: u16,
_reserved9: [u8; 2],
ris: u16,
_reserved10: [u8; 2],
mis: u16,
_reserved11: [u8; 2],
icr: u16,
_reserved12: [u8; 2],
dmacr: u8,
_reserved13: [u8; 3],
}
// ANCHOR_END: Registers
// ANCHOR: Uart
/// Driver for a PL011 UART.
#[derive(Debug)]
pub struct Uart {
registers: *mut Registers,
}
impl Uart {
/// Constructs a new instance of the UART driver for a PL011 device at the
/// given base address.
///
/// # Safety
///
/// The given base address must point to the MMIO control registers of a
/// PL011 device, which must be mapped into the address space of the process
/// as device memory and not have any other aliases.
pub unsafe fn new(base_address: *mut u32) -> Self {
Self { registers: base_address as *mut Registers }
}
/// Writes a single byte to the UART.
pub fn write_byte(&self, byte: u8) {
// Wait until there is room in the TX buffer.
while self.read_flag_register().contains(Flags::TXFF) {}
// Safe because we know that self.registers points to the control
// registers of a PL011 device which is appropriately mapped.
unsafe {
// Write to the TX buffer.
addr_of_mut!((*self.registers).dr).write_volatile(byte.into());
}
// Wait until the UART is no longer busy.
while self.read_flag_register().contains(Flags::BUSY) {}
}
/// Reads and returns a pending byte, or `None` if nothing has been
/// received.
pub fn read_byte(&self) -> Option<u8> {
if self.read_flag_register().contains(Flags::RXFE) {
None
} else {
let data = unsafe { addr_of!((*self.registers).dr).read_volatile() };
// TODO: Check for error conditions in bits 8-11.
Some(data as u8)
}
}
fn read_flag_register(&self) -> Flags {
// Safe because we know that self.registers points to the control
// registers of a PL011 device which is appropriately mapped.
unsafe { addr_of!((*self.registers).fr).read_volatile() }
}
}
// ANCHOR_END: Uart
impl Write for Uart {
fn write_str(&mut self, s: &str) -> fmt::Result {
for c in s.as_bytes() {
self.write_byte(*c);
}
Ok(())
}
}
// Safe because it just contains a pointer to device memory, which can be
// accessed from any context.
unsafe impl Send for Uart {}
}Cargo.toml (您應該不需要變更此項目):
[workspace]
[package]
name = "rtc"
version = "0.1.0"
edition = "2021"
publish = false
[dependencies]
arm-gic = "0.1.0"
bitflags = "2.4.2"
chrono = { version = "0.4.34", default-features = false }
log = "0.4.21"
smccc = "0.1.1"
spin = "0.9.8"
[build-dependencies]
cc = "1.0.88"
build.rs (您應該不需要變更此項目):
// Copyright 2023 Google LLC
//
// Licensed under the Apache License, Version 2.0 (the "License");
// you may not use this file except in compliance with the License.
// You may obtain a copy of the License at
//
// http://www.apache.org/licenses/LICENSE-2.0
//
// Unless required by applicable law or agreed to in writing, software
// distributed under the License is distributed on an "AS IS" BASIS,
// WITHOUT WARRANTIES OR CONDITIONS OF ANY KIND, either express or implied.
// See the License for the specific language governing permissions and
// limitations under the License.
use cc::Build;
use std::env;
fn main() {
#[cfg(target_os = "linux")]
env::set_var("CROSS_COMPILE", "aarch64-linux-gnu");
#[cfg(not(target_os = "linux"))]
env::set_var("CROSS_COMPILE", "aarch64-none-elf");
Build::new()
.file("entry.S")
.file("exceptions.S")
.file("idmap.S")
.compile("empty")
}entry.S (您應該不需要變更此項目):
/*
* Copyright 2023 Google LLC
*
* Licensed under the Apache License, Version 2.0 (the "License");
* you may not use this file except in compliance with the License.
* You may obtain a copy of the License at
*
* https://www.apache.org/licenses/LICENSE-2.0
*
* Unless required by applicable law or agreed to in writing, software
* distributed under the License is distributed on an "AS IS" BASIS,
* WITHOUT WARRANTIES OR CONDITIONS OF ANY KIND, either express or implied.
* See the License for the specific language governing permissions and
* limitations under the License.
*/
.macro adr_l, reg:req, sym:req
adrp \reg, \sym
add \reg, \reg, :lo12:\sym
.endm
.macro mov_i, reg:req, imm:req
movz \reg, :abs_g3:\imm
movk \reg, :abs_g2_nc:\imm
movk \reg, :abs_g1_nc:\imm
movk \reg, :abs_g0_nc:\imm
.endm
.set .L_MAIR_DEV_nGnRE, 0x04
.set .L_MAIR_MEM_WBWA, 0xff
.set .Lmairval, .L_MAIR_DEV_nGnRE | (.L_MAIR_MEM_WBWA << 8)
/* 4 KiB granule size for TTBR0_EL1. */
.set .L_TCR_TG0_4KB, 0x0 << 14
/* 4 KiB granule size for TTBR1_EL1. */
.set .L_TCR_TG1_4KB, 0x2 << 30
/* Disable translation table walk for TTBR1_EL1, generating a translation fault instead. */
.set .L_TCR_EPD1, 0x1 << 23
/* Translation table walks for TTBR0_EL1 are inner sharable. */
.set .L_TCR_SH_INNER, 0x3 << 12
/*
* Translation table walks for TTBR0_EL1 are outer write-back read-allocate write-allocate
* cacheable.
*/
.set .L_TCR_RGN_OWB, 0x1 << 10
/*
* Translation table walks for TTBR0_EL1 are inner write-back read-allocate write-allocate
* cacheable.
*/
.set .L_TCR_RGN_IWB, 0x1 << 8
/* Size offset for TTBR0_EL1 is 2**39 bytes (512 GiB). */
.set .L_TCR_T0SZ_512, 64 - 39
.set .Ltcrval, .L_TCR_TG0_4KB | .L_TCR_TG1_4KB | .L_TCR_EPD1 | .L_TCR_RGN_OWB
.set .Ltcrval, .Ltcrval | .L_TCR_RGN_IWB | .L_TCR_SH_INNER | .L_TCR_T0SZ_512
/* Stage 1 instruction access cacheability is unaffected. */
.set .L_SCTLR_ELx_I, 0x1 << 12
/* SP alignment fault if SP is not aligned to a 16 byte boundary. */
.set .L_SCTLR_ELx_SA, 0x1 << 3
/* Stage 1 data access cacheability is unaffected. */
.set .L_SCTLR_ELx_C, 0x1 << 2
/* EL0 and EL1 stage 1 MMU enabled. */
.set .L_SCTLR_ELx_M, 0x1 << 0
/* Privileged Access Never is unchanged on taking an exception to EL1. */
.set .L_SCTLR_EL1_SPAN, 0x1 << 23
/* SETEND instruction disabled at EL0 in aarch32 mode. */
.set .L_SCTLR_EL1_SED, 0x1 << 8
/* Various IT instructions are disabled at EL0 in aarch32 mode. */
.set .L_SCTLR_EL1_ITD, 0x1 << 7
.set .L_SCTLR_EL1_RES1, (0x1 << 11) | (0x1 << 20) | (0x1 << 22) | (0x1 << 28) | (0x1 << 29)
.set .Lsctlrval, .L_SCTLR_ELx_M | .L_SCTLR_ELx_C | .L_SCTLR_ELx_SA | .L_SCTLR_EL1_ITD | .L_SCTLR_EL1_SED
.set .Lsctlrval, .Lsctlrval | .L_SCTLR_ELx_I | .L_SCTLR_EL1_SPAN | .L_SCTLR_EL1_RES1
/**
* This is a generic entry point for an image. It carries out the operations required to prepare the
* loaded image to be run. Specifically, it zeroes the bss section using registers x25 and above,
* prepares the stack, enables floating point, and sets up the exception vector. It preserves x0-x3
* for the Rust entry point, as these may contain boot parameters.
*/
.section .init.entry, "ax"
.global entry
entry:
/* Load and apply the memory management configuration, ready to enable MMU and caches. */
adrp x30, idmap
msr ttbr0_el1, x30
mov_i x30, .Lmairval
msr mair_el1, x30
mov_i x30, .Ltcrval
/* Copy the supported PA range into TCR_EL1.IPS. */
mrs x29, id_aa64mmfr0_el1
bfi x30, x29, #32, #4
msr tcr_el1, x30
mov_i x30, .Lsctlrval
/*
* Ensure everything before this point has completed, then invalidate any potentially stale
* local TLB entries before they start being used.
*/
isb
tlbi vmalle1
ic iallu
dsb nsh
isb
/*
* Configure sctlr_el1 to enable MMU and cache and don't proceed until this has completed.
*/
msr sctlr_el1, x30
isb
/* Disable trapping floating point access in EL1. */
mrs x30, cpacr_el1
orr x30, x30, #(0x3 << 20)
msr cpacr_el1, x30
isb
/* Zero out the bss section. */
adr_l x29, bss_begin
adr_l x30, bss_end
0: cmp x29, x30
b.hs 1f
stp xzr, xzr, [x29], #16
b 0b
1: /* Prepare the stack. */
adr_l x30, boot_stack_end
mov sp, x30
/* Set up exception vector. */
adr x30, vector_table_el1
msr vbar_el1, x30
/* Call into Rust code. */
bl main
/* Loop forever waiting for interrupts. */
2: wfi
b 2b
exceptions.S (您應該不需要變更此項目):
/*
* Copyright 2023 Google LLC
*
* Licensed under the Apache License, Version 2.0 (the "License");
* you may not use this file except in compliance with the License.
* You may obtain a copy of the License at
*
* https://www.apache.org/licenses/LICENSE-2.0
*
* Unless required by applicable law or agreed to in writing, software
* distributed under the License is distributed on an "AS IS" BASIS,
* WITHOUT WARRANTIES OR CONDITIONS OF ANY KIND, either express or implied.
* See the License for the specific language governing permissions and
* limitations under the License.
*/
/**
* Saves the volatile registers onto the stack. This currently takes 14
* instructions, so it can be used in exception handlers with 18 instructions
* left.
*
* On return, x0 and x1 are initialised to elr_el2 and spsr_el2 respectively,
* which can be used as the first and second arguments of a subsequent call.
*/
.macro save_volatile_to_stack
/* Reserve stack space and save registers x0-x18, x29 & x30. */
stp x0, x1, [sp, #-(8 * 24)]!
stp x2, x3, [sp, #8 * 2]
stp x4, x5, [sp, #8 * 4]
stp x6, x7, [sp, #8 * 6]
stp x8, x9, [sp, #8 * 8]
stp x10, x11, [sp, #8 * 10]
stp x12, x13, [sp, #8 * 12]
stp x14, x15, [sp, #8 * 14]
stp x16, x17, [sp, #8 * 16]
str x18, [sp, #8 * 18]
stp x29, x30, [sp, #8 * 20]
/*
* Save elr_el1 & spsr_el1. This such that we can take nested exception
* and still be able to unwind.
*/
mrs x0, elr_el1
mrs x1, spsr_el1
stp x0, x1, [sp, #8 * 22]
.endm
/**
* Restores the volatile registers from the stack. This currently takes 14
* instructions, so it can be used in exception handlers while still leaving 18
* instructions left; if paired with save_volatile_to_stack, there are 4
* instructions to spare.
*/
.macro restore_volatile_from_stack
/* Restore registers x2-x18, x29 & x30. */
ldp x2, x3, [sp, #8 * 2]
ldp x4, x5, [sp, #8 * 4]
ldp x6, x7, [sp, #8 * 6]
ldp x8, x9, [sp, #8 * 8]
ldp x10, x11, [sp, #8 * 10]
ldp x12, x13, [sp, #8 * 12]
ldp x14, x15, [sp, #8 * 14]
ldp x16, x17, [sp, #8 * 16]
ldr x18, [sp, #8 * 18]
ldp x29, x30, [sp, #8 * 20]
/* Restore registers elr_el1 & spsr_el1, using x0 & x1 as scratch. */
ldp x0, x1, [sp, #8 * 22]
msr elr_el1, x0
msr spsr_el1, x1
/* Restore x0 & x1, and release stack space. */
ldp x0, x1, [sp], #8 * 24
.endm
/**
* This is a generic handler for exceptions taken at the current EL while using
* SP0. It behaves similarly to the SPx case by first switching to SPx, doing
* the work, then switching back to SP0 before returning.
*
* Switching to SPx and calling the Rust handler takes 16 instructions. To
* restore and return we need an additional 16 instructions, so we can implement
* the whole handler within the allotted 32 instructions.
*/
.macro current_exception_sp0 handler:req
msr spsel, #1
save_volatile_to_stack
bl \handler
restore_volatile_from_stack
msr spsel, #0
eret
.endm
/**
* This is a generic handler for exceptions taken at the current EL while using
* SPx. It saves volatile registers, calls the Rust handler, restores volatile
* registers, then returns.
*
* This also works for exceptions taken from EL0, if we don't care about
* non-volatile registers.
*
* Saving state and jumping to the Rust handler takes 15 instructions, and
* restoring and returning also takes 15 instructions, so we can fit the whole
* handler in 30 instructions, under the limit of 32.
*/
.macro current_exception_spx handler:req
save_volatile_to_stack
bl \handler
restore_volatile_from_stack
eret
.endm
.section .text.vector_table_el1, "ax"
.global vector_table_el1
.balign 0x800
vector_table_el1:
sync_cur_sp0:
current_exception_sp0 sync_exception_current
.balign 0x80
irq_cur_sp0:
current_exception_sp0 irq_current
.balign 0x80
fiq_cur_sp0:
current_exception_sp0 fiq_current
.balign 0x80
serr_cur_sp0:
current_exception_sp0 serr_current
.balign 0x80
sync_cur_spx:
current_exception_spx sync_exception_current
.balign 0x80
irq_cur_spx:
current_exception_spx irq_current
.balign 0x80
fiq_cur_spx:
current_exception_spx fiq_current
.balign 0x80
serr_cur_spx:
current_exception_spx serr_current
.balign 0x80
sync_lower_64:
current_exception_spx sync_lower
.balign 0x80
irq_lower_64:
current_exception_spx irq_lower
.balign 0x80
fiq_lower_64:
current_exception_spx fiq_lower
.balign 0x80
serr_lower_64:
current_exception_spx serr_lower
.balign 0x80
sync_lower_32:
current_exception_spx sync_lower
.balign 0x80
irq_lower_32:
current_exception_spx irq_lower
.balign 0x80
fiq_lower_32:
current_exception_spx fiq_lower
.balign 0x80
serr_lower_32:
current_exception_spx serr_lower
idmap.S (您應該不需要變更此項目):
/*
* Copyright 2023 Google LLC
*
* Licensed under the Apache License, Version 2.0 (the "License");
* you may not use this file except in compliance with the License.
* You may obtain a copy of the License at
*
* https://www.apache.org/licenses/LICENSE-2.0
*
* Unless required by applicable law or agreed to in writing, software
* distributed under the License is distributed on an "AS IS" BASIS,
* WITHOUT WARRANTIES OR CONDITIONS OF ANY KIND, either express or implied.
* See the License for the specific language governing permissions and
* limitations under the License.
*/
.set .L_TT_TYPE_BLOCK, 0x1
.set .L_TT_TYPE_PAGE, 0x3
.set .L_TT_TYPE_TABLE, 0x3
/* Access flag. */
.set .L_TT_AF, 0x1 << 10
/* Not global. */
.set .L_TT_NG, 0x1 << 11
.set .L_TT_XN, 0x3 << 53
.set .L_TT_MT_DEV, 0x0 << 2 // MAIR #0 (DEV_nGnRE)
.set .L_TT_MT_MEM, (0x1 << 2) | (0x3 << 8) // MAIR #1 (MEM_WBWA), inner shareable
.set .L_BLOCK_DEV, .L_TT_TYPE_BLOCK | .L_TT_MT_DEV | .L_TT_AF | .L_TT_XN
.set .L_BLOCK_MEM, .L_TT_TYPE_BLOCK | .L_TT_MT_MEM | .L_TT_AF | .L_TT_NG
.section ".rodata.idmap", "a", %progbits
.global idmap
.align 12
idmap:
/* level 1 */
.quad .L_BLOCK_DEV | 0x0 // 1 GiB of device mappings
.quad .L_BLOCK_MEM | 0x40000000 // 1 GiB of DRAM
.fill 254, 8, 0x0 // 254 GiB of unmapped VA space
.quad .L_BLOCK_DEV | 0x4000000000 // 1 GiB of device mappings
.fill 255, 8, 0x0 // 255 GiB of remaining VA space
image.ld (您應該不需要變更此項目):
/*
* Copyright 2023 Google LLC
*
* Licensed under the Apache License, Version 2.0 (the "License");
* you may not use this file except in compliance with the License.
* You may obtain a copy of the License at
*
* https://www.apache.org/licenses/LICENSE-2.0
*
* Unless required by applicable law or agreed to in writing, software
* distributed under the License is distributed on an "AS IS" BASIS,
* WITHOUT WARRANTIES OR CONDITIONS OF ANY KIND, either express or implied.
* See the License for the specific language governing permissions and
* limitations under the License.
*/
/*
* Code will start running at this symbol which is placed at the start of the
* image.
*/
ENTRY(entry)
MEMORY
{
image : ORIGIN = 0x40080000, LENGTH = 2M
}
SECTIONS
{
/*
* Collect together the code.
*/
.init : ALIGN(4096) {
text_begin = .;
*(.init.entry)
*(.init.*)
} >image
.text : {
*(.text.*)
} >image
text_end = .;
/*
* Collect together read-only data.
*/
.rodata : ALIGN(4096) {
rodata_begin = .;
*(.rodata.*)
} >image
.got : {
*(.got)
} >image
rodata_end = .;
/*
* Collect together the read-write data including .bss at the end which
* will be zero'd by the entry code.
*/
.data : ALIGN(4096) {
data_begin = .;
*(.data.*)
/*
* The entry point code assumes that .data is a multiple of 32
* bytes long.
*/
. = ALIGN(32);
data_end = .;
} >image
/* Everything beyond this point will not be included in the binary. */
bin_end = .;
/* The entry point code assumes that .bss is 16-byte aligned. */
.bss : ALIGN(16) {
bss_begin = .;
*(.bss.*)
*(COMMON)
. = ALIGN(16);
bss_end = .;
} >image
.stack (NOLOAD) : ALIGN(4096) {
boot_stack_begin = .;
. += 40 * 4096;
. = ALIGN(4096);
boot_stack_end = .;
} >image
. = ALIGN(4K);
PROVIDE(dma_region = .);
/*
* Remove unused sections from the image.
*/
/DISCARD/ : {
/* The image loads itself so doesn't need these sections. */
*(.gnu.hash)
*(.hash)
*(.interp)
*(.eh_frame_hdr)
*(.eh_frame)
*(.note.gnu.build-id)
}
}
Makefile (您應該不需要變更此項目):
# Copyright 2023 Google LLC
#
# Licensed under the Apache License, Version 2.0 (the "License");
# you may not use this file except in compliance with the License.
# You may obtain a copy of the License at
#
# http://www.apache.org/licenses/LICENSE-2.0
#
# Unless required by applicable law or agreed to in writing, software
# distributed under the License is distributed on an "AS IS" BASIS,
# WITHOUT WARRANTIES OR CONDITIONS OF ANY KIND, either express or implied.
# See the License for the specific language governing permissions and
# limitations under the License.
UNAME := $(shell uname -s)
ifeq ($(UNAME),Linux)
TARGET = aarch64-linux-gnu
else
TARGET = aarch64-none-elf
endif
OBJCOPY = $(TARGET)-objcopy
.PHONY: build qemu_minimal qemu qemu_logger
all: rtc.bin
build:
cargo build
rtc.bin: build
$(OBJCOPY) -O binary target/aarch64-unknown-none/debug/rtc $@
qemu: rtc.bin
qemu-system-aarch64 -machine virt,gic-version=3 -cpu max -serial mon:stdio -display none -kernel $< -s
clean:
cargo clean
rm -f *.bin
.cargo/config.toml (您應該不需要變更此項目):
[build]
target = "aarch64-unknown-none"
rustflags = ["-C", "link-arg=-Timage.ld"]
使用 make qemu,在 QEMU 中執行程式碼。
Rust 裸機開發:下午
RTC 驅動程式
(返回練習)
main.rs:
#![no_main]
#![no_std]
mod exceptions;
mod logger;
mod pl011;
mod pl031;
use crate::pl031::Rtc;
use arm_gic::gicv3::{IntId, Trigger};
use arm_gic::{irq_enable, wfi};
use chrono::{TimeZone, Utc};
use core::hint::spin_loop;
use crate::pl011::Uart;
use arm_gic::gicv3::GicV3;
use core::panic::PanicInfo;
use log::{error, info, trace, LevelFilter};
use smccc::psci::system_off;
use smccc::Hvc;
/// Base addresses of the GICv3.
const GICD_BASE_ADDRESS: *mut u64 = 0x800_0000 as _;
const GICR_BASE_ADDRESS: *mut u64 = 0x80A_0000 as _;
/// Base address of the primary PL011 UART.
const PL011_BASE_ADDRESS: *mut u32 = 0x900_0000 as _;
/// Base address of the PL031 RTC.
const PL031_BASE_ADDRESS: *mut u32 = 0x901_0000 as _;
/// The IRQ used by the PL031 RTC.
const PL031_IRQ: IntId = IntId::spi(2);
#[no_mangle]
extern "C" fn main(x0: u64, x1: u64, x2: u64, x3: u64) {
// Safe because `PL011_BASE_ADDRESS` is the base address of a PL011 device,
// and nothing else accesses that address range.
let uart = unsafe { Uart::new(PL011_BASE_ADDRESS) };
logger::init(uart, LevelFilter::Trace).unwrap();
info!("main({:#x}, {:#x}, {:#x}, {:#x})", x0, x1, x2, x3);
// Safe because `GICD_BASE_ADDRESS` and `GICR_BASE_ADDRESS` are the base
// addresses of a GICv3 distributor and redistributor respectively, and
// nothing else accesses those address ranges.
let mut gic = unsafe { GicV3::new(GICD_BASE_ADDRESS, GICR_BASE_ADDRESS) };
gic.setup();
// Safe because `PL031_BASE_ADDRESS` is the base address of a PL031 device,
// and nothing else accesses that address range.
let mut rtc = unsafe { Rtc::new(PL031_BASE_ADDRESS) };
let timestamp = rtc.read();
let time = Utc.timestamp_opt(timestamp.into(), 0).unwrap();
info!("RTC: {time}");
GicV3::set_priority_mask(0xff);
gic.set_interrupt_priority(PL031_IRQ, 0x80);
gic.set_trigger(PL031_IRQ, Trigger::Level);
irq_enable();
gic.enable_interrupt(PL031_IRQ, true);
// Wait for 3 seconds, without interrupts.
let target = timestamp + 3;
rtc.set_match(target);
info!("Waiting for {}", Utc.timestamp_opt(target.into(), 0).unwrap());
trace!(
"matched={}, interrupt_pending={}",
rtc.matched(),
rtc.interrupt_pending()
);
while !rtc.matched() {
spin_loop();
}
trace!(
"matched={}, interrupt_pending={}",
rtc.matched(),
rtc.interrupt_pending()
);
info!("Finished waiting");
// Wait another 3 seconds for an interrupt.
let target = timestamp + 6;
info!("Waiting for {}", Utc.timestamp_opt(target.into(), 0).unwrap());
rtc.set_match(target);
rtc.clear_interrupt();
rtc.enable_interrupt(true);
trace!(
"matched={}, interrupt_pending={}",
rtc.matched(),
rtc.interrupt_pending()
);
while !rtc.interrupt_pending() {
wfi();
}
trace!(
"matched={}, interrupt_pending={}",
rtc.matched(),
rtc.interrupt_pending()
);
info!("Finished waiting");
system_off::<Hvc>().unwrap();
}
#[panic_handler]
fn panic(info: &PanicInfo) -> ! {
error!("{info}");
system_off::<Hvc>().unwrap();
loop {}
}pl031.rs:
#![allow(unused)]
fn main() {
use core::ptr::{addr_of, addr_of_mut};
#[repr(C, align(4))]
struct Registers {
/// Data register
dr: u32,
/// Match register
mr: u32,
/// Load register
lr: u32,
/// Control register
cr: u8,
_reserved0: [u8; 3],
/// Interrupt Mask Set or Clear register
imsc: u8,
_reserved1: [u8; 3],
/// Raw Interrupt Status
ris: u8,
_reserved2: [u8; 3],
/// Masked Interrupt Status
mis: u8,
_reserved3: [u8; 3],
/// Interrupt Clear Register
icr: u8,
_reserved4: [u8; 3],
}
/// Driver for a PL031 real-time clock.
#[derive(Debug)]
pub struct Rtc {
registers: *mut Registers,
}
impl Rtc {
/// Constructs a new instance of the RTC driver for a PL031 device at the
/// given base address.
///
/// # Safety
///
/// The given base address must point to the MMIO control registers of a
/// PL031 device, which must be mapped into the address space of the process
/// as device memory and not have any other aliases.
pub unsafe fn new(base_address: *mut u32) -> Self {
Self { registers: base_address as *mut Registers }
}
/// Reads the current RTC value.
pub fn read(&self) -> u32 {
// Safe because we know that self.registers points to the control
// registers of a PL031 device which is appropriately mapped.
unsafe { addr_of!((*self.registers).dr).read_volatile() }
}
/// Writes a match value. When the RTC value matches this then an interrupt
/// will be generated (if it is enabled).
pub fn set_match(&mut self, value: u32) {
// Safe because we know that self.registers points to the control
// registers of a PL031 device which is appropriately mapped.
unsafe { addr_of_mut!((*self.registers).mr).write_volatile(value) }
}
/// Returns whether the match register matches the RTC value, whether or not
/// the interrupt is enabled.
pub fn matched(&self) -> bool {
// Safe because we know that self.registers points to the control
// registers of a PL031 device which is appropriately mapped.
let ris = unsafe { addr_of!((*self.registers).ris).read_volatile() };
(ris & 0x01) != 0
}
/// Returns whether there is currently an interrupt pending.
///
/// This should be true if and only if `matched` returns true and the
/// interrupt is masked.
pub fn interrupt_pending(&self) -> bool {
// Safe because we know that self.registers points to the control
// registers of a PL031 device which is appropriately mapped.
let ris = unsafe { addr_of!((*self.registers).mis).read_volatile() };
(ris & 0x01) != 0
}
/// Sets or clears the interrupt mask.
///
/// When the mask is true the interrupt is enabled; when it is false the
/// interrupt is disabled.
pub fn enable_interrupt(&mut self, mask: bool) {
let imsc = if mask { 0x01 } else { 0x00 };
// Safe because we know that self.registers points to the control
// registers of a PL031 device which is appropriately mapped.
unsafe { addr_of_mut!((*self.registers).imsc).write_volatile(imsc) }
}
/// Clears a pending interrupt, if any.
pub fn clear_interrupt(&mut self) {
// Safe because we know that self.registers points to the control
// registers of a PL031 device which is appropriately mapped.
unsafe { addr_of_mut!((*self.registers).icr).write_volatile(0x01) }
}
}
// Safe because it just contains a pointer to device memory, which can be
// accessed from any context.
unsafe impl Send for Rtc {}
}歡迎使用 Rust 的並行程式設計
Rust 使用 OS 執行緒搭配著互斥鎖和通道來完整支援並行處理。
在將許多執行期並行錯誤轉換為編譯期錯誤的過程中,Rust 型別系統扮演了 重要角色。這通常稱為「無懼並行」,因為你可以依賴編譯器, 確保執行期能夠正確運作。
- Rust lets us access OS concurrency toolkit: threads, sync. primitives, etc.
- The type system gives us safety for concurrency without any special features.
- The same tools that help with “concurrent” access in a single thread (e.g., a called function that might mutate an argument or save references to it to read later) save us from multi-threading issues.
執行緒
Rust 執行緒的運作方式與其他語言類似:
use std::thread;
use std::time::Duration;
fn main() {
thread::spawn(|| {
for i in 1..10 {
println!("Count in thread: {i}!");
thread::sleep(Duration::from_millis(5));
}
});
for i in 1..5 {
println!("Main thread: {i}");
thread::sleep(Duration::from_millis(5));
}
}- 執行緒都是 daemon 執行緒,主執行緒不會等待這類執行緒完成運作。
- 執行緒恐慌均為各自獨立,並非彼此相關。
- 如果恐慌附帶酬載,可使用
downcast_ref解除封裝。
- 如果恐慌附帶酬載,可使用
-
Rust thread APIs look not too different from e.g. C++ ones.
-
執行範例。
- 5ms timing is loose enough that main and spawned threads stay mostly in lockstep.
- Notice that the program ends before the spawned thread reaches 10!
- This is because main ends the program and spawned threads do not make it persist.
- Compare to pthreads/C++ std::thread/boost::thread if desired.
-
How do we wait around for the spawned thread to complete?
-
thread::spawnreturns aJoinHandle. Look at the docs.JoinHandlehas a.join()method that blocks.
-
Use
let handle = thread::spawn(...)and laterhandle.join()to wait for the thread to finish and have the program count all the way to 10. -
Now what if we want to return a value?
-
Look at docs again:
thread::spawn’s closure returnsTJoinHandle.join()returnsthread::Result<T>
-
Use the
Resultreturn value fromhandle.join()to get access to the returned value. -
Ok, what about the other case?
- Trigger a panic in the thread. Note that this doesn’t panic
main. - Access the panic payload. This is a good time to talk about
Any.
- Trigger a panic in the thread. Note that this doesn’t panic
-
Now we can return values from threads! What about taking inputs?
- Capture something by reference in the thread closure.
- An error message indicates we must move it.
- Move it in, see we can compute and then return a derived value.
-
If we want to borrow?
- Main kills child threads when it returns, but another function would just return and leave them running.
- That would be stack use-after-return, which violates memory safety!
- How do we avoid this? see next slide.
限定範圍執行緒
一般執行緒無法借用環境的資源:
use std::thread;
fn foo() {
let s = String::from("Hello");
thread::spawn(|| {
println!("Length: {}", s.len());
});
}
fn main() {
foo();
}但是,你可以使用限定範圍執行緒執行這項功能:
use std::thread;
fn main() {
let s = String::from("Hello");
thread::scope(|scope| {
scope.spawn(|| {
println!("Length: {}", s.len());
});
});
}- 原因在於
thread::scope函式完成時,能保證所有執行緒都已加入,因此能夠傳回借用的資料。 - 適用 Rust 一般借用規則:可以由一個執行緒以可變方式借用,或者由任意數量的執行緒以不可變方式借用。
通道
Rust 通道分為兩個部分:Sender<T> 和 Receiver<T>。這兩個部分 透過通道相連,但你只能看到端點。
use std::sync::mpsc;
fn main() {
let (tx, rx) = mpsc::channel();
tx.send(10).unwrap();
tx.send(20).unwrap();
println!("Received: {:?}", rx.recv());
println!("Received: {:?}", rx.recv());
let tx2 = tx.clone();
tx2.send(30).unwrap();
println!("Received: {:?}", rx.recv());
}mpsc代表多重生產者、唯一消費者。Sender和SyncSender會實作Clone(用於製作多重生產者),但Receiver不會。send()和recv()會傳回Result。如果傳回的是Err,表示對應的Sender或Receiver已釋放,且通道已關閉。
無界限的通道
你可以使用 mpsc::channel() 取得無界限的非同步通道:
use std::sync::mpsc;
use std::thread;
use std::time::Duration;
fn main() {
let (tx, rx) = mpsc::channel();
thread::spawn(move || {
let thread_id = thread::current().id();
for i in 1..10 {
tx.send(format!("Message {i}")).unwrap();
println!("{thread_id:?}: sent Message {i}");
}
println!("{thread_id:?}: done");
});
thread::sleep(Duration::from_millis(100));
for msg in rx.iter() {
println!("Main: got {msg}");
}
}有界限的通道
有界限的同步通道可讓 send 阻擋現行執行緒:
use std::sync::mpsc;
use std::thread;
use std::time::Duration;
fn main() {
let (tx, rx) = mpsc::sync_channel(3);
thread::spawn(move || {
let thread_id = thread::current().id();
for i in 1..10 {
tx.send(format!("Message {i}")).unwrap();
println!("{thread_id:?}: sent Message {i}");
}
println!("{thread_id:?}: done");
});
thread::sleep(Duration::from_millis(100));
for msg in rx.iter() {
println!("Main: got {msg}");
}
}- 呼叫
send會阻塞目前執行緒,直到管道有空間接收新訊息為止。如果沒有東西讀取管道內容,執行緒可能會無限期遭到阻塞。 - 如果管道已關閉,對
send的呼叫就會取消,並顯示錯誤 (所以會傳回Result)。接收器遭捨棄時,管道就會關閉。 - 大小為零的受限管道稱為「會合管道」。每項傳送作業都會阻塞目前執行緒,直到其他執行緒呼叫
read為止。
Send 和 Sync
Rust 如何得知要禁止在執行緒間共享存取權?答案就在以下兩個特徵中:
Send 和 Sync 是 不安全的特徵。如果你的型別只包含其他有 Send 和 Sync 的型別, 編譯器就會自動根據型別為你產生 Send 和 Sync。或許如果你知道你的型別是適用的, 也可以手動實作。
- 這些特徵可視為標記,表示該型別含有特定執行緒安全屬性。
- 這些特徵就像一般特徵,可用於泛型條件約束。
Send
如果可以將
T值安全轉移至其他執行緒,型別T就會是Send。
將所有權轉移到其他執行緒的結果,就是「destructors」會在該執行緒中 執行。因此問題是,何時能在一個執行緒中配置一個值, 並在另一個執行緒中釋放這個值的記憶體。
舉例來說,與 SQLite 資料庫的連線必須只能透過單一執行緒 存取。
Sync
如果可以同時從多個執行緒存取
T值, 型別T就會是Sync。
更精確的定義如下:
&T必須為Send,T才會是Sync
這定義簡單的表示,若一個型別可以在確保執行緒安全的情況下被共用,這型別的參考值也可以安全的被傳遞於其他的執行緒。
原因在於如果型別為 Sync,表示能在多個執行緒之間共用,沒有資料競爭或其他同步問題的風險,因此可以安全轉移到其他執行緒。此外,由於可以從任何執行緒安全存取型別參考的資料,型別參考也能安全地轉移到其他執行緒。
範例
Send + Sync
你遇到的多數型別會是 Send + Sync:
i8、f32、bool、char、&str、…(T1, T2)、[T; N]、&[T]、struct { x: T }、…String、Option<T>、Vec<T>、Box<T>、…Arc<T>:透過原子參考計數明確防護執行緒安全。Mutex<T>:透過內部鎖定系統明確防護執行緒安全。AtomicBool、AtomicU8、…:使用特殊原子性指示。
如果型別參數是 Send + Sync, 一般型別通常就會是 Send + Sync。
Send + !Sync
以下型別可以轉移到其他執行緒,但不會防護執行緒安全。 原因通常在於內部可變性:
mpsc::Sender<T>mpsc::Receiver<T>Cell<T>RefCell<T>
!Send + Sync
以下型別會防護執行緒安全,但無法轉移至其他執行緒:
MutexGuard<T>:使用 OS 層級的原始元件,這類元件必須在建立該元件的 執行緒上釋放記憶體。
!Send + !Sync
以下型別不會防護執行緒安全,也無法轉移至其他執行緒:
Rc<T>:每個Rc<T>都有一個RcBox<T>參考,其中包含一個 非原子參考計數。*const T、*mut T:Rust 會假定原始指標可能有特殊的 並行考量。
共享狀態
Rust 會使用型別系統強制同步共享的資料,主要透過兩種型別 執行:
Arc
Arc<T> 可透過 Arc::clone 取得共享唯讀存取權:
use std::sync::Arc;
use std::thread;
fn main() {
let v = Arc::new(vec![10, 20, 30]);
let mut handles = Vec::new();
for _ in 1..5 {
let v = Arc::clone(&v);
handles.push(thread::spawn(move || {
let thread_id = thread::current().id();
println!("{thread_id:?}: {v:?}");
}));
}
handles.into_iter().for_each(|h| h.join().unwrap());
println!("v: {v:?}");
}Arc代表「原子參考計數」,這個Rc的執行緒安全版本會採用原子性 運算。Arc<T>implementsClonewhether or notTdoes. It implementsSendandSyncif and only ifTimplements them both.Arc::clone()會導致執行原子性運算的費用,但之後使用得到的T不需任何費用。- 留意參考循環,
Arc並不使用垃圾收集器進行偵測。std::sync::Weak可協助執行這項功能。
Mutex
Mutex<T> ensures mutual exclusion and allows mutable access to T behind a read-only interface (another form of interior mutability):
use std::sync::Mutex;
fn main() {
let v = Mutex::new(vec![10, 20, 30]);
println!("v: {:?}", v.lock().unwrap());
{
let mut guard = v.lock().unwrap();
guard.push(40);
}
println!("v: {:?}", v.lock().unwrap());
}請留意我們如何進行 impl<T: Send> Sync for Mutex<T> 的概括性 實作。
Mutexin Rust looks like a collection with just one element — the protected data.- 必須先取得互斥鎖,才能存取受保護的資料。
- 只要使用這個鎖,就能從
&Mutex<T>取得&mut T。MutexGuard可確保&mut T的壽命不會超過所持有的鎖。 Mutex<T>implements bothSendandSynciff (if and only if)TimplementsSend.- A read-write lock counterpart:
RwLock. - Why does
lock()return aResult?- 如果持有
Mutex的執行緒發生恐慌,Mutex就會「中毒」,指出 其保護的資料可能處於不一致的狀態。如果對已中毒的互斥鎖呼叫lock(), 會發生PoisonError錯誤。無論如何,你都可以對錯誤呼叫into_inner()來復原 資料。
- 如果持有
範例
我們來看看 Arc 和 Mutex 的實際應用情形:
use std::thread;
// use std::sync::{Arc, Mutex};
fn main() {
let v = vec![10, 20, 30];
let handle = thread::spawn(|| {
v.push(10);
});
v.push(1000);
handle.join().unwrap();
println!("v: {v:?}");
}可能的解決方案:
use std::sync::{Arc, Mutex};
use std::thread;
fn main() {
let v = Arc::new(Mutex::new(vec![10, 20, 30]));
let v2 = Arc::clone(&v);
let handle = thread::spawn(move || {
let mut v2 = v2.lock().unwrap();
v2.push(10);
});
{
let mut v = v.lock().unwrap();
v.push(1000);
}
handle.join().unwrap();
println!("v: {v:?}");
}重要部分:
v已同時納入Arc和Mutex,因為兩者的考量互不相關。- 將
Mutex納入Arc,是在執行緒間共享可變狀態的常見模式。
- 將
v: Arc<_>需要複製成v2,才能轉移到其他執行緒。請注意,move已新增至 lambda 簽章。- 采用區塊,盡量縮小
LockGuard的範圍。
練習
歡迎使用以下項目,練習新的並行技能:
-
哲學家就餐問題:經典的並行練習題。
-
多執行緒連結檢查工具:您可以在這項大型專案中使用 Cargo 下載依附元件,然後同時檢查連結。
完成練習後,您可以看看我們提供的解決方案。
哲學家就餐問題
哲學家就餐問題是經典的並行練習題:
五位哲學家要在同一張餐桌上一起用餐,他們各有自己的座位。每兩個餐盤之間有一支叉子。餐盤裡裝著某種義大利麵,必須使用兩支叉子才能享用。哲學家無法同時思考和進食,而且必須左右手都拿著叉子,才能吃到義大利麵。因此,只有身旁的兩位哲學家在思考 (而非進食) 時,才能取得兩支叉子。某個哲學家吃完後,會同時放下兩支叉子。
這項練習需要在本機安裝 Cargo。請將以下程式碼複製到名為 src/main.rs 的檔案、填寫空白處,然後測試 cargo run 不會發生死結:
use std::sync::{mpsc, Arc, Mutex};
use std::thread;
use std::time::Duration;
struct Fork;
struct Philosopher {
name: String,
// left_fork: ...
// right_fork: ...
// thoughts: ...
}
impl Philosopher {
fn think(&self) {
self.thoughts
.send(format!("Eureka! {} has a new idea!", &self.name))
.unwrap();
}
fn eat(&self) {
// Pick up forks...
println!("{} is eating...", &self.name);
thread::sleep(Duration::from_millis(10));
}
}
static PHILOSOPHERS: &[&str] =
&["Socrates", "Hypatia", "Plato", "Aristotle", "Pythagoras"];
fn main() {
// Create forks
// Create philosophers
// Make each of them think and eat 100 times
// Output their thoughts
}您可以使用下列 Cargo.toml:
[package]
name = "dining-philosophers"
version = "0.1.0"
edition = "2021"
多執行緒連結檢查器
讓我們運用所學的新知識,建立多執行緒連結檢查工具。該工具應從網頁開始,檢查頁面上的連結是否有效,並應以遞迴方式檢查相同網域中的其他頁面,直到驗證完所有頁面為止。
為此,您需要使用 HTTP 用戶端,例如 reqwest。請建立新的 Cargo 專案,並使用以下指令,將 reqwest 設為依附元件:
cargo new link-checker
cd link-checker
cargo add --features blocking,rustls-tls reqwest
如果
cargo add失敗並顯示error: no such subcommand,請手動編輯Cargo.toml檔案。請新增下列依附元件。
您也需要設法找出連結。為此,我們可以使用 scraper:
cargo add scraper
最後,我們需要處理錯誤的方法。為此,我們會使用 thiserror:
cargo add thiserror
cargo add 呼叫會更新 Cargo.toml 檔案,如下所示:
[package]
name = "link-checker"
version = "0.1.0"
edition = "2021"
publish = false
[dependencies]
reqwest = { version = "0.11.12", features = ["blocking", "rustls-tls"] }
scraper = "0.13.0"
thiserror = "1.0.37"
您現在可以下載起始網頁。請以小型網站嘗試這項操作,例如 https://www.google.org/。
src/main.rs 檔案應如下所示:
use reqwest::blocking::Client;
use reqwest::Url;
use scraper::{Html, Selector};
use thiserror::Error;
#[derive(Error, Debug)]
enum Error {
#[error("request error: {0}")]
ReqwestError(#[from] reqwest::Error),
#[error("bad http response: {0}")]
BadResponse(String),
}
#[derive(Debug)]
struct CrawlCommand {
url: Url,
extract_links: bool,
}
fn visit_page(client: &Client, command: &CrawlCommand) -> Result<Vec<Url>, Error> {
println!("Checking {:#}", command.url);
let response = client.get(command.url.clone()).send()?;
if !response.status().is_success() {
return Err(Error::BadResponse(response.status().to_string()));
}
let mut link_urls = Vec::new();
if !command.extract_links {
return Ok(link_urls);
}
let base_url = response.url().to_owned();
let body_text = response.text()?;
let document = Html::parse_document(&body_text);
let selector = Selector::parse("a").unwrap();
let href_values = document
.select(&selector)
.filter_map(|element| element.value().attr("href"));
for href in href_values {
match base_url.join(href) {
Ok(link_url) => {
link_urls.push(link_url);
}
Err(err) => {
println!("On {base_url:#}: ignored unparsable {href:?}: {err}");
}
}
}
Ok(link_urls)
}
fn main() {
let client = Client::new();
let start_url = Url::parse("https://www.google.org").unwrap();
let crawl_command = CrawlCommand{ url: start_url, extract_links: true };
match visit_page(&client, &crawl_command) {
Ok(links) => println!("Links: {links:#?}"),
Err(err) => println!("Could not extract links: {err:#}"),
}
}使用以下指令,在 src/main.rs 中執行程式碼:
cargo run
工作
- 使用執行緒同時檢查連結:將要檢查的網址傳送到管道,讓幾個執行緒同時檢查網址。
- 拓展這項功能,以遞迴方式擷取
www.google.org網域中所有頁面上的連結。將頁面上限設為 100 個左右,以免遭到網站封鎖。
並行:上午練習
哲學家就餐問題
(返回練習)
use std::sync::{mpsc, Arc, Mutex};
use std::thread;
use std::time::Duration;
struct Fork;
struct Philosopher {
name: String,
left_fork: Arc<Mutex<Fork>>,
right_fork: Arc<Mutex<Fork>>,
thoughts: mpsc::SyncSender<String>,
}
impl Philosopher {
fn think(&self) {
self.thoughts
.send(format!("Eureka! {} has a new idea!", &self.name))
.unwrap();
}
fn eat(&self) {
println!("{} is trying to eat", &self.name);
let _left = self.left_fork.lock().unwrap();
let _right = self.right_fork.lock().unwrap();
println!("{} is eating...", &self.name);
thread::sleep(Duration::from_millis(10));
}
}
static PHILOSOPHERS: &[&str] =
&["Socrates", "Hypatia", "Plato", "Aristotle", "Pythagoras"];
fn main() {
let (tx, rx) = mpsc::sync_channel(10);
let forks = (0..PHILOSOPHERS.len())
.map(|_| Arc::new(Mutex::new(Fork)))
.collect::<Vec<_>>();
for i in 0..forks.len() {
let tx = tx.clone();
let mut left_fork = Arc::clone(&forks[i]);
let mut right_fork = Arc::clone(&forks[(i + 1) % forks.len()]);
// To avoid a deadlock, we have to break the symmetry
// somewhere. This will swap the forks without deinitializing
// either of them.
if i == forks.len() - 1 {
std::mem::swap(&mut left_fork, &mut right_fork);
}
let philosopher = Philosopher {
name: PHILOSOPHERS[i].to_string(),
thoughts: tx,
left_fork,
right_fork,
};
thread::spawn(move || {
for _ in 0..100 {
philosopher.eat();
philosopher.think();
}
});
}
drop(tx);
for thought in rx {
println!("{thought}");
}
}連結檢查器
(返回練習)
use std::sync::{mpsc, Arc, Mutex};
use std::thread;
use reqwest::blocking::Client;
use reqwest::Url;
use scraper::{Html, Selector};
use thiserror::Error;
#[derive(Error, Debug)]
enum Error {
#[error("request error: {0}")]
ReqwestError(#[from] reqwest::Error),
#[error("bad http response: {0}")]
BadResponse(String),
}
#[derive(Debug)]
struct CrawlCommand {
url: Url,
extract_links: bool,
}
fn visit_page(client: &Client, command: &CrawlCommand) -> Result<Vec<Url>, Error> {
println!("Checking {:#}", command.url);
let response = client.get(command.url.clone()).send()?;
if !response.status().is_success() {
return Err(Error::BadResponse(response.status().to_string()));
}
let mut link_urls = Vec::new();
if !command.extract_links {
return Ok(link_urls);
}
let base_url = response.url().to_owned();
let body_text = response.text()?;
let document = Html::parse_document(&body_text);
let selector = Selector::parse("a").unwrap();
let href_values = document
.select(&selector)
.filter_map(|element| element.value().attr("href"));
for href in href_values {
match base_url.join(href) {
Ok(link_url) => {
link_urls.push(link_url);
}
Err(err) => {
println!("On {base_url:#}: ignored unparsable {href:?}: {err}");
}
}
}
Ok(link_urls)
}
struct CrawlState {
domain: String,
visited_pages: std::collections::HashSet<String>,
}
impl CrawlState {
fn new(start_url: &Url) -> CrawlState {
let mut visited_pages = std::collections::HashSet::new();
visited_pages.insert(start_url.as_str().to_string());
CrawlState { domain: start_url.domain().unwrap().to_string(), visited_pages }
}
/// Determine whether links within the given page should be extracted.
fn should_extract_links(&self, url: &Url) -> bool {
let Some(url_domain) = url.domain() else {
return false;
};
url_domain == self.domain
}
/// Mark the given page as visited, returning false if it had already
/// been visited.
fn mark_visited(&mut self, url: &Url) -> bool {
self.visited_pages.insert(url.as_str().to_string())
}
}
type CrawlResult = Result<Vec<Url>, (Url, Error)>;
fn spawn_crawler_threads(
command_receiver: mpsc::Receiver<CrawlCommand>,
result_sender: mpsc::Sender<CrawlResult>,
thread_count: u32,
) {
let command_receiver = Arc::new(Mutex::new(command_receiver));
for _ in 0..thread_count {
let result_sender = result_sender.clone();
let command_receiver = command_receiver.clone();
thread::spawn(move || {
let client = Client::new();
loop {
let command_result = {
let receiver_guard = command_receiver.lock().unwrap();
receiver_guard.recv()
};
let Ok(crawl_command) = command_result else {
// The sender got dropped. No more commands coming in.
break;
};
let crawl_result = match visit_page(&client, &crawl_command) {
Ok(link_urls) => Ok(link_urls),
Err(error) => Err((crawl_command.url, error)),
};
result_sender.send(crawl_result).unwrap();
}
});
}
}
fn control_crawl(
start_url: Url,
command_sender: mpsc::Sender<CrawlCommand>,
result_receiver: mpsc::Receiver<CrawlResult>,
) -> Vec<Url> {
let mut crawl_state = CrawlState::new(&start_url);
let start_command = CrawlCommand { url: start_url, extract_links: true };
command_sender.send(start_command).unwrap();
let mut pending_urls = 1;
let mut bad_urls = Vec::new();
while pending_urls > 0 {
let crawl_result = result_receiver.recv().unwrap();
pending_urls -= 1;
match crawl_result {
Ok(link_urls) => {
for url in link_urls {
if crawl_state.mark_visited(&url) {
let extract_links = crawl_state.should_extract_links(&url);
let crawl_command = CrawlCommand { url, extract_links };
command_sender.send(crawl_command).unwrap();
pending_urls += 1;
}
}
}
Err((url, error)) => {
bad_urls.push(url);
println!("Got crawling error: {:#}", error);
continue;
}
}
}
bad_urls
}
fn check_links(start_url: Url) -> Vec<Url> {
let (result_sender, result_receiver) = mpsc::channel::<CrawlResult>();
let (command_sender, command_receiver) = mpsc::channel::<CrawlCommand>();
spawn_crawler_threads(command_receiver, result_sender, 16);
control_crawl(start_url, command_sender, result_receiver)
}
fn main() {
let start_url = reqwest::Url::parse("https://www.google.org").unwrap();
let bad_urls = check_links(start_url);
println!("Bad URLs: {:#?}", bad_urls);
}非同步的 Rust
「非同步(async)」是一種將多個任務併行執行的模式。在這樣的模式中,當其中一個任務進入阻塞狀態時,系統會去執行至另一個可執行的任務。這種模式允許在執行緒數量有限的環境下執行大量的任務,這是因為每個任務所造成的開銷通常都很低,而且作業系統提供的基本功能能夠有效地辨識可處理的 I/O。
Rust 的非同步操作是透過「future」來處理,代表可能在未來完成的工作。Future 會處在被「輪詢(poll)」的狀態,直到它送出信號來表示工作已經處理完成。
Future 會被非同步的執行環境(runtime)輪詢,而執行環境有許多種可選擇。
比較
-
Python 有一個類似的模型
asyncio。不過asyncio的Future類型是根據回呼函數(callback)而非輪詢。非同步的 Python 程式需要「迴圈(loop)」來處理,類似於 Rust 的執行環境。 -
JavaScript 的
Promise也是類似的概念,但仍是基於回呼函數。JavaScript 的語言執行環境實作了事件迴圈(event loop),所以隱藏了很多關於 Promise 的處理細節。
async/await
從高層次的角度來看,非同步的 Rust 程式碼看起來很像「一般的」同步程式碼:
use futures::executor::block_on;
async fn count_to(count: i32) {
for i in 1..=count {
println!("Count is: {i}!");
}
}
async fn async_main(count: i32) {
count_to(count).await;
}
fn main() {
block_on(async_main(10));
}重要須知:
-
注意這只是一個簡化過的程式碼,目的是要示範程式語法。這份範例程式碼當中並沒有需要長時間運行的操作,也沒有真正的併行處理!
-
如何得知非同步函數的回傳型別?
- 在
main函數中使用let feature: () = async_main(10);以查看型態。
- 在
-
The “async” keyword is syntactic sugar. The compiler replaces the return type with a future.
-
你不能把
main函數標示成非同步函數,除非你對編譯器額外設定了如何處理回傳的 future 的方式。 -
You need an executor to run async code.
block_onblocks the current thread until the provided future has run to completion. -
.await會非同步地等待其他操作執行完畢。別於block_on,.await不會阻塞當前的執行緒。 -
.awaitcan only be used inside anasyncfunction (or block; these are introduced later).
Futures
Future 是一種特徵,物件實作這種特徵時,代表作業或許尚未完成。Future 可供輪詢,而 poll 會傳回 Poll。
#![allow(unused)]
fn main() {
use std::pin::Pin;
use std::task::Context;
pub trait Future {
type Output;
fn poll(self: Pin<&mut Self>, cx: &mut Context<'_>) -> Poll<Self::Output>;
}
pub enum Poll<T> {
Ready(T),
Pending,
}
}非同步函式會傳回 impl Future。您也可以為自己的型別實作 Future,但不常見。舉例來說,從 tokio::spawn 傳回的 JoinHandle 會實作 Future,以便允許會合。
套用至 Future 的 .await 關鍵字會暫停目前的非同步函式,直到 Future 準備就緒,接著則會計算其輸出內容。
-
Future和Poll型別的實作方式完全相同。點選連結即可在文件中查看實作方式。 -
我們不會探討
Pin和Context,因為我們會專注於編寫非同步程式碼,而非建立新的非同步基元。簡單來說:-
Context允許 Future 在事件發生時安排自身再次接受輪詢。 -
Pin可確保 Future 在記憶體中不被移動,這樣該 Future 的指標仍維持有效。如要允許參照在.await後持續有效,這麼做就有必要。
-
Runtimes
「執行環境」支援以非同步方式執行作業 (「反應器」),並負責執行 Future (「執行器」)。Rust 沒有「內建」執行階段,但提供多種選項:
- Tokio:效能良好,具有完善的功能生態系統,例如適用於 HTTP 的 Hyper,或適用於 gRPC 的 Tonic。
- async-std:目標是成為「async 的 std」,並在
async::task中含有基本執行環境。 - smol:簡單輕量
許多大型應用程式都有專屬的執行環境。例如,Fuchsia 已有一個執行環境。
-
請注意,在列出的執行環境中,Rust Playground 只支援 Tokio。Playground 也不允許任何 I/O,因此大部分有趣的非同步作業皆無法在 Playground 中執行。
-
除非接受執行器輪詢,否則 Future 不會執行任何作業 (甚至不會啟動 I/O 作業),因此 Future 是「惰性」的。這一點與 JS Promise 不同。舉例來說,後者即使從未使用過,仍會執行至完成為止。
Tokio
Tokio 提供以下項目:
- 執行非同步程式碼的多執行緒執行階段。
- 標準程式庫的非同步版本。
- 龐大的程式庫生態系統。
use tokio::time;
async fn count_to(count: i32) {
for i in 1..=count {
println!("Count in task: {i}!");
time::sleep(time::Duration::from_millis(5)).await;
}
}
#[tokio::main]
async fn main() {
tokio::spawn(count_to(10));
for i in 1..5 {
println!("Main task: {i}");
time::sleep(time::Duration::from_millis(5)).await;
}
}-
透過
tokio::main巨集,我們現在可以使main非同步。 -
spawn函式會建立新的並行「工作」。 -
注意:
spawn會採用Future,您不會在count_to上呼叫.await。
進一步探究:
-
為什麼
count_to(通常) 不會達到 10?這是非同步取消的例子。直到tokio::spawn完成前,所傳回的控制代碼可以接受等待。 -
嘗試使用
count_to(10).await,而非採用產生狀態。 -
嘗試等待從
tokio::spawn傳回的工作。
工作
Rust 的工作系統是採用輕量執行緒的形式。
一項工作具有一個頂層 Future,執行器會輪詢該 Future 來推動進度。該 Future 可能有一或多個巢狀 Future,供其 poll 方法輪詢,可約略對應至呼叫堆疊。藉由輪詢多個子項 Future (例如競爭的計時器和 I/O 作業),即可在工作內實現並行機制。
use tokio::io::{self, AsyncReadExt, AsyncWriteExt};
use tokio::net::TcpListener;
#[tokio::main]
async fn main() -> io::Result<()> {
let listener = TcpListener::bind("127.0.0.1:0").await?;
println!("listening on port {}", listener.local_addr()?.port());
loop {
let (mut socket, addr) = listener.accept().await?;
println!("connection from {addr:?}");
tokio::spawn(async move {
socket.write_all(b"Who are you?\n").await.expect("socket error");
let mut buf = vec![0; 1024];
let name_size = socket.read(&mut buf).await.expect("socket error");
let name = std::str::from_utf8(&buf[..name_size]).unwrap().trim();
let reply = format!("Thanks for dialing in, {name}!\n");
socket.write_all(reply.as_bytes()).await.expect("socket error");
});
}
}將這個範例複製到準備好的 src/main.rs,然後從中執行。
請嘗試利用 TCP 連線工具來連線,例如 nc 或 telnet。
-
請學生以圖像呈現範例伺服器具有幾個已連線用戶端時的狀態。會有哪些工作?Future 為何?
-
這是我們第一次看到
async區塊,與閉包類似,但不接受任何引數。其回傳值為 Future,類似於async fn。 -
將非同步區塊重構為函式,並使用
?改善錯誤處理機制。
非同步管道
有些 Crate 支援非同步管道。例如 tokio:
use tokio::sync::mpsc::{self, Receiver};
async fn ping_handler(mut input: Receiver<()>) {
let mut count: usize = 0;
while let Some(_) = input.recv().await {
count += 1;
println!("Received {count} pings so far.");
}
println!("ping_handler complete");
}
#[tokio::main]
async fn main() {
let (sender, receiver) = mpsc::channel(32);
let ping_handler_task = tokio::spawn(ping_handler(receiver));
for i in 0..10 {
sender.send(()).await.expect("Failed to send ping.");
println!("Sent {} pings so far.", i + 1);
}
drop(sender);
ping_handler_task.await.expect("Something went wrong in ping handler task.");
}Future 控制流程
Future 可以合併,產生並行運算流程圖。我們已介紹過工作,工作的功能類似於獨立的執行作業執行緒。
加入
會合作業會等待整個 Future 集合準備就緒,然後蒐集多個結果一次回傳。這類似於 JavaScript 中的 Promise.all 或 Python 中的 asyncio.gather。
use anyhow::Result;
use futures::future;
use reqwest;
use std::collections::HashMap;
async fn size_of_page(url: &str) -> Result<usize> {
let resp = reqwest::get(url).await?;
Ok(resp.text().await?.len())
}
#[tokio::main]
async fn main() {
let urls: [&str; 4] = [
"https://google.com",
"https://httpbin.org/ip",
"https://play.rust-lang.org/",
"BAD_URL",
];
let futures_iter = urls.into_iter().map(size_of_page);
let results = future::join_all(futures_iter).await;
let page_sizes_dict: HashMap<&str, Result<usize>> =
urls.into_iter().zip(results.into_iter()).collect();
println!("{:?}", page_sizes_dict);
}將這個範例複製到準備好的 src/main.rs,然後從中執行。
-
若是多個不同型別的 Future,您可以使用
std::future::join!,但必須知道編譯時會有多少 Future。這目前位於futuresCrate 中,不久後就會在std::future中推出穩定版。 -
join的風險是某個 Future 可能無法解決,導致程式停滯。 -
舉例來說,您也可以併用
join_all和join!,讓所有要求會合至 HTTP 服務和資料庫查詢。請嘗試使用futures::join!,將tokio::time::sleep新增至 Future。這並非逾時 (逾時需要select!,下一章會說明),而是示範join!。
選取
選取作業會等到任何一組 Future 準備就緒,再針對該 Future 的結果提供回應。這類似於 JavaScript 中的 Promise.race。在 Python 中,則可與 asyncio.wait(task_set, return_when=asyncio.FIRST_COMPLETED) 比較。
類似於比對陳述式,select! 的主體有多個分支,格式皆為 pattern = future => statement。當 future 準備就緒時,回傳值會由 pattern 解構。接著,statement 執行時會利用產生的變數。statement 結果會成為 select! 巨集的結果。
use tokio::sync::mpsc::{self, Receiver};
use tokio::time::{sleep, Duration};
#[derive(Debug, PartialEq)]
enum Animal {
Cat { name: String },
Dog { name: String },
}
async fn first_animal_to_finish_race(
mut cat_rcv: Receiver<String>,
mut dog_rcv: Receiver<String>,
) -> Option<Animal> {
tokio::select! {
cat_name = cat_rcv.recv() => Some(Animal::Cat { name: cat_name? }),
dog_name = dog_rcv.recv() => Some(Animal::Dog { name: dog_name? })
}
}
#[tokio::main]
async fn main() {
let (cat_sender, cat_receiver) = mpsc::channel(32);
let (dog_sender, dog_receiver) = mpsc::channel(32);
tokio::spawn(async move {
sleep(Duration::from_millis(500)).await;
cat_sender.send(String::from("Felix")).await.expect("Failed to send cat.");
});
tokio::spawn(async move {
sleep(Duration::from_millis(50)).await;
dog_sender.send(String::from("Rex")).await.expect("Failed to send dog.");
});
let winner = first_animal_to_finish_race(cat_receiver, dog_receiver)
.await
.expect("Failed to receive winner");
println!("Winner is {winner:?}");
}-
這個範例是貓狗賽跑。
first_animal_to_finish_race會監聽兩個管道,並挑選先抵達者。狗花了 50 毫秒,因此贏過花費 500 毫秒的貓。 -
在這個範例中,您可以使用
oneshot管道,因為管道只應接收一個send。 -
嘗試為賽跑加上期限,示範選擇各種 Future 的情形。
-
請注意,
select!會捨棄不相符的分支版本,這會取消 Future。若每次執行select!時都會建立新的 Future,就最容易使用這種做法。- 替代方法是傳遞
&mut future,而非傳遞 Future 本身,但這可能導致多項問題,詳細討論請見 pinning 投影片。
- 替代方法是傳遞
async/await 的問題
async/await 為並行非同步程式設計提供了便利有效率的抽象機制。不過,Rust 中的 async/await 模型也會造成問題和犯錯的機會。本章會說明其中幾種情形:
阻塞執行器
大多數非同步執行環境只允許並行執行 IO 工作。這表示阻塞 CPU 的工作會阻塞執行器,不讓其他工作執行。一個簡單的解決方法,就是盡可能使用與非同步機制同等的方法。
use futures::future::join_all;
use std::time::Instant;
async fn sleep_ms(start: &Instant, id: u64, duration_ms: u64) {
std::thread::sleep(std::time::Duration::from_millis(duration_ms));
println!(
"future {id} slept for {duration_ms}ms, finished after {}ms",
start.elapsed().as_millis()
);
}
#[tokio::main(flavor = "current_thread")]
async fn main() {
let start = Instant::now();
let sleep_futures = (1..=10).map(|t| sleep_ms(&start, t, t * 10));
join_all(sleep_futures).await;
}-
執行程式碼,然後您會發現休眠狀態是連續發生,而非並行發生。
-
"current_thread"變種版本會將所有工作放在單一執行緒。這樣的效果更加明顯,但多執行緒變種版本仍存在該錯誤。 -
將
std::thread::sleep改為tokio::time::sleep,並等待結果。 -
另一個修正方式為
tokio::task::spawn_blocking,這可產生實際執行緒,並將控制代碼轉換為 Future,而不會阻塞執行器。 -
請勿將工作視為 OS 執行緒。工作不會 1 對 1 對應,且大部分執行器會允許在單一 OS 執行緒中執行多項工作。在透過 FFI 與其他程式庫互動時,這尤其會造成問題,因為程式庫可能會依附執行緒本機儲存空間,或對應至特定 OS 執行緒 (例如 CUDA)。在這種情況下,請優先使用
tokio::task::spawn_blocking。 -
請謹慎使用同步互斥鎖。將互斥鎖保留在
.await上,可能會導致其他工作造成阻塞,且該工作可能在同一執行緒上執行。
Pin
非同步區塊和函式會傳回實作 Future 特徵的型別。傳回的型別是編譯器轉換的結果,會將本機變數轉換成在 Future 中儲存的資料。
其中一些變數可保留指向其他本機變數的指標。因此,Future 不應移至其他記憶體位置,以免這些指標失效。
為避免在記憶體中移動 Future 型別,此型別只能透過固定指標輪詢。Pin 是參照的包裝函式,會禁止所有將所指向例項移至不同記憶體位置的作業。
use tokio::sync::{mpsc, oneshot};
use tokio::task::spawn;
use tokio::time::{sleep, Duration};
// A work item. In this case, just sleep for the given time and respond
// with a message on the `respond_on` channel.
#[derive(Debug)]
struct Work {
input: u32,
respond_on: oneshot::Sender<u32>,
}
// A worker which listens for work on a queue and performs it.
async fn worker(mut work_queue: mpsc::Receiver<Work>) {
let mut iterations = 0;
loop {
tokio::select! {
Some(work) = work_queue.recv() => {
sleep(Duration::from_millis(10)).await; // Pretend to work.
work.respond_on
.send(work.input * 1000)
.expect("failed to send response");
iterations += 1;
}
// TODO: report number of iterations every 100ms
}
}
}
// A requester which requests work and waits for it to complete.
async fn do_work(work_queue: &mpsc::Sender<Work>, input: u32) -> u32 {
let (tx, rx) = oneshot::channel();
work_queue
.send(Work { input, respond_on: tx })
.await
.expect("failed to send on work queue");
rx.await.expect("failed waiting for response")
}
#[tokio::main]
async fn main() {
let (tx, rx) = mpsc::channel(10);
spawn(worker(rx));
for i in 0..100 {
let resp = do_work(&tx, i).await;
println!("work result for iteration {i}: {resp}");
}
}-
您可以將此視為演員模型的例子。演員通常會在迴圈中呼叫
select!。 -
這彙整了先前幾堂課的內容,您可以放鬆慢慢做。
-
直接的將
_ = sleep(Duration::from_millis(100)) => { println!(..) }新增至select!。這永遠不會執行。為什麼? -
請改為在
loop之外新增含有該 Future 的timeout_fut:#![allow(unused)] fn main() { let mut timeout_fut = sleep(Duration::from_millis(100)); loop { select! { .., _ = timeout_fut => { println!(..); }, } } } -
這樣還是無法運作。請根據編譯器錯誤,將
&mut新增至select!中的timeout_fut來處理移動作業,然後使用Box::pin:#![allow(unused)] fn main() { let mut timeout_fut = Box::pin(sleep(Duration::from_millis(100))); loop { select! { .., _ = &mut timeout_fut => { println!(..); }, } } } -
這樣可以編譯,但逾時到期後,每次疊代都會是
Poll::Ready(熔斷型 Future 有助解決這個問題)。更新即可在每次到期時重設timeout_fut。
-
-
Box 會在堆積上分配。在某些情況下,也可以採用
std::pin::pin!(最近才推出穩定版,舊版程式碼通常使用tokio::pin!),但這不容易用於已重新指派的 Future。 -
另一個替代方案是完全不使用
pin,改為產生另一項工作,該工作每 100 毫秒就會傳送至oneshot管道。 -
包含指向自己的指標的資料稱為自我參照。一般而言,Rust 借用檢查器會禁止移動自我參照資料,因為參照的留存時間不會超過其指向的資料。不過,非同步區塊和函式的程式碼轉換不會由借用檢查器驗證。
-
Pin是參照的包裝函式。如要從現有位置移動物件,使用固定指標是行不通的。但若使用未固定的指標,則仍可以移動物件。 -
Future特徵的poll方法是使用Pin<&mut Self>參照例項,而非使用&mut Self。因此,您只能在固定指標上呼叫這個方法。
非同步特徵
Async methods in traits are were stabilized only recently, in the 1.75 release. This required support for using return-position impl Trait (RPIT) in traits, as the desugaring for async fn includes -> impl Future<Output = ...>.
However, even with the native support today there are some pitfalls around async fn and RPIT in traits:
-
Return-position impl Trait captures all in-scope lifetimes (so some patterns of borrowing cannot be expressed)
-
Traits whose methods use return-position
impl traitorasyncare notdyncompatible.
如果需要 dyn 支援,Crate async_trait 提供採用巨集的解決方法(但有些要注意的地方):
use async_trait::async_trait;
use std::time::Instant;
use tokio::time::{sleep, Duration};
#[async_trait]
trait Sleeper {
async fn sleep(&self);
}
struct FixedSleeper {
sleep_ms: u64,
}
#[async_trait]
impl Sleeper for FixedSleeper {
async fn sleep(&self) {
sleep(Duration::from_millis(self.sleep_ms)).await;
}
}
async fn run_all_sleepers_multiple_times(
sleepers: Vec<Box<dyn Sleeper>>,
n_times: usize,
) {
for _ in 0..n_times {
println!("running all sleepers..");
for sleeper in &sleepers {
let start = Instant::now();
sleeper.sleep().await;
println!("slept for {}ms", start.elapsed().as_millis());
}
}
}
#[tokio::main]
async fn main() {
let sleepers: Vec<Box<dyn Sleeper>> = vec![
Box::new(FixedSleeper { sleep_ms: 50 }),
Box::new(FixedSleeper { sleep_ms: 100 }),
];
run_all_sleepers_multiple_times(sleepers, 5).await;
}-
async_trait相當容易使用,但請注意,它是運用堆積分配來達成此效果。這種堆積分配會造成效能負擔。 -
有關
async trait語言支援的困難處涉及艱深的 Rust,可能不適合深入介紹。如有興趣深入探究,可以參閱 Niko Matsakis 的這篇文章,說明得相當清楚。 -
嘗試建立新的休眠程式結構體,讓該結構體隨機決定休眠時間長度,然後將其新增至 Vec。
安裝
捨棄 Future 表示 Future 無法再供輪詢。這稱為「取消」,可能發生在任何 await 時間點。即使 Future 遭到取消,也需審慎確保系統正常運作,例如不應出現死結或遺失資料。
use std::io::{self, ErrorKind};
use std::time::Duration;
use tokio::io::{AsyncReadExt, AsyncWriteExt, DuplexStream};
struct LinesReader {
stream: DuplexStream,
}
impl LinesReader {
fn new(stream: DuplexStream) -> Self {
Self { stream }
}
async fn next(&mut self) -> io::Result<Option<String>> {
let mut bytes = Vec::new();
let mut buf = [0];
while self.stream.read(&mut buf[..]).await? != 0 {
bytes.push(buf[0]);
if buf[0] == b'\n' {
break;
}
}
if bytes.is_empty() {
return Ok(None);
}
let s = String::from_utf8(bytes)
.map_err(|_| io::Error::new(ErrorKind::InvalidData, "非 UTF-8"))?;
Ok(Some(s))
}
}
async fn slow_copy(source: String, mut dest: DuplexStream) -> std::io::Result<()> {
for b in source.bytes() {
dest.write_u8(b).await?;
tokio::time::sleep(Duration::from_millis(10)).await
}
Ok(())
}
#[tokio::main]
async fn main() -> std::io::Result<()> {
let (client, server) = tokio::io::duplex(5);
let handle = tokio::spawn(slow_copy("hi\nthere\n".to_owned(), client));
let mut lines = LinesReader::new(server);
let mut interval = tokio::time::interval(Duration::from_millis(60));
loop {
tokio::select! {
_ = interval.tick() => println!("tick!"),
line = lines.next() => if let Some(l) = line? {
print!("{}", l)
} else {
break
},
}
}
handle.await.unwrap()?;
Ok(())
}-
編譯器無法確保安全的取消作業。您需要閱讀 API 說明文件,並考量
async fn保留的狀態。 -
與
panic和?不同,取消是正常控制流程的一部分 (相較於錯誤處理)。 -
此範例失去字串的某些部分。
-
每當
tick()分支版本先完成時,next()和其buf都會遭到捨棄。 -
LinesReader可讓buf成為結構體的一部分,確保安全的取消作業:#![allow(unused)] fn main() { struct LinesReader { stream: DuplexStream, bytes: Vec<u8>, buf: [u8; 1], } impl LinesReader { fn new(stream: DuplexStream) -> Self { Self { stream, bytes: Vec::new(), buf: [0] } } async fn next(&mut self) -> io::Result<Option<String>> { // prefix buf and bytes with self. // ... let raw = std::mem::take(&mut self.bytes); let s = String::from_utf8(raw) // ... } } }
-
-
Interval::tick會追蹤滴答是否「已送達」,因此可確保安全的取消作業。 -
AsyncReadExt::readod.read) 只會傳回資料或不讀取資料,因此可確保安全的取消作業。 -
AsyncBufReadExt::read_line與本範例相似,「無法」確保安全的取消作業。如要瞭解詳情和替代方案,請參閱說明文件。
練習
為幫助您練習非同步 Rust 技巧,我們再次提供了兩項練習:
-
哲學家就餐問題:我們早上已看過這個練習題,這次要使用非同步 Rust 來實作。
-
廣播即時通訊應用程式:利用這項大型專案,您可以嘗試使用更進階的非同步 Rust 功能。
完成練習後,您可以看看我們提供的解決方案。
哲學家就餐問題 — 非同步
請參閱哲學家就餐問題,查看題目說明。
和之前一樣,這項練習需要在本機安裝 Cargo。請將以下程式碼複製到名為 src/main.rs 的檔案、填寫空白處,然後測試 cargo run 不會發生死結:
use std::sync::Arc;
use tokio::sync::mpsc::{self, Sender};
use tokio::sync::Mutex;
use tokio::time;
struct Fork;
struct Philosopher {
name: String,
// left_fork: ...
// right_fork: ...
// thoughts: ...
}
impl Philosopher {
async fn think(&self) {
self.thoughts
.send(format!("Eureka! {} has a new idea!", &self.name))
.await
.unwrap();
}
async fn eat(&self) {
// Keep trying until we have both forks
println!("{} is eating...", &self.name);
time::sleep(time::Duration::from_millis(5)).await;
}
}
static PHILOSOPHERS: &[&str] =
&["Socrates", "Hypatia", "Plato", "Aristotle", "Pythagoras"];
#[tokio::main]
async fn main() {
// Create forks
// Create philosophers
// Make them think and eat
// Output their thoughts
}這次是使用非同步 Rust,因此會需要 tokio 依附元件。您可以使用下列 Cargo.toml:
[package]
name = "dining-philosophers-async-dine"
version = "0.1.0"
edition = "2021"
[dependencies]
tokio = { version = "1.26.0", features = ["sync", "time", "macros", "rt-multi-thread"] }
另請注意,這次必須使用 tokio Crate 中的 Mutex 和 mpsc 模組。
- 您的實作項目能否採用單一執行緒?
廣播聊天應用程式
在本練習中,我們要運用所學的新知識,實作廣播即時通訊應用程式。我們有一個即時通訊伺服器,供用戶端連線和發布訊息。用戶端會從標準輸入內容讀取使用者訊息,然後將訊息傳送至伺服器。即時通訊伺服器會將收到的每則訊息播送至所有用戶端。
為此,我們會使用伺服器上的廣播通道 和 tokio_websockets,在用戶端和伺服器之間通訊。
請建立新的 Cargo 專案,並新增下列依附元件:
Cargo.toml:
[package]
name = "chat-async"
version = "0.1.0"
edition = "2021"
[dependencies]
futures-util = { version = "0.3.30", features = ["sink"] }
http = "1.0.0"
tokio = { version = "1.36.0", features = ["full"] }
tokio-websockets = { version = "0.7.0", features = ["client", "fastrand", "server", "sha1_smol"] }
所需 API
您會需要 tokio 和 tokio_websockets 中的以下函式。請花幾分鐘熟悉此 API。
- 由
WebSocketStream實作的 StreamExt::next():用於非同步讀取 WebSocket 串流中的訊息。 - 由
WebSocketStream實作的 SinkExt::send():用於在 WebSocket 串流中非同步傳送訊息。 - Lines::next_line():用於非同步讀取標準輸入內容中的使用者訊息。
- Sender::subscribe():用於訂閱廣播管道。
兩個二進位檔
在 Cargo 專案中,通常只能有一個二進位檔,以及一個 src/main.rs 檔案。這項專案需要兩個二進位檔,一個用於用戶端,另一個用於伺服器。您可以設為兩個不同的 Cargo 專案,但我們會放入包含兩個二進位檔的單一 Cargo 專案。為順利運作,用戶端和伺服器程式碼應位於 src/bin 下方 (請參閱說明文件)。
請將以下伺服器和用戶端程式碼分別複製到 src/bin/server.rs 和 src/bin/client.rs 中。請按照下方說明完成這些檔案。
src/bin/server.rs:
use futures_util::sink::SinkExt;
use futures_util::stream::StreamExt;
use std::error::Error;
use std::net::SocketAddr;
use tokio::net::{TcpListener, TcpStream};
use tokio::sync::broadcast::{channel, Sender};
use tokio_websockets::{Message, ServerBuilder, WebSocketStream};
async fn handle_connection(
addr: SocketAddr,
mut ws_stream: WebSocketStream<TcpStream>,
bcast_tx: Sender<String>,
) -> Result<(), Box<dyn Error + Send + Sync>> {
// TODO: For a hint, see the description of the task below.
}
#[tokio::main]
async fn main() -> Result<(), Box<dyn Error + Send + Sync>> {
let (bcast_tx, _) = channel(16);
let listener = TcpListener::bind("127.0.0.1:2000").await?;
println!("listening on port 2000");
loop {
let (socket, addr) = listener.accept().await?;
println!("New connection from {addr:?}");
let bcast_tx = bcast_tx.clone();
tokio::spawn(async move {
// Wrap the raw TCP stream into a websocket.
let ws_stream = ServerBuilder::new().accept(socket).await?;
handle_connection(addr, ws_stream, bcast_tx).await
});
}
}src/bin/client.rs:
use futures_util::stream::StreamExt;
use futures_util::SinkExt;
use http::Uri;
use tokio::io::{AsyncBufReadExt, BufReader};
use tokio_websockets::{ClientBuilder, Message};
#[tokio::main]
async fn main() -> Result<(), tokio_websockets::Error> {
let (mut ws_stream, _) =
ClientBuilder::from_uri(Uri::from_static("ws://127.0.0.1:2000"))
.connect()
.await?;
let stdin = tokio::io::stdin();
let mut stdin = BufReader::new(stdin).lines();
// TODO: For a hint, see the description of the task below.
}執行二進位檔
使用以下指令執行伺服器:
cargo run --bin server
並使用以下指令執行用戶端:
cargo run --bin client
工作
- 在
src/bin/server.rs中實作handle_connection函式。- 提示:使用
tokio::select!即可在連續迴圈中並行執行兩項工作。一項工作會收到來自用戶端的訊息,然後播送訊息。另一項工作則是將伺服器收到的訊息傳送至用戶端。
- 提示:使用
- 完成
src/bin/client.rs中的主函式。- 提示:和先前一樣,在連續迴圈中使用
tokio::select!並行執行兩項工作:(1) 從標準輸入內容讀取使用者訊息,然後將訊息傳送至伺服器;(2) 接收來自伺服器的訊息,並向使用者顯示訊息。
- 提示:和先前一樣,在連續迴圈中使用
- 選用步驟:完成後,將程式碼變更為播送訊息給所有用戶端,但不包括訊息發送端。
並行:下午練習
哲學家就餐問題 — 非同步
(返回練習)
use std::sync::Arc;
use tokio::sync::mpsc::{self, Sender};
use tokio::sync::Mutex;
use tokio::time;
struct Fork;
struct Philosopher {
name: String,
left_fork: Arc<Mutex<Fork>>,
right_fork: Arc<Mutex<Fork>>,
thoughts: Sender<String>,
}
impl Philosopher {
async fn think(&self) {
self.thoughts
.send(format!("Eureka! {} has a new idea!", &self.name))
.await
.unwrap();
}
async fn eat(&self) {
// Keep trying until we have both forks
let (_left_fork, _right_fork) = loop {
// Pick up forks...
let left_fork = self.left_fork.try_lock();
let right_fork = self.right_fork.try_lock();
let Ok(left_fork) = left_fork else {
// If we didn't get the left fork, drop the right fork if we
// have it and let other tasks make progress.
drop(right_fork);
time::sleep(time::Duration::from_millis(1)).await;
continue;
};
let Ok(right_fork) = right_fork else {
// If we didn't get the right fork, drop the left fork and let
// other tasks make progress.
drop(left_fork);
time::sleep(time::Duration::from_millis(1)).await;
continue;
};
break (left_fork, right_fork);
};
println!("{} is eating...", &self.name);
time::sleep(time::Duration::from_millis(5)).await;
// The locks are dropped here
}
}
static PHILOSOPHERS: &[&str] =
&["Socrates", "Hypatia", "Plato", "Aristotle", "Pythagoras"];
#[tokio::main]
async fn main() {
// Create forks
let mut forks = vec![];
(0..PHILOSOPHERS.len()).for_each(|_| forks.push(Arc::new(Mutex::new(Fork))));
// Create philosophers
let (philosophers, mut rx) = {
let mut philosophers = vec![];
let (tx, rx) = mpsc::channel(10);
for (i, name) in PHILOSOPHERS.iter().enumerate() {
let left_fork = Arc::clone(&forks[i]);
let right_fork = Arc::clone(&forks[(i + 1) % PHILOSOPHERS.len()]);
philosophers.push(Philosopher {
name: name.to_string(),
left_fork,
right_fork,
thoughts: tx.clone(),
});
}
(philosophers, rx)
// tx is dropped here, so we don't need to explicitly drop it later
};
// Make them think and eat
for phil in philosophers {
tokio::spawn(async move {
for _ in 0..100 {
phil.think().await;
phil.eat().await;
}
});
}
// Output their thoughts
while let Some(thought) = rx.recv().await {
println!("Here is a thought: {thought}");
}
}廣播聊天應用程式
(返回練習)
src/bin/server.rs:
use futures_util::sink::SinkExt;
use futures_util::stream::StreamExt;
use std::error::Error;
use std::net::SocketAddr;
use tokio::net::{TcpListener, TcpStream};
use tokio::sync::broadcast::{channel, Sender};
use tokio_websockets::{Message, ServerBuilder, WebSocketStream};
async fn handle_connection(
addr: SocketAddr,
mut ws_stream: WebSocketStream<TcpStream>,
bcast_tx: Sender<String>,
) -> Result<(), Box<dyn Error + Send + Sync>> {
ws_stream
.send(Message::text("Welcome to chat! Type a message".to_string()))
.await?;
let mut bcast_rx = bcast_tx.subscribe();
// A continuous loop for concurrently performing two tasks: (1) receiving
// messages from `ws_stream` and broadcasting them, and (2) receiving
// messages on `bcast_rx` and sending them to the client.
loop {
tokio::select! {
incoming = ws_stream.next() => {
match incoming {
Some(Ok(msg)) => {
if let Some(text) = msg.as_text() {
println!("From client {addr:?} {text:?}");
bcast_tx.send(text.into())?;
}
}
Some(Err(err)) => return Err(err.into()),
None => return Ok(()),
}
}
msg = bcast_rx.recv() => {
ws_stream.send(Message::text(msg?)).await?;
}
}
}
}
#[tokio::main]
async fn main() -> Result<(), Box<dyn Error + Send + Sync>> {
let (bcast_tx, _) = channel(16);
let listener = TcpListener::bind("127.0.0.1:2000").await?;
println!("listening on port 2000");
loop {
let (socket, addr) = listener.accept().await?;
println!("New connection from {addr:?}");
let bcast_tx = bcast_tx.clone();
tokio::spawn(async move {
// Wrap the raw TCP stream into a websocket.
let ws_stream = ServerBuilder::new().accept(socket).await?;
handle_connection(addr, ws_stream, bcast_tx).await
});
}
}src/bin/client.rs:
use futures_util::stream::StreamExt;
use futures_util::SinkExt;
use http::Uri;
use tokio::io::{AsyncBufReadExt, BufReader};
use tokio_websockets::{ClientBuilder, Message};
#[tokio::main]
async fn main() -> Result<(), tokio_websockets::Error> {
let (mut ws_stream, _) =
ClientBuilder::from_uri(Uri::from_static("ws://127.0.0.1:2000"))
.connect()
.await?;
let stdin = tokio::io::stdin();
let mut stdin = BufReader::new(stdin).lines();
// Continuous loop for concurrently sending and receiving messages.
loop {
tokio::select! {
incoming = ws_stream.next() => {
match incoming {
Some(Ok(msg)) => {
if let Some(text) = msg.as_text() {
println!("From server: {}", text);
}
},
Some(Err(err)) => return Err(err.into()),
None => return Ok(()),
}
}
res = stdin.next_line() => {
match res {
Ok(None) => return Ok(()),
Ok(Some(line)) => ws_stream.send(Message::text(line.to_string())).await?,
Err(err) => return Err(err.into()),
}
}
}
}
}謝謝!
感謝您參加 Comprehensive Rust 🦀 課程!__希望您喜歡這門課,並能學以致用。
我們在整合課程時獲得許多樂趣。但這門課並非完美無缺,因此您若發現任何錯誤,或有改善的想法,歡迎透過 GitHub 與我們聯絡。我們很樂於傾聽您的意見!
詞彙解釋
以下詞彙解釋的目標是提供許多 Rust 詞彙的簡短定義。對翻譯而言,也可以補充說明詞彙的英文原意。
- 分配: 堆積上的動態記憶體配置。
- 引數: 傳遞至函式或方法的資訊。
- Rust 裸機開發: 低階 Rust 開發作業,通常是部署至沒有作業系統的系統。請參閱 Rust 裸機開發相關課程。
- 區塊: 請參閱區塊和「範圍」相關課程。
- 借用: 請參閱借用相關課程。
- 借用檢查器: Rust 編譯器的一部分,可檢查所有借用是否都有效。
- 大括號:
{and},用於分隔「區塊」。 - 建構: 將原始碼轉換為可執行的程式碼或可使用的程式的程序。
- 呼叫: 叫用/執行函式或方法。
- 管道: 用於在執行緒之間安全地傳遞訊息。
- Comprehensive Rust 🦀: 此處的課程合稱為 Comprehensive Rust 🦀。
- 並行: 同時執行多項工作或程序。
- Rust 中的並行: 請參閱 Rust 中的並行相關課程。
- 常數: 在程式執行期間不會變更的值。
- 控制流程: 個別陳述式或指示在程式中執行的順序。
- 崩潰: 程式發生非預期且未處理的失敗或終止情形。
- 列舉: 儲存多個具名常數之一的資料型別,可能具有相關聯的元組或結構體。
- 錯誤: 偏離預期行為的意外狀況或結果。
- 錯誤處理: 管理和回應程式執行錯誤的程序。
- 練習: 專為磨練及測試程式設計技能而設計的工作或問題。
- 函式: 執行特定工作的程式碼區塊,可重複使用。
- 垃圾收集器: 此機制會自動釋出不再使用的物件所占用的記憶體。
- 泛型: 這項功能允許為型別使用預留位置編寫程式碼,方便搭配不同資料型別重複使用程式碼。
- 不可變動: 建立後即無法變更。
- 整合測試: 這種測試可驗證系統中不同部分或元件之間的互動。
- 關鍵字: 程式設計語言中具有特定意義的保留字,無法用於命名。
- 程式庫: 一系列預先編譯的常式或程式碼,可供程式使用。
- 巨集: 名稱中有
!,即為 Rust 巨集。當一般函式不夠用時,就會使用巨集。常見例子為format!,可採用不固定數量的引數,但 Rust 函式不支援這項功能。 main函式: Rust 程式開始執行時會使用main函式。- 配對: Rust 中的控制流程結構,允許對運算式的值執行模式配對作業。
- 記憶體流失: 程式無法釋放不再需要的記憶體,導致記憶體用量逐步增加。
- 方法: Rust 中與物件或型別相關聯的函式。
- 模組: 包含函式、型別或特徵等定義的命名空間,用於整理 Rust 中的程式碼。
- 移動: 在 Rust 中將值的擁有權從某個變數轉移至另一個變數。
- 可變動: Rust 中的屬性,允許在宣告變數後修改變數。
- 擁有權: Rust 中的概念,可定義由哪部分的程式碼負責管理與值相關聯的記憶體。
- 恐慌: Rust 中無法復原的錯誤狀況,導致程式終止。
- 參數: 在呼叫函式或方法時,傳遞至函式或方法的值。
- 模式: 值、常值或結構體的組合,可以與 Rust 中的運算式配對。
- 酬載: 訊息、事件或資料結構體攜帶的資料或資訊。
- 程式: 可供電腦執行的一組指示,用來執行特定工作或解決特定問題。
- 程式設計語言: 用來向電腦傳達指示的正式系統,例如 Rust。
- 接收器: Rust 方法中的第一個參數,代表呼叫該方法的例項。
- 參照計數: 這種記憶體管理技術會追蹤物件的參照數量,並在計數達到零時取消分配物件。
- return: Rust 中的關鍵字,用來指出要從函式傳回的值。
- Rust: 著重安全性、效能和並行的系統程式設計語言。
- Rust 基礎知識: 本課程第 1 到 4 天的內容。
- Android 中的 Rust: 請參閱 Android 中的 Rust 相關課程。
- Chromium 中的 Rust: 請參閱 Chromium 中的 Rust 相關課程。
- 安全: 指符合 Rust 擁有權和借用規則的程式碼,可避免記憶體相關錯誤。
- 範圍: 程式的區域,位於其中的變數皆有效且可供使用。
- 標準程式庫: 提供 Rust 必要功能的一系列模組。
- static: Rust 中的關鍵字,可定義靜態變數或具有 ’static` 生命週期的項目。
- 字串: 儲存文本資料的資料型別。詳情請參閱比較
String與str的相關課程。 - 結構體: Rust 中的複合資料型別,能以一個名稱將不同型別的變數歸入同一組。
- 測試: Rust 模組,其中的函式可測試其他函式的正確性。
- 執行緒: 程式中獨立的執行作業序列,可允許並行執行作業。
- 執行緒安全: 程式的屬性,可在多執行緒環境中確保正確的行為。
- 特徵: 為不明型別定義的一系列方法,可在 Rust 中實現多型。
- 特徵繫結: 這種抽象機制可用來要求型別實作一些您感興趣的特徵。
- 元組: 包含各種變數的複合資料型別。元組欄位沒有名稱,可透過序數存取。
- 型別: 一種分類機制,能指定在 Rust 特定種類的值中可執行哪些作業。
- 型別推斷: Rust 編譯器功能,可推斷變數或運算式的型別。
- 未定義的行為: Rust 中未定義結果的動作或條件,經常導致無法預測的程式行為。
- 聯集: 這種資料型別可保留不同型別的值,但一次只能保留一個值。
- 單元測試: Rust 內建支援功能,可執行小型單元測試和規模較大的整合測試。請參閱「單元測試」。
- 單值型別: 不保留資料的型別,寫為元組的形式,但不含成員。
- 不安全: 這個 Rust 子集可觸發「未定義的行為」。請參閱「不安全的 Rust」。
- 變數: 儲存資料的記憶體位置。變數在「範圍」內有效。
其他 Rust 資源
Rust 社群在線上提供了大量優質的免費資源。
官方說明文件
Rust 專案中有許多資源。您可以透過這些資源瞭解 Rust 的一般概念:
- The Rust Programming Language:Rust 的免費標準用書,詳細介紹這個語言的種種知識,也收錄了一些可供使用者建構的專案。
- Rust By Example:透過一系列範例示範不同結構,進而介紹 Rust 語法。偶爾也會提供牛刀小試的練習,請您擴寫範例的程式碼。
- Rust Standard Library:Rust 標準程式庫的完整說明文件。
- The Rust Reference:本書並不完整,但會說明 Rust 文法和記憶體模型。
在 Rust 官方網站上還有更多專業指南:
- The Rustonomicon:說明不安全的 Rust,包括如何使用原始指標並與其他語言 (FFI) 互動。
- Asynchronous Programming in Rust:主要探討在 Rust 標準用書出版後問世的全新非同步程式設計模型。
- The Embedded Rust Book:說明如何在沒有作業系統的內嵌裝置上使用 Rust。
非官方學習教材
以下精選一些 Rust 的其他指南和教學課程:
- Learn Rust the Dangerous Way:以低階 C 程式設計師的角度介紹 Rust。
- Rust for Embedded C Programmers:從以 C 語言編寫韌體的開發人員角度介紹 Rust。
- Rust for professionals:利用與其他語言 (例如 C、C++、Java、JavaScript 和 Python) 並列比較的方式介紹 Rust 語法。
- Rust on Exercism:提供超過 100 項練習幫助您學習 Rust。
- Ferrous Teaching Material:一系列精簡簡報,涵蓋 Rust 語言的基礎和進階部分,並說明 WebAssembly 和 async/await 等其他主題。
- 「Rust 初學者系列」和「使用 Rust 邁出您的第一步」:專為新手開發人員編寫的兩份 Rust 指南。前者包含一套 35 部的影片,後者則是一套 11 個模組的課程,探討 Rust 語法和基本結構。
- Learn Rust With Entirely Too Many Linked Lists:透過實作幾種不同型別的清單結構,深入探討 Rust 的記憶體管理規則。
如需更多 Rust 相關書籍,請參閱 Little Book of Rust Books。
出處清單
這份教材是以許多優質的 Rust 說明文件來源為基礎。請參閱 其他資源 頁面,查看完整的實用資源清單。
Comprehensive Rust 的教材是根據 Apache 授權條款第 2.0 版取得授權,詳情請參閱 LICENSE 頁面。
Rust by Example
部分範例和習題是複製自 Rust by Example,並經過調整。詳情請參閱 third_party/rust-by-example/ 目錄,包括授權條款。
Exercism 上的 Rust
部分習題是複製自 Exercism 上的 Rust 相關內容,並經過調整。詳情請參閱 third_party/rust-on-exercism/ 目錄,包括授權條款。
CXX
在「互通性」該節的「與 C++」部分中,所使用的圖片是出自 CXX。詳情請參閱 third_party/cxx/ 目錄,包括授權條款。