Table of contents
DesignCompose Tutorial App

This page explains how to download and configure the DesignCompose tutorial app. This is written as a tutorial, so it’s important to follow each step.
About this tutorial
The DesignCompose tutorial app shows you the capabilities of DesignCompose through a series of interactive examples. You need a Figma account to run the tutorial and a large-screen device to run it on.
Initial setup
-
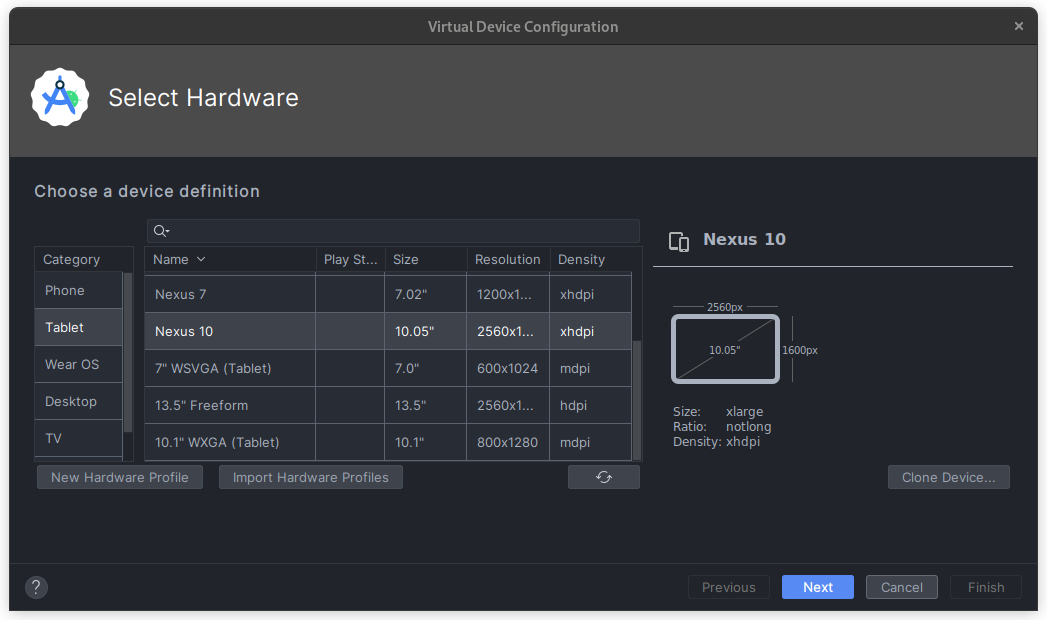
Acquire an Android-powered device or emulator with a large, portrait-orientation screen. If you don’t have a physical device handy then you can use a virtual device (Android emulator) in Android Studio. We recommend a Nexus 10 device (in the Tablet category), running the Android Tiramisu (API 33) system image with the startup orientation set to Portrait.

Figure 1. Android Studio virtual device definition screen.
-
The Tutorial Android App is built from source. Follow the instructions in Getting Started to download the source and install the required development tools.
-
The tutorial uses the Live Update feature to synchronize with your Figma files. Follow the instructions in Set Up Figma Authentication to create a Figma authentication token and be ready to use it.
Create your copy of the Figma tutorial file
The tutorial app demonstrates how you can modify a Figma design and see the results in your running Android app. First, create your own copy of the file to work with:
-
Go to the published Tutorial design file and if necessary, log in to your Figma account.
-
Click Open in Figma to create your own copy of the file.
-
Wait for your copy of the file to open, then note the Figma Document ID in the URL between
file/and the name of the document.For example, the ID of the document at
https://www.figma.com/file/aabbccdd/Tutorialisaabbccdd.
Launch and configure the tutorial
-
The Tutorial app’s project is located in the
reference-apps/tutorialdirectory. Open that directory in Android Studio and allow the project to synchronize. -
Build and launch the tutorial app on your device. See the Android Studio documentation or manually using Gradle.
-
Set your Figma access token in the app by running the
setFigmaTokenDebugGradle task.-
The task reads the token from the
$FIGMA_ACCESS_TOKENenvironment variable that was set in Store Your Figma Access Token. -
Alternatively, you can set the token in one command by running:
# From within the reference-apps/tutorial directory FIGMA_ACCESS_TOKEN=<YOUR_ACCESS_TOKEN> ./gradlew setFigmaTokenDebug -
-
Use the Design Switcher to load your version of the tutorial file.
- Click the drop-down arrow in the upper right corner of the tutorial app to open the Live Update Design Switcher panel. It should display Design Switcher Online if your key was set correctly in the previous step.

Figure 3. The Design Switcher settings button.
-
Click the Change button to switch document IDs, entering the ID for your copy of the Figma tutorial file .
-
Click Load. It takes about 10 seconds to do the initial sync.
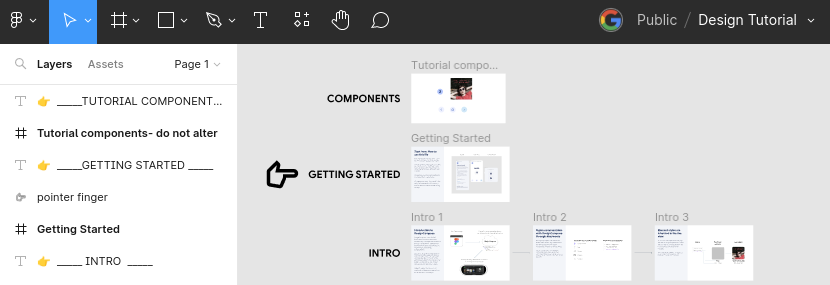
While that’s loading, return to your copy of the tutorial file on Figma and find the Getting Started box.

Figure 4. The location of the tutorial Figma file’s Getting Started frame.
Zoom in and begin your tutorial!
Figure 5. The Getting Started frame.