欢迎来到 Comprehensive Rust 🦀


这是一门由 Android 团队开发的免费 Rust 课程。课程涵盖了 Rust 的全部内容,从基本语法到泛型和错误处理等高级主题。
如需查看课程的最新版本,请访问 https://google.github.io/comprehensive-rust/。如果您在其他地方阅读,请在那里查看更新。
The course is also available as a PDF.
本课程的目标是教会你使用 Rust。假设你对 Rust 一无所知,本课程可以:
- 帮助你全面理解 Rust 的语法和语言。
- 让你可以用 Rust 修改现有程序和编写新程序。
- 为你展示常见的 Rust 习惯用法。
我们将前四天的课程称为“Rust 基础”。
在此基础上,你可以选择深入研究一个或多个专门的主题:
- Android:为期半天的课程,介绍如何在 Android 平台开发中使用 Rust(AOSP)。课程内容包括与 C、C++ 和 Java 的互操作性。
- Chromium:为期半天的课程,介绍如何在基于 Chromium 的浏览器中使用 Rust。课程内容包括与 C++ 的互操作性以及如何在 Chromium 中加入第三方 crate。
- 裸机:为期一天的课程,介绍如何使用 Rust 进行裸机(嵌入式)开发。课程内容涵盖微控制器和应用处理器。
- 并发:为期一天的课程,介绍 Rust 中的并发性。我们将涵盖传统并发(使用线程和互斥锁进行抢占式调度)和 async/await 并发(使用 futures 进行协作式多任务处理)。
非目标
Rust 是一门庞大的语言,短短几天的课程无法覆盖其全部内容。本课程不包括以下内容:
- 学习如何开发宏:请参阅 Rust Book 的第 19.5 章 和 Rust by Examples 对应章节。
学习前提
本课程假设你已经具备编程知识。Rust 是一种静态类型语言,本课程有时会将其与 C 和 C++ 进行比较,以便更好地解释或对比 Rust 的设计。
如果你会使用 Python 或 JavaScript 等动态类型语言编程,那么你也能够很好地跟上进度。
这是演讲者备注(Speaker Notes)的示例。页面中使用它来为幻灯片添加备注信息,其内容包括讲师应涉及的要点,以及对课堂上可能出现的典型问题的回答。
授课
本页供课程讲师使用。
以下是有关 Google 内部开展课程的一些相关背景。
上课时间通常是从上午 9:00 到下午 4:00,中间有 1 小时的午餐休息时间。这样上午和下午就各有 3 小时上课时间。上下午上课时间段内都有多次休息时间和学生做练习的时间。
在授课之前,你需要完成以下事项:
-
熟悉课程资料。页面提供了演讲者注释以突出重点(请帮忙多多贡献演讲者备注!)。演讲时,请确保在弹出窗口中打开演讲者笔记(点击“演讲者笔记”旁边带小箭头的链接)。这样就可以确保屏幕整洁有序,更好地向全班学员展示课程内容。
-
决定培训日期。由于课程为期四天,建议将时间安排在两周内。课程学员曾表示,他们认为在课程保留一些间隙有助于更好地进行理解。
-
找一间足以容纳全体线下学员的教室。建议的班级人数为 15-25 人。这样少的人数可以让大家能够更轻松地提问,也可以让仅有一位的讲师有足够时间回答问题。确保教室里有讲师和学生用的桌子,并能够坐下来使用笔记本电脑。特别地,讲师需要进行大量的现场编码工作,因此讲台是不需要的。
-
课程当天,请提早到教室进行准备。建议直接在笔记本电脑上运行
mdbook serve来演示课程内容(请参阅安装说明)。这样可以确保在更换页面时不会出现延迟,演示效果更好。使用笔记本运行还可以在发现错别字时及时更正。 -
让学员自己或以小组为单位解决练习问题。通常在上午和下午各安排 30-45 分钟的练习时间(包括查看解答的时间)。请务必询问学员是否遇到困难,或是否需要任何帮助。如果有多位学员遇到同样的问题,则在班级内进行讲解,并提供相应的解决方案,例如告诉大家在标准库的什么位置可以找到相关信息。
以上就是全部事项,祝你授课顺利!希望你能像我们一样享受其中的乐趣!
欢迎你在课后 提供反馈,以帮助我们不断改进课程。我们非常期待了解哪些方面做得不错,哪些方面还需要改进。同时非常欢迎学生们 向我们发送反馈!
课程结构
本页供课程讲师使用。
Rust 基础
前四天的内容是 Rust 基础。这几天的课程节奏很快,内容也很丰富!
课程安排:
- Day 1 Morning (2 hours and 5 minutes, including breaks)
| Segment | Duration |
|---|---|
| 欢迎 | 5 minutes |
| Hello, World | 15 minutes |
| 类型和值 | 40 minutes |
| 控制流基础 | 40 minutes |
- Day 1 Afternoon (2 hours and 35 minutes, including breaks)
| Segment | Duration |
|---|---|
| 元组和数组 | 35 minutes |
| 引用 | 55 minutes |
| 用户定义的类型 | 50 minutes |
- Day 2 Morning (2 hours and 55 minutes, including breaks)
| Segment | Duration |
|---|---|
| 欢迎 | 3 minutes |
| 模式匹配 | 1 hour |
| 方法和特征 | 50 minutes |
| 泛型 | 40 minutes |
- Day 2 Afternoon (3 hours and 10 minutes, including breaks)
| Segment | Duration |
|---|---|
| 标准库类型 | 1 hour and 20 minutes |
| 标准库特征 | 1 hour and 40 minutes |
- 第三天上午(2 小时 20 分钟,含休息时间)
| Segment | Duration |
|---|---|
| 欢迎 | 3 minutes |
| 内存管理 | 1 hour |
| 智能指针 | 55 minutes |
- Day 3 Afternoon (1 hour and 50 minutes, including breaks)
| Segment | Duration |
|---|---|
| 借用 | 50 minutes |
| 结构体生命周期 | 50 minutes |
- Day 4 Morning (2 hours and 40 minutes, including breaks)
| Segment | Duration |
|---|---|
| 欢迎 | 3 minutes |
| 迭代器 | 45 minutes |
| 模块 | 40 minutes |
| 测试 | 45 minutes |
- Day 4 Afternoon (2 hours and 10 minutes, including breaks)
| Segment | Duration |
|---|---|
| 错误处理 | 55 minutes |
| 不安全 Rust | 1 hour and 5 minutes |
深入探究
除了为期四天的“Rust 基础”课程外,还有一些专业课题提供:
Android 中的 Rust
深入探究 Android 中的 Rust 课程为期半天,旨在介绍如何使用 Rust 进行 Android 平台开发。其中包括与 C、C++ 和 Java 的互操作性。
你需要 检出 AOSP。在同一机器上检出 课程库, 然后将 src/android/ 目录移至所检出的 AOSP 的根目录。这将确保 Android 构建系统能检测到 src/android/ 中的 Android.bp 文件。
确保 adb sync 适用于你的模拟器或实际设备, 并使用 src/android/build_all.sh 预构建所有 Android 示例。请阅读脚本, 查看它所运行的命令,并确保这些命令能在你手动运行时正确执行。
Chromium 中的 Rust
深入探究 Chromium 中的 Rust 课程为期半天,旨在介绍 Chromium 浏览器中 Rust 的使用。课程内容包括在 Chromium 的 gn 编译系统中使用 Rust,引入第三方 crate,以及与 C++ 的互操作性。
您需要能够构建 Chromium。为了提高速度,建议使用调试、组件 构建方式,其他构建方式也可以使用。确保所构建的 Chromium 浏览器可以正常运行。
裸机 Rust
深入探究 裸机 Rust 课程为期一天,旨在介绍如何使用 Rust 进行裸机(嵌入式)开发。其中涵盖了微控制器和应用处理器。
对于微控制器部分,需要提前购买 BBC micro:bit v2 开发板。每个人都需要安装多个软件包, 具体如 欢迎页面 中所述。
Rust 中的并发
深入探究 Rust 中的并发 课程为期一天,旨在介绍传统并发和 async/await 并发。
你需要设置一个新 crate,下载所需的依赖项, 做好课前准备。然后,你可以将示例复制/粘贴到 src/main.rs 中, 以便对以下代码进行实验:
cargo init concurrency
cd concurrency
cargo add tokio --features full
cargo run
课程形式
本课程的互动性非常强, 建议你以问题驱动探索 Rust!
键盘快捷键
mdBook 中有一些实用键盘快捷键:
- Arrow-Left: Navigate to the previous page.
- Arrow-Right: Navigate to the next page.
- Ctrl + Enter: Execute the code sample that has focus.
- s: Activate the search bar.
翻译
一批优秀的志愿者已将本课程翻译成其他语言:
- 巴西葡萄牙语版本 译者:@rastringer、@hugojacob、@joaovicmendes 和 @henrif75。
- 简体中文版本 译者:@suetfei、@wnghl、@anlunx、@kongy、@noahdragon、@superwhd、@SketchK 和 @nodmp。
- 繁体中文版本 译者:@hueich、@victorhsieh、@mingyc、@kuanhungchen 和 @johnathan79717。
- Korean by @keispace, @jiyongp, @jooyunghan, and @namhyung.
- 西班牙语版本 译者:@deavid。
使用右上角的语言选择器切换语言。
未完成的翻译
还有很多语言版本仍在翻译中。以下是最近更新的翻译版本的链接:
- 孟加拉语版本 译者:@raselmandol。
- 法语版本 译者:@KookaS 和 @vcaen。
- 德语版本 译者:@Throvn 和 @ronaldfw。
- 日语版本 译者:@CoinEZ-JPN 和 @momotaro1105。
- 意大利语版本 译者:@henrythebuilder 和 @detro。
如果你想协助翻译,请参阅 翻译说明,了解如何开始翻译工作。翻译工作可通过 此议题 追踪。
使用 Cargo
开始了解 Rust 后,你很快就会遇到 Cargo,这是 Rust 生态系统中用于构建和运行 Rust 应用的标准工具。在这里,我们想简要介绍一下什么是 Cargo、它如何融入更广泛的生态系统, 以及我们如何在本培训中合理利用 Cargo。
安装
请按照 https://rustup.rs/ 上的说明操作。
这将为你提供 Cargo 构建工具 (cargo)和 Rust 编译器 (rustc)。你还将获得 rustup,这是一个命令行实用程序,你可以用它来安装不同的编译器版本。
安装 Rust 之后,你应当配置你的编辑器或 IDE 以开始使用 Rust。大多数编辑器使用了 rust-analyzer。它为 VS Code、Emacs、Vim/Neovim 及其他许多编辑器提供了自动补全及定义跳转的功能。同样也可以使用 RustRover IDE。
-
在 Debian/Ubuntu 上,你也可以通过
apt安装 Cargo、Rust 源代码和 Rust 格式化工具。但是,这样会得到一个过时的 Rust 版本,这可能会导致意外的行为。命令如下:sudo apt install cargo rust-src rustfmt
Rust 生态系统
Rust 生态系统由许多工具组成,主要包括:
-
rustc:Rust 编译器,可将.rs文件转换为二进制文件和其他中间格式。 -
cargo:Rust 依赖项管理器和构建工具。Cargo 知道如何下载托管在 https://crates.io 上的依赖项,并在构建项目时将它们传递给rustc。Cargo 还附带一个内置的测试运行程序,用于执行单元测试。 -
rustup:Rust 工具链安装和更新工具。当 Rust 发布新版本时,此工具用于安装并更新rustc和cargo。 此外,rustup还可以下载标准库的文档。可以同时安装多个版本的 Rust,rustup会根据需要让你在这些版本之间切换。
关键点:
-
Rust 有一个快速发布时间表,每六周就会发布一次新版本。新版本保持与旧版本的向后兼容性,并添加新功能。
-
共有三个发布阶段:“稳定版(stable)”、“测试版(beta)”和“夜间版(nightly)”。
-
新功能会先在“夜间版”上测试,“测试版”会每六周转为“稳定版”。
-
依赖关系也可以通过其他 registry、git 及文件夹等解析。
-
Rust 区分 版本(edition):当前版本是 Rust 2021。之前的版本是 Rust 2015 和 Rust 2018。
-
这些版本支持对语言进行向后不兼容的更改。
-
为防止破坏代码,版本是可选的: 通过
Cargo.toml文件为 crate 选择合适的版本。 -
为免分割生态系统,Rust 编译器可以混合使用为不同版本编写的代码。
-
请注意,不借助
cargo直接使用编译器的情况相当少见(大多数用户从不这样做)。 -
值得一提的是,Cargo 本身就是一个功能强大且全面的工具。它能够实现许多高级功能,包括但不限于:
- 项目/软件包结构
- 工作区
- 开发依赖和运行时依赖管理/缓存
- 构建脚本
- 全局安装
- 它还可以使用子命令插件(例如 cargo clippy)进行扩展。
-
详情请参阅 官方 Cargo Book
-
本培训中的代码示例
在本培训中,我们将主要通过示例探索 Rust 语言,这些示例可以通过浏览器执行。这能大大简化配置过程, 并确保所有人都能获得一致的体验。
我们仍然建议你安装 Cargo:它有助于你更轻松地完成练习。在最后一天,我们要做一个综合的练习, 向你展示如何使用依赖项,因此你需要安装 Cargo。
本课程中的代码块是完全交互式的:
fn main() {
    println!("Edit me!");
}
You can use Ctrl + Enter to execute the code when focus is in the text box.
如上所示,大多数代码示例都可修改。少数代码示例可能会因以下原因而不可修改:
-
嵌入的 Playground 无法执行单元测试。将代码复制并粘贴到实际 Playground 中,以演示单元测试。
-
嵌入的 Playground 会在离开页面后丢失编辑状态!因此,学员应使用本地安装的 Rust 或通过 Playground 解题。
使用 Cargo 在本地运行代码
如果你想在自己的系统上进行代码实验, 则需要先安装 Rust。为此,请按照 Rust Book 中的说明 操作。这应会为你提供一个有效的 rustc 和 cargo。在撰写本文时,最新的 Rust 稳定版是以下的版本号:
% rustc --version
rustc 1.69.0 (84c898d65 2023-04-16)
% cargo --version
cargo 1.69.0 (6e9a83356 2023-04-12)
你也可以使用任何更高版本,因为 Rust 保持向后兼容性。
了解这些信息后,请按照以下步骤从本培训中的一个示例中构建 Rust 二进制文件:
-
在你要复制的示例上点击“复制到剪贴板(Copy to clipboard)”按钮。
-
使用
cargo new exercise为代码新建一个exercise/目录:$ cargo new exercise Created binary (application) `exercise` package -
转到
exercise/并使用cargo run构建并运行二进制文件:$ cd exercise $ cargo run Compiling exercise v0.1.0 (/home/mgeisler/tmp/exercise) Finished dev [unoptimized + debuginfo] target(s) in 0.75s Running `target/debug/exercise` Hello, world! -
将
src/main.rs中的样板代码替换为自己的代码。例如, 使用上一页中的示例,将src/main.rs改为:fn main() { println!("Edit me!"); } -
使用
cargo run构建并运行更新后的二进制文件:$ cargo run Compiling exercise v0.1.0 (/home/mgeisler/tmp/exercise) Finished dev [unoptimized + debuginfo] target(s) in 0.24s Running `target/debug/exercise` Edit me! -
使用
cargo check快速检查项目是否存在错误;使用cargo build只进行编译,而不运行。你可以在target/debug/中找到常规调试 build 的输出。使用cargo build --release在target/release/中生成经过优化的 发布 build。 -
可以通过修改
Cargo.toml为项目添加依赖项。当运行cargo命令时,系统会自动下载和编译缺失的依赖项。
尽量鼓励全班学员安装 Cargo 并使用本地编辑器。这能使他们拥有常规的开发环境,让工作变得更加轻松。
欢迎来到第一天
今天是学习 Comprehensive Rust 的第一天。我们会涉及很多内容:
- Rust 基本语法:变量、标量(scalar)和复合(compound)类型、枚举(Enum)、结构体(struct)、引用、函数和方法。
- Types and type inference.
- 控制流结构:循环、条件语句等。
- 用户定义的类型:结构体和枚举。
- 模式匹配:解构枚举、结构体和数组(array)。
时间表
Including 10 minute breaks, this session should take about 2 hours and 5 minutes. It contains:
| Segment | Duration |
|---|---|
| 欢迎 | 5 minutes |
| Hello, World | 15 minutes |
| 类型和值 | 40 minutes |
| 控制流基础 | 40 minutes |
请提醒学生:
- 他们可以随时提问,不需要留到最后。
- 这个课程本应该是互动的,我们鼓励大家积极讨论。
- As an instructor, you should try to keep the discussions relevant, i.e., keep the discussions related to how Rust does things vs some other language. It can be hard to find the right balance, but err on the side of allowing discussions since they engage people much more than one-way communication.
- 有些问题会导致我们提前谈到后面的内容。
- 这完全没有问题!重复是学习的一个重要方法。请记住,这些幻灯片只是一种辅助,你可以选择性地跳过。
第一天的目标是展示 Rust 中与其他编程语言有明显相似之处的 “基础”内容。Rust 中更高级复杂的内容将在后续几天中逐步介绍。
如果您是在教室里授课,则这是一个好时机,可对课程时间表进行讲解。请注意,每节课结束之后会有练习内容,然后是休息时间。安排在休息结束后讲解练习内容的解答。为了确保课程按时间表进行,此处所列时间仅供参考。请按需进行灵活调整!
Hello, World
This segment should take about 15 minutes. It contains:
| Slide | Duration |
|---|---|
| 什么是 Rust? | 10 minutes |
| Rust 的优势 | 3 minutes |
| Playground | 2 minutes |
什么是 Rust?
Rust 是一门新的编程语言,它的1.0 版本于 2015 年发布:
- Rust 是一门静态编译语言,其功能定位与 C++ 相似
rustc使用 LLVM 作为它的后端。
- Rust 支持多种平台和架构:
- x86、ARM、WebAssembly……
- Linux、Mac、Windows……
- Rust 被广泛用于各种设备中:
- 固件和引导程序,
- 智能显示器,
- 手机,
- 桌面,
- 服务器。
Rust 和 C++ 适用于类似的场景:
- 极高的灵活性。
- 高度的控制能力。
- 能够在资源匮乏的设备(如手机)上运行。
- 没有运行时和垃圾收集。
- 关注程序可靠性和安全性,而不会牺牲任何性能。
Rust 的优势
Rust 有一些独特的卖点:
-
编译时内存安全:在编译时可防止所有类内存 bug
- 不存在未初始化的变量。
- 不存在“双重释放”。
- 不存在“释放后使用”。
- 不存在
NULL指针。 - 不存在被遗忘的互斥锁。
- 不存在线程之间的数据竞争。
- 不存在迭代器失效。
-
没有未定义的运行时行为:每个 Rust 语句的行为都有明确定义
- 数组访问有边界检查。
- 整数溢出有明确定义(panic 或回绕)。
-
现代语言功能:具有与高级语言一样丰富且人性化的表达能力
- 枚举和模式匹配。
- 泛型。
- 无额外开销的外部函数接口(FFI)。
- 零成本抽象。
- 强大的编译器错误提示。
- 内置依赖管理器。
- 对测试的内置支持。
- 优秀的语言服务协议(Language Server Protocol)支持。
不用在这里占用过多时间。所有这些要点均会在后面进行详细讲解。
应该问问学生们都使用过哪些语言。根据答案侧重讲解 Rust 的不同特性:
-
使用过 C 或 C++:Rust 利用借用检查消除了一类 运行时错误 。你可以达到堪比 C 和 C++ 的性能,而没有内存不安全的问题。并且你还可以得到些现代的语言构造,比如模式匹配和内置依赖管理。
-
使用过 Java、Go、Python、JavaScript……:你可以得到和这些语言相同的内存安全特性,并拥有类似的使用高级语言的感受。同时你可以得到类似 C 和 C++ 的高速且可预测的执行性能(无垃圾回收机制),以及在需要时对底层硬件的访问。
Playground
The Rust Playground provides an easy way to run short Rust programs, and is the basis for the examples and exercises in this course. Try running the “hello-world” program it starts with. It comes with a few handy features:
-
在 “Tools” 下,使用
rustfmt选项以 “standard” 方式设置代码格式。 -
Rust 具有两个用于生成代码的主要 “配置文件”:调试(进行额外运行时检查、较少优化)和发布(较少运行时检查,进行大量优化)。可以在顶部的 “Debug” 下访问这些内容。
-
如果感兴趣,您可以使用 “…” 下的 “ASM” 查看生成的汇编代码。
As students head into the break, encourage them to open up the playground and experiment a little. Encourage them to keep the tab open and try things out during the rest of the course. This is particularly helpful for advanced students who want to know more about Rust’s optimizations or generated assembly.
类型和值
This segment should take about 40 minutes. It contains:
| Slide | Duration |
|---|---|
| Hello, World | 5 minutes |
| 变量 | 5 minutes |
| 值 | 5 minutes |
| 算术 | 3 minutes |
| 类型推导 | 3 minutes |
| 练习:Fibonacci | 15 minutes |
Hello, World
让我们进入最简单的 Rust 程序,一个经典的 Hello World 程序:
fn main() {
    println!("Hello 🌍!");
}
你看到的:
- 函数以
fn开头。 - 像 C 和 C++ 一样,块由花括号分隔。
main函数是程序的入口点。- Rust 有卫生宏 (hygienic macros),
println!就是一个例子。 - Rust 字符串是 UTF-8 编码的,可以包含任何 Unicode 字符。
This slide tries to make the students comfortable with Rust code. They will see a ton of it over the next four days so we start small with something familiar.
关键点:
-
Rust is very much like other languages in the C/C++/Java tradition. It is imperative and it doesn’t try to reinvent things unless absolutely necessary.
-
Rust 是一门现代编程语言,它完全支持 Unicode 等特性。
-
Rust uses macros for situations where you want to have a variable number of arguments (no function overloading).
-
宏是“卫生的”,这意味着它们不会意外地捕获它们所在作用域中的标识符。实际上,Rust 的宏只是部分卫生。
变量
Rust provides type safety via static typing. Variable bindings are made with let:
fn main() {
    let x: i32 = 10;
    println!("x: {x}");
    // x = 20;
    // println!("x: {x}");
}-
取消备注
x = 20,以证明变量默认是不可变的。添加mut关键字以允许进行更改。 -
这里的
i32是变量的类型。编译时必须已知类型,但在很多情况下,由于具有类型推理功能(稍后介绍),程序员可以忽略这一点。
值
以下是一些基本的内置类型以及每种类型的字面量值的语法。
| 类型 | 字面量 | |
|---|---|---|
| 有符号整数 | i8、i16、i32、i64、i128、isize | -10、0、1_000、123_i64 |
| 无符号整数 | u8、u16、u32、u64、u128、usize | 0、123、10_u16 |
| 浮点数 | f32、f64 | 3.14、-10.0e20、2_f32 |
| Unicode 标量类型 | char | 'a'、'α'、'∞' |
| 布尔值 | bool | true、false |
各类型占用的空间为:
iN,uN和fN占用 N 位,isize和usize占用一个指针大小的空间,char占用 32 位空间,bool占用 8 位空间。
上表中还有一些未提及的语法:
- 数字中的所有下划线均可忽略,它们只是为了方便辨识。因此,
1_000可以写为1000(或10_00),而123_i64可以写为123i64。
算术
fn interproduct(a: i32, b: i32, c: i32) -> i32 {
    return a * b + b * c + c * a;
}

fn main() {
    println!("result: {}", interproduct(120, 100, 248));
}这是我们第一次看到除 main 之外的函数,不过其含义应该很明确:它接受三个整数,然后返回一个整数。稍后会对这些函数进行详细介绍。
算术和优先级均与其他语言极为相似。
整数溢出是什么样的?在 C 和 C++ 中,有符号 整数溢出实际上是未定义的,可能会在不同平台或编译器上执行不同的操作。在 Rust 中,整数溢出具有明确定义。
Change the i32’s to i16 to see an integer overflow, which panics (checked) in a debug build and wraps in a release build. There are other options, such as overflowing, saturating, and carrying. These are accessed with method syntax, e.g., (a * b).saturating_add(b * c).saturating_add(c * a).
事实上,编译器会检测常量表达式的溢出情况,这便是为何该示例需要单独的函数。
类型推导
Rust 会根据变量的使用来确定其类型:
fn takes_u32(x: u32) {
    println!("u32: {x}");
}

fn takes_i8(y: i8) {
    println!("i8: {y}");
}

fn main() {
    let x = 10;
    let y = 20;

    takes_u32(x);
    takes_i8(y);
    // takes_u32(y);
}这张幻灯片演示了 Rust 编译器是如何根据变量声明和用法来推导其类型的。
需要重点强调的是这样声明的变量并非像那种动态类型语言中可以持有任何数据的“任何类型”。这种声明所生成的机器码与明确类型声明完全相同。编译器进行类型推导能够让我们编写更简略的代码。
当整数字面量的类型不受限制时,Rust 默认为 i32。这在错误消息中有时显示为 {integer}。同样,浮点字面量默认为 f64。
fn main() {
    let x = 3.14;
    let y = 20;
    assert_eq!(x, y);
    // ERROR: no implementation for `{float} == {integer}`
}
练习:Fibonacci
The first and second Fibonacci numbers are both 1. For n>2, the n’th Fibonacci number is calculated recursively as the sum of the n-1’th and n-2’th Fibonacci numbers.
Write a function fib(n) that calculates the n’th Fibonacci number. When will this function panic?
fn fib(n: u32) -> u32 {
    if n <= 2 {
        // The base case.
        todo!("Implement this")
    } else {
        // The recursive case.
        todo!("Implement this")
    }
}

fn main() {
    let n = 20;
    println!("fib({n}) = {}", fib(n));
}
解答
fn fib(n: u32) -> u32 {
    if n <= 2 {
        return 1;
    } else {
        return fib(n - 1) + fib(n - 2);
    }
}

fn main() {
    let n = 20;
    println!("fib({n}) = {}", fib(n));
}
控制流基础
This segment should take about 40 minutes. It contains:
| Slide | Duration |
|---|---|
| if 表达式 | 4 minutes |
| 循环控制 | 5 minutes |
| break 和 continue | 4 minutes |
| 代码块和作用域 | 5 minutes |
| 函数 | 3 minutes |
| 宏 | 2 minutes |
| 练习:考拉兹序列 | 15 minutes |
if 表达式
if 表达式 的用法与其他语言中的 if 语句完全一样。
fn main() {
    let x = 10;
    if x == 0 {
        println!("zero!");
    } else if x < 100 {
        println!("biggish");
    } else {
        println!("huge");
    }
}
此外,你还可以将 if 用作一个表达式。每个块的最后一个表达式 将成为 if 表达式的值:
fn main() {
    let x = 10;
    let size = if x < 20 { "small" } else { "large" };
    println!("number size: {}", size);
}Because if is an expression and must have a particular type, both of its branch blocks must have the same type. Show what happens if you add ; after "small" in the second example.
如果在表达式中使用 if,则表达式中必须包含 ; 来将其与下一个语句分隔开。移除 println! 前面的 ; 即可查看编译器错误。
循环控制
Rust 中有三个循环关键字:while、loop 和 for:
while
The while keyword works much like in other languages, executing the loop body as long as the condition is true.
fn main() {
    let mut x = 200;
    while x >= 10 {
        x = x / 2;
    }
    println!("Final x: {x}");
}
for
The for loop iterates over ranges of values or the items in a collection:
fn main() {
    for x in 1..5 {
        println!("x: {x}");
    }

    for elem in [1, 2, 3, 4, 5] {
        println!("elem: {elem}");
    }
}- Under the hood
forloops use a concept called “iterators” to handle iterating over different kinds of ranges/collections. Iterators will be discussed in more detail later. - 请注意,
for循环只迭代到4。现在展示使用1..=5语法表示一个包含边界的范围。
loop
The loop statement just loops forever, until a break.
fn main() {
    let mut i = 0;
    loop {
        i += 1;
        println!("{i}");
        if i > 100 {
            break;
        }
    }
}
break 和 continue
如果需要立即启动 下一次迭代,请使用 continue。
If you want to exit any kind of loop early, use break. For loop, this can take an optional expression that becomes the value of the loop expression.
fn main() {
    let mut i = 0;
    loop {
        i += 1;
        if i > 5 {
            break;
        }
        if i % 2 == 0 {
            continue;
        }
        println!("{}", i);
    }
}
Labels
continue 和 break 都可以选择接受一个标签参数,用来 终止嵌套循环:
fn main() {
    let s = [[5, 6, 7], [8, 9, 10], [21, 15, 32]];
    let mut elements_searched = 0;
    let target_value = 10;
    'outer: for i in 0..=2 {
        for j in 0..=2 {
            elements_searched += 1;
            if s[i][j] == target_value {
                break 'outer;
            }
        }
    }
    print!("elements searched: {elements_searched}");
}- 请注意,
loop是唯一返回有意义的值的循环结构。 这是因为它保证至少被输入一次(与while和for循环不同)。
代码块和作用域
块
A block in Rust contains a sequence of expressions, enclosed by braces {}. Each block has a value and a type, which are those of the last expression of the block:
fn main() {
    let z = 13;
    let x = {
        let y = 10;
        println!("y: {y}");
        z - y
    };
    println!("x: {x}");
}
If the last expression ends with ;, then the resulting value and type is ().
- 你可以通过更改块的最后一行,来展示块值的变化情况。例如,添加/移除分号或使用
return。
作用域和遮蔽(Shadowing)
变量的作用域仅限于封闭代码块内。
你可以隐藏变量,位于外部作用域的变量和 相同作用域的变量都可以:
fn main() {
    let a = 10;
    println!("before: {a}");
    {
        let a = "hello";
        println!("inner scope: {a}");

        let a = true;
        println!("shadowed in inner scope: {a}");
    }

    println!("after: {a}");
}- Show that a variable’s scope is limited by adding a
bin the inner block in the last example, and then trying to access it outside that block. - Shadowing is different from mutation, because after shadowing both variable’s memory locations exist at the same time. Both are available under the same name, depending where you use it in the code.
- A shadowing variable can have a different type.
- 隐藏起初看起来会有些晦涩,但是它很便于存
.unwrap()之后的得到的值。
函数
fn gcd(a: u32, b: u32) -> u32 {
    if b > 0 {
        gcd(b, a % b)
    } else {
        a
    }
}

fn main() {
    println!("gcd: {}", gcd(143, 52));
}- 类型跟随在声明的参数后(与某些编程语言相反),然后是返回类型。
- The last expression in a function body (or any block) becomes the return value. Simply omit the
;at the end of the expression. Thereturnkeyword can be used for early return, but the “bare value” form is idiomatic at the end of a function (refactorgcdto use areturn). - 有些函数没有返回值,会返回“单元类型(unit type)”
()。如果省略了-> ()的返回类型,编译器将会自动推断。 - Overloading is not supported – each function has a single implementation.
- 始终采用固定数量的参数。不支持默认参数。宏可用于支持可变函数。
- Always takes a single set of parameter types. These types can be generic, which will be covered later.
宏
宏在编译过程中会扩展为 Rust 代码,并且可以接受可变数量的参数。它们以 ! 结尾来进行区分。Rust 标准库包含各种有用的宏。
println!(format, ..)prints a line to standard output, applying formatting described instd::fmt.format!(format, ..)的用法与println!类似,但它以字符串形式返回结果。dbg!(expression)会记录表达式的值并返回该值。todo!()用于标记尚未实现的代码段。如果执行该代码段,则会触发 panic。unreachable!()用于标记无法访问的代码段。如果执行该代码段,则会触发 panic。
fn factorial(n: u32) -> u32 {
    let mut product = 1;
    for i in 1..=n {
        product *= dbg!(i);
    }
    product
}

fn fizzbuzz(n: u32) -> u32 {
    todo!()
}

fn main() {
    let n = 4;
    println!("{n}! = {}", factorial(n));
}这一节的要点是介绍这些常见的便捷功能以及如何使用它们。而为何将它们定义为宏以及它们可以扩展为什么内容,并不是特别关键。
本课程不会介绍如何定义宏,但在后续部分会介绍派生宏的用法。
练习:考拉兹序列
The Collatz Sequence is defined as follows, for an arbitrary n1 greater than zero:
- If ni is 1, then the sequence terminates at ni.
- If ni is even, then ni+1 = ni / 2.
- If ni is odd, then ni+1 = 3 * ni + 1.
For example, beginning with n1 = 3:
- 3 is odd, so n2 = 3 * 3 + 1 = 10;
- 10 is even, so n3 = 10 / 2 = 5;
- 5 is odd, so n4 = 3 * 5 + 1 = 16;
- 16 is even, so n5 = 16 / 2 = 8;
- 8 is even, so n6 = 8 / 2 = 4;
- 4 is even, so n7 = 4 / 2 = 2;
- 2 is even, so n8 = 1; and
- 序列终止。
编写一个函数,用于计算给定初始 n 的考拉兹序列的长度。
/// Determine the length of the collatz sequence beginning at `n`.
fn collatz_length(mut n: i32) -> u32 {
  todo!("Implement this")
}

fn main() {
  todo!("Implement this")
}
解答
/// Determine the length of the collatz sequence beginning at `n`.
fn collatz_length(mut n: i32) -> u32 {
    let mut len = 1;
    while n > 1 {
        n = if n % 2 == 0 { n / 2 } else { 3 * n + 1 };
        len += 1;
    }
    len
}

#[test]
fn test_collatz_length() {
    assert_eq!(collatz_length(11), 15);
}

fn main() {
    println!("Length: {}", collatz_length(11));
}
Welcome Back
Including 10 minute breaks, this session should take about 2 hours and 35 minutes. It contains:
| Segment | Duration |
|---|---|
| 元组和数组 | 35 minutes |
| 引用 | 55 minutes |
| 用户定义的类型 | 50 minutes |
元组和数组
This segment should take about 35 minutes. It contains:
| Slide | Duration |
|---|---|
| 数组(Arrays) | 5 minutes |
| 元组(Tuples) | 5 minutes |
| 数组迭代 | 3 minutes |
| 解构 | 5 minutes |
| 练习:嵌套数组 | 15 minutes |
数组(Arrays)
fn main() {
    let mut a: [i8; 10] = [42; 10];
    a[5] = 0;
    println!("a: {a:?}");
}-
A value of the array type
[T; N]holdsN(a compile-time constant) elements of the same typeT. Note that the length of the array is part of its type, which means that[u8; 3]and[u8; 4]are considered two different types. Slices, which have a size determined at runtime, are covered later. -
请尝试访问出界数组元素。系统会在运行时检查数组访问。Rust 通常会通过优化消除这些检查,以及使用不安全的 Rust 来避免这些检查。
-
我们可以使用字面量来为数组赋值。
-
The
println!macro asks for the debug implementation with the?format parameter:{}gives the default output,{:?}gives the debug output. Types such as integers and strings implement the default output, but arrays only implement the debug output. This means that we must use debug output here. -
添加
#,比如{a:#?},会输出“美观打印(pretty printing)” 格式,这种格式可能会更加易读。
元组(Tuples)
fn main() {
    let t: (i8, bool) = (7, true);
    println!("t.0: {}", t.0);
    println!("t.1: {}", t.1);
}-
和数组一样,元组也具有固定的长度。
-
元组将不同类型的值组成一个复合类型。
-
元组中的字段可以通过英文句号加上值的下标进行访问比如:
t.0,t.1。 -
The empty tuple
()is referred to as the “unit type” and signifies absence of a return value, akin tovoidin other languages.
数组迭代
for 语句支持对数组进行迭代(但不支持元组)。
fn main() {
    let primes = [2, 3, 5, 7, 11, 13, 17, 19];
    for prime in primes {
        for i in 2..prime {
            assert_ne!(prime % i, 0);
        }
    }
}此功能使用了 IntoIterator trait,但我们还没有讲到它。
这里新增了 assert_ne! 宏。此外,还有 assert_eq! 和 assert! 宏。系统始终会对这些宏进行检查,而像 debug_assert! 这样的仅调试变体在发布 build 中不会编译成任何代码。
解构
When working with tuples and other structured values it’s common to want to extract the inner values into local variables. This can be done manually by directly accessing the inner values:
fn print_tuple(tuple: (i32, i32)) {
    let left = tuple.0;
    let right = tuple.1;
    println!("left: {left}, right: {right}");
}
However, Rust also supports using pattern matching to destructure a larger value into its constituent parts:
fn print_tuple(tuple: (i32, i32)) {
    let (left, right) = tuple;
    println!("left: {left}, right: {right}");
}- The patterns used here are “irrefutable”, meaning that the compiler can statically verify that the value on the right of
=has the same structure as the pattern. - A variable name is an irrefutable pattern that always matches any value, hence why we can also use
letto declare a single variable. - Rust also supports using patterns in conditionals, allowing for equality comparison and destructuring to happen at the same time. This form of pattern matching will be discussed in more detail later.
- Edit the examples above to show the compiler error when the pattern doesn’t match the value being matched on.
练习:嵌套数组
数组可以包含其他数组:
#![allow(unused)]
fn main() {
let array = [[1, 2, 3], [4, 5, 6], [7, 8, 9]];
}
What is the type of this variable?
Use an array such as the above to write a function transpose which will transpose a matrix (turn rows into columns):
硬编码这两个函数,让它们处理 3 × 3 的矩阵。
将下面的代码复制到 https://play.rust-lang.org/ 并实现上述函数:
// TODO: remove this when you're done with your implementation.
#![allow(unused_variables, dead_code)]

fn transpose(matrix: [[i32; 3]; 3]) -> [[i32; 3]; 3] {
    unimplemented!()
}

#[test]
fn test_transpose() {
    let matrix = [
        [101, 102, 103], //
        [201, 202, 203],
        [301, 302, 303],
    ];
    let transposed = transpose(matrix);
    assert_eq!(
        transposed,
        [
            [101, 201, 301], //
            [102, 202, 302],
            [103, 203, 303],
        ]
    );
}

fn main() {
    let matrix = [
        [101, 102, 103], // <-- the comment makes rustfmt add a newline
        [201, 202, 203],
        [301, 302, 303],
    ];

    println!("matrix: {:#?}", matrix);
    let transposed = transpose(matrix);
    println!("transposed: {:#?}", transposed);
}
解答
fn transpose(matrix: [[i32; 3]; 3]) -> [[i32; 3]; 3] {
    let mut result = [[0; 3]; 3];
    for i in 0..3 {
        for j in 0..3 {
            result[j][i] = matrix[i][j];
        }
    }
    result
}

#[test]
fn test_transpose() {
    let matrix = [
        [101, 102, 103], //
        [201, 202, 203],
        [301, 302, 303],
    ];
    let transposed = transpose(matrix);
    assert_eq!(
        transposed,
        [
            [101, 201, 301], //
            [102, 202, 302],
            [103, 203, 303],
        ]
    );
}

fn main() {
    let matrix = [
        [101, 102, 103], // <-- the comment makes rustfmt add a newline
        [201, 202, 203],
        [301, 302, 303],
    ];

    println!("matrix: {:#?}", matrix);
    let transposed = transpose(matrix);
    println!("transposed: {:#?}", transposed);
}
引用
This segment should take about 55 minutes. It contains:
| Slide | Duration |
|---|---|
| 共享引用 | 10 minutes |
| 独占引用 | 10 minutes |
| Slices: &[T] | 10 minutes |
| 字符串 | 10 minutes |
| 练习:几何图形 | 15 minutes |
共享引用
引用提供了一种可以访问另一个值但无需对该值负责的方式,也被称为 “借用”。共享引用处于只读状态,且引用的数据无法更改。
fn main() {
    let a = 'A';
    let b = 'B';
    let mut r: &char = &a;
    println!("r: {}", *r);
    r = &b;
    println!("r: {}", *r);
}
对类型 T 的共享引用表示为 &T。可以使用 & 运算符创建引用值。* 运算符会 “解引用”某个引用,并得到该引用值。
Rust 会静态禁止悬垂引用:
fn x_axis(x: i32) -> &(i32, i32) {
    let point = (x, 0);
    return &point;
}-
引用被称为 “借用”了其所引用的值,这对于不熟悉指针的学生来说是一个很好的模型:代码可以通过引用来访问值,但原始变量仍然保有对该值的 “所有权”。本课程会在第 3 天详细介绍所有权。
-
引用是以指针的形式实现的,其关键优势在于它们可以比其所指的内容小得多。熟悉 C 或 C++ 的学生会将引用视为指针。本课程的后续部分将介绍 Rust 如何防止因使用原始指针而导致的内存安全 bug。
-
Rust 不会自动为您创建引用,必须始终使用
&符号。 -
Rust will auto-dereference in some cases, in particular when invoking methods (try
r.is_ascii()). There is no need for an->operator like in C++. -
在本例中,
r是可变的,因此可以为其重新赋值 (r = &b)。请注意,这会重新绑定r,使其引用其他内容。这与 C++ 不同,在 C++ 中为引用赋值会更改引用的值。 -
共享引用不允许修改其所引用的值,即使该值是可变的。请尝试
*r = 'X'。 -
Rust 会跟踪所有引用的生命周期,以确保它们存在足够长的时间。在安全的 Rust 中不会出现悬空引用。
x_axis会返回对point的引用,但point会在该函数返回时取消分配,因此不会进行编译。 -
我们会在讲到所有权(ownership)时详细讨论借用(borrow)。
独占引用
独占引用(也称为可变引用)允许更改其所引用的值。它们的类型为 &mut T。
fn main() {
    let mut point = (1, 2);
    let x_coord = &mut point.0;
    *x_coord = 20;
    println!("point: {point:?}");
}关键点:
-
“独占模式”表示只有此引用可用于访问该值。在独占引用存在期间,不允许同时存在其他引用(无论是共享引用还是独占引用),并且无法访问引用的值。请尝试在
x_coord处于活动状态时创建&point.0或更改point.0。 -
Be sure to note the difference between
let mut x_coord: &i32andlet x_coord: &mut i32. The first one represents a shared reference which can be bound to different values, while the second represents an exclusive reference to a mutable value.
切片
切片 (slice) 的作用是提供对集合 (collection) 的视图 (view):
fn main() {
    let mut a: [i32; 6] = [10, 20, 30, 40, 50, 60];
    println!("a: {a:?}");

    let s: &[i32] = &a[2..4];

    println!("s: {s:?}");
}- 切片从被切片的类型中借用 (borrow) 数据。
- Question: What happens if you modify
a[3]right before printings?
-
We create a slice by borrowing
aand specifying the starting and ending indexes in brackets. -
If the slice starts at index 0, Rust’s range syntax allows us to drop the starting index, meaning that
&a[0..a.len()]and&a[..a.len()]are identical. -
The same is true for the last index, so
&a[2..a.len()]and&a[2..]are identical. -
To easily create a slice of the full array, we can therefore use
&a[..]. -
sis a reference to a slice ofi32s. Notice that the type ofs(&[i32]) no longer mentions the array length. This allows us to perform computation on slices of different sizes. -
Slices always borrow from another object. In this example,
ahas to remain ‘alive’ (in scope) for at least as long as our slice. -
The question about modifying
a[3]can spark an interesting discussion, but the answer is that for memory safety reasons you cannot do it throughaat this point in the execution, but you can read the data from bothaandssafely. It works before you created the slice, and again after theprintln, when the slice is no longer used.
字符串
现在我们就可以理解 Rust 中的两种字符串类型:
&stris a slice of UTF-8 encoded bytes, similar to&[u8].Stringis an owned, heap-allocated buffer of UTF-8 bytes.
fn main() {
    let s1: &str = "World";
    println!("s1: {s1}");

    let mut s2: String = String::from("Hello ");
    println!("s2: {s2}");
    s2.push_str(s1);
    println!("s2: {s2}");

    let s3: &str = &s2[s2.len() - s1.len()..];
    println!("s3: {s3}");
}-
&strintroduces a string slice, which is an immutable reference to UTF-8 encoded string data stored in a block of memory. String literals ("Hello"), are stored in the program’s binary. -
Rust’s
Stringtype is a wrapper around a vector of bytes. As with aVec<T>, it is owned. -
As with many other types
String::from()creates a string from a string literal;String::new()creates a new empty string, to which string data can be added using thepush()andpush_str()methods. -
The
format!()macro is a convenient way to generate an owned string from dynamic values. It accepts the same format specification asprintln!(). -
You can borrow
&strslices fromStringvia&and optionally range selection. If you select a byte range that is not aligned to character boundaries, the expression will panic. Thecharsiterator iterates over characters and is preferred over trying to get character boundaries right. -
For C++ programmers: think of
&strasstd::string_viewfrom C++, but the one that always points to a valid string in memory. RustStringis a rough equivalent ofstd::stringfrom C++ (main difference: it can only contain UTF-8 encoded bytes and will never use a small-string optimization). -
Byte strings literals allow you to create a
&[u8]value directly:fn main() { println!("{:?}", b"abc"); println!("{:?}", &[97, 98, 99]); } -
原始字符串可在创建
&str时禁用转义:r"\n" == "\\n"。可以在外层引号两侧添加相同数量的#,以在字符串中嵌入双引号:fn main() { println!(r#"<a href="link.html">link</a>"#); println!("<a href=\"link.html\">link</a>"); }
练习:几何图形
我们将为三维几何图形创建几个实用函数,将点表示为 [f64;3]。函数签名由您自行确定。
// Calculate the magnitude of a vector by summing the squares of its coordinates
// and taking the square root. Use the `sqrt()` method to calculate the square
// root, like `v.sqrt()`.


fn magnitude(...) -> f64 {
    todo!()
}

// Normalize a vector by calculating its magnitude and dividing all of its
// coordinates by that magnitude.


fn normalize(...) {
    todo!()
}

// Use the following `main` to test your work.

fn main() {
    println!("Magnitude of a unit vector: {}", magnitude(&[0.0, 1.0, 0.0]));

    let mut v = [1.0, 2.0, 9.0];
    println!("Magnitude of {v:?}: {}", magnitude(&v));
    normalize(&mut v);
    println!("Magnitude of {v:?} after normalization: {}", magnitude(&v));
}
解答
/// Calculate the magnitude of the given vector.
fn magnitude(vector: &[f64; 3]) -> f64 {
    let mut mag_squared = 0.0;
    for coord in vector {
        mag_squared += coord * coord;
    }
    mag_squared.sqrt()
}

/// Change the magnitude of the vector to 1.0 without changing its direction.
fn normalize(vector: &mut [f64; 3]) {
    let mag = magnitude(vector);
    for item in vector {
        *item /= mag;
    }
}

fn main() {
    println!("Magnitude of a unit vector: {}", magnitude(&[0.0, 1.0, 0.0]));

    let mut v = [1.0, 2.0, 9.0];
    println!("Magnitude of {v:?}: {}", magnitude(&v));
    normalize(&mut v);
    println!("Magnitude of {v:?} after normalization: {}", magnitude(&v));
}
用户定义的类型
This segment should take about 50 minutes. It contains:
| Slide | Duration |
|---|---|
| 结构体 | 10 minutes |
| 元组结构体 | 10 minutes |
| 枚举 | 5 minutes |
| static | 5 minutes |
| 类型别名 | 2 minutes |
| 练习:电梯事件 | 15 minutes |
结构体
与 C 和 C++ 一样,Rust 支持自定义结构体:
struct Person {
    name: String,
    age: u8,
}

fn describe(person: &Person) {
    println!("{} is {} years old", person.name, person.age);
}

fn main() {
    let mut peter = Person { name: String::from("Peter"), age: 27 };
    describe(&peter);

    peter.age = 28;
    describe(&peter);

    let name = String::from("Avery");
    let age = 39;
    let avery = Person { name, age };
    describe(&avery);

    let jackie = Person { name: String::from("Jackie"), ..avery };
    describe(&jackie);
}关键点:
- 结构体的运作方式与使用 C 或 C++ 时类似。
- 不需要 typedef 即可定义类型,这与使用 C++ 类似,但与使用 C 不同。
- 与使用 C++ 不同的是,结构体之间没有继承关系。
- This may be a good time to let people know there are different types of structs.
- Zero-sized structs (e.g.
struct Foo;) might be used when implementing a trait on some type but don’t have any data that you want to store in the value itself. - 下一张幻灯片将介绍元组结构体,当字段名称不重要时使用。
- Zero-sized structs (e.g.
- If you already have variables with the right names, then you can create the struct using a shorthand.
- The syntax
..averyallows us to copy the majority of the fields from the old struct without having to explicitly type it all out. It must always be the last element.
元组结构体
如果字段名称不重要,您可以使用元组结构体:
struct Point(i32, i32);

fn main() {
    let p = Point(17, 23);
    println!("({}, {})", p.0, p.1);
}
这通常用于单字段封装容器(称为 newtype):
struct PoundsOfForce(f64);
struct Newtons(f64);

fn compute_thruster_force() -> PoundsOfForce {
    todo!("Ask a rocket scientist at NASA")
}

fn set_thruster_force(force: Newtons) {
    // ...
}

fn main() {
    let force = compute_thruster_force();
    set_thruster_force(force);
}- 如需对基元类型中的值的额外信息进行编码,使用 newtype 是一种非常好的方式,例如:
- 数字会以某些单位来衡量:上方示例中为
Newtons。 - The value passed some validation when it was created, so you no longer have to validate it again at every use:
PhoneNumber(String)orOddNumber(u32).
- 数字会以某些单位来衡量:上方示例中为
- 展示如何通过访问 newtype 中的单个字段,将
f64值添加到Newtons类型。- Rust 通常不喜欢不明确的内容,例如自动解封或将布尔值用作整数。
- 运算符过载在第 3 天(泛型)讨论。
- 此示例巧妙地引用了火星气候探测者号 的失败事故。
枚举
enum 关键字允许创建具有几个 不同变体的类型:
#[derive(Debug)]
enum Direction {
    Left,
    Right,
}

#[derive(Debug)]
enum PlayerMove {
    Pass,                        // Simple variant
    Run(Direction),              // Tuple variant
    Teleport { x: u32, y: u32 }, // Struct variant
}

fn main() {
    let m: PlayerMove = PlayerMove::Run(Direction::Left);
    println!("On this turn: {:?}", m);
}关键点:
- Enumerations allow you to collect a set of values under one type.
Directionis a type with variants. There are two values ofDirection:Direction::LeftandDirection::Right.PlayerMoveis a type with three variants. In addition to the payloads, Rust will store a discriminant so that it knows at runtime which variant is in aPlayerMovevalue.- This might be a good time to compare structs and enums:
- In both, you can have a simple version without fields (unit struct) or one with different types of fields (variant payloads).
- You could even implement the different variants of an enum with separate structs but then they wouldn’t be the same type as they would if they were all defined in an enum.
- Rust 使用最小的空间来存储判标识。
-
如有必要,它会存储所需最小大小的整数
-
如果允许的变体值未涵盖所有位模式,则它将使用无效的位模式对判别标识进行编码(“小众优化”)。例如,
Option<&u8>存储的要么是指向整数的指针,要么是None变体的NULL值。 -
You can control the discriminant if needed (e.g., for compatibility with C):
#[repr(u32)]
enum Bar {
    A, // 0
    B = 10000,
    C, // 10001
}

fn main() {
    println!("A: {}", Bar::A as u32);
    println!("B: {}", Bar::B as u32);
    println!("C: {}", Bar::C as u32);
}
Without
repr, the discriminant type takes 2 bytes, because 10001 fits 2 bytes.
-
探索更多
Rust 具有多种优化措施,可以减少枚举占用的空间。
-
Null pointer optimization: For some types, Rust guarantees that
size_of::<T>()equalssize_of::<Option<T>>().Example code if you want to show how the bitwise representation may look like in practice. It’s important to note that the compiler provides no guarantees regarding this representation, therefore this is totally unsafe.
use std::mem::transmute;

macro_rules! dbg_bits {
    ($e:expr, $bit_type:ty) => {
        println!("- {}: {:#x}", stringify!($e), transmute::<_, $bit_type>($e));
    };
}

fn main() {
    unsafe {
        println!("bool:");
        dbg_bits!(false, u8);
        dbg_bits!(true, u8);

        println!("Option<bool>:");
        dbg_bits!(None::<bool>, u8);
        dbg_bits!(Some(false), u8);
        dbg_bits!(Some(true), u8);

        println!("Option<Option<bool>>:");
        dbg_bits!(Some(Some(false)), u8);
        dbg_bits!(Some(Some(true)), u8);
        dbg_bits!(Some(None::<bool>), u8);
        dbg_bits!(None::<Option<bool>>, u8);

        println!("Option<&i32>:");
        dbg_bits!(None::<&i32>, usize);
        dbg_bits!(Some(&0i32), usize);
    }
}
static
静态变量在程序的整个执行过程中始终有效,因此不会移动:
static BANNER: &str = "Welcome to RustOS 3.14";

fn main() {
    println!("{BANNER}");
}
As noted in the Rust RFC Book, these are not inlined upon use and have an actual associated memory location. This is useful for unsafe and embedded code, and the variable lives through the entirety of the program execution. When a globally-scoped value does not have a reason to need object identity, const is generally preferred.
staticis similar to mutable global variables in C++.staticprovides object identity: an address in memory and state as required by types with interior mutability such asMutex<T>.
探索更多
Because static variables are accessible from any thread, they must be Sync. Interior mutability is possible through a Mutex, atomic or similar.
Thread-local data can be created with the macro std::thread_local.
const
Constants are evaluated at compile time and their values are inlined wherever they are used:
const DIGEST_SIZE: usize = 3;
const ZERO: Option<u8> = Some(42);

fn compute_digest(text: &str) -> [u8; DIGEST_SIZE] {
    let mut digest = [ZERO.unwrap_or(0); DIGEST_SIZE];
    for (idx, &b) in text.as_bytes().iter().enumerate() {
        digest[idx % DIGEST_SIZE] = digest[idx % DIGEST_SIZE].wrapping_add(b);
    }
    digest
}

fn main() {
    let digest = compute_digest("Hello");
    println!("digest: {digest:?}");
}
根据 Rust RFC Book 这些变量在使用时是内联 (inlined) 的。
在编译时只能调用标记为“const”的函数以生成“const”值。不过,可在运行时调用“const”函数。
- Mention that
constbehaves semantically similar to C++’sconstexpr - 虽然需要使用在运行中求值的常量的情况并不是很常见,但是它是有帮助的,而且比使用静态变量更安全。
类型别名
类型别名为另一种类型创建名称。这两种类型可以互换使用。
enum CarryableConcreteItem {
    Left,
    Right,
}

type Item = CarryableConcreteItem;

// Aliases are more useful with long, complex types:
use std::cell::RefCell;
use std::sync::{Arc, RwLock};
type PlayerInventory = RwLock<Vec<Arc<RefCell<Item>>>>;C 语言程序员会认为这类似于 typedef。
练习:电梯事件
我们将创建一个数据结构来表示电梯控制系统中的事件。您可以自行定义用于构造各种事件的类型和函数。使用 #[derive(Debug)] 以允许通过 {:?} 设置类型格式。
This exercise only requires creating and populating data structures so that main runs without errors. The next part of the course will cover getting data out of these structures.
#[derive(Debug)]
/// An event in the elevator system that the controller must react to.
enum Event {
    // TODO: add required variants
}

/// A direction of travel.
#[derive(Debug)]
enum Direction {
    Up,
    Down,
}

/// The car has arrived on the given floor.
fn car_arrived(floor: i32) -> Event {
    todo!()
}

/// The car doors have opened.
fn car_door_opened() -> Event {
    todo!()
}

/// The car doors have closed.
fn car_door_closed() -> Event {
    todo!()
}

/// A directional button was pressed in an elevator lobby on the given floor.
fn lobby_call_button_pressed(floor: i32, dir: Direction) -> Event {
    todo!()
}

/// A floor button was pressed in the elevator car.
fn car_floor_button_pressed(floor: i32) -> Event {
    todo!()
}

fn main() {
    println!(
        "A ground floor passenger has pressed the up button: {:?}",
        lobby_call_button_pressed(0, Direction::Up)
    );
    println!("The car has arrived on the ground floor: {:?}", car_arrived(0));
    println!("The car door opened: {:?}", car_door_opened());
    println!(
        "A passenger has pressed the 3rd floor button: {:?}",
        car_floor_button_pressed(3)
    );
    println!("The car door closed: {:?}", car_door_closed());
    println!("The car has arrived on the 3rd floor: {:?}", car_arrived(3));
}
解答
#[derive(Debug)]
/// An event in the elevator system that the controller must react to.
enum Event {
    /// A button was pressed.
    ButtonPressed(Button),

    /// The car has arrived at the given floor.
    CarArrived(Floor),

    /// The car's doors have opened.
    CarDoorOpened,

    /// The car's doors have closed.
    CarDoorClosed,
}

/// A floor is represented as an integer.
type Floor = i32;

/// A direction of travel.
#[derive(Debug)]
enum Direction {
    Up,
    Down,
}

/// A user-accessible button.
#[derive(Debug)]
enum Button {
    /// A button in the elevator lobby on the given floor.
    LobbyCall(Direction, Floor),

    /// A floor button within the car.
    CarFloor(Floor),
}

/// The car has arrived on the given floor.
fn car_arrived(floor: i32) -> Event {
    Event::CarArrived(floor)
}

/// The car doors have opened.
fn car_door_opened() -> Event {
    Event::CarDoorOpened
}

/// The car doors have closed.
fn car_door_closed() -> Event {
    Event::CarDoorClosed
}

/// A directional button was pressed in an elevator lobby on the given floor.
fn lobby_call_button_pressed(floor: i32, dir: Direction) -> Event {
    Event::ButtonPressed(Button::LobbyCall(dir, floor))
}

/// A floor button was pressed in the elevator car.
fn car_floor_button_pressed(floor: i32) -> Event {
    Event::ButtonPressed(Button::CarFloor(floor))
}

fn main() {
    println!(
        "A ground floor passenger has pressed the up button: {:?}",
        lobby_call_button_pressed(0, Direction::Up)
    );
    println!("The car has arrived on the ground floor: {:?}", car_arrived(0));
    println!("The car door opened: {:?}", car_door_opened());
    println!(
        "A passenger has pressed the 3rd floor button: {:?}",
        car_floor_button_pressed(3)
    );
    println!("The car door closed: {:?}", car_door_closed());
    println!("The car has arrived on the 3rd floor: {:?}", car_arrived(3));
}
欢迎来到第二天
Now that we have seen a fair amount of Rust, today will focus on Rust’s type system:
- Pattern matching: extracting data from structures.
- 方法:将函数与类型相关联。
- 特征:多个类型所共有的行为。
- 泛型:对其他类型进行类型参数化。
- 标准库类型和特征:探索 Rust 丰富的标准库。
时间表
Including 10 minute breaks, this session should take about 2 hours and 55 minutes. It contains:
| Segment | Duration |
|---|---|
| 欢迎 | 3 minutes |
| 模式匹配 | 1 hour |
| 方法和特征 | 50 minutes |
| 泛型 | 40 minutes |
模式匹配
This segment should take about 1 hour. It contains:
| Slide | Duration |
|---|---|
| Matching Values | 10 minutes |
| 解构 | 10 minutes |
| let 控制流 | 10 minutes |
| 练习:表达式求值 | 30 minutes |
Matching Values
The match keyword lets you match a value against one or more patterns. The comparisons are done from top to bottom and the first match wins.
模式(pattern)可以是简单的值,其用法类似于 C 与 C++ 中的 switch 。
#[rustfmt::skip]
fn main() {
    let input = 'x';
    match input {
        'q'                       => println!("Quitting"),
        'a' | 's' | 'w' | 'd'     => println!("Moving around"),
        '0'..='9'                 => println!("Number input"),
        key if key.is_lowercase() => println!("Lowercase: {key}"),
        _                         => println!("Something else"),
    }
}
The _ pattern is a wildcard pattern which matches any value. The expressions must be exhaustive, meaning that it covers every possibility, so _ is often used as the final catch-all case.
Match can be used as an expression. Just like if, each match arm must have the same type. The type is the last expression of the block, if any. In the example above, the type is ().
模式中的变量(本例中为 key)将创建一个可在匹配分支内使用的绑定。
只有当条件为真时,保护语句才能使分支匹配成功。
关键点:
-
You might point out how some specific characters are being used when in a pattern
|as anor..can expand as much as it needs to be1..=5represents an inclusive range- “_”是通配符
-
有些想法比模式本身所允许的程度更加复杂,如果我们希望简要地表达这些想法,就必须把匹配守卫视为独立的语法功能。
-
它们与匹配分支中的单独“if”表达式不同。选择匹配分支后,分支块内(在“=>”之后)会出现“if”表达式。如果该分支块内的“if”条件失败,系统不会考虑原始“match”表达式的其他分支。
-
只要表达式在包含“|”的模式中,就会适用守卫定义的条件。
解构
与元组一样,结构体和枚举也可以通过匹配方式进行解构:
结构体
struct Foo {
    x: (u32, u32),
    y: u32,
}

#[rustfmt::skip]
fn main() {
    let foo = Foo { x: (1, 2), y: 3 };
    match foo {
        Foo { x: (1, b), y } => println!("x.0 = 1, b = {b}, y = {y}"),
        Foo { y: 2, x: i }   => println!("y = 2, x = {i:?}"),
        Foo { y, .. }        => println!("y = {y}, other fields were ignored"),
    }
}
枚举
模式还可用于将变量绑定到值的某些部分。这是您检查类型结构的方式。我们先从简单的“enum”类型开始:
enum Result {
    Ok(i32),
    Err(String),
}

fn divide_in_two(n: i32) -> Result {
    if n % 2 == 0 {
        Result::Ok(n / 2)
    } else {
        Result::Err(format!("cannot divide {n} into two equal parts"))
    }
}

fn main() {
    let n = 100;
    match divide_in_two(n) {
        Result::Ok(half) => println!("{n} divided in two is {half}"),
        Result::Err(msg) => println!("sorry, an error happened: {msg}"),
    }
}
在这里,我们使用了分支来解构“Result”值。在第一个分支中,“half”被绑定到“Ok”变体中的值。在第二个分支中,“msg”被绑定到错误消息。
结构体
- 更改“foo”中的字面量值以与其他模式相匹配。
- 向“Foo”添加一个新字段,并根据需要更改模式。
- 捕获和常量表达式之间的区别可能很难发现。尝试将第二个分支中的“2”更改为一个变量,可以看到它几乎无法运作了。将它更改为“const”,可以看到它又正常运作了。
枚举
关键点:
- “if”/“else”表达式将返回一个枚举,该枚举之后会使用“match”进行解封装。
- 您可以尝试在枚举定义中添加第三个变体,并在运行代码时显示错误。指出代码现在有哪些地方还不详尽,并说明编译器会如何尝试给予提示。
- The values in the enum variants can only be accessed after being pattern matched.
- Demonstrate what happens when the search is inexhaustive. Note the advantage the Rust compiler provides by confirming when all cases are handled.
- Save the result of
divide_in_twoin theresultvariable andmatchit in a loop. That won’t compile becausemsgis consumed when matched. To fix it, match&resultinstead ofresult. That will makemsga reference so it won’t be consumed. This “match ergonomics” appeared in Rust 2018. If you want to support older Rust, replacemsgwithref msgin the pattern.
let 控制流
Rust 有几个与其他语言不同的控制流结构。它们用于模式匹配:
if let表达式while letexpressionsmatch表达式
if let 表达式
if let 表达式 能让你根据某个值是否与模式相匹配来执行不同的代码:
use std::time::Duration;

fn sleep_for(secs: f32) {
    if let Ok(dur) = Duration::try_from_secs_f32(secs) {
        std::thread::sleep(dur);
        println!("slept for {:?}", dur);
    }
}

fn main() {
    sleep_for(-10.0);
    sleep_for(0.8);
}
let else expressions
如需了解匹配模式并从函数返回的常见情况,请使用 let else。“else” 分支必须执行不同的结束方式(例如,return、break 或 panic,但不能直接执行到代码块的末尾)。
fn hex_or_die_trying(maybe_string: Option<String>) -> Result<u32, String> {
    let s = if let Some(s) = maybe_string {
        s
    } else {
        return Err(String::from("got None"));
    };

    let first_byte_char = if let Some(first_byte_char) = s.chars().next() {
        first_byte_char
    } else {
        return Err(String::from("got empty string"));
    };

    if let Some(digit) = first_byte_char.to_digit(16) {
        Ok(digit)
    } else {
        Err(String::from("not a hex digit"))
    }
}

fn main() {
    println!("result: {:?}", hex_or_die_trying(Some(String::from("foo"))));
}
与 if let 一样,while let 变体会针对一个模式重复测试一个值:
fn main() {
    let mut name = String::from("Comprehensive Rust 🦀");
    while let Some(c) = name.pop() {
        println!("character: {c}");
    }
    // (There are more efficient ways to reverse a string!)
}
Here String::pop returns Some(c) until the string is empty, after which it will return None. The while let lets us keep iterating through all items.
if-let
- Unlike
match,if letdoes not have to cover all branches. This can make it more concise thanmatch. - 使用
Option时,常见的做法是处理Some值。 - 与
match不同的是,if let不支持模式匹配的 guard 子句。
let-else
if-lets can pile up, as shown. The let-else construct supports flattening this nested code. Rewrite the awkward version for students, so they can see the transformation.
重写后的版本为:
#![allow(unused)]
fn main() {
fn hex_or_die_trying(maybe_string: Option<String>) -> Result<u32, String> {
    let Some(s) = maybe_string else {
        return Err(String::from("got None"));
    };

    let Some(first_byte_char) = s.chars().next() else {
        return Err(String::from("got empty string"));
    };

    let Some(digit) = first_byte_char.to_digit(16) else {
        return Err(String::from("not a hex digit"));
    };

    return Ok(digit);
}
}
while-let
- 指出只要值与模式匹配,
while let循环就会一直进行下去。 - You could rewrite the
while letloop as an infinite loop with an if statement that breaks when there is no value to unwrap forname.pop(). Thewhile letprovides syntactic sugar for the above scenario.
练习:表达式求值
Let’s write a simple recursive evaluator for arithmetic expressions.
The Box type here is a smart pointer, and will be covered in detail later in the course. An expression can be “boxed” with Box::new as seen in the tests. To evaluate a boxed expression, use the deref operator (*) to “unbox” it: eval(*boxed_expr).
Some expressions cannot be evaluated and will return an error. The standard Result<Value, String> type is an enum that represents either a successful value (Ok(Value)) or an error (Err(String)). We will cover this type in detail later.
将代码复制粘贴到 Rust Playground,然后开始实现 eval。最终结果应能通过测试。使用 todo!() 并使测试逐个通过可能会很有帮助。您还可以使用 #[ignore] 暂时跳过测试:
#[test]
#[ignore]
fn test_value() { .. }
If you finish early, try writing a test that results in division by zero or integer overflow. How could you handle this with Result instead of a panic?
#![allow(unused)]
fn main() {
/// An operation to perform on two subexpressions.
#[derive(Debug)]
enum Operation {
    Add,
    Sub,
    Mul,
    Div,
}

/// An expression, in tree form.
#[derive(Debug)]
enum Expression {
    /// An operation on two subexpressions.
    Op { op: Operation, left: Box<Expression>, right: Box<Expression> },

    /// A literal value
    Value(i64),
}

fn eval(e: Expression) -> Result<i64, String> {
    todo!()
}

#[test]
fn test_value() {
    assert_eq!(eval(Expression::Value(19)), Ok(19));
}

#[test]
fn test_sum() {
    assert_eq!(
        eval(Expression::Op {
            op: Operation::Add,
            left: Box::new(Expression::Value(10)),
            right: Box::new(Expression::Value(20)),
        }),
        Ok(30)
    );
}

#[test]
fn test_recursion() {
    let term1 = Expression::Op {
        op: Operation::Mul,
        left: Box::new(Expression::Value(10)),
        right: Box::new(Expression::Value(9)),
    };
    let term2 = Expression::Op {
        op: Operation::Mul,
        left: Box::new(Expression::Op {
            op: Operation::Sub,
            left: Box::new(Expression::Value(3)),
            right: Box::new(Expression::Value(4)),
        }),
        right: Box::new(Expression::Value(5)),
    };
    assert_eq!(
        eval(Expression::Op {
            op: Operation::Add,
            left: Box::new(term1),
            right: Box::new(term2),
        }),
        Ok(85)
    );
}

#[test]
fn test_error() {
    assert_eq!(
        eval(Expression::Op {
            op: Operation::Div,
            left: Box::new(Expression::Value(99)),
            right: Box::new(Expression::Value(0)),
        }),
        Err(String::from("division by zero"))
    );
}
}
解答
/// An operation to perform on two subexpressions.
#[derive(Debug)]
enum Operation {
    Add,
    Sub,
    Mul,
    Div,
}

/// An expression, in tree form.
#[derive(Debug)]
enum Expression {
    /// An operation on two subexpressions.
    Op { op: Operation, left: Box<Expression>, right: Box<Expression> },

    /// A literal value
    Value(i64),
}

fn eval(e: Expression) -> Result<i64, String> {
    match e {
        Expression::Op { op, left, right } => {
            let left = match eval(*left) {
                Ok(v) => v,
                e @ Err(_) => return e,
            };
            let right = match eval(*right) {
                Ok(v) => v,
                e @ Err(_) => return e,
            };
            Ok(match op {
                Operation::Add => left + right,
                Operation::Sub => left - right,
                Operation::Mul => left * right,
                Operation::Div => {
                    if right == 0 {
                        return Err(String::from("division by zero"));
                    } else {
                        left / right
                    }
                }
            })
        }
        Expression::Value(v) => Ok(v),
    }
}

#[test]
fn test_value() {
    assert_eq!(eval(Expression::Value(19)), Ok(19));
}

#[test]
fn test_sum() {
    assert_eq!(
        eval(Expression::Op {
            op: Operation::Add,
            left: Box::new(Expression::Value(10)),
            right: Box::new(Expression::Value(20)),
        }),
        Ok(30)
    );
}

#[test]
fn test_recursion() {
    let term1 = Expression::Op {
        op: Operation::Mul,
        left: Box::new(Expression::Value(10)),
        right: Box::new(Expression::Value(9)),
    };
    let term2 = Expression::Op {
        op: Operation::Mul,
        left: Box::new(Expression::Op {
            op: Operation::Sub,
            left: Box::new(Expression::Value(3)),
            right: Box::new(Expression::Value(4)),
        }),
        right: Box::new(Expression::Value(5)),
    };
    assert_eq!(
        eval(Expression::Op {
            op: Operation::Add,
            left: Box::new(term1),
            right: Box::new(term2),
        }),
        Ok(85)
    );
}

#[test]
fn test_error() {
    assert_eq!(
        eval(Expression::Op {
            op: Operation::Div,
            left: Box::new(Expression::Value(99)),
            right: Box::new(Expression::Value(0)),
        }),
        Err(String::from("division by zero"))
    );
}

fn main() {
    let expr = Expression::Op {
        op: Operation::Sub,
        left: Box::new(Expression::Value(20)),
        right: Box::new(Expression::Value(10)),
    };
    println!("expr: {:?}", expr);
    println!("result: {:?}", eval(expr));
}
方法和特征
This segment should take about 50 minutes. It contains:
| Slide | Duration |
|---|---|
| 方法 | 10 minutes |
| 特征(Trait) | 15 minutes |
| 派生特征 | 3 minutes |
| 练习:通用日志 | 20 minutes |
方法
Rust 允许您将函数与新类型相关联。您可以使用“impl”块来执行此操作:
#[derive(Debug)]
struct Race {
    name: String,
    laps: Vec<i32>,
}

impl Race {
    // No receiver, a static method
    fn new(name: &str) -> Self {
        Self { name: String::from(name), laps: Vec::new() }
    }

    // Exclusive borrowed read-write access to self
    fn add_lap(&mut self, lap: i32) {
        self.laps.push(lap);
    }

    // Shared and read-only borrowed access to self
    fn print_laps(&self) {
        println!("Recorded {} laps for {}:", self.laps.len(), self.name);
        for (idx, lap) in self.laps.iter().enumerate() {
            println!("Lap {idx}: {lap} sec");
        }
    }

    // Exclusive ownership of self
    fn finish(self) {
        let total: i32 = self.laps.iter().sum();
        println!("Race {} is finished, total lap time: {}", self.name, total);
    }
}

fn main() {
    let mut race = Race::new("Monaco Grand Prix");
    race.add_lap(70);
    race.add_lap(68);
    race.print_laps();
    race.add_lap(71);
    race.print_laps();
    race.finish();
    // race.add_lap(42);
}
The self arguments specify the “receiver” - the object the method acts on. There are several common receivers for a method:
- “&self”:使用不可变的共享引用从调用方借用对象。之后可以再次使用该对象。
- “&mut self”:使用唯一的可变引用从调用方借用对象。之后可以再次使用该对象。
- “self”:获取对象的所有权并将其从调用方移出。该方法会成为对象的所有者。除非明确转移对象的所有权,否则在该方法返回时,对象将被丢弃(取消分配)。具备完全所有权,不自动等同于具备可变性。
mut self: same as above, but the method can mutate the object.- 无接收器:这将变为结构体上的静态方法。通常用于创建构造函数,按惯例被称为“new”。
关键点:
- 引入方法时,将方法与函数进行比较会很有帮助。
- 在某种类型(例如结构体或枚举)的实例上调用方法,第一个参数将该实例表示为“self”。
- 开发者可能会选择使用方法,以便利用方法接收器语法并让方法更有条理。通过使用方法,我们可以将所有实现代码保存在一个可预测的位置。
- 指出关键字“self”的用法,它是一种方法接收器。
- 显示它是“self: Self”的缩写术语,或许要显示结构体名称的可能用法。
- 说明“Self”是“impl”块所属类型的类型别名,可以在块中的其他位置使用。
- 指出“self”的使用方式与其他结构体一样,并且可以使用点表示法来指代各个字段。
- This might be a good time to demonstrate how the
&selfdiffers fromselfby trying to runfinishtwice. - Beyond variants on
self, there are also special wrapper types allowed to be receiver types, such asBox<Self>.
特征(Trait)
Rust 让您可以依据特征对类型进行抽象化处理。特征与接口类似:
trait Pet {
    /// Return a sentence from this pet.
    fn talk(&self) -> String;

    /// Print a string to the terminal greeting this pet.
    fn greet(&self);
}-
trait 定义了类型实现该 trait 所必须具备的一些方法。
-
In the “Generics” segment, next, we will see how to build functionality that is generic over all types implementing a trait.
实现 Unsafe Trait
trait Pet {
    fn talk(&self) -> String;

    fn greet(&self) {
        println!("Oh you're a cutie! What's your name? {}", self.talk());
    }
}

struct Dog {
    name: String,
    age: i8,
}

impl Pet for Dog {
    fn talk(&self) -> String {
        format!("Woof, my name is {}!", self.name)
    }
}

fn main() {
    let fido = Dog { name: String::from("Fido"), age: 5 };
    fido.greet();
}-
To implement
TraitforType, you use animpl Trait for Type { .. }block. -
Unlike Go interfaces, just having matching methods is not enough: a
Cattype with atalk()method would not automatically satisfyPetunless it is in animpl Petblock. -
Traits may provide default implementations of some methods. Default implementations can rely on all the methods of the trait. In this case,
greetis provided, and relies ontalk.
更多 trait
A trait can require that types implementing it also implement other traits, called supertraits. Here, any type implementing Pet must implement Animal.
trait Animal {
    fn leg_count(&self) -> u32;
}

trait Pet: Animal {
    fn name(&self) -> String;
}

struct Dog(String);

impl Animal for Dog {
    fn leg_count(&self) -> u32 {
        4
    }
}

impl Pet for Dog {
    fn name(&self) -> String {
        self.0.clone()
    }
}

fn main() {
    let puppy = Dog(String::from("Rex"));
    println!("{} has {} legs", puppy.name(), puppy.leg_count());
}
This is sometimes called “trait inheritance” but students should not expect this to behave like OO inheritance. It just specifies an additional requirement on implementations of a trait.
共享类型
Associated types are placeholder types which are supplied by the trait implementation.
#[derive(Debug)]
struct Meters(i32);
#[derive(Debug)]
struct MetersSquared(i32);

trait Multiply {
    type Output;
    fn multiply(&self, other: &Self) -> Self::Output;
}

impl Multiply for Meters {
    type Output = MetersSquared;
    fn multiply(&self, other: &Self) -> Self::Output {
        MetersSquared(self.0 * other.0)
    }
}

fn main() {
    println!("{:?}", Meters(10).multiply(&Meters(20)));
}-
Associated types are sometimes also called “output types”. The key observation is that the implementer, not the caller, chooses this type.
-
Many standard library traits have associated types, including arithmetic operators and
Iterator.
派生特征
系统可以自动为您的自定义类型实现支持的 trait,如下所示:
#[derive(Debug, Clone, Default)]
struct Player {
    name: String,
    strength: u8,
    hit_points: u8,
}

fn main() {
    let p1 = Player::default(); // Default trait adds `default` constructor.
    let mut p2 = p1.clone(); // Clone trait adds `clone` method.
    p2.name = String::from("EldurScrollz");
    // Debug trait adds support for printing with `{:?}`.
    println!("{:?} vs. {:?}", p1, p2);
}派生功能是通过宏实现的,并且许多 crate 提供有用的派生宏,以添加实用功能。例如,serde 可以使用 #[derive(Serialize)] 为结构体派生序列化支持。
Exercise: Logger Trait
Let’s design a simple logging utility, using a trait Logger with a log method. Code which might log its progress can then take an &impl Logger. In testing, this might put messages in the test logfile, while in a production build it would send messages to a log server.
However, the StderrLogger given below logs all messages, regardless of verbosity. Your task is to write a VerbosityFilter type that will ignore messages above a maximum verbosity.
This is a common pattern: a struct wrapping a trait implementation and implementing that same trait, adding behavior in the process. What other kinds of wrappers might be useful in a logging utility?
use std::fmt::Display;

pub trait Logger {
    /// Log a message at the given verbosity level.
    fn log(&self, verbosity: u8, message: impl Display);
}

struct StderrLogger;

impl Logger for StderrLogger {
    fn log(&self, verbosity: u8, message: impl Display) {
        eprintln!("verbosity={verbosity}: {message}");
    }
}

fn do_things(logger: &impl Logger) {
    logger.log(5, "FYI");
    logger.log(2, "Uhoh");
}

// TODO: Define and implement `VerbosityFilter`.

fn main() {
    let l = VerbosityFilter { max_verbosity: 3, inner: StderrLogger };
    do_things(&l);
}
解答
use std::fmt::Display;

pub trait Logger {
    /// Log a message at the given verbosity level.
    fn log(&self, verbosity: u8, message: impl Display);
}

struct StderrLogger;

impl Logger for StderrLogger {
    fn log(&self, verbosity: u8, message: impl Display) {
        eprintln!("verbosity={verbosity}: {message}");
    }
}

fn do_things(logger: &impl Logger) {
    logger.log(5, "FYI");
    logger.log(2, "Uhoh");
}

/// Only log messages up to the given verbosity level.
struct VerbosityFilter {
    max_verbosity: u8,
    inner: StderrLogger,
}

impl Logger for VerbosityFilter {
    fn log(&self, verbosity: u8, message: impl Display) {
        if verbosity <= self.max_verbosity {
            self.inner.log(verbosity, message);
        }
    }
}

fn main() {
    let l = VerbosityFilter { max_verbosity: 3, inner: StderrLogger };
    do_things(&l);
}
泛型
This segment should take about 40 minutes. It contains:
| Slide | Duration |
|---|---|
| 泛型函数 | 5 minutes |
| 泛型类型 | 10 minutes |
| 特征边界 | 10 minutes |
| impl Trait | 5 minutes |
| 练习:通用 min 函数 | 10 minutes |
泛型函数
Rust supports generics, which lets you abstract algorithms or data structures (such as sorting or a binary tree) over the types used or stored.
/// Pick `even` or `odd` depending on the value of `n`.
fn pick<T>(n: i32, even: T, odd: T) -> T {
    if n % 2 == 0 {
        even
    } else {
        odd
    }
}

fn main() {
    println!("picked a number: {:?}", pick(97, 222, 333));
    println!("picked a tuple: {:?}", pick(28, ("dog", 1), ("cat", 2)));
}-
Rust 会根据参数类型和返回值推理出 T 的类型。
-
这与 C++ 模板类似,但 Rust 会立即编译部分通用函数,因此该函数必须对所有符合约束条件的类型都有效。例如,请尝试修改
pick函数,如果n == 0,则返回even + odd。即使仅使用带有整数的“pick”实例化,Rust 仍会将其视为无效。C++ 可让您做到这一点。 -
Generic code is turned into non-generic code based on the call sites. This is a zero-cost abstraction: you get exactly the same result as if you had hand-coded the data structures without the abstraction.
泛型类型
您可以使用泛型对具体字段类型进行抽象化处理:
#[derive(Debug)]
struct Point<T> {
    x: T,
    y: T,
}

impl<T> Point<T> {
    fn coords(&self) -> (&T, &T) {
        (&self.x, &self.y)
    }

    fn set_x(&mut self, x: T) {
        self.x = x;
    }
}

fn main() {
    let integer = Point { x: 5, y: 10 };
    let float = Point { x: 1.0, y: 4.0 };
    println!("{integer:?} and {float:?}");
    println!("coords: {:?}", integer.coords());
}-
*问:*为什么
T在impl<T> Point<T> {}中指定了两次?这不是多余的吗?- 这是因为它是泛型类型的泛型实现部分。它们是独立的泛型内容。
- 这意味着这些方法是针对所有
T定义的。 - It is possible to write
impl Point<u32> { .. }.Point依然是一个泛型,并且您可以使用Point<f64>,但此块中的方法将仅适用于Point<u32>。
-
请尝试声明一个新变量
let p = Point { x: 5, y: 10.0 };。通过使用两种类型变量(例如T和U),更新代码以允许具有不同类型元素的点。
泛型
Traits can also be generic, just like types and functions. A trait’s parameters get concrete types when it is used.
#[derive(Debug)]
struct Foo(String);

impl From<u32> for Foo {
    fn from(from: u32) -> Foo {
        Foo(format!("Converted from integer: {from}"))
    }
}

impl From<bool> for Foo {
    fn from(from: bool) -> Foo {
        Foo(format!("Converted from bool: {from}"))
    }
}

fn main() {
    let from_int = Foo::from(123);
    let from_bool = Foo::from(true);
    println!("{from_int:?}, {from_bool:?}");
}-
The
Fromtrait will be covered later in the course, but its definition in thestddocs is simple. -
Implementations of the trait do not need to cover all possible type parameters. Here,
Foo::From("hello")would not compile because there is noFrom<&str>implementation forFoo. -
Generic traits take types as “input”, while associated types are a kind of “output” type. A trait can have multiple implementations for different input types.
-
In fact, Rust requires that at most one implementation of a trait match for any type T. Unlike some other languages, Rust has no heuristic for choosing the “most specific” match. There is work on adding this support, called specialization.
特征边界
使用泛型时,您通常会想要利用类型来实现某些特性, 这样才能调用此特征的方法。
您可以使用 T: Trait 或 impl Trait 执行此操作:
fn duplicate<T: Clone>(a: T) -> (T, T) {
    (a.clone(), a.clone())
}

// struct NotClonable;

fn main() {
    let foo = String::from("foo");
    let pair = duplicate(foo);
    println!("{pair:?}");
}-
请尝试创建一个
NonClonable对象,并将其传递给duplicate函数。 -
当需要多个 trait 时,请使用
+将它们连接起来。 -
显示
where子句,学员在阅读代码时会看到它。fn duplicate<T>(a: T) -> (T, T) where T: Clone, { (a.clone(), a.clone()) }- 它会在您有多个形参的情况下整理函数签名。
- 它具有额外功能,因此也更强大。
- 如果有人提问,便阐明额外功能是指“:”左侧的类别可为任意值,例如
Option<T>。
- 如果有人提问,便阐明额外功能是指“:”左侧的类别可为任意值,例如
-
请注意,Rust 尚不支持专精领域认证。例如,根据原始
duplicate函数,添加专精领域认证的Duplicate(a: u32)是无效的。
impl Trait
与特征边界类似,impl Trait 语法可以在函数形参 和返回值中使用:
// Syntactic sugar for:
//   fn add_42_millions<T: Into<i32>>(x: T) -> i32 {
fn add_42_millions(x: impl Into<i32>) -> i32 {
    x.into() + 42_000_000
}

fn pair_of(x: u32) -> impl std::fmt::Debug {
    (x + 1, x - 1)
}

fn main() {
    let many = add_42_millions(42_i8);
    println!("{many}");
    let many_more = add_42_millions(10_000_000);
    println!("{many_more}");
    let debuggable = pair_of(27);
    println!("debuggable: {debuggable:?}");
}impl Trait allows you to work with types which you cannot name. The meaning of impl Trait is a bit different in the different positions.
-
对形参来说,
impl Trait就像是具有特征边界的匿名泛型形参。 -
对返回值类型来说,它则意味着返回值类型就是实现该特征的某具体类型, 无需为该类型命名。如果您不想在公共 API 中公开该具体类型,便可 使用此方法。
在返回位置处进行推断有一定难度。会返回
impl Foo的函数会挑选 自身返回的具体类型,而不必在来源中写出此信息。会返回 泛型类型(例如collect<B>() -> B)的函数则可返回符合B的任何类型,而调用方可能需要选择一个类型,例如使用let x: Vec<_> = foo.collect()或使用以下 Turbofish:foo.collect::<Vec<_>>()。
debuggable 是什么类型?尝试输入 let debuggable: () = ..,查看会显示什么错误消息。
练习:通用 min 函数
In this short exercise, you will implement a generic min function that determines the minimum of two values, using the Ord trait.
use std::cmp::Ordering;

// TODO: implement the `min` function used in `main`.

fn main() {
    assert_eq!(min(0, 10), 0);
    assert_eq!(min(500, 123), 123);

    assert_eq!(min('a', 'z'), 'a');
    assert_eq!(min('7', '1'), '1');

    assert_eq!(min("hello", "goodbye"), "goodbye");
    assert_eq!(min("bat", "armadillo"), "armadillo");
}解答
use std::cmp::Ordering;

fn min<T: Ord>(l: T, r: T) -> T {
    match l.cmp(&r) {
        Ordering::Less | Ordering::Equal => l,
        Ordering::Greater => r,
    }
}

fn main() {
    assert_eq!(min(0, 10), 0);
    assert_eq!(min(500, 123), 123);

    assert_eq!(min('a', 'z'), 'a');
    assert_eq!(min('7', '1'), '1');

    assert_eq!(min("hello", "goodbye"), "goodbye");
    assert_eq!(min("bat", "armadillo"), "armadillo");
}
Welcome Back
Including 10 minute breaks, this session should take about 3 hours and 10 minutes. It contains:
| Segment | Duration |
|---|---|
| 标准库类型 | 1 hour and 20 minutes |
| 标准库特征 | 1 hour and 40 minutes |
标准库类型
This segment should take about 1 hour and 20 minutes. It contains:
| Slide | Duration |
|---|---|
| 标准库 | 3 minutes |
| 文档 | 5 minutes |
| Option | 10 minutes |
| Result | 10 minutes |
| String | 10 minutes |
| Vec | 10 minutes |
| HashMap | 10 minutes |
| 练习:计数器 | 20 minutes |
对于本部分的每张幻灯片,请花些时间仔细阅读文档页面,重点了解一些较为常用的方法。
标准库
Rust comes with a standard library which helps establish a set of common types used by Rust libraries and programs. This way, two libraries can work together smoothly because they both use the same String type.
In fact, Rust contains several layers of the Standard Library: core, alloc and std.
coreincludes the most basic types and functions that don’t depend onlibc, allocator or even the presence of an operating system.alloc包括需要全局堆分配器的类型,例如Vec、Box和Arc。- 嵌入式 Rust 应用通常只使用
core,偶尔会使用alloc。
文档
Rust comes with extensive documentation. For example:
- All of the details about loops.
- ‘u8’ 等基元类型。
- Standard library types like
OptionorBinaryHeap.
事实上,您可以为自己的代码编写文档:
/// Determine whether the first argument is divisible by the second argument.
///
/// If the second argument is zero, the result is false.
fn is_divisible_by(lhs: u32, rhs: u32) -> bool {
    if rhs == 0 {
        return false;
    }
    lhs % rhs == 0
}
The contents are treated as Markdown. All published Rust library crates are automatically documented at docs.rs using the rustdoc tool. It is idiomatic to document all public items in an API using this pattern.
如需从项内(例如在模块内)为项编写文档,请使用 //! 或 /*! .. */,这称为“内部文档注释”:
//! This module contains functionality relating to divisibility of integers.- Show students the generated docs for the
randcrate at https://docs.rs/rand.
Option
我们已经了解了 Option<T> 的一些用法。它可以存储“T”类型的值,或者不存储任何值。例如,‘String::find’ 会返回 Option<usize>。
fn main() {
    let name = "Löwe 老虎 Léopard Gepardi";
    let mut position: Option<usize> = name.find('é');
    println!("find returned {position:?}");
    assert_eq!(position.unwrap(), 14);
    position = name.find('Z');
    println!("find returned {position:?}");
    assert_eq!(position.expect("Character not found"), 0);
}Optionis widely used, not just in the standard library.unwrap会返回Option或 panic 中的值。expect方法与此类似,但其使用错误消息。- 出现 None 时您或许会恐慌,但不能 “无意中”忘记检查是否为 None 的情况。
- 在草拟阶段的编程中,频繁使用
unwrap/expect进行处理十分常见,但在正式版代码时,通常以更为妥当的方式处理None的情况。
- 小众优化意味着
Option<T>在内存中的大小通常与T相同。
Result
Result 与 Option 相似,但表示操作成功或失败,且每个操作的类型不同。这类似于表达式练习中定义的 Res,但是一个泛型:Result<T, E>,其中 T 用于 Ok 变体,E 出现在 Err 变体中。
use std::fs::File;
use std::io::Read;

fn main() {
    let file: Result<File, std::io::Error> = File::open("diary.txt");
    match file {
        Ok(mut file) => {
            let mut contents = String::new();
            if let Ok(bytes) = file.read_to_string(&mut contents) {
                println!("Dear diary: {contents} ({bytes} bytes)");
            } else {
                println!("Could not read file content");
            }
        }
        Err(err) => {
            println!("The diary could not be opened: {err}");
        }
    }
}- 与
Option方法相同,成功值位于Result方法内部, 开发者必须显示提取成功值。因此,建议进行错误检查。在绝不应出现错误的情况下, 可以调用unwrap()或expect()方法,这也是一种开发者意向信号。 Resultdocumentation is a recommended read. Not during the course, but it is worth mentioning. It contains a lot of convenience methods and functions that help functional-style programming.Resultis the standard type to implement error handling as we will see on Day 4.
String
String 是标准堆分配的可扩容 UTF-8 字符串缓冲区:
fn main() {
    let mut s1 = String::new();
    s1.push_str("Hello");
    println!("s1: len = {}, capacity = {}", s1.len(), s1.capacity());

    let mut s2 = String::with_capacity(s1.len() + 1);
    s2.push_str(&s1);
    s2.push('!');
    println!("s2: len = {}, capacity = {}", s2.len(), s2.capacity());

    let s3 = String::from("🇨🇭");
    println!("s3: len = {}, number of chars = {}", s3.len(), s3.chars().count());
}
String 会实现 Deref<Target = str>,这意味着您可以 对 String 调用所有 str 方法。
- “String::new”会返回一个新的空字符串,如果您知道自己想要推送到字符串的数据量,请使用“String::with_capacity”。
- “String::len”会返回“String”的大小(以字节为单位,可能不同于以字符为单位的长度)。
- “String::chars”会针对实际字符返回一个迭代器。请注意,由于字素簇,“char”可能与人们所认为的“字符”有所不同。
- 当人们提到字符串时,可能是指“&str”或“String”。
- 当某个类型实现“Deref<Target = T>”时,编译器会让您以公开透明方式从“T”调用方法。
- 我们尚未讨论过
Dereftrait,所以本部分目前主要介绍文档中边栏的结构。 - “String”会实现“Deref<Target = str>”,后者可公开透明地授予其访问“str”方法的权限。
- Write and compare
let s3 = s1.deref();andlet s3 = &*s1;.
- 我们尚未讨论过
- “String”是作为字节矢量的封装容器实现的,矢量上支持的许多操作在“String”上也受支持,但有一些额外保证。
- 比较将“String”编入索引的不同方式:
- 使用“s3.chars().nth(i).unwrap()”转换为字符,其中“i”代表是否出界。
- 通过使用“s3[0..4]”转换为子字符串,其中该 Slice 在或不在字符边界上。
- Many types can be converted to a string with the
to_stringmethod. This trait is automatically implemented for all types that implementDisplay, so anything that can be formatted can also be converted to a string.
Vec
Vec 是标准的可调整大小堆分配缓冲区:
fn main() {
    let mut v1 = Vec::new();
    v1.push(42);
    println!("v1: len = {}, capacity = {}", v1.len(), v1.capacity());

    let mut v2 = Vec::with_capacity(v1.len() + 1);
    v2.extend(v1.iter());
    v2.push(9999);
    println!("v2: len = {}, capacity = {}", v2.len(), v2.capacity());

    // Canonical macro to initialize a vector with elements.
    let mut v3 = vec![0, 0, 1, 2, 3, 4];

    // Retain only the even elements.
    v3.retain(|x| x % 2 == 0);
    println!("{v3:?}");

    // Remove consecutive duplicates.
    v3.dedup();
    println!("{v3:?}");
}
Vec 会实现 Deref<Target = [T]>,这意味着您可以对 Vec 调用 slice 方法。
Vecis a type of collection, along withStringandHashMap. The data it contains is stored on the heap. This means the amount of data doesn’t need to be known at compile time. It can grow or shrink at runtime.- Notice how
Vec<T>is a generic type too, but you don’t have to specifyTexplicitly. As always with Rust type inference, theTwas established during the firstpushcall. - “vec![…]”是用来代替“Vec::new()”的规范化宏,它支持向矢量添加初始元素。
- 如需将矢量编入索引,您可以使用“[’ ‘]”方法,但如果超出边界,矢量将会 panic。此外,使用“get”将返回“Option”。“pop”函数会移除最后一个元素。
- Slices are covered on day 3. For now, students only need to know that a value of type
Vecgives access to all of the documented slice methods, too.
HashMap
标准的哈希映射,内含针对 HashDoS 攻击的保护措施:
use std::collections::HashMap;

fn main() {
    let mut page_counts = HashMap::new();
    page_counts.insert("Adventures of Huckleberry Finn", 207);
    page_counts.insert("Grimms' Fairy Tales", 751);
    page_counts.insert("Pride and Prejudice", 303);

    if !page_counts.contains_key("Les Misérables") {
        println!(
            "We know about {} books, but not Les Misérables.",
            page_counts.len()
        );
    }

    for book in ["Pride and Prejudice", "Alice's Adventure in Wonderland"] {
        match page_counts.get(book) {
            Some(count) => println!("{book}: {count} pages"),
            None => println!("{book} is unknown."),
        }
    }

    // Use the .entry() method to insert a value if nothing is found.
    for book in ["Pride and Prejudice", "Alice's Adventure in Wonderland"] {
        let page_count: &mut i32 = page_counts.entry(book).or_insert(0);
        *page_count += 1;
    }

    println!("{page_counts:#?}");
}-
“HashMap”未在序言中定义,因此需要纳入范围中。
-
请尝试使用以下代码行。第一行将查看图书是否在 hashmap 中;如果不在,则返回替代值。如果未找到图书,第二行会在 hashmap 中插入替代值。
let pc1 = page_counts .get("Harry Potter and the Sorcerer's Stone") .unwrap_or(&336); let pc2 = page_counts .entry("The Hunger Games".to_string()) .or_insert(374); -
遗憾的是,与“vec!”不同,不存在标准的“hashmap!”宏。
-
不过,从 Rust 1.56 开始,HashMap 实现了“From<[(K, V); N]>”,让我们能够轻松地从字面量数组初始化哈希映射:
let page_counts = HashMap::from([
  ("Harry Potter and the Sorcerer's Stone".to_string(), 336),
  ("The Hunger Games".to_string(), 374),
]);
-
-
或者,HashMap 也可以基于任何可生成键-值元组的“Iterator”进行构建。
-
我们要展示“HashMap<String, i32>”,避免将“&str”用作键,以便简化示例。当然,可以在集合中使用引用,但可能会导致借用检查器出现复杂问题。
- 尝试从上述示例中移除“to_string()”,看看它是否仍可编译。您认为我们可能会在哪些方面遇到问题?
-
此类型具有几种特定于方法的返回值类型,例如“std::collections::hash_map::Keys”。这些类型通常会出现在 Rust 文档的搜索结果中。向学员展示此类型的文档,以及指向“keys”方法的实用链接。
练习:计数器
在本练习中,您将学习一个非常简单的数据结构,并将其变成泛型的。该结构使用 std::collections::HashMap 来跟踪已经出现过的值以及每个值出现的次数。
Counter 的初始版本经过硬编码,仅适用于 u32 值。使结构体及其方法可用于所跟踪的值类型,以便 Counter 能够跟踪任何类型的值。
如果提前完成操作,请尝试使用 entry 方法将哈希查找次数减半,从而实现 count 方法。
use std::collections::HashMap;

/// Counter counts the number of times each value of type T has been seen.
struct Counter {
    values: HashMap<u32, u64>,
}

impl Counter {
    /// Create a new Counter.
    fn new() -> Self {
        Counter {
            values: HashMap::new(),
        }
    }

    /// Count an occurrence of the given value.
    fn count(&mut self, value: u32) {
        if self.values.contains_key(&value) {
            *self.values.get_mut(&value).unwrap() += 1;
        } else {
            self.values.insert(value, 1);
        }
    }

    /// Return the number of times the given value has been seen.
    fn times_seen(&self, value: u32) -> u64 {
        self.values.get(&value).copied().unwrap_or_default()
    }
}

fn main() {
    let mut ctr = Counter::new();
    ctr.count(13);
    ctr.count(14);
    ctr.count(16);
    ctr.count(14);
    ctr.count(14);
    ctr.count(11);

    for i in 10..20 {
        println!("saw {} values equal to {}", ctr.times_seen(i), i);
    }

    let mut strctr = Counter::new();
    strctr.count("apple");
    strctr.count("orange");
    strctr.count("apple");
    println!("got {} apples", strctr.times_seen("apple"));
}
解答
use std::collections::HashMap;
use std::hash::Hash;

/// Counter counts the number of times each value of type T has been seen.
struct Counter<T> {
    values: HashMap<T, u64>,
}

impl<T: Eq + Hash> Counter<T> {
    /// Create a new Counter.
    fn new() -> Self {
        Counter { values: HashMap::new() }
    }

    /// Count an occurrence of the given value.
    fn count(&mut self, value: T) {
        *self.values.entry(value).or_default() += 1;
    }

    /// Return the number of times the given value has been seen.
    fn times_seen(&self, value: T) -> u64 {
        self.values.get(&value).copied().unwrap_or_default()
    }
}

fn main() {
    let mut ctr = Counter::new();
    ctr.count(13);
    ctr.count(14);
    ctr.count(16);
    ctr.count(14);
    ctr.count(14);
    ctr.count(11);

    for i in 10..20 {
        println!("saw {} values equal to {}", ctr.times_seen(i), i);
    }

    let mut strctr = Counter::new();
    strctr.count("apple");
    strctr.count("orange");
    strctr.count("apple");
    println!("got {} apples", strctr.times_seen("apple"));
}
标准库特征
This segment should take about 1 hour and 40 minutes. It contains:
| Slide | Duration |
|---|---|
| 比较 | 10 minutes |
| 运算符 | 10 minutes |
| From 和 Into | 10 minutes |
| 类型转换 | 5 minutes |
| Read 和 Write | 10 minutes |
| Default,结构体更新语法 | 5 minutes |
| 闭包 | 20 minutes |
| 练习:ROT13 | 30 minutes |
与标准库类型一样,请花些时间仔细阅读每个 trait 的文档。
此部分内容较长。中途可休息一下。
比较
这些 trait 支持在值之间进行比较。对于包含实现这些 trait 的字段,可以派生所有这些 trait。
PartialEq and Eq
PartialEq 指部分等价关系,其中包含必需的方法 eq 和提供的方法 ne。== 和 != 运算符会调用这些方法。
struct Key {
    id: u32,
    metadata: Option<String>,
}
impl PartialEq for Key {
    fn eq(&self, other: &Self) -> bool {
        self.id == other.id
    }
}
Eq is a full equivalence relation (reflexive, symmetric, and transitive) and implies PartialEq. Functions that require full equivalence will use Eq as a trait bound.
PartialOrd and Ord
PartialOrd 定义了使用 partial_cmp 方法的部分排序。它用于实现 <、<=、>= 和 > 运算符。
use std::cmp::Ordering;
#[derive(Eq, PartialEq)]
struct Citation {
    author: String,
    year: u32,
}
impl PartialOrd for Citation {
    fn partial_cmp(&self, other: &Self) -> Option<Ordering> {
        match self.author.partial_cmp(&other.author) {
            Some(Ordering::Equal) => self.year.partial_cmp(&other.year),
            author_ord => author_ord,
        }
    }
}
Ord 是总排序,其中 cmp 返回 Ordering。
PartialEq 可以在不同类型之间实现,但 Eq 不能,因为它具有自反性:
struct Key {
    id: u32,
    metadata: Option<String>,
}
impl PartialEq<u32> for Key {
    fn eq(&self, other: &u32) -> bool {
        self.id == *other
    }
}
在实践中,派生这些 trait 很常见,但很少会实现它们。
运算符
运算符重载是通过 std::ops 中的特征实现的:
#[derive(Debug, Copy, Clone)]
struct Point {
    x: i32,
    y: i32,
}

impl std::ops::Add for Point {
    type Output = Self;

    fn add(self, other: Self) -> Self {
        Self { x: self.x + other.x, y: self.y + other.y }
    }
}

fn main() {
    let p1 = Point { x: 10, y: 20 };
    let p2 = Point { x: 100, y: 200 };
    println!("{:?} + {:?} = {:?}", p1, p2, p1 + p2);
}讨论点:
- You could implement
Addfor&Point. In which situations is that useful?- 回答:
Add:add会耗用self。如果您的运算符重载对象 (即类型T)不是Copy,建议您也为&T重载运算符。这可避免调用点上存在不必要的 克隆任务。
- 回答:
- 为什么
Output是关联类型?可将它用作该方法的类型形参吗?- Short answer: Function type parameters are controlled by the caller, but associated types (like
Output) are controlled by the implementer of a trait.
- Short answer: Function type parameters are controlled by the caller, but associated types (like
- 您可以针对两种不同类型实现
Add,例如,impl Add<(i32, i32)> for Point会向Point中添加元组。
From 和 Into
fn main() {
    let s = String::from("hello");
    let addr = std::net::Ipv4Addr::from([127, 0, 0, 1]);
    let one = i16::from(true);
    let bigger = i32::from(123_i16);
    println!("{s}, {addr}, {one}, {bigger}");
}fn main() {
let s: String = "hello".into();
let addr: std::net::Ipv4Addr = [127, 0, 0, 1].into();
let one: i16 = true.into();
let bigger: i32 = 123_i16.into();
println!("{s}, {addr}, {one}, {bigger}");
}- 这就是为什么通常只需实现
From,因为您的类型也会实现Into。 - 若要声明某个函数实参输入类型(例如“任何可转换成
String的类型”),规则便会相反,此时应使用Into。 您的函数会接受可实现From的类型,以及那些仅实现Into的类型。
类型转换
Rust 没有隐式类型转换,但支持使用 as 进行显式转换。转换写法通常和 C 语言的写法相一致。
fn main() {
    let value: i64 = 1000;
    println!("as u16: {}", value as u16);
    println!("as i16: {}", value as i16);
    println!("as u8: {}", value as u8);
}
使用 as 的结果在 Rust 中 始终 定义明确,并且在不同平台上保持一致。这可能和您对于更改符号或转换为更小类型的直观理解不一样。为清晰起见,请查看文档和注释。
使用 as 进行类型转换是一种快捷好用但容易出错的方法,也在未来进行代码更新时,比如改变了类型或类型范围时会导致潜伏的 Bug。 类型转换最好是用于明确是要进行无条件截取(比如截取低位的 u64 为 u32,忽略高位的数值)。
对于绝对不会出错的转换(比如 u32 转 u64),相比 as,更推荐用 From 或 Into 以肯定该转换是不会出错的。对于可能出错的转换,如果你想对这些不能成功转换的情况有不同处理方案时,可以考虑 TryFrom 和 TryInto。
请在这张幻灯片之后休息一下。
as 类似于 C++ 静态类型转换。通常不建议在可能丢失数据的情况下使用 as,或者至少应该添加说明性注释。
会经常遇到的是,将整数类型转换为 usize 以用作索引。
Read 和 Write
您可以使用 Read 和 BufRead 对 u8 来源进行抽象化处理:
use std::io::{BufRead, BufReader, Read, Result};

fn count_lines<R: Read>(reader: R) -> usize {
    let buf_reader = BufReader::new(reader);
    buf_reader.lines().count()
}

fn main() -> Result<()> {
    let slice: &[u8] = b"foo\nbar\nbaz\n";
    println!("lines in slice: {}", count_lines(slice));

    let file = std::fs::File::open(std::env::current_exe()?)?;
    println!("lines in file: {}", count_lines(file));
    Ok(())
}
您同样可使用 Write 对 u8 接收器进行抽象化处理:
use std::io::{Result, Write};

fn log<W: Write>(writer: &mut W, msg: &str) -> Result<()> {
    writer.write_all(msg.as_bytes())?;
    writer.write_all("\n".as_bytes())
}

fn main() -> Result<()> {
    let mut buffer = Vec::new();
    log(&mut buffer, "Hello")?;
    log(&mut buffer, "World")?;
    println!("Logged: {:?}", buffer);
    Ok(())
}
Default 特征
Default 特征会为类型生成默认值。
#[derive(Debug, Default)]
struct Derived {
    x: u32,
    y: String,
    z: Implemented,
}

#[derive(Debug)]
struct Implemented(String);

impl Default for Implemented {
    fn default() -> Self {
        Self("John Smith".into())
    }
}

fn main() {
    let default_struct = Derived::default();
    println!("{default_struct:#?}");

    let almost_default_struct =
        Derived { y: "Y is set!".into(), ..Derived::default() };
    println!("{almost_default_struct:#?}");

    let nothing: Option<Derived> = None;
    println!("{:#?}", nothing.unwrap_or_default());
}- 系统可以直接实现它,也可以通过
#[derive(Default)]派生出它。 - A derived implementation will produce a value where all fields are set to their default values.
- 这意味着,该结构体中的所有类型也都必须实现
Default。
- 这意味着,该结构体中的所有类型也都必须实现
- 标准的 Rust 类型通常会以合理的值(例如
0“” `等)实现Default`。 - The partial struct initialization works nicely with default.
- The Rust standard library is aware that types can implement
Defaultand provides convenience methods that use it. - The
..syntax is called struct update syntax.
闭包
闭包或 lambda 表达式具有无法命名的类型。不过,它们会 实现特殊的 Fn, FnMut 和 FnOnce 特征:
fn apply_with_log(func: impl FnOnce(i32) -> i32, input: i32) -> i32 {
    println!("Calling function on {input}");
    func(input)
}

fn main() {
    let add_3 = |x| x + 3;
    println!("add_3: {}", apply_with_log(add_3, 10));
    println!("add_3: {}", apply_with_log(add_3, 20));

    let mut v = Vec::new();
    let mut accumulate = |x: i32| {
        v.push(x);
        v.iter().sum::<i32>()
    };
    println!("accumulate: {}", apply_with_log(&mut accumulate, 4));
    println!("accumulate: {}", apply_with_log(&mut accumulate, 5));

    let multiply_sum = |x| x * v.into_iter().sum::<i32>();
    println!("multiply_sum: {}", apply_with_log(multiply_sum, 3));
}Fn(例如 add_3)既不会耗用也不会修改捕获的值,或许 也不会捕获任何值。它可被并发调用多次。
FnMut(例如 accumulate)可能会改变捕获的值。您可以多次调用它, 但不能并发调用它。
如果您使用 FnOnce(例如 multiply_sum),或许只能调用它一次。它可能会耗用 所捕获的值。
FnMut 是 FnOnce 的子类型。Fn 是 FnMut 和 FnOnce 的子类型。也就是说,您可以在任何 需要调用 FnOnce 的地方使用 FnMut,还可在任何需要调用 FnMut 或 FnOnce 的地方 使用 Fn。
When you define a function that takes a closure, you should take FnOnce if you can (i.e. you call it once), or FnMut else, and last Fn. This allows the most flexibility for the caller.
In contrast, when you have a closure, the most flexible you can have is Fn (it can be passed everywhere), then FnMut, and lastly FnOnce.
编译器也会推断 Copy(例如针对 add_3)和 Clone(例如 multiply_sum), 具体取决于闭包捕获的数据。
默认情况下,闭包会依据引用来捕获数据(如果可以的话)。move 关键字则可让闭包依据值 来捕获数据。
fn make_greeter(prefix: String) -> impl Fn(&str) {
    return move |name| println!("{} {}", prefix, name);
}

fn main() {
    let hi = make_greeter("Hi".to_string());
    hi("Greg");
}
练习:ROT13
在此示例中,您将实现经典的 “ROT13”加密。将此代码复制到 Playground,并实现缺失的位。请仅旋转 ASCII 字母字符,以确保结果仍为有效的 UTF-8 编码字符。
use std::io::Read;

struct RotDecoder<R: Read> {
    input: R,
    rot: u8,
}

// Implement the `Read` trait for `RotDecoder`.

fn main() {
    let mut rot =
        RotDecoder { input: "Gb trg gb gur bgure fvqr!".as_bytes(), rot: 13 };
    let mut result = String::new();
    rot.read_to_string(&mut result).unwrap();
    println!("{}", result);
}

#[cfg(test)]
mod test {
    use super::*;

    #[test]
    fn joke() {
        let mut rot =
            RotDecoder { input: "Gb trg gb gur bgure fvqr!".as_bytes(), rot: 13 };
        let mut result = String::new();
        rot.read_to_string(&mut result).unwrap();
        assert_eq!(&result, "To get to the other side!");
    }

    #[test]
    fn binary() {
        let input: Vec<u8> = (0..=255u8).collect();
        let mut rot = RotDecoder::<&[u8]> { input: input.as_ref(), rot: 13 };
        let mut buf = [0u8; 256];
        assert_eq!(rot.read(&mut buf).unwrap(), 256);
        for i in 0..=255 {
            if input[i] != buf[i] {
                assert!(input[i].is_ascii_alphabetic());
                assert!(buf[i].is_ascii_alphabetic());
            }
        }
    }
}
如果将两个 RotDecoder 实例链接在一起,每个实例旋转 13 个字符,会发生什么情况?
解答
use std::io::Read;

struct RotDecoder<R: Read> {
    input: R,
    rot: u8,
}

impl<R: Read> Read for RotDecoder<R> {
    fn read(&mut self, buf: &mut [u8]) -> std::io::Result<usize> {
        let size = self.input.read(buf)?;
        for b in &mut buf[..size] {
            if b.is_ascii_alphabetic() {
                let base = if b.is_ascii_uppercase() { 'A' } else { 'a' } as u8;
                *b = (*b - base + self.rot) % 26 + base;
            }
        }
        Ok(size)
    }
}

fn main() {
    let mut rot =
        RotDecoder { input: "Gb trg gb gur bgure fvqr!".as_bytes(), rot: 13 };
    let mut result = String::new();
    rot.read_to_string(&mut result).unwrap();
    println!("{}", result);
}

#[cfg(test)]
mod test {
    use super::*;

    #[test]
    fn joke() {
        let mut rot =
            RotDecoder { input: "Gb trg gb gur bgure fvqr!".as_bytes(), rot: 13 };
        let mut result = String::new();
        rot.read_to_string(&mut result).unwrap();
        assert_eq!(&result, "To get to the other side!");
    }

    #[test]
    fn binary() {
        let input: Vec<u8> = (0..=255u8).collect();
        let mut rot = RotDecoder::<&[u8]> { input: input.as_ref(), rot: 13 };
        let mut buf = [0u8; 256];
        assert_eq!(rot.read(&mut buf).unwrap(), 256);
        for i in 0..=255 {
            if input[i] != buf[i] {
                assert!(input[i].is_ascii_alphabetic());
                assert!(buf[i].is_ascii_alphabetic());
            }
        }
    }
}
欢迎参加第 3 天的课程
今日内容:
- 内存管理、生命周期和借用检查器:Rust 如何确保内存安全。
- 智能指针:标准库指针类型。
时间表
Including 10 minute breaks, this session should take about 2 hours and 20 minutes. It contains:
| Segment | Duration |
|---|---|
| 欢迎 | 3 minutes |
| 内存管理 | 1 hour |
| 智能指针 | 55 minutes |
内存管理
This segment should take about 1 hour. It contains:
| Slide | Duration |
|---|---|
| 回顾:程序的内存分配 | 5 minutes |
| 内存管理方法 | 10 minutes |
| 所有权 | 5 minutes |
| 移动语义 | 5 minutes |
| Clone | 2 minutes |
| 复合类型 | 5 minutes |
| Drop | 10 minutes |
| 练习:构建器类型 | 20 minutes |
回顾:程序的内存分配
程序通过以下两种方式分配内存:
-
栈:局部变量的连续内存区域。
- 值在编译时具有已知的固定大小。
- 速度极快:只需移动一个栈指针。
- 易于管理:遵循函数调用规则。
- 优秀的内存局部性。
-
堆:函数调用之外的值的存储。
- 值具有动态大小,具体大小需在运行时确定。
- 比栈稍慢:需要向系统申请空间。
- 不保证内存局部性。
示例
Creating a String puts fixed-sized metadata on the stack and dynamically sized data, the actual string, on the heap:
fn main() {
    let s1 = String::from("Hello");
}-
指出
String底层由Vec实现,因此它具有容量和长度,如果值可变,则可以通过在堆上重新分配存储空间进行增长。 -
如果学员提出相关问题,你可以提及我们不仅能使用[系统分配器]在堆上分配底层内存,还能使用 Allocator API 实现自定义分配器
探索更多
We can inspect the memory layout with unsafe Rust. However, you should point out that this is rightfully unsafe!
fn main() {
    let mut s1 = String::from("Hello");
    s1.push(' ');
    s1.push_str("world");
    // DON'T DO THIS AT HOME! For educational purposes only.
    // String provides no guarantees about its layout, so this could lead to
    // undefined behavior.
    unsafe {
        let (capacity, ptr, len): (usize, usize, usize) = std::mem::transmute(s1);
        println!("capacity = {capacity}, ptr = {ptr:#x}, len = {len}");
    }
}
内存管理方法
传统上,语言分为两大类:
- 通过手动内存管理实现完全控制:C、C++、Pascal…
- 程序员决定何时分配或释放堆内存。
- 程序员必须确定指针是否仍指向有效内存。
- 研究表明,程序员难免会犯错。
- 运行时通过自动内存管理实现完全安全:Java、Python、Go、Haskell…
- 运行时系统可确保在内存无法被引用之前,不会释放该内存。
- 通常通过引用计数、垃圾回收或 RAII 实现。
Rust 提供了一个全新的组合:
通过编译时强制执行正确的内存>管理来实现完全控制与安全。
它通过一个明确的所有权(ownership)概念来实现此目的。
本幻灯片旨在帮助学习其他语言的学生更好地了解 Rust。
-
C 语言必须使用
malloc和free函数手动管理堆。常见错误包括忘记调用free、针对同一指针多次调用它,或在释放某指针所指向的内存后解引用它。 -
C++ 具有智能指针(
unique_ptr、shared_ptr)等工具,可以利用与调用析构函数相关的语言保证来确保在函数返回时释放内存。这些工具仍然很容易被滥用并导致与 C 语言类似的 bug。 -
Java、Go 和 Python 依赖垃圾回收器来识别无法再访问的内存并将其舍弃。这保证可对所有指针进行解引用操作,从而消除了释放后使用等各类 bug。但是,垃圾回收 (GC) 会产生运行时成本,并且很难进行适当调优。
在许多情况下,Rust 的所有权和借用模型可以实现 C 语言的性能,能够精确地在所需位置执行分配和释放操作,且为零成本。它还提供类似于 C++ 智能指针的工具。必要时,它还提供引用计数等其他选项,甚至还有第三方 crate 可以支持运行时垃圾回收(本课程中不作介绍)。
所有权
所有变量绑定都有一个有效的“作用域”,使用 超出其作用域的变量是错误的:
struct Point(i32, i32);

fn main() {
    {
        let p = Point(3, 4);
        println!("x: {}", p.0);
    }
    println!("y: {}", p.1);
}
We say that the variable owns the value. Every Rust value has precisely one owner at all times.
At the end of the scope, the variable is dropped and the data is freed. A destructor can run here to free up resources.
熟悉垃圾回收实现的学生知道,垃圾回收器从一组 “根”开始查找所有可访问内存。Rust 的 “单一所有者”原则与此类似。
移动语义
An assignment will transfer ownership between variables:
fn main() {
    let s1: String = String::from("Hello!");
    let s2: String = s1;
    println!("s2: {s2}");
    // println!("s1: {s1}");
}- 将
s1赋值给s2,即转移了所有权。 - When
s1goes out of scope, nothing happens: it does not own anything. - 当
s2离开作用域时,字符串数据被释放。
移动到 s2 中之前:
移动到 s2 中之后:
你将值传递给函数时,该值会被赋给函数 参数。这就转移了所有权:
fn say_hello(name: String) {
    println!("Hello {name}")
}

fn main() {
    let name = String::from("Alice");
    say_hello(name);
    // say_hello(name);
}-
指出这与 C++ 中的默认值相反。除非你使用
std::move(并已定义 move 构造函数!),否则 C++ 中的默认值是按值复制的。 -
只有所有权发生了转移。是否会生成任何机器码来操控数据本身是一个优化方面的问题,系统会主动优化此类副本。
-
简单的值(例如整数)可以标记为“Copy”(请看后续幻灯片)。
-
在 Rust 中,克隆是显式的(通过使用
clone)。
在 say_hello 示例中:
- 首次调用
say_hello时,main便放弃了name的所有权。此后,main中不能再使用name。 - 在
say_hello函数结束时,系统会释放为name分配的堆内存。 - 如果
main将name作为引用 (&name) 传递过去,且say_hello接受作为参数的引用,则可保留所有权。 - 此外,
main也可以在首次调用时传递name的克隆 (name.clone())。 - 相较于 C++,Rust 通过将移动语义设为默认值,并强制程序员进行显式克隆,更难以无意中创建副本。
探索更多
Defensive Copies in Modern C++
现代 C++ 以不同的方式解决此问题:
std::string s1 = "Cpp";
std::string s2 = s1;  // Duplicate the data in s1.
s1中的堆数据被复制,s2获得自己的独立副本。- 当
s1和s2离开作用域时,它们会各自释放自己的内存。
复制-赋值之前:
复制-赋值之后:
关键点:
-
C++ 做出了与 Rust 略有不同的选择。由于“=”会复制数据,因此必须克隆字符串数据。否则,当任一字符串超出范围时,便会出现二次释放。
-
C++ 还包含“std::move”,它用于指示何时可以移动某个值。如果示例为“s2 = std::move(s1)”,则不会发生堆分配。移动后,“s1”将处于有效但未指定的状态。与 Rust 不同,程序员可以继续使用“s1”。
-
与 Rust 不同,使用 C++ 时,“=”可以运行任意代码,具体取决于要复制或移动的类型。
Clone
有时,如需 复制某个值。Clone 特征 可以完成此操作。
#[derive(Default)]
struct Backends {
    hostnames: Vec<String>,
    weights: Vec<f64>,
}

impl Backends {
    fn set_hostnames(&mut self, hostnames: &Vec<String>) {
        self.hostnames = hostnames.clone();
        self.weights = hostnames.iter().map(|_| 1.0).collect();
    }
}Clone 的设计理念是让您轻松发现堆分配的位置。查找 .clone() 和其他一些内容,例如 Vec::new 或 Box::new。
通常的做法是,先使用 “克隆操作”解决借用检查器问题,在后续通过优化消除这些克隆操作。
复合类型
虽然移动语义是默认的,但默认情况下会复制某些类型:
fn main() {
    let x = 42;
    let y = x;
    println!("x: {x}"); // would not be accessible if not Copy
    println!("y: {y}");
}
这些类型实现了 Copy trait。
你可以选择自己的类型来使用复制语义:
#[derive(Copy, Clone, Debug)]
struct Point(i32, i32);

fn main() {
    let p1 = Point(3, 4);
    let p2 = p1;
    println!("p1: {p1:?}");
    println!("p2: {p2:?}");
}- 赋值之后,
p1和p2都拥有自己的数据。 - 我们还可以使用
p1.clone()显式复制数据。
复制和克隆是两码事:
- 复制是指内存区域的按位复制,不适用于任意对象。
- 复制不允许自定义逻辑(不同于 C++ 中的复制构造函数)。
- 克隆是一种更通用的操作,也允许通过实现
Clonetrait 来自定义行为。 - 复制不适用于实现
Droptrait 的类型。
在上述示例中,请尝试以下操作:
- 在
struct Point中添加String字段。由于String不属于Copy类型,因此无法编译。 - Remove
Copyfrom thederiveattribute. The compiler error is now in theprintln!forp1. - 指出如果你改为克隆
p1,则可按预期运行。
Drop 特征
用于实现 Drop 的值可以指定在超出范围时运行的代码:
struct Droppable {
    name: &'static str,
}

impl Drop for Droppable {
    fn drop(&mut self) {
        println!("Dropping {}", self.name);
    }
}

fn main() {
    let a = Droppable { name: "a" };
    {
        let b = Droppable { name: "b" };
        {
            let c = Droppable { name: "c" };
            let d = Droppable { name: "d" };
            println!("Exiting block B");
        }
        println!("Exiting block A");
    }
    drop(a);
    println!("Exiting main");
}- 请注意,
std::mem::drop与std::ops::Drop::drop不同。 - 当值超出范围时,系统会自动将其删除。
- 丢弃某个值时,如果该值实现了
std::ops::Drop,则会调用其Drop::drop实现。 - 然后,该值所有字段也会被丢弃,无论其是否实现了
Drop。 std::mem::drop只是一个采用任何值的空函数。重要的是它获得了值的所有权,因此在其作用域结束时便会被丢弃。如此您可以轻松提前明确地丢弃值,而不必等到值超过范围的时候。- 这对于通过
drop执行任务的对象来说非常有用,例如释放锁、关闭文件等。
- 这对于通过
讨论点:
- 为什么
Drop::drop不使用self?- 简答:如果这样的话,系统会在代码块结尾 调用
std::mem::drop,进而引发再一次调用Drop::drop,并引发堆栈 溢出!
- 简答:如果这样的话,系统会在代码块结尾 调用
- 尝试用
a.drop()替换drop(a)。
练习:构建器类型
在此示例中,我们将实现一个拥有全部数据所有权的复杂数据类型。我们将使用 “构建器模式”来支持逐步构建新值,通过便捷函数来实现。
填补缺失的内容。
#[derive(Debug)]
enum Language {
    Rust,
    Java,
    Perl,
}

#[derive(Clone, Debug)]
struct Dependency {
    name: String,
    version_expression: String,
}

/// A representation of a software package.
#[derive(Debug)]
struct Package {
    name: String,
    version: String,
    authors: Vec<String>,
    dependencies: Vec<Dependency>,
    language: Option<Language>,
}

impl Package {
    /// Return a representation of this package as a dependency, for use in
    /// building other packages.
    fn as_dependency(&self) -> Dependency {
        todo!("1")
    }
}

/// A builder for a Package. Use `build()` to create the `Package` itself.
struct PackageBuilder(Package);

impl PackageBuilder {
    fn new(name: impl Into<String>) -> Self {
        todo!("2")
    }

    /// Set the package version.
    fn version(mut self, version: impl Into<String>) -> Self {
        self.0.version = version.into();
        self
    }

    /// Set the package authors.
    fn authors(mut self, authors: Vec<String>) -> Self {
        todo!("3")
    }

    /// Add an additional dependency.
    fn dependency(mut self, dependency: Dependency) -> Self {
        todo!("4")
    }

    /// Set the language. If not set, language defaults to None.
    fn language(mut self, language: Language) -> Self {
        todo!("5")
    }

    fn build(self) -> Package {
        self.0
    }
}

fn main() {
    let base64 = PackageBuilder::new("base64").version("0.13").build();
    println!("base64: {base64:?}");
    let log =
        PackageBuilder::new("log").version("0.4").language(Language::Rust).build();
    println!("log: {log:?}");
    let serde = PackageBuilder::new("serde")
        .authors(vec!["djmitche".into()])
        .version(String::from("4.0"))
        .dependency(base64.as_dependency())
        .dependency(log.as_dependency())
        .build();
    println!("serde: {serde:?}");
}
解答
#[derive(Debug)]
enum Language {
    Rust,
    Java,
    Perl,
}

#[derive(Clone, Debug)]
struct Dependency {
    name: String,
    version_expression: String,
}

/// A representation of a software package.
#[derive(Debug)]
struct Package {
    name: String,
    version: String,
    authors: Vec<String>,
    dependencies: Vec<Dependency>,
    language: Option<Language>,
}

impl Package {
    /// Return a representation of this package as a dependency, for use in
    /// building other packages.
    fn as_dependency(&self) -> Dependency {
        Dependency {
            name: self.name.clone(),
            version_expression: self.version.clone(),
        }
    }
}

/// A builder for a Package. Use `build()` to create the `Package` itself.
struct PackageBuilder(Package);

impl PackageBuilder {
    fn new(name: impl Into<String>) -> Self {
        Self(Package {
            name: name.into(),
            version: "0.1".into(),
            authors: vec![],
            dependencies: vec![],
            language: None,
        })
    }

    /// Set the package version.
    fn version(mut self, version: impl Into<String>) -> Self {
        self.0.version = version.into();
        self
    }

    /// Set the package authors.
    fn authors(mut self, authors: Vec<String>) -> Self {
        self.0.authors = authors;
        self
    }

    /// Add an additional dependency.
    fn dependency(mut self, dependency: Dependency) -> Self {
        self.0.dependencies.push(dependency);
        self
    }

    /// Set the language. If not set, language defaults to None.
    fn language(mut self, language: Language) -> Self {
        self.0.language = Some(language);
        self
    }

    fn build(self) -> Package {
        self.0
    }
}

fn main() {
    let base64 = PackageBuilder::new("base64").version("0.13").build();
    println!("base64: {base64:?}");
    let log =
        PackageBuilder::new("log").version("0.4").language(Language::Rust).build();
    println!("log: {log:?}");
    let serde = PackageBuilder::new("serde")
        .authors(vec!["djmitche".into()])
        .version(String::from("4.0"))
        .dependency(base64.as_dependency())
        .dependency(log.as_dependency())
        .build();
    println!("serde: {serde:?}");
}
智能指针
This segment should take about 55 minutes. It contains:
| Slide | Duration |
|---|---|
| Box | 10 minutes |
| Rc | 5 minutes |
| 特征对象 | 10 minutes |
| 练习:二叉树 | 30 minutes |
Box<T>
Box 是指向堆上数据的自有指针:
fn main() {
    let five = Box::new(5);
    println!("five: {}", *five);
}Box<T> 会实现 Deref<Target = T>,这意味着您可以直接在 Box<T> 上通过 T 调用相应方法。
递归数据类型或具有动态大小的数据类型需要使用 Box:
#[derive(Debug)]
enum List<T> {
    /// A non-empty list: first element and the rest of the list.
    Element(T, Box<List<T>>),
    /// An empty list.
    Nil,
}

fn main() {
    let list: List<i32> =
        List::Element(1, Box::new(List::Element(2, Box::new(List::Nil))));
    println!("{list:?}");
}-
Boxis likestd::unique_ptrin C++, except that it’s guaranteed to be not null. -
在以下情况下,
Box可能会很实用:- 在编译时间遇到无法知晓大小的类型,但 Rust 编译器需要知道确切大小。
- 想要转让大量数据的所有权。为避免在堆栈上复制大量数据,请改为将数据存储在
Box中的堆上,以便仅移动指针。
-
If
Boxwas not used and we attempted to embed aListdirectly into theList, the compiler would not be able to compute a fixed size for the struct in memory (theListwould be of infinite size). -
Box大小与一般指针相同,并且只会指向堆中的下一个List元素, 因此可以解决这个问题。 -
Remove the
Boxin the List definition and show the compiler error. We get the message “recursive without indirection”, because for data recursion, we have to use indirection, aBoxor reference of some kind, instead of storing the value directly.
探索更多
小众优化
Though Box looks like std::unique_ptr in C++, it cannot be empty/null. This makes Box one of the types that allow the compiler to optimize storage of some enums.
For example, Option<Box<T>> has the same size, as just Box<T>, because compiler uses NULL-value to discriminate variants instead of using explicit tag (“Null Pointer Optimization”):
use std::mem::size_of_val;

struct Item(String);

fn main() {
    let just_box: Box<Item> = Box::new(Item("Just box".into()));
    let optional_box: Option<Box<Item>> =
        Some(Box::new(Item("Optional box".into())));
    let none: Option<Box<Item>> = None;

    assert_eq!(size_of_val(&just_box), size_of_val(&optional_box));
    assert_eq!(size_of_val(&just_box), size_of_val(&none));

    println!("Size of just_box: {}", size_of_val(&just_box));
    println!("Size of optional_box: {}", size_of_val(&optional_box));
    println!("Size of none: {}", size_of_val(&none));
}
Rc
Rc 是引用计数的共享指针。如果您需要从多个位置 引用相同的数据,请使用此指针:
use std::rc::Rc;

fn main() {
    let a = Rc::new(10);
    let b = Rc::clone(&a);

    println!("a: {a}");
    println!("b: {b}");
}Rc的计数可确保只要有引用,内含的值就会保持有效。- Rust 中的“Rc”与 C++ 中的“std::shared_ptr”类似。
Rc::clone的成本很低:这个做法会创建指向相同分配的指针,并增加引用计数,而不会产生深层的克隆,排查代码性能问题时通常可以忽略。make_mut实际上会在必要时克隆内部值(“clone-on-write”),并返回可变的引用。- 使用
Rc::strong_count可查看引用计数。 Rc::downgradegives you a weakly reference-counted object to create cycles that will be dropped properly (likely in combination withRefCell).
特征对象
特征(Trait)对象可接受不同类型的值,举例来说,在集合中会是这样:
struct Dog {
    name: String,
    age: i8,
}
struct Cat {
    lives: i8,
}

trait Pet {
    fn talk(&self) -> String;
}

impl Pet for Dog {
    fn talk(&self) -> String {
        format!("Woof, my name is {}!", self.name)
    }
}

impl Pet for Cat {
    fn talk(&self) -> String {
        String::from("Miau!")
    }
}

fn main() {
    let pets: Vec<Box<dyn Pet>> = vec![
        Box::new(Cat { lives: 9 }),
        Box::new(Dog { name: String::from("Fido"), age: 5 }),
    ];
    for pet in pets {
        println!("Hello, who are you? {}", pet.talk());
    }
}
以下是分配 pets 后的内存布局:
- 实现给定 trait 的类型可能大小不同。因此,上例中不可能具有像
Vec<dyn Pet>这样的项。 - 可通过“dyn Pet”这个方法向编译器告知实现“Pet”的动态大小类型。
- 在本例中,
pets在栈上分配内存,矢量数据存储在堆上。这两个矢量元素是 胖指针:- 胖指针属于全角指针。它包含两个部分:指向实际对象的指针,以及指向该特定对象的
Pet实现的 虚拟方法表 (vtable) 的指针。 Dog(名为 Fido)类型的数据是name和age字段。Cat类型包含一个lives字段。
- 胖指针属于全角指针。它包含两个部分:指向实际对象的指针,以及指向该特定对象的
- 比较上述示例中的这些输出:
println!("{} {}", std::mem::size_of::<Dog>(), std::mem::size_of::<Cat>());
println!("{} {}", std::mem::size_of::<&Dog>(), std::mem::size_of::<&Cat>());
println!("{}", std::mem::size_of::<&dyn Pet>());
println!("{}", std::mem::size_of::<Box<dyn Pet>>());
练习:二叉树
二元树是一种树型数据结构,其中每个节点都有两个子节点(左侧和右侧)。我们将创建一个树状结构,其中每个节点存储一个值。对于给定的节点 N,N 的左侧子树中的所有节点都包含较小的值,而 N 的右侧子树中的所有节点都将包含较大的值。
实现以下类型,以便通过指定的测试。
额外提示:对按顺序返回值的二元树实现迭代器。
/// A node in the binary tree.
#[derive(Debug)]
struct Node<T: Ord> {
    value: T,
    left: Subtree<T>,
    right: Subtree<T>,
}

/// A possibly-empty subtree.
#[derive(Debug)]
struct Subtree<T: Ord>(Option<Box<Node<T>>>);

/// A container storing a set of values, using a binary tree.
///
/// If the same value is added multiple times, it is only stored once.
#[derive(Debug)]
pub struct BinaryTree<T: Ord> {
    root: Subtree<T>,
}

// Implement `new`, `insert`, `len`, and `has`.

#[cfg(test)]
mod tests {
    use super::*;

    #[test]
    fn len() {
        let mut tree = BinaryTree::new();
        assert_eq!(tree.len(), 0);
        tree.insert(2);
        assert_eq!(tree.len(), 1);
        tree.insert(1);
        assert_eq!(tree.len(), 2);
        tree.insert(2); // not a unique item
        assert_eq!(tree.len(), 2);
    }

    #[test]
    fn has() {
        let mut tree = BinaryTree::new();
        fn check_has(tree: &BinaryTree<i32>, exp: &[bool]) {
            let got: Vec<bool> =
                (0..exp.len()).map(|i| tree.has(&(i as i32))).collect();
            assert_eq!(&got, exp);
        }

        check_has(&tree, &[false, false, false, false, false]);
        tree.insert(0);
        check_has(&tree, &[true, false, false, false, false]);
        tree.insert(4);
        check_has(&tree, &[true, false, false, false, true]);
        tree.insert(4);
        check_has(&tree, &[true, false, false, false, true]);
        tree.insert(3);
        check_has(&tree, &[true, false, false, true, true]);
    }

    #[test]
    fn unbalanced() {
        let mut tree = BinaryTree::new();
        for i in 0..100 {
            tree.insert(i);
        }
        assert_eq!(tree.len(), 100);
        assert!(tree.has(&50));
    }
}
解答
use std::cmp::Ordering;

/// A node in the binary tree.
#[derive(Debug)]
struct Node<T: Ord> {
    value: T,
    left: Subtree<T>,
    right: Subtree<T>,
}

/// A possibly-empty subtree.
#[derive(Debug)]
struct Subtree<T: Ord>(Option<Box<Node<T>>>);

/// A container storing a set of values, using a binary tree.
///
/// If the same value is added multiple times, it is only stored once.
#[derive(Debug)]
pub struct BinaryTree<T: Ord> {
    root: Subtree<T>,
}

impl<T: Ord> BinaryTree<T> {
    fn new() -> Self {
        Self { root: Subtree::new() }
    }

    fn insert(&mut self, value: T) {
        self.root.insert(value);
    }

    fn has(&self, value: &T) -> bool {
        self.root.has(value)
    }

    fn len(&self) -> usize {
        self.root.len()
    }
}

impl<T: Ord> Subtree<T> {
    fn new() -> Self {
        Self(None)
    }

    fn insert(&mut self, value: T) {
        match &mut self.0 {
            None => self.0 = Some(Box::new(Node::new(value))),
            Some(n) => match value.cmp(&n.value) {
                Ordering::Less => n.left.insert(value),
                Ordering::Equal => {}
                Ordering::Greater => n.right.insert(value),
            },
        }
    }

    fn has(&self, value: &T) -> bool {
        match &self.0 {
            None => false,
            Some(n) => match value.cmp(&n.value) {
                Ordering::Less => n.left.has(value),
                Ordering::Equal => true,
                Ordering::Greater => n.right.has(value),
            },
        }
    }

    fn len(&self) -> usize {
        match &self.0 {
            None => 0,
            Some(n) => 1 + n.left.len() + n.right.len(),
        }
    }
}

impl<T: Ord> Node<T> {
    fn new(value: T) -> Self {
        Self { value, left: Subtree::new(), right: Subtree::new() }
    }
}

fn main() {
    let mut tree = BinaryTree::new();
    tree.insert("foo");
    assert_eq!(tree.len(), 1);
    tree.insert("bar");
    assert!(tree.has(&"foo"));
}

#[cfg(test)]
mod tests {
    use super::*;

    #[test]
    fn len() {
        let mut tree = BinaryTree::new();
        assert_eq!(tree.len(), 0);
        tree.insert(2);
        assert_eq!(tree.len(), 1);
        tree.insert(1);
        assert_eq!(tree.len(), 2);
        tree.insert(2); // not a unique item
        assert_eq!(tree.len(), 2);
    }

    #[test]
    fn has() {
        let mut tree = BinaryTree::new();
        fn check_has(tree: &BinaryTree<i32>, exp: &[bool]) {
            let got: Vec<bool> =
                (0..exp.len()).map(|i| tree.has(&(i as i32))).collect();
            assert_eq!(&got, exp);
        }

        check_has(&tree, &[false, false, false, false, false]);
        tree.insert(0);
        check_has(&tree, &[true, false, false, false, false]);
        tree.insert(4);
        check_has(&tree, &[true, false, false, false, true]);
        tree.insert(4);
        check_has(&tree, &[true, false, false, false, true]);
        tree.insert(3);
        check_has(&tree, &[true, false, false, true, true]);
    }

    #[test]
    fn unbalanced() {
        let mut tree = BinaryTree::new();
        for i in 0..100 {
            tree.insert(i);
        }
        assert_eq!(tree.len(), 100);
        assert!(tree.has(&50));
    }
}
Welcome Back
Including 10 minute breaks, this session should take about 1 hour and 50 minutes. It contains:
| Segment | Duration |
|---|---|
| 借用 | 50 minutes |
| 结构体生命周期 | 50 minutes |
借用
This segment should take about 50 minutes. It contains:
| Slide | Duration |
|---|---|
| 借用值 | 10 minutes |
| 借用检查 | 10 minutes |
| 内部可变性 | 10 minutes |
| 练习:健康统计 | 20 minutes |
借用值
As we saw before, instead of transferring ownership when calling a function, you can let a function borrow the value:
#[derive(Debug)]
struct Point(i32, i32);

fn add(p1: &Point, p2: &Point) -> Point {
    Point(p1.0 + p2.0, p1.1 + p2.1)
}

fn main() {
    let p1 = Point(3, 4);
    let p2 = Point(10, 20);
    let p3 = add(&p1, &p2);
    println!("{p1:?} + {p2:?} = {p3:?}");
}add函数“借用”两个点并返回一个新点。- 调用方会保留输入的所有权。
此幻灯片是对第 1 天引用材料的回顾,并稍作了扩展,添加了函数参数和返回值。
探索更多
关于栈返回的说明:
-
Demonstrate that the return from
addis cheap because the compiler can eliminate the copy operation. Change the above code to print stack addresses and run it on the Playground or look at the assembly in Godbolt. In the “DEBUG” optimization level, the addresses should change, while they stay the same when changing to the “RELEASE” setting:#[derive(Debug)] struct Point(i32, i32); fn add(p1: &Point, p2: &Point) -> Point { let p = Point(p1.0 + p2.0, p1.1 + p2.1); println!("&p.0: {:p}", &p.0); p } pub fn main() { let p1 = Point(3, 4); let p2 = Point(10, 20); let p3 = add(&p1, &p2); println!("&p3.0: {:p}", &p3.0); println!("{p1:?} + {p2:?} = {p3:?}"); } -
Rust 编译器能够执行返回值优化 (RVO)。
-
In C++, copy elision has to be defined in the language specification because constructors can have side effects. In Rust, this is not an issue at all. If RVO did not happen, Rust will always perform a simple and efficient
memcpycopy.
借用检查
Rust’s borrow checker puts constraints on the ways you can borrow values. For a given value, at any time:
- You can have one or more shared references to the value, or
- You can have exactly one exclusive reference to the value.
fn main() {
    let mut a: i32 = 10;
    let b: &i32 = &a;

    {
        let c: &mut i32 = &mut a;
        *c = 20;
    }

    println!("a: {a}");
    println!("b: {b}");
}- 请注意,要求是相冲突的引用不能 同时存在。而引用的解引用位置无关紧要。
- 上述代码无法编译,因为
a同时作为可变值(通过c)和不可变值(通过b)被借用。 - 将
b的println!语句移到引入c的作用域之前,这段代码就可以编译。 - 这样更改后,编译器会发现
b只在通过c对a进行新可变借用之前使用过。这是借用检查器的一个功能,名为“非词法作用域生命周期”。 - The exclusive reference constraint is quite strong. Rust uses it to ensure that data races do not occur. Rust also relies on this constraint to optimize code. For example, a value behind a shared reference can be safely cached in a register for the lifetime of that reference.
- 借用检查器专用于处理许多常见模式,例如同时对结构体中的不同字段进行独占引用。但在某些情况下,它并不能完全 “领会”您的意图,这往往会导致 “与借用检查器进行一番斗争”。
内部可变性
In some situations, it’s necessary to modify data behind a shared (read-only) reference. For example, a shared data structure might have an internal cache, and wish to update that cache from read-only methods.
The “interior mutability” pattern allows exclusive (mutable) access behind a shared reference. The standard library provides several ways to do this, all while still ensuring safety, typically by performing a runtime check.
RefCell
use std::cell::RefCell;
use std::rc::Rc;

#[derive(Debug, Default)]
struct Node {
    value: i64,
    children: Vec<Rc<RefCell<Node>>>,
}

impl Node {
    fn new(value: i64) -> Rc<RefCell<Node>> {
        Rc::new(RefCell::new(Node { value, ..Node::default() }))
    }

    fn sum(&self) -> i64 {
        self.value + self.children.iter().map(|c| c.borrow().sum()).sum::<i64>()
    }
}

fn main() {
    let root = Node::new(1);
    root.borrow_mut().children.push(Node::new(5));
    let subtree = Node::new(10);
    subtree.borrow_mut().children.push(Node::new(11));
    subtree.borrow_mut().children.push(Node::new(12));
    root.borrow_mut().children.push(subtree);

    println!("graph: {root:#?}");
    println!("graph sum: {}", root.borrow().sum());
}
Cell
Cell wraps a value and allows getting or setting the value, even with a shared reference to the Cell. However, it does not allow any references to the value. Since there are no references, borrowing rules cannot be broken.
The main thing to take away from this slide is that Rust provides safe ways to modify data behind a shared reference. There are a variety of ways to ensure that safety, and RefCell and Cell are two of them.
-
RefCellenforces Rust’s usual borrowing rules (either multiple shared references or a single exclusive reference) with a runtime check. In this case, all borrows are very short and never overlap, so the checks always succeed. -
Rconly allows shared (read-only) access to its contents, since its purpose is to allow (and count) many references. But we want to modify the value, so we need interior mutability. -
Cellis a simpler means to ensure safety: it has asetmethod that takes&self. This needs no runtime check, but requires moving values, which can have its own cost. -
Demonstrate that reference loops can be created by adding
roottosubtree.children. -
为了演示运行时 panic,请添加一个会递增“self.value”并以相同方法调用其子项的“fn inc(&mut self)”。如果存在引用循环,就会 panic,并且“thread”“main”会因“already borrowed: BorrowMutError”而 panic。
练习:健康统计
你正在实现一个健康监控系统。作为其中的一部分,你需要对用户的健康统计数据进行追踪。
You’ll start with a stubbed function in an impl block as well as a User struct definition. Your goal is to implement the stubbed out method on the User struct defined in the impl block.
Copy the code below to https://play.rust-lang.org/ and fill in the missing method:
// TODO: remove this when you're done with your implementation.
#![allow(unused_variables, dead_code)]


#![allow(dead_code)]
pub struct User {
    name: String,
    age: u32,
    height: f32,
    visit_count: usize,
    last_blood_pressure: Option<(u32, u32)>,
}

pub struct Measurements {
    height: f32,
    blood_pressure: (u32, u32),
}

pub struct HealthReport<'a> {
    patient_name: &'a str,
    visit_count: u32,
    height_change: f32,
    blood_pressure_change: Option<(i32, i32)>,
}

impl User {
    pub fn new(name: String, age: u32, height: f32) -> Self {
        Self { name, age, height, visit_count: 0, last_blood_pressure: None }
    }

    pub fn visit_doctor(&mut self, measurements: Measurements) -> HealthReport {
        todo!("Update a user's statistics based on measurements from a visit to the doctor")
    }
}

fn main() {
    let bob = User::new(String::from("Bob"), 32, 155.2);
    println!("I'm {} and my age is {}", bob.name, bob.age);
}

#[test]
fn test_visit() {
    let mut bob = User::new(String::from("Bob"), 32, 155.2);
    assert_eq!(bob.visit_count, 0);
    let report =
        bob.visit_doctor(Measurements { height: 156.1, blood_pressure: (120, 80) });
    assert_eq!(report.patient_name, "Bob");
    assert_eq!(report.visit_count, 1);
    assert_eq!(report.blood_pressure_change, None);

    let report =
        bob.visit_doctor(Measurements { height: 156.1, blood_pressure: (115, 76) });

    assert_eq!(report.visit_count, 2);
    assert_eq!(report.blood_pressure_change, Some((-5, -4)));
}
解答
#![allow(dead_code)]
pub struct User {
    name: String,
    age: u32,
    height: f32,
    visit_count: usize,
    last_blood_pressure: Option<(u32, u32)>,
}

pub struct Measurements {
    height: f32,
    blood_pressure: (u32, u32),
}

pub struct HealthReport<'a> {
    patient_name: &'a str,
    visit_count: u32,
    height_change: f32,
    blood_pressure_change: Option<(i32, i32)>,
}

impl User {
    pub fn new(name: String, age: u32, height: f32) -> Self {
        Self { name, age, height, visit_count: 0, last_blood_pressure: None }
    }

    pub fn visit_doctor(&mut self, measurements: Measurements) -> HealthReport {
        self.visit_count += 1;
        let bp = measurements.blood_pressure;
        let report = HealthReport {
            patient_name: &self.name,
            visit_count: self.visit_count as u32,
            height_change: measurements.height - self.height,
            blood_pressure_change: match self.last_blood_pressure {
                Some(lbp) => {
                    Some((bp.0 as i32 - lbp.0 as i32, bp.1 as i32 - lbp.1 as i32))
                }
                None => None,
            },
        };
        self.height = measurements.height;
        self.last_blood_pressure = Some(bp);
        report
    }
}

fn main() {
    let bob = User::new(String::from("Bob"), 32, 155.2);
    println!("I'm {} and my age is {}", bob.name, bob.age);
}

#[test]
fn test_visit() {
    let mut bob = User::new(String::from("Bob"), 32, 155.2);
    assert_eq!(bob.visit_count, 0);
    let report =
        bob.visit_doctor(Measurements { height: 156.1, blood_pressure: (120, 80) });
    assert_eq!(report.patient_name, "Bob");
    assert_eq!(report.visit_count, 1);
    assert_eq!(report.blood_pressure_change, None);

    let report =
        bob.visit_doctor(Measurements { height: 156.1, blood_pressure: (115, 76) });

    assert_eq!(report.visit_count, 2);
    assert_eq!(report.blood_pressure_change, Some((-5, -4)));
}
结构体生命周期
This segment should take about 50 minutes. It contains:
| Slide | Duration |
|---|---|
| 生命周期注解 | 10 minutes |
| 生命周期省略 | 5 minutes |
| 结构体生命周期 | 5 minutes |
| 练习:Protobuf 解析 | 30 minutes |
生命周期注解
A reference has a lifetime, which must not “outlive” the value it refers to. This is verified by the borrow checker.
The lifetime can be implicit - this is what we have seen so far. Lifetimes can also be explicit: &'a Point, &'document str. Lifetimes start with ' and 'a is a typical default name. Read &'a Point as “a borrowed Point which is valid for at least the lifetime a”.
Lifetimes are always inferred by the compiler: you cannot assign a lifetime yourself. Explicit lifetime annotations create constraints where there is ambiguity; the compiler verifies that there is a valid solution.
当考虑向函数传递值和从函数返回值时,生命周期会变得更加复杂。
#[derive(Debug)]
struct Point(i32, i32);

fn left_most(p1: &Point, p2: &Point) -> &Point {
    if p1.0 < p2.0 {
        p1
    } else {
        p2
    }
}

fn main() {
    let p1: Point = Point(10, 10);
    let p2: Point = Point(20, 20);
    let p3 = left_most(&p1, &p2); // What is the lifetime of p3?
    println!("p3: {p3:?}");
}In this example, the compiler does not know what lifetime to infer for p3. Looking inside the function body shows that it can only safely assume that p3’s lifetime is the shorter of p1 and p2. But just like types, Rust requires explicit annotations of lifetimes on function arguments and return values.
将 'a 适当添加到 left_most 中:
fn left_most<'a>(p1: &'a Point, p2: &'a Point) -> &'a Point {这表示.,“假设 p1 和 p2 的存在时间都比 'a 更长,则返回值至少在 'a 内有效”。
在一般情况下,可以省略生命周期,如下一张幻灯片中所述。
函数调用中的生命周期
Lifetimes for function arguments and return values must be fully specified, but Rust allows lifetimes to be elided in most cases with a few simple rules. This is not inference – it is just a syntactic shorthand.
- 每个没有生命周期注解的参数都会添加一个生命周期注解。
- 如果只有一个参数生命周期,则将其赋予所有未加注解的返回值。
- 如果有多个参数生命周期,但第一个是用于
self的,则将该生命周期赋予所有未加注解的返回值。
#[derive(Debug)]
struct Point(i32, i32);

fn cab_distance(p1: &Point, p2: &Point) -> i32 {
    (p1.0 - p2.0).abs() + (p1.1 - p2.1).abs()
}

fn nearest<'a>(points: &'a [Point], query: &Point) -> Option<&'a Point> {
    let mut nearest = None;
    for p in points {
        if let Some((_, nearest_dist)) = nearest {
            let dist = cab_distance(p, query);
            if dist < nearest_dist {
                nearest = Some((p, dist));
            }
        } else {
            nearest = Some((p, cab_distance(p, query)));
        };
    }
    nearest.map(|(p, _)| p)
}

fn main() {
    println!(
        "{:?}",
        nearest(
            &[Point(1, 0), Point(1, 0), Point(-1, 0), Point(0, -1),],
            &Point(0, 2)
        )
    );
}在此示例中,cab_distance 被轻易省略掉了。
nearest 函数提供了另一个函数示例,该函数的参数中包含多个引用,需要显式注解。
请尝试将签名调整为 “谎报”了返回的生命周期:
fn nearest<'a, 'q>(points: &'a [Point], query: &'q Point) -> Option<&'q Point> {This won’t compile, demonstrating that the annotations are checked for validity by the compiler. Note that this is not the case for raw pointers (unsafe), and this is a common source of errors with unsafe Rust.
Students may ask when to use lifetimes. Rust borrows always have lifetimes. Most of the time, elision and type inference mean these don’t need to be written out. In more complicated cases, lifetime annotations can help resolve ambiguity. Often, especially when prototyping, it’s easier to just work with owned data by cloning values where necessary.
数据结构中的生命周期
如果数据类型存储了借用的数据,则必须对其添加生命周期注释:
#[derive(Debug)]
struct Highlight<'doc>(&'doc str);

fn erase(text: String) {
    println!("Bye {text}!");
}

fn main() {
    let text = String::from("The quick brown fox jumps over the lazy dog.");
    let fox = Highlight(&text[4..19]);
    let dog = Highlight(&text[35..43]);
    // erase(text);
    println!("{fox:?}");
    println!("{dog:?}");
}- 在上述示例中,
Highlight注释会强制包含&str的底层数据的生命周期至少与使用该数据的任何Highlight实例一样长。 - 如果
text在fox(或dog)的生命周期结束前被消耗,借用检查器将抛出一个错误。 - 借用数据的类型会迫使用户保留原始数据。这对于创建轻量级视图很有用,但通常会使它们更难使用。
- 如有可能,让数据结构直接拥有自己的数据。
- 一些包含多个引用的结构可以有多个生命周期注释。除了结构体本身的生命周期之外,如果需要描述引用之间的生命周期关系,则可能需要这样做。这些都是非常高级的用例。
练习:Protobuf 解析
在本练习中,您将为 protobuf 二进制编码 构建一个解析器。别担心,其实非常简单!这展示了一种常见的解析模式,即传递数据 slice。底层数据本身永远不会被复制。
如要完整解析 protobuf 消息,需要知道字段的类型(按字段编号编入索引)。这通常会在 proto 文件中提供。在本练习中,我们将把这些信息编码成处理每个字段所调用的函数中的 match 语句。
我们将使用以下 proto:
message PhoneNumber {
  optional string number = 1;
  optional string type = 2;
}

message Person {
  optional string name = 1;
  optional int32 id = 2;
  repeated PhoneNumber phones = 3;
}
proto 消息被编码为连续的一系列字段。每个字段都通过 “标签”后面紧跟值的形式来实现。标签包含一个字段编号(例如Person 消息的 id 字段的值为 2)和线型(用于定义应如何从字节流确定载荷)。
整数(包括标签)使用名为 VARINT 的可变长度编码表示。幸运的是,下面为您提供了 parse_varint 的定义。该指定代码还定义了一些回调,用于处理 Person 和 PhoneNumber 字段,并将消息解析为对这些回调的一系列调用。
What remains for you is to implement the parse_field function and the ProtoMessage trait for Person and PhoneNumber.
use std::convert::TryFrom;
use thiserror::Error;

#[derive(Debug, Error)]
enum Error {
    #[error("Invalid varint")]
    InvalidVarint,
    #[error("Invalid wire-type")]
    InvalidWireType,
    #[error("Unexpected EOF")]
    UnexpectedEOF,
    #[error("Invalid length")]
    InvalidSize(#[from] std::num::TryFromIntError),
    #[error("Unexpected wire-type)")]
    UnexpectedWireType,
    #[error("Invalid string (not UTF-8)")]
    InvalidString,
}

/// A wire type as seen on the wire.
enum WireType {
    /// Varint WireType 表明该值为单个 VARINT。
    Varint,
    //I64,  -- not needed for this exercise
    /// The Len WireType indicates that the value is a length represented as a
    /// VARINT followed by exactly that number of bytes.
    Len,
    /// The I32 WireType indicates that the value is precisely 4 bytes in
    /// little-endian order containing a 32-bit signed integer.
    I32,
}

#[derive(Debug)]
/// A field's value, typed based on the wire type.
enum FieldValue<'a> {
    Varint(u64),
    //I64(i64),  -- not needed for this exercise
    Len(&'a [u8]),
    I32(i32),
}

#[derive(Debug)]
/// A field, containing the field number and its value.
struct Field<'a> {
    field_num: u64,
    value: FieldValue<'a>,
}

trait ProtoMessage<'a>: Default + 'a {
    fn add_field(&mut self, field: Field<'a>) -> Result<(), Error>;
}

impl TryFrom<u64> for WireType {
    type Error = Error;

    fn try_from(value: u64) -> Result<WireType, Error> {
        Ok(match value {
            0 => WireType::Varint,
            //1 => WireType::I64,  -- not needed for this exercise
            2 => WireType::Len,
            5 => WireType::I32,
            _ => return Err(Error::InvalidWireType),
        })
    }
}

impl<'a> FieldValue<'a> {
    fn as_string(&self) -> Result<&'a str, Error> {
        let FieldValue::Len(data) = self else {
            return Err(Error::UnexpectedWireType);
        };
        std::str::from_utf8(data).map_err(|_| Error::InvalidString)
    }

    fn as_bytes(&self) -> Result<&'a [u8], Error> {
        let FieldValue::Len(data) = self else {
            return Err(Error::UnexpectedWireType);
        };
        Ok(data)
    }

    fn as_u64(&self) -> Result<u64, Error> {
        let FieldValue::Varint(value) = self else {
            return Err(Error::UnexpectedWireType);
        };
        Ok(*value)
    }
}

/// Parse a VARINT, returning the parsed value and the remaining bytes.
fn parse_varint(data: &[u8]) -> Result<(u64, &[u8]), Error> {
    for i in 0..7 {
        let Some(b) = data.get(i) else {
            return Err(Error::InvalidVarint);
        };
        if b & 0x80 == 0 {
            // This is the last byte of the VARINT, so convert it to
            // a u64 and return it.
            let mut value = 0u64;
            for b in data[..=i].iter().rev() {
                value = (value << 7) | (b & 0x7f) as u64;
            }
            return Ok((value, &data[i + 1..]));
        }
    }

    // More than 7 bytes is invalid.
    Err(Error::InvalidVarint)
}

/// Convert a tag into a field number and a WireType.
fn unpack_tag(tag: u64) -> Result<(u64, WireType), Error> {
    let field_num = tag >> 3;
    let wire_type = WireType::try_from(tag & 0x7)?;
    Ok((field_num, wire_type))
}


/// Parse a field, returning the remaining bytes
fn parse_field(data: &[u8]) -> Result<(Field, &[u8]), Error> {
    let (tag, remainder) = parse_varint(data)?;
    let (field_num, wire_type) = unpack_tag(tag)?;
    let (fieldvalue, remainder) = match wire_type {
        _ => todo!("Based on the wire type, build a Field, consuming as many bytes as necessary.")
    };
    todo!("Return the field, and any un-consumed bytes.")
}

/// Parse a message in the given data, calling `T::add_field` for each field in
/// the message.
///
/// The entire input is consumed.
fn parse_message<'a, T: ProtoMessage<'a>>(mut data: &'a [u8]) -> Result<T, Error> {
    let mut result = T::default();
    while !data.is_empty() {
        let parsed = parse_field(data)?;
        result.add_field(parsed.0)?;
        data = parsed.1;
    }
    Ok(result)
}

#[derive(Debug, Default)]
struct PhoneNumber<'a> {
    number: &'a str,
    type_: &'a str,
}

#[derive(Debug, Default)]
struct Person<'a> {
    name: &'a str,
    id: u64,
    phone: Vec<PhoneNumber<'a>>,
}

// TODO: Implement ProtoMessage for Person and PhoneNumber.

fn main() {
    let person: Person = parse_message(&[
        0x0a, 0x07, 0x6d, 0x61, 0x78, 0x77, 0x65, 0x6c, 0x6c, 0x10, 0x2a, 0x1a,
        0x16, 0x0a, 0x0e, 0x2b, 0x31, 0x32, 0x30, 0x32, 0x2d, 0x35, 0x35, 0x35,
        0x2d, 0x31, 0x32, 0x31, 0x32, 0x12, 0x04, 0x68, 0x6f, 0x6d, 0x65, 0x1a,
        0x18, 0x0a, 0x0e, 0x2b, 0x31, 0x38, 0x30, 0x30, 0x2d, 0x38, 0x36, 0x37,
        0x2d, 0x35, 0x33, 0x30, 0x38, 0x12, 0x06, 0x6d, 0x6f, 0x62, 0x69, 0x6c,
        0x65,
    ])
    .unwrap();
    println!("{:#?}", person);
}
解答
use std::convert::TryFrom;
use thiserror::Error;

#[derive(Debug, Error)]
enum Error {
    #[error("Invalid varint")]
    InvalidVarint,
    #[error("Invalid wire-type")]
    InvalidWireType,
    #[error("Unexpected EOF")]
    UnexpectedEOF,
    #[error("Invalid length")]
    InvalidSize(#[from] std::num::TryFromIntError),
    #[error("Unexpected wire-type)")]
    UnexpectedWireType,
    #[error("Invalid string (not UTF-8)")]
    InvalidString,
}

/// A wire type as seen on the wire.
enum WireType {
    /// Varint WireType 表明该值为单个 VARINT。
    Varint,
    //I64,  -- not needed for this exercise
    /// The Len WireType indicates that the value is a length represented as a
    /// VARINT followed by exactly that number of bytes.
    Len,
    /// The I32 WireType indicates that the value is precisely 4 bytes in
    /// little-endian order containing a 32-bit signed integer.
    I32,
}

#[derive(Debug)]
/// A field's value, typed based on the wire type.
enum FieldValue<'a> {
    Varint(u64),
    //I64(i64),  -- not needed for this exercise
    Len(&'a [u8]),
    I32(i32),
}

#[derive(Debug)]
/// A field, containing the field number and its value.
struct Field<'a> {
    field_num: u64,
    value: FieldValue<'a>,
}

trait ProtoMessage<'a>: Default + 'a {
    fn add_field(&mut self, field: Field<'a>) -> Result<(), Error>;
}

impl TryFrom<u64> for WireType {
    type Error = Error;

    fn try_from(value: u64) -> Result<WireType, Error> {
        Ok(match value {
            0 => WireType::Varint,
            //1 => WireType::I64,  -- not needed for this exercise
            2 => WireType::Len,
            5 => WireType::I32,
            _ => return Err(Error::InvalidWireType),
        })
    }
}

impl<'a> FieldValue<'a> {
    fn as_string(&self) -> Result<&'a str, Error> {
        let FieldValue::Len(data) = self else {
            return Err(Error::UnexpectedWireType);
        };
        std::str::from_utf8(data).map_err(|_| Error::InvalidString)
    }

    fn as_bytes(&self) -> Result<&'a [u8], Error> {
        let FieldValue::Len(data) = self else {
            return Err(Error::UnexpectedWireType);
        };
        Ok(data)
    }

    fn as_u64(&self) -> Result<u64, Error> {
        let FieldValue::Varint(value) = self else {
            return Err(Error::UnexpectedWireType);
        };
        Ok(*value)
    }
}

/// Parse a VARINT, returning the parsed value and the remaining bytes.
fn parse_varint(data: &[u8]) -> Result<(u64, &[u8]), Error> {
    for i in 0..7 {
        let Some(b) = data.get(i) else {
            return Err(Error::InvalidVarint);
        };
        if b & 0x80 == 0 {
            // This is the last byte of the VARINT, so convert it to
            // a u64 and return it.
            let mut value = 0u64;
            for b in data[..=i].iter().rev() {
                value = (value << 7) | (b & 0x7f) as u64;
            }
            return Ok((value, &data[i + 1..]));
        }
    }

    // More than 7 bytes is invalid.
    Err(Error::InvalidVarint)
}

/// Convert a tag into a field number and a WireType.
fn unpack_tag(tag: u64) -> Result<(u64, WireType), Error> {
    let field_num = tag >> 3;
    let wire_type = WireType::try_from(tag & 0x7)?;
    Ok((field_num, wire_type))
}

/// Parse a field, returning the remaining bytes
fn parse_field(data: &[u8]) -> Result<(Field, &[u8]), Error> {
    let (tag, remainder) = parse_varint(data)?;
    let (field_num, wire_type) = unpack_tag(tag)?;
    let (fieldvalue, remainder) = match wire_type {
        WireType::Varint => {
            let (value, remainder) = parse_varint(remainder)?;
            (FieldValue::Varint(value), remainder)
        }
        WireType::Len => {
            let (len, remainder) = parse_varint(remainder)?;
            let len: usize = len.try_into()?;
            if remainder.len() < len {
                return Err(Error::UnexpectedEOF);
            }
            let (value, remainder) = remainder.split_at(len);
            (FieldValue::Len(value), remainder)
        }
        WireType::I32 => {
            if remainder.len() < 4 {
                return Err(Error::UnexpectedEOF);
            }
            let (value, remainder) = remainder.split_at(4);
            // Unwrap error because `value` is definitely 4 bytes long.
            let value = i32::from_le_bytes(value.try_into().unwrap());
            (FieldValue::I32(value), remainder)
        }
    };
    Ok((Field { field_num, value: fieldvalue }, remainder))
}

/// Parse a message in the given data, calling `T::add_field` for each field in
/// the message.
///
/// The entire input is consumed.
fn parse_message<'a, T: ProtoMessage<'a>>(mut data: &'a [u8]) -> Result<T, Error> {
    let mut result = T::default();
    while !data.is_empty() {
        let parsed = parse_field(data)?;
        result.add_field(parsed.0)?;
        data = parsed.1;
    }
    Ok(result)
}

#[derive(Debug, Default)]
struct PhoneNumber<'a> {
    number: &'a str,
    type_: &'a str,
}

#[derive(Debug, Default)]
struct Person<'a> {
    name: &'a str,
    id: u64,
    phone: Vec<PhoneNumber<'a>>,
}

impl<'a> ProtoMessage<'a> for Person<'a> {
    fn add_field(&mut self, field: Field<'a>) -> Result<(), Error> {
        match field.field_num {
            1 => self.name = field.value.as_string()?,
            2 => self.id = field.value.as_u64()?,
            3 => self.phone.push(parse_message(field.value.as_bytes()?)?),
            _ => {} // skip everything else
        }
        Ok(())
    }
}

impl<'a> ProtoMessage<'a> for PhoneNumber<'a> {
    fn add_field(&mut self, field: Field<'a>) -> Result<(), Error> {
        match field.field_num {
            1 => self.number = field.value.as_string()?,
            2 => self.type_ = field.value.as_string()?,
            _ => {} // skip everything else
        }
        Ok(())
    }
}

fn main() {
    let person: Person = parse_message(&[
        0x0a, 0x07, 0x6d, 0x61, 0x78, 0x77, 0x65, 0x6c, 0x6c, 0x10, 0x2a, 0x1a,
        0x16, 0x0a, 0x0e, 0x2b, 0x31, 0x32, 0x30, 0x32, 0x2d, 0x35, 0x35, 0x35,
        0x2d, 0x31, 0x32, 0x31, 0x32, 0x12, 0x04, 0x68, 0x6f, 0x6d, 0x65, 0x1a,
        0x18, 0x0a, 0x0e, 0x2b, 0x31, 0x38, 0x30, 0x30, 0x2d, 0x38, 0x36, 0x37,
        0x2d, 0x35, 0x33, 0x30, 0x38, 0x12, 0x06, 0x6d, 0x6f, 0x62, 0x69, 0x6c,
        0x65,
    ])
    .unwrap();
    println!("{:#?}", person);
}

#[cfg(test)]
mod test {
    use super::*;

    #[test]
    fn as_string() {
        assert!(FieldValue::Varint(10).as_string().is_err());
        assert!(FieldValue::I32(10).as_string().is_err());
        assert_eq!(FieldValue::Len(b"hello").as_string().unwrap(), "hello");
    }

    #[test]
    fn as_bytes() {
        assert!(FieldValue::Varint(10).as_bytes().is_err());
        assert!(FieldValue::I32(10).as_bytes().is_err());
        assert_eq!(FieldValue::Len(b"hello").as_bytes().unwrap(), b"hello");
    }

    #[test]
    fn as_u64() {
        assert_eq!(FieldValue::Varint(10).as_u64().unwrap(), 10u64);
        assert!(FieldValue::I32(10).as_u64().is_err());
        assert!(FieldValue::Len(b"hello").as_u64().is_err());
    }
}
Welcome to Day 4
Today we will cover topics relating to building large-scale software in Rust:
- 迭代器:深入了解
Iterator特征。 - 模块和可见性。
- Testing.
- 错误处理:panic、“Result”和 try 运算符“?”。
- 不安全 Rust:当无法用安全 Rust 表达您的意图时,则可将其作为应急方法。
时间表
Including 10 minute breaks, this session should take about 2 hours and 40 minutes. It contains:
| Segment | Duration |
|---|---|
| 欢迎 | 3 minutes |
| 迭代器 | 45 minutes |
| 模块 | 40 minutes |
| 测试 | 45 minutes |
迭代器
This segment should take about 45 minutes. It contains:
| Slide | Duration |
|---|---|
| Iterator | 5 minutes |
| IntoIterator | 5 minutes |
| FromIterator | 5 minutes |
| 练习:迭代器方法链 | 30 minutes |
Iterator
‘Iterator’ trait 支持迭代集合中的值。它需要用到 next 方法,并提供很多方法。许多标准库类型均能实现 Iterator,您也可以自行实现:
struct Fibonacci {
    curr: u32,
    next: u32,
}

impl Iterator for Fibonacci {
    type Item = u32;

    fn next(&mut self) -> Option<Self::Item> {
        let new_next = self.curr + self.next;
        self.curr = self.next;
        self.next = new_next;
        Some(self.curr)
    }
}

fn main() {
    let fib = Fibonacci { curr: 0, next: 1 };
    for (i, n) in fib.enumerate().take(5) {
        println!("fib({i}): {n}");
    }
}-
The
Iteratortrait implements many common functional programming operations over collections (e.g.map,filter,reduce, etc). This is the trait where you can find all the documentation about them. In Rust these functions should produce the code as efficient as equivalent imperative implementations. -
IntoIterator是迫使 for 循环运作的特征。此特征由集合类型 (例如Vec<T>)和相关引用(例如&Vec<T>和&[T])而实现。此外,范围也会实现这项特征。因此, 您可以使用for i in some_vec { .. }来遍历某矢量,但some_vec.next()不存在。
IntoIterator
The Iterator trait tells you how to iterate once you have created an iterator. The related trait IntoIterator defines how to create an iterator for a type. It is used automatically by the for loop.
struct Grid {
    x_coords: Vec<u32>,
    y_coords: Vec<u32>,
}

impl IntoIterator for Grid {
    type Item = (u32, u32);
    type IntoIter = GridIter;
    fn into_iter(self) -> GridIter {
        GridIter { grid: self, i: 0, j: 0 }
    }
}

struct GridIter {
    grid: Grid,
    i: usize,
    j: usize,
}

impl Iterator for GridIter {
    type Item = (u32, u32);

    fn next(&mut self) -> Option<(u32, u32)> {
        if self.i >= self.grid.x_coords.len() {
            self.i = 0;
            self.j += 1;
            if self.j >= self.grid.y_coords.len() {
                return None;
            }
        }
        let res = Some((self.grid.x_coords[self.i], self.grid.y_coords[self.j]));
        self.i += 1;
        res
    }
}

fn main() {
    let grid = Grid { x_coords: vec![3, 5, 7, 9], y_coords: vec![10, 20, 30, 40] };
    for (x, y) in grid {
        println!("point = {x}, {y}");
    }
}Click through to the docs for IntoIterator. Every implementation of IntoIterator must declare two types:
Item: the type to iterate over, such asi8,- “IntoIter”:“into_iter”方法返回的“Iterator”类型。
Note that IntoIter and Item are linked: the iterator must have the same Item type, which means that it returns Option<Item>
此示例对 x 坐标和 y 坐标的所有组合进行了迭代。
请尝试在 main 中对网格进行两次迭代。为什么会失败?请注意,IntoIterator::into_iter 获得了 self 的所有权。
如要解决此问题,请为 &Grid 实现 IntoIterator,并在 GridIter 中存储对 Grid 的引用。
对于标准库类型,可能会出现同样的问题:for e in some_vector 将获得 some_vector 的所有权,并迭代该矢量中的自有元素。请改用 for e in &some_vector 来迭代 some_vector 的元素的引用。
FromIterator
FromIterator 让您可通过 Iterator 构建一个集合。
fn main() {
    let primes = vec![2, 3, 5, 7];
    let prime_squares = primes.into_iter().map(|p| p * p).collect::<Vec<_>>();
    println!("prime_squares: {prime_squares:?}");
}Iterator implements
fn collect<B>(self) -> B
where
    B: FromIterator<Self::Item>,
    Self: Sized
可以通过两种方式为此方法指定 B:
- With the “turbofish”:
some_iterator.collect::<COLLECTION_TYPE>(), as shown. The_shorthand used here lets Rust infer the type of theVecelements. - 使用类型推理功能时:
let prime_squares: Vec<_> = some_iterator.collect()。将示例重写成使用这种形式。
There are basic implementations of FromIterator for Vec, HashMap, etc. There are also more specialized implementations which let you do cool things like convert an Iterator<Item = Result<V, E>> into a Result<Vec<V>, E>.
练习:迭代器方法链
In this exercise, you will need to find and use some of the provided methods in the Iterator trait to implement a complex calculation.
Copy the following code to https://play.rust-lang.org/ and make the tests pass. Use an iterator expression and collect the result to construct the return value.
#![allow(unused)]
fn main() {
/// Calculate the differences between elements of `values` offset by `offset`,
/// wrapping around from the end of `values` to the beginning.
///
/// Element `n` of the result is `values[(n+offset)%len] - values[n]`.
fn offset_differences<N>(offset: usize, values: Vec<N>) -> Vec<N>
where
    N: Copy + std::ops::Sub<Output = N>,
{
    unimplemented!()
}

#[test]
fn test_offset_one() {
    assert_eq!(offset_differences(1, vec![1, 3, 5, 7]), vec![2, 2, 2, -6]);
    assert_eq!(offset_differences(1, vec![1, 3, 5]), vec![2, 2, -4]);
    assert_eq!(offset_differences(1, vec![1, 3]), vec![2, -2]);
}

#[test]
fn test_larger_offsets() {
    assert_eq!(offset_differences(2, vec![1, 3, 5, 7]), vec![4, 4, -4, -4]);
    assert_eq!(offset_differences(3, vec![1, 3, 5, 7]), vec![6, -2, -2, -2]);
    assert_eq!(offset_differences(4, vec![1, 3, 5, 7]), vec![0, 0, 0, 0]);
    assert_eq!(offset_differences(5, vec![1, 3, 5, 7]), vec![2, 2, 2, -6]);
}

#[test]
fn test_custom_type() {
    assert_eq!(
        offset_differences(1, vec![1.0, 11.0, 5.0, 0.0]),
        vec![10.0, -6.0, -5.0, 1.0]
    );
}

#[test]
fn test_degenerate_cases() {
    assert_eq!(offset_differences(1, vec![0]), vec![0]);
    assert_eq!(offset_differences(1, vec![1]), vec![0]);
    let empty: Vec<i32> = vec![];
    assert_eq!(offset_differences(1, empty), vec![]);
}
}
解答
/// Calculate the differences between elements of `values` offset by `offset`,
/// wrapping around from the end of `values` to the beginning.
///
/// Element `n` of the result is `values[(n+offset)%len] - values[n]`.
fn offset_differences<N>(offset: usize, values: Vec<N>) -> Vec<N>
where
    N: Copy + std::ops::Sub<Output = N>,
{
    let a = (&values).into_iter();
    let b = (&values).into_iter().cycle().skip(offset);
    a.zip(b).map(|(a, b)| *b - *a).collect()
}

#[test]
fn test_offset_one() {
    assert_eq!(offset_differences(1, vec![1, 3, 5, 7]), vec![2, 2, 2, -6]);
    assert_eq!(offset_differences(1, vec![1, 3, 5]), vec![2, 2, -4]);
    assert_eq!(offset_differences(1, vec![1, 3]), vec![2, -2]);
}

#[test]
fn test_larger_offsets() {
    assert_eq!(offset_differences(2, vec![1, 3, 5, 7]), vec![4, 4, -4, -4]);
    assert_eq!(offset_differences(3, vec![1, 3, 5, 7]), vec![6, -2, -2, -2]);
    assert_eq!(offset_differences(4, vec![1, 3, 5, 7]), vec![0, 0, 0, 0]);
    assert_eq!(offset_differences(5, vec![1, 3, 5, 7]), vec![2, 2, 2, -6]);
}

#[test]
fn test_custom_type() {
    assert_eq!(
        offset_differences(1, vec![1.0, 11.0, 5.0, 0.0]),
        vec![10.0, -6.0, -5.0, 1.0]
    );
}

#[test]
fn test_degenerate_cases() {
    assert_eq!(offset_differences(1, vec![0]), vec![0]);
    assert_eq!(offset_differences(1, vec![1]), vec![0]);
    let empty: Vec<i32> = vec![];
    assert_eq!(offset_differences(1, empty), vec![]);
}

fn main() {}
模块
This segment should take about 40 minutes. It contains:
| Slide | Duration |
|---|---|
| 模块 | 3 minutes |
| 文件系统层级结构 | 5 minutes |
| 可见性 | 5 minutes |
| use、super、self | 10 minutes |
| 练习:面向 GUI 库的模块 | 15 minutes |
模块
我们已看了“impl”块如何让我们将函数的命名空间建为一种类型。
同样,“mod”让我们可为类型和函数建立命名空间:
mod foo {
    pub fn do_something() {
        println!("In the foo module");
    }
}

mod bar {
    pub fn do_something() {
        println!("In the bar module");
    }
}

fn main() {
    foo::do_something();
    bar::do_something();
}- 包提供功能,并包含一个描述如何构建包含 1 个以上 crate 的捆绑包的“Cargo.toml”文件。
- crate 是一种模块树,其中的二进制 crate 会创建一个可执行文件,而库 crate 会编译为库。
- 模块定义了组织和范围,并且是本部分的重点。
文件系统层级结构
如果省略模块内容,则会指示 Rust 在另一个文件中查找:
mod garden;这会告知 Rust 可以在“src/garden.rs”中找到“garden”模块内容。同样,您可以在“src/garden/vegetables.rs”中找到“garden::vegetables”模块。
“crate”根目录位于:
- “src/lib.rs”(对于库 crate)
- “src/main.rs”(对于二进制文件 crate)
也可以使用“内部文档注释”对文件中定义的模块进行记录。这些用于记录包含它们的项(在本例中为模块)。
//! This module implements the garden, including a highly performant germination
//! implementation.

// Re-export types from this module.
pub use garden::Garden;
pub use seeds::SeedPacket;

/// Sow the given seed packets.
pub fn sow(seeds: Vec<SeedPacket>) {
    todo!()
}

/// Harvest the produce in the garden that is ready.
pub fn harvest(garden: &mut Garden) {
    todo!()
}-
在 Rust 2018 之前的版本中,模块需要位于“module/mod.rs”而非“module.rs”中,对于 2018 年之后的版本而言,这仍是有效的替代方案。
-
引入“filename.rs”来替代“filename/mod.rs”的主要原因是,许多名为“mod.rs”的文件在 IDE 中可能难以区分。
-
即使主模块是文件,更深层的嵌套也可以使用文件夹:
src/ ├── main.rs ├── top_module.rs └── top_module/ └── sub_module.rs -
Rust 寻找模块的位置可通过编译器指令更改:
#[path = "some/path.rs"]
mod some_module;
例如,如果您想将某个模块的测试放在名为“some_module_test.rs”的文件中(类似于 Go 中的惯例),这样做很有用。
可见性
模块是一种隐私边界:
- 默认情况下,模块项是私有的(隐藏实现详情)。
- 父项和同级子项始终可见。
- 换言之,如果某个项在模块“foo”中可见,那么该项在“foo”的所有后代中均可见。
mod outer {
    fn private() {
        println!("outer::private");
    }

    pub fn public() {
        println!("outer::public");
    }

    mod inner {
        fn private() {
            println!("outer::inner::private");
        }

        pub fn public() {
            println!("outer::inner::public");
            super::private();
        }
    }
}

fn main() {
    outer::public();
}- 使用“pub”关键字将模块设为公开。
此外,您还可以使用高级“pub(…)”说明符来限制公开可见的范围。
- 请参阅 Rust 参考。
- 配置“pub(crate)”可见性是一种常见模式。
- 您可以为特定路径授予可见性,这种情况不太常见。
- 在任何情况下,都必须向祖先模块(及其所有后代)授予可见性。
use、super、self
一个模块可以使用“use”将另一个模块的符号全部纳入。您通常在每个模块的顶部会看到如下内容:
use std::collections::HashSet;
use std::process::abort;
路径
路径解析如下:
-
作为相对路径:
foo或self::foo是指当前模块中的foo,- “super::foo”是指父模块中的“foo”。
-
作为绝对路径:
crate::foo是指当前 crate 的根中的foo,- “bar::foo”是指“bar”crate 中的“foo”。
-
通常使用较短的路径来 “重新导出”符号。例如,crate 中的顶层
lib.rs文件可能会mod storage; pub use storage::disk::DiskStorage; pub use storage::network::NetworkStorage;通过便捷的短路径,使得
DiskStorage和NetworkStorage可供其他 crate 使用。 -
在大多数情况下,只有模块中显示的项才需通过
use引入。不过,即使实现该 trait 的类型已处于作用域内,如要调用该 trait 的任何方法,仍需将该 trait 引入到作用域内。例如,如需对实现Readtrait 的类型使用read_to_string方法,您需要使用use std::io::Read引入。 -
use语句可以包含通配符:use std::io::*。但不推荐这种做法,因为不清楚导入了哪些项,并且这些内容可能会随时间而变化。
练习:面向 GUI 库的模块
In this exercise, you will reorganize a small GUI Library implementation. This library defines a Widget trait and a few implementations of that trait, as well as a main function.
It is typical to put each type or set of closely-related types into its own module, so each widget type should get its own module.
Cargo Setup
Rust Playground 仅支持一个文件,因此您需要在本地文件系统上创建一个 Cargo 项目:
cargo init gui-modules
cd gui-modules
cargo run
Edit the resulting src/main.rs to add mod statements, and add additional files in the src directory.
Source
Here’s the single-module implementation of the GUI library:
pub trait Widget {
    /// Natural width of `self`.
    fn width(&self) -> usize;

    /// Draw the widget into a buffer.
    fn draw_into(&self, buffer: &mut dyn std::fmt::Write);

    /// Draw the widget on standard output.
    fn draw(&self) {
        let mut buffer = String::new();
        self.draw_into(&mut buffer);
        println!("{buffer}");
    }
}

pub struct Label {
    label: String,
}

impl Label {
    fn new(label: &str) -> Label {
        Label { label: label.to_owned() }
    }
}

pub struct Button {
    label: Label,
}

impl Button {
    fn new(label: &str) -> Button {
        Button { label: Label::new(label) }
    }
}

pub struct Window {
    title: String,
    widgets: Vec<Box<dyn Widget>>,
}

impl Window {
    fn new(title: &str) -> Window {
        Window { title: title.to_owned(), widgets: Vec::new() }
    }

    fn add_widget(&mut self, widget: Box<dyn Widget>) {
        self.widgets.push(widget);
    }

    fn inner_width(&self) -> usize {
        std::cmp::max(
            self.title.chars().count(),
            self.widgets.iter().map(|w| w.width()).max().unwrap_or(0),
        )
    }
}

impl Widget for Window {
    fn width(&self) -> usize {
        // Add 4 paddings for borders
        self.inner_width() + 4
    }

    fn draw_into(&self, buffer: &mut dyn std::fmt::Write) {
        let mut inner = String::new();
        for widget in &self.widgets {
            widget.draw_into(&mut inner);
        }

        let inner_width = self.inner_width();

        // TODO: Change draw_into to return Result<(), std::fmt::Error>. Then use the
        // ?-operator here instead of .unwrap().
        writeln!(buffer, "+-{:-<inner_width$}-+", "").unwrap();
        writeln!(buffer, "| {:^inner_width$} |", &self.title).unwrap();
        writeln!(buffer, "+={:=<inner_width$}=+", "").unwrap();
        for line in inner.lines() {
            writeln!(buffer, "| {:inner_width$} |", line).unwrap();
        }
        writeln!(buffer, "+-{:-<inner_width$}-+", "").unwrap();
    }
}

impl Widget for Button {
    fn width(&self) -> usize {
        self.label.width() + 8 // add a bit of padding
    }

    fn draw_into(&self, buffer: &mut dyn std::fmt::Write) {
        let width = self.width();
        let mut label = String::new();
        self.label.draw_into(&mut label);

        writeln!(buffer, "+{:-<width$}+", "").unwrap();
        for line in label.lines() {
            writeln!(buffer, "|{:^width$}|", &line).unwrap();
        }
        writeln!(buffer, "+{:-<width$}+", "").unwrap();
    }
}

impl Widget for Label {
    fn width(&self) -> usize {
        self.label.lines().map(|line| line.chars().count()).max().unwrap_or(0)
    }

    fn draw_into(&self, buffer: &mut dyn std::fmt::Write) {
        writeln!(buffer, "{}", &self.label).unwrap();
    }
}

fn main() {
    let mut window = Window::new("Rust GUI Demo 1.23");
    window.add_widget(Box::new(Label::new("This is a small text GUI demo.")));
    window.add_widget(Box::new(Button::new("Click me!")));
    window.draw();
}鼓励学生按照自己认为合适的方式划分代码,并熟悉必需的 mod、use 和 pub 声明。之后,讨论哪些组织方式最符合惯例。
解答
src
├── main.rs
├── widgets
│   ├── button.rs
│   ├── label.rs
│   └── window.rs
└── widgets.rs
// ---- src/widgets.rs ----
mod button;
mod label;
mod window;

pub trait Widget {
    /// Natural width of `self`.
    fn width(&self) -> usize;

    /// Draw the widget into a buffer.
    fn draw_into(&self, buffer: &mut dyn std::fmt::Write);

    /// Draw the widget on standard output.
    fn draw(&self) {
        let mut buffer = String::new();
        self.draw_into(&mut buffer);
        println!("{buffer}");
    }
}

pub use button::Button;
pub use label::Label;
pub use window::Window;
// ---- src/widgets/label.rs ----
use super::Widget;
pub struct Label {
label: String,
}
impl Label {
pub fn new(label: &str) -> Label {
Label { label: label.to_owned() }
}
}
impl Widget for Label {
fn width(&self) -> usize {
// ANCHOR_END: Label-width
self.label.lines().map(|line| line.chars().count()).max().unwrap_or(0)
}
// ANCHOR: Label-draw_into
fn draw_into(&self, buffer: &mut dyn std::fmt::Write) {
// ANCHOR_END: Label-draw_into
writeln!(buffer, "{}", &self.label).unwrap();
}
}// ---- src/widgets/button.rs ----
use super::{Label, Widget};
pub struct Button {
label: Label,
}
impl Button {
pub fn new(label: &str) -> Button {
Button { label: Label::new(label) }
}
}
impl Widget for Button {
fn width(&self) -> usize {
// ANCHOR_END: Button-width
self.label.width() + 8 // add a bit of padding
}
// ANCHOR: Button-draw_into
fn draw_into(&self, buffer: &mut dyn std::fmt::Write) {
// ANCHOR_END: Button-draw_into
let width = self.width();
let mut label = String::new();
self.label.draw_into(&mut label);
writeln!(buffer, "+{:-<width$}+", "").unwrap();
for line in label.lines() {
writeln!(buffer, "|{:^width$}|", &line).unwrap();
}
writeln!(buffer, "+{:-<width$}+", "").unwrap();
}
}// ---- src/widgets/window.rs ----
use super::Widget;
pub struct Window {
title: String,
widgets: Vec<Box<dyn Widget>>,
}
impl Window {
pub fn new(title: &str) -> Window {
Window { title: title.to_owned(), widgets: Vec::new() }
}
pub fn add_widget(&mut self, widget: Box<dyn Widget>) {
self.widgets.push(widget);
}
fn inner_width(&self) -> usize {
std::cmp::max(
self.title.chars().count(),
self.widgets.iter().map(|w| w.width()).max().unwrap_or(0),
)
}
}
impl Widget for Window {
fn width(&self) -> usize {
// ANCHOR_END: Window-width
// Add 4 paddings for borders
self.inner_width() + 4
}
// ANCHOR: Window-draw_into
fn draw_into(&self, buffer: &mut dyn std::fmt::Write) {
// ANCHOR_END: Window-draw_into
let mut inner = String::new();
for widget in &self.widgets {
widget.draw_into(&mut inner);
}
let inner_width = self.inner_width();
// TODO: after learning about error handling, you can change
// draw_into to return Result<(), std::fmt::Error>. Then use
// the ?-operator here instead of .unwrap().
writeln!(buffer, "+-{:-<inner_width$}-+", "").unwrap();
writeln!(buffer, "| {:^inner_width$} |", &self.title).unwrap();
writeln!(buffer, "+={:=<inner_width$}=+", "").unwrap();
for line in inner.lines() {
writeln!(buffer, "| {:inner_width$} |", line).unwrap();
}
writeln!(buffer, "+-{:-<inner_width$}-+", "").unwrap();
}
}// ---- src/main.rs ----
mod widgets;
use widgets::Widget;
fn main() {
let mut window = widgets::Window::new("Rust GUI Demo 1.23");
window
.add_widget(Box::new(widgets::Label::new("This is a small text GUI demo.")));
window.add_widget(Box::new(widgets::Button::new("Click me!")));
window.draw();
}测试
This segment should take about 45 minutes. It contains:
| Slide | Duration |
|---|---|
| 测试模块 | 5 minutes |
| 其他类型的测试 | 5 minutes |
| 编译器 Lint 和 Clippy | 3 minutes |
| 练习:卢恩算法 | 30 minutes |
单元测试
Rust 和 Cargo 随附了一个简单的单元测试框架:
-
单元测试在您的整个代码中都受支持。
-
您可以通过
tests/目录来支持集成测试。
Tests are marked with #[test]. Unit tests are often put in a nested tests module, using #[cfg(test)] to conditionally compile them only when building tests.
fn first_word(text: &str) -> &str {
    match text.find(' ') {
        Some(idx) => &text[..idx],
        None => &text,
    }
}

#[cfg(test)]
mod tests {
    use super::*;

    #[test]
    fn test_empty() {
        assert_eq!(first_word(""), "");
    }

    #[test]
    fn test_single_word() {
        assert_eq!(first_word("Hello"), "Hello");
    }

    #[test]
    fn test_multiple_words() {
        assert_eq!(first_word("Hello World"), "Hello");
    }
}- 这样一来,您可以对专用帮助程序进行单元测试。
- 仅当您运行
cargo test时,#[cfg(test)]属性才有效。
在 Playground 中运行测试显示测试结果。
其他类型的测试
集成测试
如果您想要以客户的身份测试您的库,请使用集成测试。
在 tests/ 下方创建一个 .rs 文件:
// tests/my_library.rs
use my_library::init;

#[test]
fn test_init() {
    assert!(init().is_ok());
}
这些测试只能使用您的 crate 的公共 API。
文档测试
Rust 本身就支持文档测试:
#![allow(unused)]
fn main() {
/// Shortens a string to the given length.
///
/// ```
/// # use playground::shorten_string;
/// assert_eq!(shorten_string("Hello World", 5), "Hello");
/// assert_eq!(shorten_string("Hello World", 20), "Hello World");
/// ```
pub fn shorten_string(s: &str, length: usize) -> &str {
    &s[..std::cmp::min(length, s.len())]
}
}///注释中的代码块会自动被视为 Rust 代码。- 代码会作为
cargo test的一部分进行编译和执行。 - Adding
#in the code will hide it from the docs, but will still compile/run it. - 在 Rust Playground 上测试上述代码。
编译器 Lint 和 Clippy
Rust 编译器会生成出色的错误消息,并提供实用的内置 lint 功能。Clippy 提供了更多 lint 功能,采用按组分类方式,并可按项目灵活启用。
#[deny(clippy::cast_possible_truncation)]
fn main() {
    let x = 3;
    while (x < 70000) {
        x *= 2;
    }
    println!("X probably fits in a u16, right? {}", x as u16);
}运行代码示例并检查错误消息。此处还会显示一些 lint,但是一旦完成代码编译,就不会再显示这些 lint。切换到 Playground 网站以显示这些 lint。
解析完 lint 之后,请在 Playground 网站上运行 clippy,以显示 clippy 警告。Clippy 提供了大量的 lint 文档,并且在不断添加新的 lint(包括默认拒绝 lint)。
请注意,带有 help: ... 的错误或警告可以通过 cargo Fix 或编辑器进行修复。
练习:卢恩算法
卢恩算法
卢恩算法用于验证信用卡号。该算法将字符串作为输入内容,并执行以下操作来验证信用卡号:
-
Ignore all spaces. Reject number with fewer than two digits.
-
从右到左,将偶数位的数字乘二。对于数字“1234”,我们将“3”和“1”乘二;对于数字“98765”,将“6”和“8”乘二。
-
将一个数字乘二后,如果结果大于 9,则将每位数字相加。因此,将“7”乘二得“14”,然后“1 + 4 = 5”。
-
将所有未乘二和已乘二的数字相加。
-
如果总和以“0”结尾,则信用卡号有效。
提供的代码提供了一个有缺陷的 Luhn 算法实现,附带两个基本单元测试,用于验证大部分算法是否正确实现。
Copy the code below to https://play.rust-lang.org/ and write additional tests to uncover bugs in the provided implementation, fixing any bugs you find.
#![allow(unused)]
fn main() {
pub fn luhn(cc_number: &str) -> bool {
    let mut sum = 0;
    let mut double = false;

    for c in cc_number.chars().rev() {
        if let Some(digit) = c.to_digit(10) {
            if double {
                let double_digit = digit * 2;
                sum +=
                    if double_digit > 9 { double_digit - 9 } else { double_digit };
            } else {
                sum += digit;
            }
            double = !double;
        } else {
            continue;
        }
    }

    sum % 10 == 0
}

#[cfg(test)]
mod test {
    use super::*;

    #[test]
    fn test_valid_cc_number() {
        assert!(luhn("4263 9826 4026 9299"));
        assert!(luhn("4539 3195 0343 6467"));
        assert!(luhn("7992 7398 713"));
    }

    #[test]
    fn test_invalid_cc_number() {
        assert!(!luhn("4223 9826 4026 9299"));
        assert!(!luhn("4539 3195 0343 6476"));
        assert!(!luhn("8273 1232 7352 0569"));
    }
}
}
解答
// This is the buggy version that appears in the problem.
#[cfg(never)]
pub fn luhn(cc_number: &str) -> bool {
    let mut sum = 0;
    let mut double = false;

    for c in cc_number.chars().rev() {
        if let Some(digit) = c.to_digit(10) {
            if double {
                let double_digit = digit * 2;
                sum +=
                    if double_digit > 9 { double_digit - 9 } else { double_digit };
            } else {
                sum += digit;
            }
            double = !double;
        } else {
            continue;
        }
    }

    sum % 10 == 0
}

// This is the solution and passes all of the tests below.
pub fn luhn(cc_number: &str) -> bool {
    let mut sum = 0;
    let mut double = false;
    let mut digits = 0;

    for c in cc_number.chars().rev() {
        if let Some(digit) = c.to_digit(10) {
            digits += 1;
            if double {
                let double_digit = digit * 2;
                sum +=
                    if double_digit > 9 { double_digit - 9 } else { double_digit };
            } else {
                sum += digit;
            }
            double = !double;
        } else if c.is_whitespace() {
            continue;
        } else {
            return false;
        }
    }

    digits >= 2 && sum % 10 == 0
}

fn main() {
    let cc_number = "1234 5678 1234 5670";
    println!(
        "Is {cc_number} a valid credit card number? {}",
        if luhn(cc_number) { "yes" } else { "no" }
    );
}

#[cfg(test)]
mod test {
    use super::*;

    #[test]
    fn test_valid_cc_number() {
        assert!(luhn("4263 9826 4026 9299"));
        assert!(luhn("4539 3195 0343 6467"));
        assert!(luhn("7992 7398 713"));
    }

    #[test]
    fn test_invalid_cc_number() {
        assert!(!luhn("4223 9826 4026 9299"));
        assert!(!luhn("4539 3195 0343 6476"));
        assert!(!luhn("8273 1232 7352 0569"));
    }

    #[test]
    fn test_non_digit_cc_number() {
        assert!(!luhn("foo"));
        assert!(!luhn("foo 0 0"));
    }

    #[test]
    fn test_empty_cc_number() {
        assert!(!luhn(""));
        assert!(!luhn(" "));
        assert!(!luhn("  "));
        assert!(!luhn("    "));
    }

    #[test]
    fn test_single_digit_cc_number() {
        assert!(!luhn("0"));
    }

    #[test]
    fn test_two_digit_cc_number() {
        assert!(luhn(" 0 0 "));
    }
}
Welcome Back
Including 10 minute breaks, this session should take about 2 hours and 10 minutes. It contains:
| Segment | Duration |
|---|---|
| 错误处理 | 55 minutes |
| 不安全 Rust | 1 hour and 5 minutes |
错误处理
This segment should take about 55 minutes. It contains:
| Slide | Duration |
|---|---|
| Panics | 3 minutes |
| 尝试运算符 | 5 minutes |
| 尝试转换 | 5 minutes |
| Error 特征 | 5 minutes |
| thiserror 和 anyhow | 5 minutes |
| 练习:使用 Result 进行重写 | 30 minutes |
Panics
Rust 通过 “panic”机制处理严重错误。
如果运行时发生严重错误,Rust 会触发 panic:
fn main() {
    let v = vec![10, 20, 30];
    println!("v[100]: {}", v[100]);
}- Panic 用于指示不可恢复的意外错误。
- Panic反映了程序中的 bug 问题。
- 运行时失败(例如边界检查失败)可能会触发 panic
- 断言(例如
assert!)在失败时会触发 panic - 针对特定用途的 panic 可以使用
panic!宏。
- 使用 panic 会 “展开”堆栈,并丢弃对应的值,就像函数已经返回一样。
- 如果崩溃不可接受,请使用不会触发 panic 的 API(例如
Vec::get)。
默认情况下,panic 会导致堆栈展开。您可以捕获展开信息:
use std::panic;

fn main() {
    let result = panic::catch_unwind(|| "No problem here!");
    println!("{result:?}");

    let result = panic::catch_unwind(|| {
        panic!("oh no!");
    });
    println!("{result:?}");
}- 捕获异常;请勿尝试使用
catch_unwind实现异常! - 如果服务器需要持续运行(即使是在请求发生崩溃的情况下), 此方法十分有用。
- 如果您在
Cargo.toml中设置了panic = 'abort',此方法不会生效。
尝试运算符
Runtime errors like connection-refused or file-not-found are handled with the Result type, but matching this type on every call can be cumbersome. The try-operator ? is used to return errors to the caller. It lets you turn the common
match some_expression {
    Ok(value) => value,
    Err(err) => return Err(err),
}
转换成更简单的命令
some_expression?We can use this to simplify our error handling code:
use std::io::Read;
use std::{fs, io};

fn read_username(path: &str) -> Result<String, io::Error> {
    let username_file_result = fs::File::open(path);
    let mut username_file = match username_file_result {
        Ok(file) => file,
        Err(err) => return Err(err),
    };

    let mut username = String::new();
    match username_file.read_to_string(&mut username) {
        Ok(_) => Ok(username),
        Err(err) => Err(err),
    }
}

fn main() {
    //fs::write("config.dat", "alice").unwrap();
    let username = read_username("config.dat");
    println!("username or error: {username:?}");
}简化 read_username 函数以使用 ?。
关键点:
username变量可以是Ok(string)或Err(error)。- 可以使用
fs::write调用来测试不同的场景:没有文件、空文件、包含用户名的文件。 - Note that
maincan return aResult<(), E>as long as it implementsstd::process::Termination. In practice, this means thatEimplementsDebug. The executable will print theErrvariant and return a nonzero exit status on error.
尝试转换
? 的有效展开比前面介绍的内容略微复杂一些:
expression?效果等同于
match expression {
    Ok(value) => value,
    Err(err)  => return Err(From::from(err)),
}
The From::from call here means we attempt to convert the error type to the type returned by the function. This makes it easy to encapsulate errors into higher-level errors.
示例
use std::error::Error;
use std::fmt::{self, Display, Formatter};
use std::fs::File;
use std::io::{self, Read};

#[derive(Debug)]
enum ReadUsernameError {
    IoError(io::Error),
    EmptyUsername(String),
}

impl Error for ReadUsernameError {}

impl Display for ReadUsernameError {
    fn fmt(&self, f: &mut Formatter) -> fmt::Result {
        match self {
            Self::IoError(e) => write!(f, "IO error: {e}"),
            Self::EmptyUsername(path) => write!(f, "Found no username in {path}"),
        }
    }
}

impl From<io::Error> for ReadUsernameError {
    fn from(err: io::Error) -> Self {
        Self::IoError(err)
    }
}

fn read_username(path: &str) -> Result<String, ReadUsernameError> {
    let mut username = String::with_capacity(100);
    File::open(path)?.read_to_string(&mut username)?;
    if username.is_empty() {
        return Err(ReadUsernameError::EmptyUsername(String::from(path)));
    }
    Ok(username)
}

fn main() {
    //fs::write("config.dat", "").unwrap();
    let username = read_username("config.dat");
    println!("username or error: {username:?}");
}The ? operator must return a value compatible with the return type of the function. For Result, it means that the error types have to be compatible. A function that returns Result<T, ErrorOuter> can only use ? on a value of type Result<U, ErrorInner> if ErrorOuter and ErrorInner are the same type or if ErrorOuter implements From<ErrorInner>.
From 实现的常见替代方案是 Result::map_err,尤其是只在一个位置进行转换时。
There is no compatibility requirement for Option. A function returning Option<T> can use the ? operator on Option<U> for arbitrary T and U types.
A function that returns Result cannot use ? on Option and vice versa. However, Option::ok_or converts Option to Result whereas Result::ok turns Result into Option.
动态错误类型
Sometimes we want to allow any type of error to be returned without writing our own enum covering all the different possibilities. The std::error::Error trait makes it easy to create a trait object that can contain any error.
use std::error::Error;
use std::fs;
use std::io::Read;

fn read_count(path: &str) -> Result<i32, Box<dyn Error>> {
    let mut count_str = String::new();
    fs::File::open(path)?.read_to_string(&mut count_str)?;
    let count: i32 = count_str.parse()?;
    Ok(count)
}

fn main() {
    fs::write("count.dat", "1i3").unwrap();
    match read_count("count.dat") {
        Ok(count) => println!("Count: {count}"),
        Err(err) => println!("Error: {err}"),
    }
}read_count 函数可以返回 std::io::Error(通过文件操作)或 std::num::ParseIntError(通过 String::parse)。
Boxing errors saves on code, but gives up the ability to cleanly handle different error cases differently in the program. As such it’s generally not a good idea to use Box<dyn Error> in the public API of a library, but it can be a good option in a program where you just want to display the error message somewhere.
Make sure to implement the std::error::Error trait when defining a custom error type so it can be boxed. But if you need to support the no_std attribute, keep in mind that the std::error::Error trait is currently compatible with no_std in nightly only.
thiserror 和 anyhow
The thiserror and anyhow crates are widely used to simplify error handling.
thiserroris often used in libraries to create custom error types that implementFrom<T>.anyhowis often used by applications to help with error handling in functions, including adding contextual information to your errors.
use anyhow::{bail, Context, Result};
use std::fs;
use std::io::Read;
use thiserror::Error;

#[derive(Clone, Debug, Eq, Error, PartialEq)]
#[error("Found no username in {0}")]
struct EmptyUsernameError(String);

fn read_username(path: &str) -> Result<String> {
    let mut username = String::with_capacity(100);
    fs::File::open(path)
        .with_context(|| format!("Failed to open {path}"))?
        .read_to_string(&mut username)
        .context("Failed to read")?;
    if username.is_empty() {
        bail!(EmptyUsernameError(path.to_string()));
    }
    Ok(username)
}

fn main() {
    //fs::write("config.dat", "").unwrap();
    match read_username("config.dat") {
        Ok(username) => println!("Username: {username}"),
        Err(err) => println!("Error: {err:?}"),
    }
}thiserror
- The
Errorderive macro is provided bythiserror, and has lots of useful attributes to help define error types in a compact way. - The
std::error::Errortrait is derived automatically. - The message from
#[error]is used to derive theDisplaytrait.
anyhow
anyhow::Erroris essentially a wrapper aroundBox<dyn Error>. As such it’s again generally not a good choice for the public API of a library, but is widely used in applications.anyhow::Result<V>is a type alias forResult<V, anyhow::Error>.- Actual error type inside of it can be extracted for examination if necessary.
- Functionality provided by
anyhow::Result<T>may be familiar to Go developers, as it provides similar usage patterns and ergonomics to(T, error)from Go. anyhow::Contextis a trait implemented for the standardResultandOptiontypes.use anyhow::Contextis necessary to enable.context()and.with_context()on those types.
练习:使用 Result 进行重写
以下代码实现了一个非常简单的表达式语言解析器。不过,它通过 panic 机制来处理错误。请重写该代码,改用惯用的错误处理方式,并将错误传播到 main 函数的返回值。您可以随意使用 thiserror 和 anyhow。
提示:请先修复 parse 函数中的错误处理问题。该部分正常运行后,请更新 Tokenizer 以实现 Iterator<Item=Result<Token, TokenizerError>>,并在解析器中进行相应处理。
use std::iter::Peekable;
use std::str::Chars;

/// An arithmetic operator.
#[derive(Debug, PartialEq, Clone, Copy)]
enum Op {
    Add,
    Sub,
}

/// A token in the expression language.
#[derive(Debug, PartialEq)]
enum Token {
    Number(String),
    Identifier(String),
    Operator(Op),
}

/// An expression in the expression language.
#[derive(Debug, PartialEq)]
enum Expression {
    /// A reference to a variable.
    Var(String),
    /// A literal number.
    Number(u32),
    /// A binary operation.
    Operation(Box<Expression>, Op, Box<Expression>),
}

fn tokenize(input: &str) -> Tokenizer {
    return Tokenizer(input.chars().peekable());
}

struct Tokenizer<'a>(Peekable<Chars<'a>>);

impl<'a> Iterator for Tokenizer<'a> {
    type Item = Token;

    fn next(&mut self) -> Option<Token> {
        let c = self.0.next()?;
        match c {
            '0'..='9' => {
                let mut num = String::from(c);
                while let Some(c @ '0'..='9') = self.0.peek() {
                    num.push(*c);
                    self.0.next();
                }
                Some(Token::Number(num))
            }
            'a'..='z' => {
                let mut ident = String::from(c);
                while let Some(c @ ('a'..='z' | '_' | '0'..='9')) = self.0.peek() {
                    ident.push(*c);
                    self.0.next();
                }
                Some(Token::Identifier(ident))
            }
            '+' => Some(Token::Operator(Op::Add)),
            '-' => Some(Token::Operator(Op::Sub)),
            _ => panic!("Unexpected character {c}"),
        }
    }
}

fn parse(input: &str) -> Expression {
    let mut tokens = tokenize(input);

    fn parse_expr<'a>(tokens: &mut Tokenizer<'a>) -> Expression {
        let Some(tok) = tokens.next() else {
            panic!("Unexpected end of input");
        };
        let expr = match tok {
            Token::Number(num) => {
                let v = num.parse().expect("Invalid 32-bit integer'");
                Expression::Number(v)
            }
            Token::Identifier(ident) => Expression::Var(ident),
            Token::Operator(_) => panic!("Unexpected token {tok:?}"),
        };
        // Look ahead to parse a binary operation if present.
        match tokens.next() {
            None => expr,
            Some(Token::Operator(op)) => Expression::Operation(
                Box::new(expr),
                op,
                Box::new(parse_expr(tokens)),
            ),
            Some(tok) => panic!("Unexpected token {tok:?}"),
        }
    }

    parse_expr(&mut tokens)
}

fn main() {
    let expr = parse("10+foo+20-30");
    println!("{expr:?}");
}
解答
use thiserror::Error;
use std::iter::Peekable;
use std::str::Chars;

/// An arithmetic operator.
#[derive(Debug, PartialEq, Clone, Copy)]
enum Op {
    Add,
    Sub,
}

/// A token in the expression language.
#[derive(Debug, PartialEq)]
enum Token {
    Number(String),
    Identifier(String),
    Operator(Op),
}

/// An expression in the expression language.
#[derive(Debug, PartialEq)]
enum Expression {
    /// A reference to a variable.
    Var(String),
    /// A literal number.
    Number(u32),
    /// A binary operation.
    Operation(Box<Expression>, Op, Box<Expression>),
}

fn tokenize(input: &str) -> Tokenizer {
    return Tokenizer(input.chars().peekable());
}

#[derive(Debug, Error)]
enum TokenizerError {
    #[error("Unexpected character '{0}' in input")]
    UnexpectedCharacter(char),
}

struct Tokenizer<'a>(Peekable<Chars<'a>>);

impl<'a> Iterator for Tokenizer<'a> {
    type Item = Result<Token, TokenizerError>;

    fn next(&mut self) -> Option<Result<Token, TokenizerError>> {
        let c = self.0.next()?;
        match c {
            '0'..='9' => {
                let mut num = String::from(c);
                while let Some(c @ '0'..='9') = self.0.peek() {
                    num.push(*c);
                    self.0.next();
                }
                Some(Ok(Token::Number(num)))
            }
            'a'..='z' => {
                let mut ident = String::from(c);
                while let Some(c @ ('a'..='z' | '_' | '0'..='9')) = self.0.peek() {
                    ident.push(*c);
                    self.0.next();
                }
                Some(Ok(Token::Identifier(ident)))
            }
            '+' => Some(Ok(Token::Operator(Op::Add))),
            '-' => Some(Ok(Token::Operator(Op::Sub))),
            _ => Some(Err(TokenizerError::UnexpectedCharacter(c))),
        }
    }
}

#[derive(Debug, Error)]
enum ParserError {
    #[error("Tokenizer error: {0}")]
    TokenizerError(#[from] TokenizerError),
    #[error("Unexpected end of input")]
    UnexpectedEOF,
    #[error("Unexpected token {0:?}")]
    UnexpectedToken(Token),
    #[error("Invalid number")]
    InvalidNumber(#[from] std::num::ParseIntError),
}

fn parse(input: &str) -> Result<Expression, ParserError> {
    let mut tokens = tokenize(input);

    fn parse_expr<'a>(
        tokens: &mut Tokenizer<'a>,
    ) -> Result<Expression, ParserError> {
        let tok = tokens.next().ok_or(ParserError::UnexpectedEOF)??;
        let expr = match tok {
            Token::Number(num) => {
                let v = num.parse()?;
                Expression::Number(v)
            }
            Token::Identifier(ident) => Expression::Var(ident),
            Token::Operator(_) => return Err(ParserError::UnexpectedToken(tok)),
        };
        // Look ahead to parse a binary operation if present.
        Ok(match tokens.next() {
            None => expr,
            Some(Ok(Token::Operator(op))) => Expression::Operation(
                Box::new(expr),
                op,
                Box::new(parse_expr(tokens)?),
            ),
            Some(Err(e)) => return Err(e.into()),
            Some(Ok(tok)) => return Err(ParserError::UnexpectedToken(tok)),
        })
    }

    parse_expr(&mut tokens)
}

fn main() -> anyhow::Result<()> {
    let expr = parse("10+foo+20-30")?;
    println!("{expr:?}");
    Ok(())
}
不安全 Rust
This segment should take about 1 hour and 5 minutes. It contains:
| Slide | Duration |
|---|---|
| Unsafe | 5 minutes |
| 解引用裸指针 | 10 minutes |
| 可变的静态变量 | 5 minutes |
| 联合体 | 5 minutes |
| Unsafe 函数 | 5 minutes |
| Unsafe 特征 | 5 minutes |
| 练习:FFI 封装容器 | 30 minutes |
不安全 Rust
Rust 语言包含两个部分:
- **安全 Rust:**内存安全,没有潜在的未定义行为。
- **不安全 Rust:**如果违反了前提条件,可能会触发未定义的行为。
We saw mostly safe Rust in this course, but it’s important to know what Unsafe Rust is.
不安全的代码通常内容很少而且与其他代码隔离, 其正确性也应得到仔细记录。这类代码通常封装在安全的抽象层中。
不安全 Rust 提供了五种新功能:
- 解引用原始指针。
- 访问或修改可变的静态变量。
- 访问
union字段。 - 调用
unsafe函数,包括extern函数。 - 实现
unsafetrait。
下面,我们将简要介绍这些不安全功能。如需了解完整详情,请参阅 《Rust 手册》第 19.1 章 和 Rustonomicon。
Unsafe Rust does not mean the code is incorrect. It means that developers have turned off some compiler safety features and have to write correct code by themselves. It means the compiler no longer enforces Rust’s memory-safety rules.
解引用裸指针
创建指针是安全的操作,但解引用指针需要使用 unsafe 方法:
fn main() {
    let mut s = String::from("careful!");

    let r1 = &mut s as *mut String;
    let r2 = r1 as *const String;

    // SAFETY: r1 and r2 were obtained from references and so are guaranteed to
    // be non-null and properly aligned, the objects underlying the references
    // from which they were obtained are live throughout the whole unsafe
    // block, and they are not accessed either through the references or
    // concurrently through any other pointers.
    unsafe {
        println!("r1 is: {}", *r1);
        *r1 = String::from("uhoh");
        println!("r2 is: {}", *r2);
    }

    // NOT SAFE. DO NOT DO THIS.
    /*
    let r3: &String = unsafe { &*r1 };
    drop(s);
    println!("r3 is: {}", *r3);
    */
}我们建议(而且 Android Rust 样式指南要求)为每个 unsafe 代码块编写一条注释, 说明该代码块中的代码如何满足其所执行的不安全操作的 安全要求。
对于指针解除引用,这意味着指针必须为 valid,即:
- 指针必须为非 null。
- 指针必须是 dereferenceable(在单个已分配对象的边界内)。
- 对象不得已取消分配。
- 不得并发访问相同位置。
- 如果通过转换引用类型来获取指针,则底层对象必须处于活跃状态, 而且不得使用任何引用来访问内存。
在大多数情况下,指针还必须正确对齐。
The “NOT SAFE” section gives an example of a common kind of UB bug: *r1 has the 'static lifetime, so r3 has type &'static String, and thus outlives s. Creating a reference from a pointer requires great care.
可变的静态变量
读取不可变的静态变量是安全的操作:
static HELLO_WORLD: &str = "Hello, world!";

fn main() {
    println!("HELLO_WORLD: {HELLO_WORLD}");
}
但是,读取和写入可变的静态变量是不安全的,因为这可能会 造成数据争用:
static mut COUNTER: u32 = 0;

fn add_to_counter(inc: u32) {
    // SAFETY: There are no other threads which could be accessing `COUNTER`.
    unsafe {
        COUNTER += inc;
    }
}

fn main() {
    add_to_counter(42);

    // SAFETY: There are no other threads which could be accessing `COUNTER`.
    unsafe {
        println!("COUNTER: {COUNTER}");
    }
}-
此处的程序是安全的,因为它是单线程的。不过,Rust 编译器比较保守,会做出最坏的假设。请尝试移除
unsafe,看看编译器如何解释从多个线程中修改静态变量是一种未定义的行为。 -
通常,我们不建议使用可变的静态变量,但在某些情况下,在低层级
no_std代码中可能需要这样做, 例如实现堆分配器或使用某些 C API。
联合体
联合体与枚举类似,但您需要自行跟踪活跃字段:
#[repr(C)]
union MyUnion {
    i: u8,
    b: bool,
}

fn main() {
    let u = MyUnion { i: 42 };
    println!("int: {}", unsafe { u.i });
    println!("bool: {}", unsafe { u.b }); // Undefined behavior!
}在 Rust 中很少需要用到联合体,因为您通常可以使用枚举。联合体只是偶尔用于 与 C 库 API 进行交互。
如果您只是想将字节重新解释为其他类型,则可能需要使用 std::mem::transmute 或 安全的封装容器,例如 zerocopy crate。
Unsafe 函数
调用 Unsafe 函数
如果函数或方法具有额外的前提条件,您必须遵守这些前提条件来避免未定义的行为, 则可以将该函数或方法标记为 unsafe:
extern "C" {
    fn abs(input: i32) -> i32;
}

fn main() {
    let emojis = "🗻∈🌏";

    // SAFETY: The indices are in the correct order, within the bounds of the
    // string slice, and lie on UTF-8 sequence boundaries.
    unsafe {
        println!("emoji: {}", emojis.get_unchecked(0..4));
        println!("emoji: {}", emojis.get_unchecked(4..7));
        println!("emoji: {}", emojis.get_unchecked(7..11));
    }

    println!("char count: {}", count_chars(unsafe { emojis.get_unchecked(0..7) }));

    // SAFETY: `abs` doesn't deal with pointers and doesn't have any safety
    // requirements.
    unsafe {
        println!("Absolute value of -3 according to C: {}", abs(-3));
    }

    // Not upholding the UTF-8 encoding requirement breaks memory safety!
    // println!("emoji: {}", unsafe { emojis.get_unchecked(0..3) });
    // println!("char count: {}", count_chars(unsafe {
    // emojis.get_unchecked(0..3) }));
}

fn count_chars(s: &str) -> usize {
    s.chars().count()
}
编写 Unsafe 函数
如果您自己编写的函数需要满足特定条件以避免未定义的行为, 您可以将这些函数标记为 unsafe。
/// Swaps the values pointed to by the given pointers.
///
/// # Safety
///
/// The pointers must be valid and properly aligned.
unsafe fn swap(a: *mut u8, b: *mut u8) {
    let temp = *a;
    *a = *b;
    *b = temp;
}

fn main() {
    let mut a = 42;
    let mut b = 66;

    // SAFETY: ...
    unsafe {
        swap(&mut a, &mut b);
    }

    println!("a = {}, b = {}", a, b);
}调用 Unsafe 函数
get_unchecked, like most _unchecked functions, is unsafe, because it can create UB if the range is incorrect. abs is incorrect for a different reason: it is an external function (FFI). Calling external functions is usually only a problem when those functions do things with pointers which might violate Rust’s memory model, but in general any C function might have undefined behaviour under any arbitrary circumstances.
本例中的“C”是 ABI;也可以使用其他 ABI。
编写 Unsafe 函数
We wouldn’t actually use pointers for a swap function - it can be done safely with references.
Note that unsafe code is allowed within an unsafe function without an unsafe block. We can prohibit this with #[deny(unsafe_op_in_unsafe_fn)]. Try adding it and see what happens. This will likely change in a future Rust edition.
实现 Unsafe Trait
与函数一样,如果您在实现某个 trait 时必须保证特定条件来避免未定义的行为, 您也可以将该 trait 标记为 unsafe。
例如,zerocopy crate 包含一个不安全的 trait, 大致内容是这样的:
use std::mem::size_of_val;
use std::slice;

/// ...
/// # Safety
/// The type must have a defined representation and no padding.
pub unsafe trait AsBytes {
    fn as_bytes(&self) -> &[u8] {
        unsafe {
            slice::from_raw_parts(
                self as *const Self as *const u8,
                size_of_val(self),
            )
        }
    }
}

// SAFETY: `u32` has a defined representation and no padding.
unsafe impl AsBytes for u32 {}在 Rustdoc 中有关 trait 的章节下,有一个标题为 # 安全 的部分介绍了 安全实现 trait 的要求。
实际上,与 AsBytes 相关的安全说明远比这里展示的更详尽、更复杂。
内置的 Send 和 Sync trait 都是不安全的。
安全 FFI 封装容器
Rust 为通过 外部函数接口 (FFI) 调用函数提供了出色的支持。我们将使用它为 libc 函数构建一个安全封装容器,用于从 C 代码中读取目录中的文件名称。
建议您参考以下手册页面:
您还需要浏览“std::ffi”模块。在下方,您会发现完成这个练习所需的多种字符串类型:
| 类型 | 编码 | 使用 |
|---|---|---|
| “str”和“String” | UTF-8 | 用 Rust 进行文本处理 |
| “CStr”和“CString” | 以空字符结尾 | 与 C 函数通信 |
| “OsStr”和“OsString” | 特定于操作系统 | 与操作系统通信 |
您将在以下所有类型之间进行转换:
- 将
&str转换为CString:您需要为尾随\0字符分配空格, - 将
CString转换为\*const i8:您需要一个指针来调用 C 函数, - 将
\*const i8转换为&CStr:您需要一些能够找到尾随\0字符的内容, &CStrto&[u8]: a slice of bytes is the universal interface for “some unknown data”,- 将
&\[u8\]转换为&OsStr:&OsStr是向OsString迈进的一步,请使用OsStrExt来创建它, - 将“&OsStr”转换为“OsString”:您需要克隆“&OsStr”中的数据,以便能够返回它并再次调用“readdir”。
秘典 中也有一个关于 FFI 的非常实用的章节。
将以下代码复制到 https://play.rust-lang.org/,并填入缺少的函数和方法:
// TODO: remove this when you're done with your implementation.
#![allow(unused_imports, unused_variables, dead_code)]

mod ffi {
    use std::os::raw::{c_char, c_int};
    #[cfg(not(target_os = "macos"))]
    use std::os::raw::{c_long, c_uchar, c_ulong, c_ushort};

    // Opaque type. See https://doc.rust-lang.org/nomicon/ffi.html.
    #[repr(C)]
    pub struct DIR {
        _data: [u8; 0],
        _marker: core::marker::PhantomData<(*mut u8, core::marker::PhantomPinned)>,
    }

    // Layout according to the Linux man page for readdir(3), where ino_t and
    // off_t are resolved according to the definitions in
    // /usr/include/x86_64-linux-gnu/{sys/types.h, bits/typesizes.h}.
    #[cfg(not(target_os = "macos"))]
    #[repr(C)]
    pub struct dirent {
        pub d_ino: c_ulong,
        pub d_off: c_long,
        pub d_reclen: c_ushort,
        pub d_type: c_uchar,
        pub d_name: [c_char; 256],
    }

    // Layout according to the macOS man page for dir(5).
    #[cfg(all(target_os = "macos"))]
    #[repr(C)]
    pub struct dirent {
        pub d_fileno: u64,
        pub d_seekoff: u64,
        pub d_reclen: u16,
        pub d_namlen: u16,
        pub d_type: u8,
        pub d_name: [c_char; 1024],
    }

    extern "C" {
        pub fn opendir(s: *const c_char) -> *mut DIR;

        #[cfg(not(all(target_os = "macos", target_arch = "x86_64")))]
        pub fn readdir(s: *mut DIR) -> *const dirent;

        // See https://github.com/rust-lang/libc/issues/414 and the section on
        // _DARWIN_FEATURE_64_BIT_INODE in the macOS man page for stat(2).
        //
        // "Platforms that existed before these updates were available" refers
        // to macOS (as opposed to iOS / wearOS / etc.) on Intel and PowerPC.
        #[cfg(all(target_os = "macos", target_arch = "x86_64"))]
        #[link_name = "readdir$INODE64"]
        pub fn readdir(s: *mut DIR) -> *const dirent;

        pub fn closedir(s: *mut DIR) -> c_int;
    }
}

use std::ffi::{CStr, CString, OsStr, OsString};
use std::os::unix::ffi::OsStrExt;

#[derive(Debug)]
struct DirectoryIterator {
    path: CString,
    dir: *mut ffi::DIR,
}

impl DirectoryIterator {
    fn new(path: &str) -> Result<DirectoryIterator, String> {
        // Call opendir and return a Ok value if that worked,
        // otherwise return Err with a message.
        unimplemented!()
    }
}

impl Iterator for DirectoryIterator {
    type Item = OsString;
    fn next(&mut self) -> Option<OsString> {
        // Keep calling readdir until we get a NULL pointer back.
        unimplemented!()
    }
}

impl Drop for DirectoryIterator {
    fn drop(&mut self) {
        // Call closedir as needed.
        unimplemented!()
    }
}

fn main() -> Result<(), String> {
    let iter = DirectoryIterator::new(".")?;
    println!("files: {:#?}", iter.collect::<Vec<_>>());
    Ok(())
}
解答
mod ffi {
    use std::os::raw::{c_char, c_int};
    #[cfg(not(target_os = "macos"))]
    use std::os::raw::{c_long, c_uchar, c_ulong, c_ushort};

    // Opaque type. See https://doc.rust-lang.org/nomicon/ffi.html.
    #[repr(C)]
    pub struct DIR {
        _data: [u8; 0],
        _marker: core::marker::PhantomData<(*mut u8, core::marker::PhantomPinned)>,
    }

    // Layout according to the Linux man page for readdir(3), where ino_t and
    // off_t are resolved according to the definitions in
    // /usr/include/x86_64-linux-gnu/{sys/types.h, bits/typesizes.h}.
    #[cfg(not(target_os = "macos"))]
    #[repr(C)]
    pub struct dirent {
        pub d_ino: c_ulong,
        pub d_off: c_long,
        pub d_reclen: c_ushort,
        pub d_type: c_uchar,
        pub d_name: [c_char; 256],
    }

    // Layout according to the macOS man page for dir(5).
    #[cfg(all(target_os = "macos"))]
    #[repr(C)]
    pub struct dirent {
        pub d_fileno: u64,
        pub d_seekoff: u64,
        pub d_reclen: u16,
        pub d_namlen: u16,
        pub d_type: u8,
        pub d_name: [c_char; 1024],
    }

    extern "C" {
        pub fn opendir(s: *const c_char) -> *mut DIR;

        #[cfg(not(all(target_os = "macos", target_arch = "x86_64")))]
        pub fn readdir(s: *mut DIR) -> *const dirent;

        // See https://github.com/rust-lang/libc/issues/414 and the section on
        // _DARWIN_FEATURE_64_BIT_INODE in the macOS man page for stat(2).
        //
        // "Platforms that existed before these updates were available" refers
        // to macOS (as opposed to iOS / wearOS / etc.) on Intel and PowerPC.
        #[cfg(all(target_os = "macos", target_arch = "x86_64"))]
        #[link_name = "readdir$INODE64"]
        pub fn readdir(s: *mut DIR) -> *const dirent;

        pub fn closedir(s: *mut DIR) -> c_int;
    }
}

use std::ffi::{CStr, CString, OsStr, OsString};
use std::os::unix::ffi::OsStrExt;

#[derive(Debug)]
struct DirectoryIterator {
    path: CString,
    dir: *mut ffi::DIR,
}

impl DirectoryIterator {
    fn new(path: &str) -> Result<DirectoryIterator, String> {
        // Call opendir and return a Ok value if that worked,
        // otherwise return Err with a message.
        let path =
            CString::new(path).map_err(|err| format!("Invalid path: {err}"))?;
        // SAFETY: path.as_ptr() cannot be NULL.
        let dir = unsafe { ffi::opendir(path.as_ptr()) };
        if dir.is_null() {
            Err(format!("Could not open {:?}", path))
        } else {
            Ok(DirectoryIterator { path, dir })
        }
    }
}

impl Iterator for DirectoryIterator {
    type Item = OsString;
    fn next(&mut self) -> Option<OsString> {
        // Keep calling readdir until we get a NULL pointer back.
        // SAFETY: self.dir is never NULL.
        let dirent = unsafe { ffi::readdir(self.dir) };
        if dirent.is_null() {
            // We have reached the end of the directory.
            return None;
        }
        // SAFETY: dirent is not NULL and dirent.d_name is NUL
        // terminated.
        let d_name = unsafe { CStr::from_ptr((*dirent).d_name.as_ptr()) };
        let os_str = OsStr::from_bytes(d_name.to_bytes());
        Some(os_str.to_owned())
    }
}

impl Drop for DirectoryIterator {
    fn drop(&mut self) {
        // Call closedir as needed.
        if !self.dir.is_null() {
            // SAFETY: self.dir is not NULL.
            if unsafe { ffi::closedir(self.dir) } != 0 {
                panic!("Could not close {:?}", self.path);
            }
        }
    }
}

fn main() -> Result<(), String> {
    let iter = DirectoryIterator::new(".")?;
    println!("files: {:#?}", iter.collect::<Vec<_>>());
    Ok(())
}

#[cfg(test)]
mod tests {
    use super::*;
    use std::error::Error;

    #[test]
    fn test_nonexisting_directory() {
        let iter = DirectoryIterator::new("no-such-directory");
        assert!(iter.is_err());
    }

    #[test]
    fn test_empty_directory() -> Result<(), Box<dyn Error>> {
        let tmp = tempfile::TempDir::new()?;
        let iter = DirectoryIterator::new(
            tmp.path().to_str().ok_or("Non UTF-8 character in path")?,
        )?;
        let mut entries = iter.collect::<Vec<_>>();
        entries.sort();
        assert_eq!(entries, &[".", ".."]);
        Ok(())
    }

    #[test]
    fn test_nonempty_directory() -> Result<(), Box<dyn Error>> {
        let tmp = tempfile::TempDir::new()?;
        std::fs::write(tmp.path().join("foo.txt"), "The Foo Diaries\n")?;
        std::fs::write(tmp.path().join("bar.png"), "<PNG>\n")?;
        std::fs::write(tmp.path().join("crab.rs"), "//! Crab\n")?;
        let iter = DirectoryIterator::new(
            tmp.path().to_str().ok_or("Non UTF-8 character in path")?,
        )?;
        let mut entries = iter.collect::<Vec<_>>();
        entries.sort();
        assert_eq!(entries, &[".", "..", "bar.png", "crab.rs", "foo.txt"]);
        Ok(())
    }
}
欢迎来到Android 中的Rust
Rust is supported for system software on Android. This means that you can write new services, libraries, drivers or even firmware in Rust (or improve existing code as needed).
今天我们会尝试在你自己的项目中调用Rust。 所以试着在你的代码中找一小段来改成Rust。 代码中越少依赖(dependencies),越少“独特”的类型,越好。比如 一段解析原始字符的代码就很理想。
鉴于 Android 中越来越多地使用 Rust,演讲者可能会提到以下任何一项:
-
服务示例:DNS-over-HTTP
-
内核驱动程序:Binder
-
固件:pKVM 固件
设置
We will be using a Cuttlefish Android Virtual Device to test our code. Make sure you have access to one or create a new one with:
source build/envsetup.sh
lunch aosp_cf_x86_64_phone-trunk_staging-userdebug
acloud create
更多细节请参考 Android Developer Codelab.
关键点:
-
Cuttlefish is a reference Android device designed to work on generic Linux desktops. MacOS support is also planned.
-
Cuttlefish 系统映像会保持媲美真实设备的高保真度,是运行许多 Rust 用例的理想模拟器。
构建规则
Android 构建系统(Soong)通过一系列模块来支持Rust:
| Module Type | 描述 |
|---|---|
rust_binary | Produces a Rust binary. |
rust_library | 生成一个 Rust 库,并提供 rlib 和 dylib 两种变体。 |
rust_ffi | 生成一个可由 cc 模块使用的 Rust C 库,并提供静态和共享两种变体。 |
rust_proc_macro | 生成“proc-macro”Rust 库。这些宏与编译器插件类似。 |
rust_test | 生成使用标准 Rust 测试框架的 Rust 测试二进制文件。 |
rust_fuzz | 生成使用 libfuzzer 的 Rust 模糊测试二进制文件。 |
rust_protobuf | 生成源代码并生成为特定 protobuf 提供接口的 Rust 库。 |
rust_bindgen | 生成源代码并生成包含 Rust 绑定到 C 库的 Rust 库。 |
下面我们来看看 rust_binary 和 rust_library。
演讲者可能会提及其他内容:
-
Cargo 未针对多语言代码库进行优化,并且从互联网下载软件包。
-
For compliance and performance, Android must have crates in-tree. It must also interop with C/C++/Java code. Soong fills that gap.
-
Soong 与 Bazel 有许多相似之处,后者是 Blaze 的开源变体(在 google3 中使用)。
-
对所有 Rust 操作系统开发者而言,了解类似 Bazel 的构建规都很有用。
-
趣味小知识:《星际迷航》中的数据是 Soong 类型的 Android。
Rust 二进制文件
让我们从一个简单的应用程序开始。在 AOSP 签出的根目录下,创建以下文件:
hello_rust/Android.bp:
rust_binary {
    name: "hello_rust",
    crate_name: "hello_rust",
    srcs: ["src/main.rs"],
}
hello_rust/src/main.rs:
//! Rust demo.

/// Prints a greeting to standard output.
fn main() {
    println!("Hello from Rust!");
}
你现在可以构建、推送和运行二进制文件:
m hello_rust
adb push "$ANDROID_PRODUCT_OUT/system/bin/hello_rust" /data/local/tmp
adb shell /data/local/tmp/hello_rust
Hello from Rust!
Rust 库
您可以使用 rust_library 为 Android 创建一个新的 Rust 库。
在这里,我们声明了对两个库的依赖:
libgreeting, 我们在下面进行了定义,libtextwrap, 一个已经在external/rust/crates/中提供的 crate。
hello_rust/Android.bp:
rust_binary {
    name: "hello_rust_with_dep",
    crate_name: "hello_rust_with_dep",
    srcs: ["src/main.rs"],
    rustlibs: [
        "libgreetings",
        "libtextwrap",
    ],
    prefer_rlib: true, // Need this to avoid dynamic link error.
}

rust_library {
    name: "libgreetings",
    crate_name: "greetings",
    srcs: ["src/lib.rs"],
}
hello_rust/src/main.rs:
//! Rust demo.

use greetings::greeting;
use textwrap::fill;

/// Prints a greeting to standard output.
fn main() {
    println!("{}", fill(&greeting("Bob"), 24));
}hello_rust/src/lib.rs:
//! Greeting library.

/// Greet `name`.
pub fn greeting(name: &str) -> String {
    format!("Hello {name}, it is very nice to meet you!")
}
您可以像之前一样构建、推送和运行二进制文件:
m hello_rust_with_dep
adb push "$ANDROID_PRODUCT_OUT/system/bin/hello_rust_with_dep" /data/local/tmp
adb shell /data/local/tmp/hello_rust_with_dep
Hello Bob, it is very
nice to meet you!
AIDL
Rust 支持 Android 接口定义语言 (AIDL):
- Rust 代码可以调用现有的 AIDL 服务器,
- 您可以在 Rust 中创建新的 AIDL 服务器。
/** Birthday service interface. */
To illustrate how to use Rust with Binder, we’re going to walk through the process of creating a Binder interface. We’re then going to both implement the described service and write client code that talks to that service.
AIDL 接口
您可以使用 AIDL 接口声明您的服务的 API:
birthday_service/aidl/com/example/birthdayservice/IBirthdayService.aidl:
/** Birthday service interface. */
interface IBirthdayService {
    /** Generate a Happy Birthday message. */
    String wishHappyBirthday(String name, int years);
}
birthday_service/aidl/Android.bp:
aidl_interface {
    name: "com.example.birthdayservice",
    srcs: ["com/example/birthdayservice/*.aidl"],
    unstable: true,
    backend: {
        rust: { // Rust is not enabled by default
            enabled: true,
        },
    },
}
- Note that the directory structure under the
aidl/directory needs to match the package name used in the AIDL file, i.e. the package iscom.example.birthdayserviceand the file is ataidl/com/example/IBirthdayService.aidl.
Generated Service API
Binder generates a trait corresponding to the interface definition. trait to talk to the service.
birthday_service/aidl/com/example/birthdayservice/IBirthdayService.aidl:
/** Birthday service interface. */
interface IBirthdayService {
    /** Generate a Happy Birthday message. */
    String wishHappyBirthday(String name, int years);
}
Generated trait:
trait IBirthdayService {
    fn wishHappyBirthday(&self, name: &str, years: i32) -> binder::Result<String>;
}
Your service will need to implement this trait, and your client will use this trait to talk to the service.
- The generated bindings can be found at
out/soong/.intermediates/<path to module>/. - Point out how the generated function signature, specifically the argument and return types, correspond the interface definition.
Stringfor an argument results in a different Rust type thanStringas a return type.
服务实现
我们现在可以实现AIDL服务:
birthday_service/src/lib.rs:
use com_example_birthdayservice::aidl::com::example::birthdayservice::IBirthdayService::IBirthdayService;
use com_example_birthdayservice::binder;

/// The `IBirthdayService` implementation.
pub struct BirthdayService;

impl binder::Interface for BirthdayService {}

impl IBirthdayService for BirthdayService {
    fn wishHappyBirthday(&self, name: &str, years: i32) -> binder::Result<String> {
        Ok(format!("Happy Birthday {name}, congratulations with the {years} years!"))
    }
}birthday_service/Android.bp:
rust_library {
    name: "libbirthdayservice",
    srcs: ["src/lib.rs"],
    crate_name: "birthdayservice",
    rustlibs: [
        "com.example.birthdayservice-rust",
        "libbinder_rs",
    ],
}
- Point out the path to the generated
IBirthdayServicetrait, and explain why each of the segments is necessary. - TODO: What does the
binder::Interfacetrait do? Are there methods to override? Where source?
AIDL 服务器
最后,我们可以创建一个暴露服务的服务器:
birthday_service/src/server.rs:
//! Birthday service.
use birthdayservice::BirthdayService;
use com_example_birthdayservice::aidl::com::example::birthdayservice::IBirthdayService::BnBirthdayService;
use com_example_birthdayservice::binder;

const SERVICE_IDENTIFIER: &str = "birthdayservice";

/// Entry point for birthday service.
fn main() {
    let birthday_service = BirthdayService;
    let birthday_service_binder = BnBirthdayService::new_binder(
        birthday_service,
        binder::BinderFeatures::default(),
    );
    binder::add_service(SERVICE_IDENTIFIER, birthday_service_binder.as_binder())
        .expect("Failed to register service");
    binder::ProcessState::join_thread_pool()
}birthday_service/Android.bp:
rust_binary {
    name: "birthday_server",
    crate_name: "birthday_server",
    srcs: ["src/server.rs"],
    rustlibs: [
        "com.example.birthdayservice-rust",
        "libbinder_rs",
        "libbirthdayservice",
    ],
    prefer_rlib: true, // To avoid dynamic link error.
}
The process for taking a user-defined service implementation (in this case the BirthdayService type, which implements the IBirthdayService) and starting it as a Binder service has multiple steps, and may appear more complicated than students are used to if they’ve used Binder from C++ or another language. Explain to students why each step is necessary.
- Create an instance of your service type (
BirthdayService). - Wrap the service object in corresponding
Bn*type (BnBirthdayServicein this case). This type is generated by Binder and provides the common Binder functionality that would be provided by theBnBinderbase class in C++. We don’t have inheritance in Rust, so instead we use composition, putting ourBirthdayServicewithin the generatedBnBinderService. - Call
add_service, giving it a service identifier and your service object (theBnBirthdayServiceobject in the example). - Call
join_thread_poolto add the current thread to Binder’s thread pool and start listening for connections.
部署
我们现在可以构建、推送和启动服务:
m birthday_server
adb push "$ANDROID_PRODUCT_OUT/system/bin/birthday_server" /data/local/tmp
adb root
adb shell /data/local/tmp/birthday_server
在另一个终端中,检查该服务是否正在运行:
adb shell service check birthdayservice
Service birthdayservice: found
您还可以使用 service call 命令调用该服务:
adb shell service call birthdayservice 1 s16 Bob i32 24
Result: Parcel(
0x00000000: 00000000 00000036 00610048 00700070 '....6...H.a.p.p.'
0x00000010: 00200079 00690042 00740072 00640068 'y. .B.i.r.t.h.d.'
0x00000020: 00790061 00420020 0062006f 0020002c 'a.y. .B.o.b.,. .'
0x00000030: 006f0063 0067006e 00610072 00750074 'c.o.n.g.r.a.t.u.'
0x00000040: 0061006c 00690074 006e006f 00200073 'l.a.t.i.o.n.s. .'
0x00000050: 00690077 00680074 00740020 00650068 'w.i.t.h. .t.h.e.'
0x00000060: 00320020 00200034 00650079 00720061 ' .2.4. .y.e.a.r.'
0x00000070: 00210073 00000000 's.!..... ')
AIDL 客户端
最后,我们可以为我们的新服务创建一个 Rust 客户端。
birthday_service/src/client.rs:
use com_example_birthdayservice::aidl::com::example::birthdayservice::IBirthdayService::IBirthdayService;
use com_example_birthdayservice::binder;
const SERVICE_IDENTIFIER: &str = "birthdayservice";
/// Call the birthday service.
fn main() -> Result<(), Box<dyn Error>> {
let name = std::env::args().nth(1).unwrap_or_else(|| String::from("Bob"));
let years = std::env::args()
.nth(2)
.and_then(|arg| arg.parse::<i32>().ok())
.unwrap_or(42);
binder::ProcessState::start_thread_pool();
let service = binder::get_interface::<dyn IBirthdayService>(SERVICE_IDENTIFIER)
.map_err(|_| "Failed to connect to BirthdayService")?;
// Call the service.
let msg = service.wishHappyBirthday(&name, years)?;
println!("{msg}");
}birthday_service/Android.bp:
rust_binary {
name: "birthday_client",
crate_name: "birthday_client",
srcs: ["src/client.rs"],
rustlibs: [
"com.example.birthdayservice-rust",
"libbinder_rs",
],
prefer_rlib: true, // To avoid dynamic link error.
}
请注意,客户端不依赖于 libbirthdayservice。
在您的设备上构建、推送并运行客户端:
m birthday_client
adb push "$ANDROID_PRODUCT_OUT/system/bin/birthday_client" /data/local/tmp
adb shell /data/local/tmp/birthday_client Charlie 60
Happy Birthday Charlie, congratulations with the 60 years!
Strong<dyn IBirthdayService>is the trait object representing the service that the client has connected to.Strongis a custom smart pointer type for Binder. It handles both an in-process ref count for the service trait object, and the global Binder ref count that tracks how many processes have a reference to the object.- Note that the trait object that the client uses to talk to the service uses the exact same trait that the server implements. For a given Binder interface, there is a single Rust trait generated that both client and server use.
- Use the same service identifier used when registering the service. This should ideally be defined in a common crate that both the client and server can depend on.
更改 API
让我们扩展API以提供更多功能:我们希望允许客户端指定生日贺卡的行列表:
package com.example.birthdayservice;
/** Birthday service interface. */
interface IBirthdayService {
/** Generate a Happy Birthday message. */
String wishHappyBirthday(String name, int years, in String[] text);
}
This results in an updated trait definition for IBirthdayService:
trait IBirthdayService {
fn wishHappyBirthday(
&self,
name: &str,
years: i32,
text: &[String],
) -> binder::Result<String>;
}- Note how the
String[]in the AIDL definition is translated as a&[String]in Rust, i.e. that idiomatic Rust types are used in the generated bindings wherever possible:inarray arguments are translated to slices.outandinoutargs are translated to&mut Vec<T>.- Return values are translated to returning a
Vec<T>.
Updating Client and Service
Update the client and server code to account for the new API.
birthday_service/src/lib.rs:
impl IBirthdayService for BirthdayService {
fn wishHappyBirthday(
&self,
name: &str,
years: i32,
text: &[String],
) -> binder::Result<String> {
let mut msg = format!(
"Happy Birthday {name}, congratulations with the {years} years!",
);
for line in text {
msg.push('\n');
msg.push_str(line);
}
Ok(msg)
}
}birthday_service/src/client.rs:
let msg = service.wishHappyBirthday(
&name,
years,
&[
String::from("Habby birfday to yuuuuu"),
String::from("And also: many more"),
],
)?;- TODO: Move code snippets into project files where they’ll actually be built?
Working With AIDL Types
AIDL types translate into the appropriate idiomatic Rust type:
- Primitive types map (mostly) to idiomatic Rust types.
- Collection types like slices,
Vecs and string types are supported. - References to AIDL objects and file handles can be sent between clients and services.
- File handles and parcelables are fully supported.
Primitive Types
Primitive types map (mostly) idiomatically:
| AIDL Type | Rust Type | Note |
|---|---|---|
boolean | bool | |
byte | i8 | Note that bytes are signed. |
char | u16 | Note the usage of u16, NOT u32. |
int | i32 | |
long | i64 | |
float | f32 | |
double | f64 | |
| String | String |
数组(Arrays)
The array types (T[], byte[], and List<T>) get translated to the appropriate Rust array type depending on how they are used in the function signature:
| Position | Rust Type |
|---|---|
in argument | &[T] |
out/inout argument | &mut Vec<T> |
| Return | Vec<T> |
- In Android 13 or higher, fixed-size arrays are supported, i.e.
T[N]becomes[T; N]. Fixed-size arrays can have multiple dimensions (e.g. int[3][4]). In the Java backend, fixed-size arrays are represented as array types. - Arrays in parcelable fields always get translated to
Vec<T>.
特征对象
AIDL objects can be sent either as a concrete AIDL type or as the type-erased IBinder interface:
birthday_service/aidl/com/example/birthdayservice/IBirthdayInfoProvider.aidl:
package com.example.birthdayservice;
interface IBirthdayInfoProvider {
String name();
int years();
}
birthday_service/aidl/com/example/birthdayservice/IBirthdayService.aidl:
import com.example.birthdayservice.IBirthdayInfoProvider;
interface IBirthdayService {
/** The same thing, but using a binder object. */
String wishWithProvider(IBirthdayInfoProvider provider);
/** The same thing, but using `IBinder`. */
String wishWithErasedProvider(IBinder provider);
}
birthday_service/src/client.rs:
/// Rust struct implementing the `IBirthdayInfoProvider` interface.
struct InfoProvider {
name: String,
age: u8,
}
impl binder::Interface for InfoProvider {}
impl IBirthdayInfoProvider for InfoProvider {
fn name(&self) -> binder::Result<String> {
Ok(self.name.clone())
}
fn years(&self) -> binder::Result<i32> {
Ok(self.age as i32)
}
}
fn main() {
binder::ProcessState::start_thread_pool();
let service = connect().expect("Failed to connect to BirthdayService");
// Create a binder object for the `IBirthdayInfoProvider` interface.
let provider = BnBirthdayInfoProvider::new_binder(
InfoProvider { name: name.clone(), age: years as u8 },
BinderFeatures::default(),
);
// Send the binder object to the service.
service.wishWithProvider(&provider)?;
// Perform the same operation but passing the provider as an `SpIBinder`.
service.wishWithErasedProvider(&provider.as_binder())?;
}- Note the usage of
BnBirthdayInfoProvider. This serves the same purpose asBnBirthdayServicethat we saw previously.
变量
Binder for Rust supports sending parcelables directly:
birthday_service/aidl/com/example/birthdayservice/BirthdayInfo.aidl:
package com.example.birthdayservice;
parcelable BirthdayInfo {
String name;
int years;
}
birthday_service/aidl/com/example/birthdayservice/IBirthdayService.aidl:
import com.example.birthdayservice.BirthdayInfo;
interface IBirthdayService {
/** The same thing, but with a parcelable. */
String wishWithInfo(in BirthdayInfo info);
}
birthday_service/src/client.rs:
fn main() {
binder::ProcessState::start_thread_pool();
let service = connect().expect("Failed to connect to BirthdayService");
service.wishWithInfo(&BirthdayInfo { name: name.clone(), years })?;
}Sending Files
Files can be sent between Binder clients/servers using the ParcelFileDescriptor type:
birthday_service/aidl/com/example/birthdayservice/IBirthdayService.aidl:
interface IBirthdayService {
/** The same thing, but loads info from a file. */
String wishFromFile(in ParcelFileDescriptor infoFile);
}
birthday_service/src/client.rs:
fn main() {
binder::ProcessState::start_thread_pool();
let service = connect().expect("Failed to connect to BirthdayService");
// Open a file and put the birthday info in it.
let mut file = File::create("/data/local/tmp/birthday.info").unwrap();
writeln!(file, "{name}")?;
writeln!(file, "{years}")?;
// Create a `ParcelFileDescriptor` from the file and send it.
let file = ParcelFileDescriptor::new(file);
service.wishFromFile(&file)?;
}birthday_service/src/lib.rs:
impl IBirthdayService for BirthdayService {
fn wishFromFile(
&self,
info_file: &ParcelFileDescriptor,
) -> binder::Result<String> {
// Convert the file descriptor to a `File`. `ParcelFileDescriptor` wraps
// an `OwnedFd`, which can be cloned and then used to create a `File`
// object.
let mut info_file = info_file
.as_ref()
.try_clone()
.map(File::from)
.expect("Invalid file handle");
let mut contents = String::new();
info_file.read_to_string(&mut contents).unwrap();
let mut lines = contents.lines();
let name = lines.next().unwrap();
let years: i32 = lines.next().unwrap().parse().unwrap();
Ok(format!("Happy Birthday {name}, congratulations with the {years} years!"))
}
}ParcelFileDescriptorwraps anOwnedFd, and so can be created from aFile(or any other type that wraps anOwnedFd), and can be used to create a newFilehandle on the other side.- Other types of file descriptors can be wrapped and sent, e.g. TCP, UDP, and UNIX sockets.
Testing in Android
Building on Testing, we will now look at how unit tests work in AOSP. Use the rust_test module for your unit tests:
testing/Android.bp:
rust_library {
name: "libleftpad",
crate_name: "leftpad",
srcs: ["src/lib.rs"],
}
rust_test {
name: "libleftpad_test",
crate_name: "leftpad_test",
srcs: ["src/lib.rs"],
host_supported: true,
test_suites: ["general-tests"],
}
testing/src/lib.rs:
#![allow(unused)]
fn main() {
//! Left-padding library.
/// Left-pad `s` to `width`.
pub fn leftpad(s: &str, width: usize) -> String {
format!("{s:>width$}")
}
#[cfg(test)]
mod tests {
use super::*;
#[test]
fn short_string() {
assert_eq!(leftpad("foo", 5), " foo");
}
#[test]
fn long_string() {
assert_eq!(leftpad("foobar", 6), "foobar");
}
}
}You can now run the test with
atest --host libleftpad_test
The output looks like this:
INFO: Elapsed time: 2.666s, Critical Path: 2.40s
INFO: 3 processes: 2 internal, 1 linux-sandbox.
INFO: Build completed successfully, 3 total actions
//comprehensive-rust-android/testing:libleftpad_test_host PASSED in 2.3s
PASSED libleftpad_test.tests::long_string (0.0s)
PASSED libleftpad_test.tests::short_string (0.0s)
Test cases: finished with 2 passing and 0 failing out of 2 test cases
Notice how you only mention the root of the library crate. Tests are found recursively in nested modules.
GoogleTest
The GoogleTest crate allows for flexible test assertions using matchers:
use googletest::prelude::*;
#[googletest::test]
fn test_elements_are() {
let value = vec!["foo", "bar", "baz"];
expect_that!(value, elements_are!(eq("foo"), lt("xyz"), starts_with("b")));
}如果我们将最后一个元素更改为 "!",测试将失败,并会提供详细的错误消息来指出错误的位置:
---- test_elements_are stdout ----
Value of: value
Expected: has elements:
0. is equal to "foo"
1. is less than "xyz"
2. starts with prefix "!"
Actual: ["foo", "bar", "baz"],
where element #2 is "baz", which does not start with "!"
at src/testing/googletest.rs:6:5
Error: See failure output above
-
GoogleTest 不是 Rust Playground 的一部分,因此您需要在本地环境中运行此示例。使用
cargo add googletest快速将其添加到现有 Cargo 项目中。 -
use googletest::prelude::*;行会导入一些 常用的宏和类型。 -
这只是冰山一角,还有很多内置匹配器。
-
A particularly nice feature is that mismatches in multi-line strings are shown as a diff:
#[test]
fn test_multiline_string_diff() {
let haiku = "Memory safety found,\n\
Rust's strong typing guides the way,\n\
Secure code you'll write.";
assert_that!(
haiku,
eq("Memory safety found,\n\
Rust's silly humor guides the way,\n\
Secure code you'll write.")
);
}显示用颜色标识的差异(此处未显示颜色):
Value of: haiku
Expected: is equal to "Memory safety found,\nRust's silly humor guides the way,\nSecure code you'll write."
Actual: "Memory safety found,\nRust's strong typing guides the way,\nSecure code you'll write.",
which isn't equal to "Memory safety found,\nRust's silly humor guides the way,\nSecure code you'll write."
Difference(-actual / +expected):
Memory safety found,
-Rust's strong typing guides the way,
+Rust's silly humor guides the way,
Secure code you'll write.
at src/testing/googletest.rs:17:5
- crate 是 适用于 C++ 的 GoogleTest 的 Rust 移植版。
模拟
对于模拟,Mockall 是一个广泛使用的库。您需要重构代码才能使用 trait,然后便可很快地对其进行模拟:
use std::time::Duration;
#[mockall::automock]
pub trait Pet {
fn is_hungry(&self, since_last_meal: Duration) -> bool;
}
#[test]
fn test_robot_dog() {
let mut mock_dog = MockPet::new();
mock_dog.expect_is_hungry().return_const(true);
assert_eq!(mock_dog.is_hungry(Duration::from_secs(10)), true);
}-
Mockall is the recommended mocking library in Android (AOSP). There are other mocking libraries available on crates.io, in particular in the area of mocking HTTP services. The other mocking libraries work in a similar fashion as Mockall, meaning that they make it easy to get a mock implementation of a given trait.
-
请注意,模拟在某种程度上具有 争议性:借助模拟,您可以将测试与其依赖项完全隔离。最立竿见影的是,测试作业会更快且更稳定。另一方面,模拟对象的配置可能出现错误,并返回与真实依赖项不同的输出。
建议您尽可能使用真实依赖项。例如,许多数据库都支持您配置内存后端。这意味着,您可以在测试中获得正确的功能行为,而且测试速度会很快并会自动清理。
同样,许多 Web 框架都支持您启动进程内服务器,该服务器会绑定到
localhost上的随机端口。相比模拟框架,请始终优先选择这种方式,因为这有助于您在真实环境中测试代码。 -
Mockall 不是 Rust Playground 的一部分,因此您需要在本地环境中运行此示例。使用
cargo add mockall快速将 Mockall 添加到现有 Cargo 项目中。 -
Mockall 具有更多功能。具体而言,您可以设置基于传递参数的预期值。在这里,我们使用该功能来模拟一只猫,它在上次被喂食的 3 小时后会感到饥饿:
#[test]
fn test_robot_cat() {
let mut mock_cat = MockPet::new();
mock_cat
.expect_is_hungry()
.with(mockall::predicate::gt(Duration::from_secs(3 * 3600)))
.return_const(true);
mock_cat.expect_is_hungry().return_const(false);
assert_eq!(mock_cat.is_hungry(Duration::from_secs(1 * 3600)), false);
assert_eq!(mock_cat.is_hungry(Duration::from_secs(5 * 3600)), true);
}- 您可以使用
.times(n)将调用模拟方法的次数限制为n,如果不满足此条件,模拟对象被释放时会自动 panic。
日志记录
你应该使用 log crate 来自动记录日志到 logcat (设备上)或 stdout(主机上):
hello_rust_logs/Android.bp:
rust_binary {
name: "hello_rust_logs",
crate_name: "hello_rust_logs",
srcs: ["src/main.rs"],
rustlibs: [
"liblog_rust",
"liblogger",
],
host_supported: true,
}
hello_rust_logs/src/main.rs:
//! Rust logging demo.
use log::{debug, error, info};
/// Logs a greeting.
fn main() {
logger::init(
logger::Config::default()
.with_tag_on_device("rust")
.with_min_level(log::Level::Trace),
);
debug!("Starting program.");
info!("Things are going fine.");
error!("Something went wrong!");
}在你的设备上构建,推送,并运行二进制文件 :
m hello_rust_logs
adb push "$ANDROID_PRODUCT_OUT/system/bin/hello_rust_logs" /data/local/tmp
adb shell /data/local/tmp/hello_rust_logs
日志将会在 adb logcat 中显示:
adb logcat -s rust
09-08 08:38:32.454 2420 2420 D rust: hello_rust_logs: Starting program.
09-08 08:38:32.454 2420 2420 I rust: hello_rust_logs: Things are going fine.
09-08 08:38:32.454 2420 2420 E rust: hello_rust_logs: Something went wrong!
互操作性
Rust 对于与其他编程语言的互操作性有着出色的支持。这意味着您可以:
- 从其他语言调用 Rust 函数。
- 从 Rust 调用用其他语言编写的函数。
当您从外部语言调用函数时,我们称之为使用 外部函数接口(Foreign Function Interface, FFI)。
与 C 的互操作性
Rust 对使用 C 调用约定链接目标文件提供了完整的支持。同样地,你可以导出 Rust 函数并从 C 中调用它们。
如果你愿意的话,你可以手工完成它:
extern "C" {
fn abs(x: i32) -> i32;
}
fn main() {
let x = -42;
// SAFETY: `abs` doesn't have any safety requirements.
let abs_x = unsafe { abs(x) };
println!("{x}, {abs_x}");
}我们已经在安全 FFI 封装容器练习中看到了这个例子。
这假设对目标平台拥有充分的了解,不建议用于生产环境。
接下来我们将探讨更好的选择。
使用 Bindgen
bindgen 工具可以自动生成 C 头文件的绑定代码。
首先创建一个小型的 C 语言库:
interoperability/bindgen/libbirthday.h:
typedef struct card {
const char* name;
int years;
} card;
void print_card(const card* card);
interoperability/bindgen/libbirthday.c:
#include <stdio.h>
#include "libbirthday.h"
void print_card(const card* card) {
printf("+--------------\n");
printf("| Happy Birthday %s!\n", card->name);
printf("| Congratulations with the %i years!\n", card->years);
printf("+--------------\n");
}
将该库添加到你的 Android.bp 文件中:
interoperability/bindgen/Android.bp:
cc_library {
name: "libbirthday",
srcs: ["libbirthday.c"],
}
为该库创建一个包装头文件(在此示例中不是必需的):
interoperability/bindgen/libbirthday_wrapper.h:
#include "libbirthday.h"
您现在可以自动生成绑定代码:
interoperability/bindgen/Android.bp:
rust_bindgen {
name: "libbirthday_bindgen",
crate_name: "birthday_bindgen",
wrapper_src: "libbirthday_wrapper.h",
source_stem: "bindings",
static_libs: ["libbirthday"],
}
最后,我们可以在 Rust 程序中使用这些绑定:
interoperability/bindgen/Android.bp:
rust_binary {
name: "print_birthday_card",
srcs: ["main.rs"],
rustlibs: ["libbirthday_bindgen"],
}
interoperability/bindgen/main.rs:
//! Bindgen demo.
use birthday_bindgen::{card, print_card};
fn main() {
let name = std::ffi::CString::new("Peter").unwrap();
let card = card { name: name.as_ptr(), years: 42 };
// SAFETY: The pointer we pass is valid because it came from a Rust
// reference, and the `name` it contains refers to `name` above which also
// remains valid. `print_card` doesn't store either pointer to use later
// after it returns.
unsafe {
print_card(&card as *const card);
}
}在你的设备上构建,推送,并运行二进制文件 :
m print_birthday_card
adb push "$ANDROID_PRODUCT_OUT/system/bin/print_birthday_card" /data/local/tmp
adb shell /data/local/tmp/print_birthday_card
最后,我们可以运行自动生成的测试来确保绑定代码正常工作:
interoperability/bindgen/Android.bp:
rust_test {
name: "libbirthday_bindgen_test",
srcs: [":libbirthday_bindgen"],
crate_name: "libbirthday_bindgen_test",
test_suites: ["general-tests"],
auto_gen_config: true,
clippy_lints: "none", // Generated file, skip linting
lints: "none",
}
atest libbirthday_bindgen_test
调用 Rust
将 Rust 函数和类型导出到 C 很简单:
interoperability/rust/libanalyze/analyze.rs
//! Rust FFI demo.
#![deny(improper_ctypes_definitions)]
use std::os::raw::c_int;
/// Analyze the numbers.
#[no_mangle]
pub extern "C" fn analyze_numbers(x: c_int, y: c_int) {
if x < y {
println!("x ({x}) is smallest!");
} else {
println!("y ({y}) is probably larger than x ({x})");
}
}interoperability/rust/libanalyze/analyze.h
#ifndef ANALYSE_H
#define ANALYSE_H
extern "C" {
void analyze_numbers(int x, int y);
}
#endif
interoperability/rust/libanalyze/Android.bp
rust_ffi {
name: "libanalyze_ffi",
crate_name: "analyze_ffi",
srcs: ["analyze.rs"],
include_dirs: ["."],
}
我们现在可以从一个 C 二进制文件中调用它:
interoperability/rust/analyze/main.c
#include "analyze.h"
int main() {
analyze_numbers(10, 20);
analyze_numbers(123, 123);
return 0;
}
interoperability/rust/analyze/Android.bp
cc_binary {
name: "analyze_numbers",
srcs: ["main.c"],
static_libs: ["libanalyze_ffi"],
}
在你的设备上构建,推送,并运行二进制文件 :
m analyze_numbers
adb push "$ANDROID_PRODUCT_OUT/system/bin/analyze_numbers" /data/local/tmp
adb shell /data/local/tmp/analyze_numbers
#[no_mangle] 禁用了 Rust 通常的名称重整,因此导出的符号将仅为函数的名称。你还可以使用 #[export_name = "some_name"] 来指定任意你想要的名称。
与 C++ 交互
CXX crate 使得在 Rust 和 C++ 之间进行安全的互操作成为可能。
整体的方法如下:

桥接模块
CXX依赖于提供的函数签名说明,这些签名会在不用语言之间进行交互使用。您可以在带有 #[cxx::bridge] 属性宏注解的 Rust 模块中使用 extern 代码块提供此说明。
#[allow(unsafe_op_in_unsafe_fn)]
#[cxx::bridge(namespace = "org::blobstore")]
mod ffi {
// Shared structs with fields visible to both languages.
struct BlobMetadata {
size: usize,
tags: Vec<String>,
}
// Rust types and signatures exposed to C++.
extern "Rust" {
type MultiBuf;
fn next_chunk(buf: &mut MultiBuf) -> &[u8];
}
// C++ types and signatures exposed to Rust.
unsafe extern "C++" {
include!("include/blobstore.h");
type BlobstoreClient;
fn new_blobstore_client() -> UniquePtr<BlobstoreClient>;
fn put(self: Pin<&mut BlobstoreClient>, parts: &mut MultiBuf) -> u64;
fn tag(self: Pin<&mut BlobstoreClient>, blobid: u64, tag: &str);
fn metadata(&self, blobid: u64) -> BlobMetadata;
}
}- 桥接通常在您的 crate 内的
ffi模块中声明。 - 根据在桥接模块中进行的声明,CXX 将生成匹配的 Rust 和 C++ 类型/函数定义,以便将这些内容公开给这两种语言。
- 如需查看生成的 Rust 代码,请使用 cargo-expand 查看展开后的 proc 宏。对于大多数示例,您可以使用
cargo expand ::ffi来仅展开ffi模块(但这不适用于 Android 项目)。 - 如需查看生成的 C++ 代码,请在
target/cxxbridge中查找。
Rust Bridge Declarations
#[cxx::bridge]
mod ffi {
extern "Rust" {
type MyType; // Opaque type
fn foo(&self); // Method on `MyType`
fn bar() -> Box<MyType>; // Free function
}
}
struct MyType(i32);
impl MyType {
fn foo(&self) {
println!("{}", self.0);
}
}
fn bar() -> Box<MyType> {
Box::new(MyType(123))
}extern "Rust"中声明的内容引用了父级模块中作用域内的内容。- CXX 代码生成器使用
extern "Rust"部分生成包含相应 C++ 声明的 C++ 头文件。生成的头文件与包含桥接的 Rust 源文件的路径相同,但文件扩展名为 .rs.h。
生成的 C++ 代码
#[cxx::bridge]
mod ffi {
// Rust types and signatures exposed to C++.
extern "Rust" {
type MultiBuf;
fn next_chunk(buf: &mut MultiBuf) -> &[u8];
}
}大致生成以下 C++:
struct MultiBuf final : public ::rust::Opaque {
~MultiBuf() = delete;
private:
friend ::rust::layout;
struct layout {
static ::std::size_t size() noexcept;
static ::std::size_t align() noexcept;
};
};
::rust::Slice<::std::uint8_t const> next_chunk(::org::blobstore::MultiBuf &buf) noexcept;
C++ 桥接声明
#[cxx::bridge]
mod ffi {
// C++ types and signatures exposed to Rust.
unsafe extern "C++" {
include!("include/blobstore.h");
type BlobstoreClient;
fn new_blobstore_client() -> UniquePtr<BlobstoreClient>;
fn put(self: Pin<&mut BlobstoreClient>, parts: &mut MultiBuf) -> u64;
fn tag(self: Pin<&mut BlobstoreClient>, blobid: u64, tag: &str);
fn metadata(&self, blobid: u64) -> BlobMetadata;
}
}大致生成以下 Rust:
#[repr(C)]
pub struct BlobstoreClient {
_private: ::cxx::private::Opaque,
}
pub fn new_blobstore_client() -> ::cxx::UniquePtr<BlobstoreClient> {
extern "C" {
#[link_name = "org$blobstore$cxxbridge1$new_blobstore_client"]
fn __new_blobstore_client() -> *mut BlobstoreClient;
}
unsafe { ::cxx::UniquePtr::from_raw(__new_blobstore_client()) }
}
impl BlobstoreClient {
pub fn put(&self, parts: &mut MultiBuf) -> u64 {
extern "C" {
#[link_name = "org$blobstore$cxxbridge1$BlobstoreClient$put"]
fn __put(
_: &BlobstoreClient,
parts: *mut ::cxx::core::ffi::c_void,
) -> u64;
}
unsafe {
__put(self, parts as *mut MultiBuf as *mut ::cxx::core::ffi::c_void)
}
}
}
// ...- 程序员无需承诺他们输入的签名准确无误。CXX 会执行静态断言,确认签名与 C++ 中声明的内容完全一致。
- 借助
unsafe extern代码块,您可以声明可从 Rust 安全调用的 C++ 函数。
共享类型
#[cxx::bridge]
mod ffi {
#[derive(Clone, Debug, Hash)]
struct PlayingCard {
suit: Suit,
value: u8, // A=1, J=11, Q=12, K=13
}
enum Suit {
Clubs,
Diamonds,
Hearts,
Spades,
}
}- 仅支持类似 C 函数(单元)的枚举。
- 共享类型的
#[derive()]支持有限数量的 trait。系统还会针对 C++ 代码生成相应的功能,例如,如果您派生了Hash,还会为相应的 C++ 类型生成std::hash实现。
共享枚举
#[cxx::bridge]
mod ffi {
enum Suit {
Clubs,
Diamonds,
Hearts,
Spades,
}
}Generated Rust:
#![allow(unused)]
fn main() {
#[derive(Copy, Clone, PartialEq, Eq)]
#[repr(transparent)]
pub struct Suit {
pub repr: u8,
}
#[allow(non_upper_case_globals)]
impl Suit {
pub const Clubs: Self = Suit { repr: 0 };
pub const Diamonds: Self = Suit { repr: 1 };
pub const Hearts: Self = Suit { repr: 2 };
pub const Spades: Self = Suit { repr: 3 };
}
}Generated C++:
enum class Suit : uint8_t {
Clubs = 0,
Diamonds = 1,
Hearts = 2,
Spades = 3,
};
- 在 Rust 端,为共享枚举生成的代码实际上是封装数值的结构体。这是因为在 C++ 中,枚举类存储与所有已列变体不同的值不属于 UB,而 Rust 表示法需要具有相同的行为。
Rust 错误处理
#[cxx::bridge]
mod ffi {
extern "Rust" {
fn fallible(depth: usize) -> Result<String>;
}
}
fn fallible(depth: usize) -> anyhow::Result<String> {
if depth == 0 {
return Err(anyhow::Error::msg("fallible1 requires depth > 0"));
}
Ok("Success!".into())
}- 在 C++ 方面,返回
Result的 Rust 函数会被翻译为异常。 - 抛出的异常始终是
rust::Error类型,该类型主要用于提供获取错误消息字符串的方法。错误消息将由错误类型的Displayimpl 提供。 - 当 panic 从 Rust 展开到 C++ 时,会始终导致进程立即终止。
C++ 错误处理
#[cxx::bridge]
mod ffi {
unsafe extern "C++" {
include!("example/include/example.h");
fn fallible(depth: usize) -> Result<String>;
}
}
fn main() {
if let Err(err) = ffi::fallible(99) {
eprintln!("Error: {}", err);
process::exit(1);
}
}- 声明用于返回
Result的 C++ 函数将捕获 C++ 端抛出的任何异常,并将其作为Err值返回给调用 Rust 函数。 - 如果外部 “C++”函数抛出l了异常,但 CXX 桥接中未声明该函数用于返回
Result,则程序会调用 C++ 的std::terminate。此行为等同于通过 C++ 函数nowithout抛出了相同的异常。
其他类型
| Rust Type | C++ Type |
|---|---|
| String | rust::String |
&str | rust::Str |
CxxString | std::string |
&[T]/&mut [T] | rust::Slice |
Box<T> | rust::Box<T> |
UniquePtr<T> | std::unique_ptr<T> |
Vec<T> | rust::Vec<T> |
CxxVector<T> | std::vector<T> |
- 这些类型可用于共享结构体的字段以及外部函数的参数和返回结果。
- 请注意,Rust 的
String不会直接映射到std::string。导致这种情况的原因有以下几种:std::string不遵循String所需的 UTF-8 不变性。- 这两种类型的内存布局不同,因此无法直接在语言之间进行传递。
std::string需要与 Rust 的移动语义不匹配的 move 构造函数,因此std::string无法按值传递给 Rust。
Building in Android
创建 cc_library_static 以构建 C++ 库,包括 CXX 生成的头文件和源文件。
cc_library_static {
name: "libcxx_test_cpp",
srcs: ["cxx_test.cpp"],
generated_headers: [
"cxx-bridge-header",
"libcxx_test_bridge_header"
],
generated_sources: ["libcxx_test_bridge_code"],
}
- 指出
libcxx_test_bridge_header和libcxx_test_bridge_code是 CXX 生成的 C++ 绑定的依赖项。我们将在下一张幻灯片中介绍具体的设置方法。 - 请注意,您还需要依靠
cxx-bridge-header库才能提取常见的 CXX 定义。 - 如需了解如何在 Android 中使用 CXX 的完整文档,请参阅 Android 文档。建议您与全班同学分享该链接,以便学生知道日后可以在哪里找到这些说明。
Building in Android
创建两个 genrule:一个用于生成 CXX 头文件,另一个用于生成 CXX 源文件。然后,这些内容会被用作 cc_library_static 的输入。
// Generate a C++ header containing the C++ bindings
// to the Rust exported functions in lib.rs.
genrule {
name: "libcxx_test_bridge_header",
tools: ["cxxbridge"],
cmd: "$(location cxxbridge) $(in) --header > $(out)",
srcs: ["lib.rs"],
out: ["lib.rs.h"],
}
// Generate the C++ code that Rust calls into.
genrule {
name: "libcxx_test_bridge_code",
tools: ["cxxbridge"],
cmd: "$(location cxxbridge) $(in) > $(out)",
srcs: ["lib.rs"],
out: ["lib.rs.cc"],
}
cxxbridge工具是一款独立工具,用于生成桥接模块的 C++ 端。它包含在 Android 中,并作为 Soong 工具提供。- 按照惯例,如果您的 Rust 源文件是
lib.rs,则头文件将命名为lib.rs.h,源文件将命名为lib.rs.cc。不过,系统并不强制执行此命名惯例。
Building in Android
创建一个依赖于 libcxx 和 cc_library_static 的 rust_binary。
rust_binary {
name: "cxx_test",
srcs: ["lib.rs"],
rustlibs: ["libcxx"],
static_libs: ["libcxx_test_cpp"],
}
与 Java 的互操作性
Java可以通过 Java 本地接口 (JNI) 加载共享对象。jni crate 允许您创建一个兼容的库。
首先,我们创建一个可以导出到 Java 的 Rust 函数:
interoperability/java/src/lib.rs:
#![allow(unused)]
fn main() {
//! Rust <-> Java FFI demo.
use jni::objects::{JClass, JString};
use jni::sys::jstring;
use jni::JNIEnv;
/// HelloWorld::hello method implementation.
#[no_mangle]
pub extern "system" fn Java_HelloWorld_hello(
env: JNIEnv,
_class: JClass,
name: JString,
) -> jstring {
let input: String = env.get_string(name).unwrap().into();
let greeting = format!("Hello, {input}!");
let output = env.new_string(greeting).unwrap();
output.into_inner()
}
}interoperability/java/Android.bp:
rust_ffi_shared {
name: "libhello_jni",
crate_name: "hello_jni",
srcs: ["src/lib.rs"],
rustlibs: ["libjni"],
}
We then call this function from Java:
interoperability/java/HelloWorld.java:
class HelloWorld {
private static native String hello(String name);
static {
System.loadLibrary("hello_jni");
}
public static void main(String[] args) {
String output = HelloWorld.hello("Alice");
System.out.println(output);
}
}
interoperability/java/Android.bp:
java_binary {
name: "helloworld_jni",
srcs: ["HelloWorld.java"],
main_class: "HelloWorld",
required: ["libhello_jni"],
}
最后,您可以构建、同步和运行二进制文件:
m helloworld_jni
adb sync # requires adb root && adb remount
adb shell /system/bin/helloworld_jni
习题
这是一个小组练习:我们将查看你们正在处理的项目之一,并尝试将一些 Rust 代码集成进去。以下是一些建议:
-
使用 Rust 编写的客户端调用你的 AIDL 服务。
-
将你项目中的某个函数迁移到 Rust 中并调用它。
此处没有提供解决方案,因为这是开放式的:它依赖于班级中是否有人有一段您可以即时转换成 Rust 的代码。
Welcome to Rust in Chromium
Chromium 中的第三方库支持 Rust,并使用第一方粘合代码连接 Rust 和现有 Chromium C++ 代码。
今天,我们将调用 Rust 对字符串进行一些有趣的操作。如果您的代码中某个部分是用于向用户展示 UTF8 字符串,那么可以在代码库中的对应部分按照这个步骤来操作,而不一定要在我们所讨论的确切部分。
设置
请确保您可以构建并运行 Chromium。只要您的代码较新(提交位置始于 1223636,对应于 2023 年 11 月),则可在任何平台和任何一组 build 标志下运行。
gn gen out/Debug
autoninja -C out/Debug chrome
out/Debug/chrome # or on Mac, out/Debug/Chromium.app/Contents/MacOS/Chromium
(建议使用调试 build 组件,以缩短迭代时间。这是默认值!)
如果您不具备这点,请参阅 如何构建 Chromium。注意:设置 build Chromium 需要花些时间。
此外,我们还建议您安装 Visual Studio 代码。
About the exercises
本课程的这一部分包含一系列练习,它们之间是相辅相成的。我们将在整个课程中进行这些练习,而不仅仅是在最后阶段完成。如果您没有时间完成某个部分,也无需担心:可以在下一阶段赶上进度。
Chromium 和 Cargo 的生态对比
The Rust community typically uses cargo and libraries from crates.io. Chromium is built using gn and ninja and a curated set of dependencies.
使用 Rust 编写代码时,您可以选择:
- 借助
//build/rust/*.gni模板(例如rust_static_library,我们稍后会介绍)使用gn和ninja。该操作会使用经过审核的 Chromium 工具链和 crate。 - 使用
cargo,但 仅限于经过审核的 Chromium 工具链和 crate - 使用
cargo,信任 工具链 和/或 从互联网下载的 crate
From here on we’ll be focusing on gn and ninja, because this is how Rust code can be built into the Chromium browser. At the same time, Cargo is an important part of the Rust ecosystem and you should keep it in your toolbox.
Mini exercise
分成各个小组开展以下活动:
- 思考
cargo在哪些场景下具有优势,并评估这些场景的风险状况。 - 讨论在使用
gn和ninja以及离线cargo等时,需要信任哪些工具、库和人群。
Ask students to avoid peeking at the speaker notes before completing the exercise. Assuming folks taking the course are physically together, ask them to discuss in small groups of 3-4 people.
与第一部分练习相关的备注/提示(“Cargo 可能具有优势的场景”):
-
It’s fantastic that when writing a tool, or prototyping a part of Chromium, one has access to the rich ecosystem of crates.io libraries. There is a crate for almost anything and they are usually quite pleasant to use. (
clapfor command-line parsing,serdefor serializing/deserializing to/from various formats,itertoolsfor working with iterators, etc.).- 借助
cargo,您便可以轻松试用库(只需向 `Cargo.toml`` 添加一行代码然后开始编写即可) - 不妨比较下 CPAN 是如何帮助
perl成为热门之选的。或者与python+pip进行比较。
- 借助
-
Development experience is made really nice not only by core Rust tools (e.g. using
rustupto switch to a differentrustcversion when testing a crate that needs to work on nightly, current stable, and older stable) but also by an ecosystem of third-party tools (e.g. Mozilla providescargo vetfor streamlining and sharing security audits;criterioncrate gives a streamlined way to run benchmarks).- 借助
cargo,您可通过cargo install --locked cargo-vet轻松添加工具。 - 不妨与 Chrome 扩展程序或 VScode 扩展程序进行比较。
- 借助
-
以下是一些适合选用
cargo,较为宽泛的通用项目示例:- Perhaps surprisingly, Rust is becoming increasingly popular in the industry for writing command line tools. The breadth and ergonomics of libraries is comparable to Python, while being more robust (thanks to the rich typesystem) and running faster (as a compiled, rather than interpreted language).
- 如要加入 Rust 生态系统,必须使用 Cargo 等标准 Rust 工具。如果希望库获得外部贡献,并且能够用于除 Chromium 之外(例如用于 Bazel 或 Android/Soong 构建环境)的项目,则应该使用 Cargo。
-
基于
cargo\ 的 Chromium 相关项目示例:serde_json_lenient(已在 Google 的其他部分进行了实验,结果是能使 PR 性能得到提升)- 字体库(例如
font-types) gnrt工具(我们将在本课程稍后的部分中加以介绍)使用clap进行命令行解析,使用toml处理配置文件。- Disclaimer: a unique reason for using
cargowas unavailability ofgnwhen building and bootstrapping Rust standard library when building Rust toolchain. run_gnrt.pyuses Chromium’s copy ofcargoandrustc.gnrtdepends on third-party libraries downloaded from the internet, butrun_gnrt.pyaskscargothat only--lockedcontent is allowed viaCargo.lock.)
- Disclaimer: a unique reason for using
学生可将以下内容认定为隐式信任或明确信任:
rustc(Rust 编译器)则依赖于 LLVM 库、Clang 编译器、“rustc”源代码(从 GitHub 获取,并由 Rust 编译器团队审核)、为引导而下载的二进制 Rust 编译器rustup(值得注意的是,rustup是在 https://github.com/rust-lang/ 保护下组织开发的,与rustc相同。)cargo、rustfmt等- 各种内部基础架构(用于构建
rustc的聊天机器人、用于将预构建工具链分发给 Chromium 工程师的系统等。) cargo Audit、cargo vet等 Cargo 工具- 包含到
//third_party/rust的 Rust 库(由 security@chromium.org 进行审核) - 其他 Rust 库(一些小众但很受欢迎又常用的库)
Chromium Rust 政策
Chromium 尚不支持使用第一方 Rust,除非是经过 区域技术主管 批准的特殊情况。
有关 Chromium 的第三方库政策,请参阅 此处。根据该这些政策,在很多情况下允许将 Rust 作为第三方库使用,包括无论是在性能还是安全方面,它们都是理想之选。
鲜少有 Rust 库会直接公开 C/C++ API,这意味着几乎所有此类库都需要使用少量的第一方粘合代码。
特定第三方 crate 的第一方 Rust 粘合代码通常应放在
third_party/rust/<crate>/<version>/wrapper目录中。
因此,今天的课程将重点介绍以下内容:
- 引入第三方 Rust 库 (“crates”)
- 编写粘合代码,以便能够从 Chromium C++ 中使用这些 crate。
如果此政策随时间而发生变化,则本课程也会随之更新。
Build rules
Rust 代码通常使用 cargo 构建而成。为提高效率,Chromium 使用 gn 和 ninja 进行构建,其静态规则支持实现最大程度的并行处理。Rust 也不例外。
Adding Rust code to Chromium
在一些现有的 Chromium BUILD.gn 文件中,声明 rust_static_library:
import("//build/rust/rust_static_library.gni")
rust_static_library("my_rust_lib") {
crate_root = "lib.rs"
sources = [ "lib.rs" ]
}
您还可以在其他 Rust 目标上添加 deps。稍后,我们通过该操作来使用第三方代码。
您必须 同时 指定 crate 根目录 和 完整的源代码列表。crate_root 是供 Rust 编译器使用的文件,表示编译单元的根文件,通常为 lib.rs。sources 是所有源文件的完整列表,ninja 需要用它来确定何时该进行重新构建。
(在 Rust 中,并不存在所谓的 Rust source_set,因为整个 crate 就是一个编译单元。static_library 是最小的单元。)
学生可能会疑惑为何我们需要 gn 模板,而不使用 gn 内置的 Rust 静态库支持 进行操作。原因是此模板支持 CXX 互操作性、各项 Rust 功能以及单元测试,我们稍后便会用到其中的一些功能。
Including unsafe Rust Code
默认情况下,禁止在 rust_static_library 中使用不安全的 Rust 代码,因为此类代码无法编译。如需使用不安全的 Rust 代码,请将 allow_unsafe = true 添加到 gn 目标中。(在本课程的稍后部分,我们将介绍在哪些情形下必须这样做。)
import("//build/rust/rust_static_library.gni")
rust_static_library("my_rust_lib") {
crate_root = "lib.rs"
sources = [
"lib.rs",
"hippopotamus.rs"
]
allow_unsafe = true
}
在 Chromium C++ 中导入 Rust 代码
只需将上述目标添加到某些 Chromium C++ 目标的 deps 中即可。
import("//build/rust/rust_static_library.gni")
rust_static_library("my_rust_lib") {
crate_root = "lib.rs"
sources = [ "lib.rs" ]
}
# or source_set, static_library etc.
component("preexisting_cpp") {
deps = [ ":my_rust_lib" ]
}
Visual Studio Code
在 Rust 代码中,通常会省略类型,这使得拥有强大的 IDE 甚至比 C++ 更为有用。Visual Studio Code 非常适用于在 Chromium 中处理 Rust 代码。如需使用此功能,
- 请确保您的 VSCode 安装了
rust-analyzer扩展程序,而不是较早版本的 Rust 支持插件。 gn gen out/Debug --export-rust-project(或输出目录的等效项)In -s out/Debug/rust-project.json rust-project.json
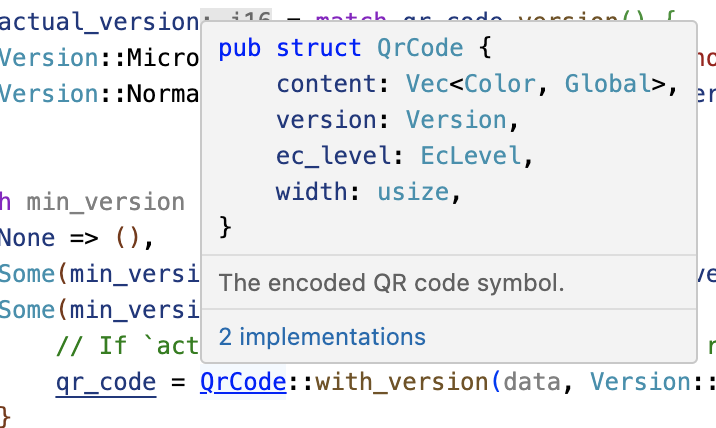
如果受众群体对 IDE 持有怀疑态度,不妨演示下 rust-analyzer 的部分代码注解和探索功能,或许能让他们改观。
以下步骤可能会对演示有所帮助(但您也可以选用一段最为熟悉的 Chromium 相关 Rust 代码):
- 打开
components/qr_code_generator/qr_code_generator_ffi_glue.rs - 将光标置于 `qr_code_generator_ffi_glue.rs 中的
QrCode::new调用(大约第 26 行)上 - Demo show documentation (typical bindings: vscode = ctrl k i; vim/CoC = K).
- Demo go to definition (typical bindings: vscode = F12; vim/CoC = g d). (This will take you to
//third_party/rust/.../qr_code-.../src/lib.rs.) - 演示 outline 并前往
QrCode::with_bits方法(大约第 164 行;大纲位于 vscode 中的文件资源管理器窗格中;典型绑定:vim/CoC = space o) - 演示 type annotations(
QrCode::with_bits方法中提供了一些很好的示例)
值得注意的是,修改 BUILD.gn 文件后,需要重新运行 gn gen ... --export-rust-project(我们将在本课程的练习中多次执行该操作)。
Build rules exercise
在 Chromium build 中,向 //ui/base/BUILD.gn 添加新的 Rust 目标,其中包含:
#![allow(unused)]
fn main() {
#[no_mangle]
pub extern "C" fn hello_from_rust() {
println!("Hello from Rust!")
}
}Important: note that no_mangle here is considered a type of unsafety by the Rust compiler, so you’ll need to allow unsafe code in your gn target.
将这个新的 Rust 目标添加为 //ui/base:base 的依赖项。在 ui/base/resource/resource_bundle.cc 顶部声明此函数(稍后,我们将介绍如何通过绑定生成工具来自动执行此操作):
extern "C" void hello_from_rust();
从 ui/base/resource/resource_bundle.cc 中的某个位置调用此函数,我们建议在从 ResourceBundle::MaybeMangleLocalizedString 的顶部调用此函数。构建并运行 Chromium,并确保多次显示 “Hello from Rust!”。
如果您使用 VSCode,现在就请设置 Rust,以便其能在 VSCode 中正常运行。这对后续练习会很有帮助。如果操作成功,则可使用右键点击 println! 上的 “Go to definition”。
如何获取帮助
- 适用于 [
rust_static_librarygn 模板] 的选项 (https://source.chromium.org/chromium/chromium/src/+/main:build/rust/rust_static_library.gni;l=16) - 关于 [
#[no_mangle]] 的详细信息 (https://doc.rust-lang.org/beta/reference/abi.html#the-no_mangle-attribute) - 关于 [
extern "C"] 的详细信息 (https://doc.rust-lang.org/std/keyword.extern.html) - 关于 gn 的 [
--export-rust-project] 开关的详细信息 (https://gn.googlesource.com/gn/+/main/docs/reference.md#compilation-database) - 如何在 VSCode 中安装 rust-analyzer
此示例很独特,因为其归根结底是最通用的互操作语言,即 C 语言。C++ 和 Rust 本身都可以声明和调用 C ABI 函数。在本课程的稍后部分,我们会直接将 C++ 和 Rust 关联起来。
此处需要使用 allow_unsafe = true,因为 #[no_mangle] 可能会支持 Rust 生成两个同名函数,而 Rust 无法保证会调用正确的函数。
如果需要纯 Rust 可执行文件,也可以使用 rust_executable gn 模板执行此操作。
测试
Rust community typically authors unit tests in a module placed in the same source file as the code being tested. This was covered earlier in the course and looks like this:
#![allow(unused)]
fn main() {
#[cfg(test)]
mod tests {
#[test]
fn my_test() {
todo!()
}
}
}In Chromium we place unit tests in a separate source file and we continue to follow this practice for Rust — this makes tests consistently discoverable and helps to avoid rebuilding .rs files a second time (in the test configuration).
This results in the following options for testing Rust code in Chromium:
- Native Rust tests (i.e.
#[test]). Discouraged outside of//third_party/rust. gtesttests authored in C++ and exercising Rust via FFI calls. Sufficient when Rust code is just a thin FFI layer and the existing unit tests provide sufficient coverage for the feature.gtesttests authored in Rust and using the crate under test through its public API (usingpub mod for_testing { ... }if needed). This is the subject of the next few slides.
Mention that native Rust tests of third-party crates should eventually be exercised by Chromium bots. (Such testing is needed rarely — only after adding or updating third-party crates.)
Some examples may help illustrate when C++ gtest vs Rust gtest should be used:
-
QR has very little functionality in the first-party Rust layer (it’s just a thin FFI glue) and therefore uses the existing C++ unit tests for testing both the C++ and the Rust implementation (parameterizing the tests so they enable or disable Rust using a
ScopedFeatureList). -
Hypothetical/WIP PNG integration may need to implement memory-safe implementation of pixel transformations that are provided by
libpngbut missing in thepngcrate - e.g. RGBA => BGRA, or gamma correction. Such functionality may benefit from separate tests authored in Rust.
rust_gtest_interop 库
The rust_gtest_interop library provides a way to:
- Use a Rust function as a
gtesttestcase (using the#[gtest(...)]attribute) - Use
expect_eq!and similar macros (similar toassert_eq!but not panicking and not terminating the test when the assertion fails).
Example:
use rust_gtest_interop::prelude::*;
#[gtest(MyRustTestSuite, MyAdditionTest)]
fn test_addition() {
expect_eq!(2 + 2, 4);
}Rust 测试的 GN 规则
The simplest way to build Rust gtest tests is to add them to an existing test binary that already contains tests authored in C++. For example:
test("ui_base_unittests") {
...
sources += [ "my_rust_lib_unittest.rs" ]
deps += [ ":my_rust_lib" ]
}
Authoring Rust tests in a separate static_library also works, but requires manually declaring the dependency on the support libraries:
rust_static_library("my_rust_lib_unittests") {
testonly = true
is_gtest_unittests = true
crate_root = "my_rust_lib_unittest.rs"
sources = [ "my_rust_lib_unittest.rs" ]
deps = [
":my_rust_lib",
"//testing/rust_gtest_interop",
]
}
test("ui_base_unittests") {
...
deps += [ ":my_rust_lib_unittests" ]
}
chromium::import! 宏
After adding :my_rust_lib to GN deps, we still need to learn how to import and use my_rust_lib from my_rust_lib_unittest.rs. We haven’t provided an explicit crate_name for my_rust_lib so its crate name is computed based on the full target path and name. Fortunately we can avoid working with such an unwieldy name by using the chromium::import! macro from the automatically-imported chromium crate:
chromium::import! {
"//ui/base:my_rust_lib";
}
use my_rust_lib::my_function_under_test;Under the covers the macro expands to something similar to:
extern crate ui_sbase_cmy_urust_ulib as my_rust_lib;
use my_rust_lib::my_function_under_test;More information can be found in the doc comment of the chromium::import macro.
rust_static_library supports specifying an explicit name via crate_name property, but doing this is discouraged. And it is discouraged because the crate name has to be globally unique. crates.io guarantees uniqueness of its crate names so cargo_crate GN targets (generated by the gnrt tool covered in a later section) use short crate names.
Testing exercise
Time for another exercise!
In your Chromium build:
- Add a testable function next to
hello_from_rust. Some suggestions: adding two integers received as arguments, computing the nth Fibonacci number, summing integers in a slice, etc. - Add a separate
..._unittest.rsfile with a test for the new function. - Add the new tests to
BUILD.gn. - Build the tests, run them, and verify that the new test works.
与 C++ 的互操作性
Rust 社区提供了多种 C++/Rust 互操作选项,并且一直在不断开发新工具。目前,Chromium 使用一种名为 CXX 的工具。
您可以使用接口定义语言(与 Rust 极为相似)描述整个语言边界,然后 CXX 工具会据此生成 Rust 和 C++ 函数及类型的声明。
See the CXX tutorial for a full example of using this.
请仔细研究这个图表。解释背后的原理和您之前所做的完全相同。说明自动执行这一流程具有以下好处:
- 使用该工具可保证 C++ 端和 Rust 端相匹配(例如,如果
#[cxx::bridge]与实际的 C++ 或 Rust 定义不匹配,则会出现编译错误。但使用不同步的手动绑定,可能会导致未定义行为) - 该工具还可自动生成 FFI thunk(即小型但可兼容 C-ABI 的自由函数),以便适应非 C 语言特性(例如,启用对 Rust 或 C++ 方法的 FFI 调用;而手动实现绑定一般需要自行编写这种顶级的自由函数)
- 该工具和库可以处理一系列核心类型,例如:
&[T]可以跨 FFI 边界进行传递,即使它无法保证任何特定的 ABI 或内存布局一致无误。进行手动绑定时,必须手动解构std::span<T>/&[T],并根据指针和长度进行重新构建,但这很容易出错,因为每种语言对于空 slice 的表示方式略有不同- 系统对
std::unique_ptr<T>、std::shared_ptr<T>和/或Box等智能指针提供原生支持。如果使用手动绑定,则必须传递可兼容 C-ABI 的原始指针,这会增加生命周期和内存安全风险。 rust::String和CxxString类型能够识别并处理不同语言之间在字符串表示方面的差异(例如,rust::String::lossy可以通过非 UTF8 输入构建 Rust 字符串;rust::String::c_str可以为字符串加上 NUL 终止符)。
绑定示例
CXX requires that the whole C++/Rust boundary is declared in cxx::bridge modules inside .rs source code.
#[cxx::bridge]
mod ffi {
extern "Rust" {
type MultiBuf;
fn next_chunk(buf: &mut MultiBuf) -> &[u8];
}
unsafe extern "C++" {
include!("example/include/blobstore.h");
type BlobstoreClient;
fn new_blobstore_client() -> UniquePtr<BlobstoreClient>;
fn put(self: &BlobstoreClient, buf: &mut MultiBuf) -> Result<u64>;
}
}
// Definitions of Rust types and functions go here指出:
- Although this looks like a regular Rust
mod, the#[cxx::bridge]procedural macro does complex things to it. The generated code is quite a bit more sophisticated - though this does still result in amodcalledffiin your code. - Native support for C++’s
std::unique_ptrin Rust - Native support for Rust slices in C++
- 从 C++ 调用 Rust,并使用 Rust 类型(顶部位置)
- 从 Rust 调用 C++,并使用 C++ 类型(底部位置)
常见误解:这 看似 Rust 在解析 C++ 头文件,其实具有误导性。Rust 不会对此头文件进行解释,只是在生成的 C++ 代码中添加 #include,以便于 C++ 编译器 使用。
CXX 的局限性
CXX 的局限性
By far the most useful page when using CXX is the type reference.
CXX 基本适用于以下情况:
- 您的 Rust-C++ 接口非常简单,可以声明其中的全部内容。
- 目前,您只使用了 CXX 提供原生支持的类型,例如
std::unique_ptr、std::string、&[u8]等。
这样具有很多局限性,例如缺少对 Rust 的 Option 类型的支持。
由于这些局限,我们在 Chromium 中只能将 Rust 用于隔离紧密的 “叶节点”,而无法用于任意的 Rust-C++ 互操作。当您打算在 Chromium 中探索 Rust 的应用场景时,推荐先从拟定针对语言边界的 CXX 绑定入手,以查看该语言边界是否足够简单明了。
此外,还应讨论使用 CXX 时的其他一些困难之处,例如:
- 其根据 C++ 异常来进行错误处理(下一张幻灯片中将加以介绍)
- 函数指针使用起来很不方便。
CXX 错误处理
CXX’s support for Result<T,E> relies on C++ exceptions, so we can’t use that in Chromium. Alternatives:
-
The
Tpart ofResult<T, E>can be:- Returned via out parameters (e.g. via
&mut T). This requires thatTcan be passed across the FFI boundary - for exampleThas to be:- A primitive type (like
u32orusize) - A type natively supported by
cxx(likeUniquePtr<T>) that has a suitable default value to use in a failure case (unlikeBox<T>).
- A primitive type (like
- Retained on the Rust side, and exposed via reference. This may be needed when
Tis a Rust type, which cannot be passed across the FFI boundary, and cannot be stored inUniquePtr<T>.
- Returned via out parameters (e.g. via
-
The
Epart ofResult<T, E>can be:- Returned as a boolean (e.g.
truerepresenting success, andfalserepresenting failure) - Preserving error details is in theory possible, but so far hasn’t been needed in practice.
- Returned as a boolean (e.g.
CXX Error Handling: QR Example
The QR code generator is an example where a boolean is used to communicate success vs failure, and where the successful result can be passed across the FFI boundary:
#[cxx::bridge(namespace = "qr_code_generator")]
mod ffi {
extern "Rust" {
fn generate_qr_code_using_rust(
data: &[u8],
min_version: i16,
out_pixels: Pin<&mut CxxVector<u8>>,
out_qr_size: &mut usize,
) -> bool;
}
}Students may be curious about the semantics of the out_qr_size output. This is not the size of the vector, but the size of the QR code (and admittedly it is a bit redundant - this is the square root of the size of the vector).
It may be worth pointing out the importance of initializing out_qr_size before calling into the Rust function. Creation of a Rust reference that points to uninitialized memory results in Undefined Behavior (unlike in C++, when only the act of dereferencing such memory results in UB).
If students ask about Pin, then explain why CXX needs it for mutable references to C++ data: the answer is that C++ data can’t be moved around like Rust data, because it may contain self-referential pointers.
CXX Error Handling: PNG Example
A prototype of a PNG decoder illustrates what can be done when the successful result cannot be passed across the FFI boundary:
#[cxx::bridge(namespace = "gfx::rust_bindings")]
mod ffi {
extern "Rust" {
/// This returns an FFI-friendly equivalent of `Result<PngReader<'a>,
/// ()>`.
fn new_png_reader<'a>(input: &'a [u8]) -> Box<ResultOfPngReader<'a>>;
/// C++ bindings for the `crate::png::ResultOfPngReader` type.
type ResultOfPngReader<'a>;
fn is_err(self: &ResultOfPngReader) -> bool;
fn unwrap_as_mut<'a, 'b>(
self: &'b mut ResultOfPngReader<'a>,
) -> &'b mut PngReader<'a>;
/// C++ bindings for the `crate::png::PngReader` type.
type PngReader<'a>;
fn height(self: &PngReader) -> u32;
fn width(self: &PngReader) -> u32;
fn read_rgba8(self: &mut PngReader, output: &mut [u8]) -> bool;
}
}PngReader and ResultOfPngReader are Rust types — objects of these types cannot cross the FFI boundary without indirection of a Box<T>. We can’t have an out_parameter: &mut PngReader, because CXX doesn’t allow C++ to store Rust objects by value.
This example illustrates that even though CXX doesn’t support arbitrary generics nor templates, we can still pass them across the FFI boundary by manually specializing / monomorphizing them into a non-generic type. In the example ResultOfPngReader is a non-generic type that forwards into appropriate methods of Result<T, E> (e.g. into is_err, unwrap, and/or as_mut).
在 Chromium 中使用 CXX
Using cxx in Chromium
在 Chromium 中,针对每个需要使用 Rust 的叶节点,我们定义独立的 #[cxx::bridge] mod。通常,每个 rust_static_library 都有对应的定义。只需将
cxx_bindings = [ "my_rust_file.rs" ]
# list of files containing #[cxx::bridge], not all source files
allow_unsafe = true
添加到您现有的 rust_static_library 以及 crate_root 和 sources 的目标中。
C++ 头文件会在合理的位置生成,因此您只需
#include "ui/base/my_rust_file.rs.h"
您会发现,//base 中提供了一些实用函数,可将 Chromium C++ 类型与 CXX Rust 类型相互转换,例如 SpanToRustSlice。
学生可能会问:为什么我们仍然需要 allow_unsafe = true?
总的来说,按照常规 Rust 标准,没有任何 C/C++ 代码是 “安全”的。在 Rust 中来回调用 C/C++ 可能会对内存执行任意操作,并危及 Rust 自身数据布局的安全性。如果 C/C++ 互操作性中出现 过多 的 unsafe 关键字,可能会损害此类关键字的信噪比,并且 存在争议。但严格地说,将任何外部代码引入 Rust 二进制文件可能会导致 Rust 中出现意外行为。
The narrow answer lies in the diagram at the top of this page — behind the scenes, CXX generates Rust unsafe and extern "C" functions just like we did manually in the previous section.
Exercise: Interoperability with C++
第一部分
- 在您之前创建的 Rust 文件中,添加
#[cxx::bridge]来指定一个将从 C++ 调用的函数(名为hello_from_rust),该函数不接受任何参数也不返回任何值。 - 修改之前的
hello_from_rust函数,移除extern "C"和#[no_mangle]。现在,这只是一个标准的 Rust 函数。 - 请修改
gn目标以构建这些绑定。 - 在 C++ 代码中,移除
hello_from_rust的正向声明,然后添加生成的头文件。 - Build and run!
第二部分
建议尝试操作一下 CXX。这有助于您更好地理解 Rust 在Chromium 中的灵活性。
Some things to try:
- 从 Rust 回调到 C++。您需要执行以下操作:
- 创建一个附加头文件,且您可以从
cxx::bridge对其进行include!操作。您需要在这个新的头文件中声明要调用的 C++ 函数。 - 创建一个
unsafe代码块,用于调用此类函数,也可以在#[cxx::bridge]中指定unsafe关键字,如此处所述。 - 您可能还需要添加
#include "third_party/rust/cxx/v1/crate/include/cxx.h"
- 创建一个附加头文件,且您可以从
- 将 C++ 字符串从 C++ 传递到 Rust。
- 将对 C++ 对象的引用传递到 Rust。
- 刻意让 Rust 函数签名与
#[cxx::bridge]不匹配,并逐渐熟悉所看到的错误信息。 - 刻意让 C++ 函数签名与
#[cxx::bridge]不匹配,并适应您看到的错误。 - 将某个类型的
std::unique_ptr从 C++ 传递到 Rust,以便 Rust 拥有某个 C++ 对象的所有权。 - 创建一个 Rust 对象并将其传递到 C++,以便 C++ 拥有它的所有权。(提示:您需要使用
Box)。 - 声明调用某个 C++ 类型的方法。从 Rust 调用它们。
- 声明调用某个 Rust 类型的方法。从 C++ 调用它们。
第三部分
现在,您已经了解了 CXX 互操作性的优势和局限,请思考几个 Rust 在 Chromium 中的应用场景,其中接口要足够简单构思该如何定义该接口。
如何获取帮助
您可能会遇到以下问题:
- 当我用类型 Y 初始化类型 X 的变量时,出现了初始化问题,其中 X 和 Y 都是函数类型。这是因为您的 C++ 函数实现与
cxx::bridge中的声明并不完全一致。 - 我好像能随意将 C++ 引用转换为 Rust 引用。这样不会导致 UB 风险吗?对于 CXX 的_不透明_类型,答案为否,因为它们的大小为零。对于 CXX 的基本类型,确实_有可能_导致 UB,但鉴于 CXX 的设计策略,要构建能导致这种情况的示例颇为困难。
添加第三方 Crate
Rust 库被称为 crate,可在 crates.io 中找到。Rust 的 crate 之间非常容易相互依赖。事实证明,他们确实如此!
| 属性 | C++ library | Rust crate |
|---|---|---|
| Build system | 很多 | 保持一致:Cargo.toml |
| 典型库的大小 | 大 | 小 |
| 传递依赖项 | 很少 | 很多 |
对于 Chromium 工程师来说,这种依赖关系具有以下利弊:
- 所有 crate 都使用共同的构建系统,这样我们就可以自动将其收录到 Chromium 中…
- …但是,crate 通常具有传递依赖项,因此可能需要引入多个库。
我们将讨论以下内容:
- 如何将 crate 添加到 Chromium 源代码树中
- 如何为其制定
gn构建规则 - 如何审核其源代码以确保足够的安全性。
配置 Cargo.tom 文件以添加 crate
Chromium 具有一组集中管理的直接 crate 依赖项。这些依赖项通过单独的 Cargo.toml 文件进行管理:
[dependencies]
bitflags = "1"
cfg-if = "1"
cxx = "1"
# lots more...
与任何其他 Cargo.toml 一样,您可以指定 有关依赖项的更多详细信息。最常见的是,您需要指定要在 crate 中启用的 features。
向 Chromium 中添加 crate 时,通常需要在附加文件 gnrt_config.toml 中提供一些额外的信息,我们将在下文中加以介绍。
配置 gnrt_config.toml
与 Cargo.toml 一起使用的是 gnrt_config.toml。此文件包含 Chromium 专用扩展程序,可用于处理 crate。
如果添加新的 crate,至少要明确指定 group。可以为以下选项之一:
# 'safe': The library satisfies the rule-of-2 and can be used in any process.
# 'sandbox': The library does not satisfy the rule-of-2 and must be used in
# a sandboxed process such as the renderer or a utility process.
# 'test': The library is only used in tests.
例如:
[crate.my-new-crate]
group = 'test' # only used in test code
根据 crate 源代码布局,您可能还需要使用此文件指定其 LICENSE 文件的所在位置。
稍后,我们将介绍需要在此文件中配置的其他内容,以便能够解决问题。
下载 Crate
有一款名为 gnrt 的工具,具有下载 crate 以及生成 BUILD.gn 规则的功能。
首先,按如下所示下载所需的 crate:
cd chromium/src
vpython3 tools/crates/run_gnrt.py -- vendor
虽然
gnrt工具是 Chromium 源代码的一部分,但通过运行此命令,您可以从crates.io下载并运行其依赖项。有关该安全决策的讨论,请参阅 前面的部分。
运行此 vendor 命令可能会下载以下内容:
- Your crate
- 直接依赖项和传递依赖项
cargo要求的其他 crate 的新版本,用于解析 Chromium 所需的全部 crate。
Chromium 会修复一些 crate 的补丁,并将其保存在 //third_party/rust/chromium_crates_io/patches 中。系统会自动重新应用这些补丁,但如果补丁应用失败,您可能需要进行手动操作。
生成 gn 构建规则
下载 crate 后,按如下方式生成 BUILD.gn 文件:
vpython3 tools/crates/run_gnrt.py -- gen
现在,运行 git status。您应该会看到:
third_party/rust/chromium_crates_io/vendor中至少包含一个新的 crate 源代码third_party/rust/<crate name>/v<major semver version>中至少包含一个新的BUILD.gn- 相应的
README.chromium
The “major semver version” is a Rust “semver” version number.
请仔细观察,尤其是 third_party/rust 中生成的内容。
浅谈下 semver,特别是在 Chromium 中,它支持使用多个不兼容的 crate 版本。虽然在 Cargo 生态系统中不鼓励这种方式,但在某些情况下却是必要的。
解决问题
如果构建失败,可能是 build.rs 文件所致:这些程序在构建过程中执行了任意操作。这与 gn 和 ninja 的设计完全不相符,它们旨在实现静态、确定性的构建规则,以最大限度地提高构建的并行性和可重复性。
系统支持自动进行某些 build.rs 操作;而有些需要进行额外的处理:
| 构建脚本效果 | 我们的 gn 模板均支持 | 您需要完成的工作 |
|---|---|---|
| 检查 rustc 版本以配置启用和停用功能 | 是 | 无 |
| 检查平台或 CPU 以配置启用和停用功能 | 是 | 无 |
| Generating code | 是 | 是的,在 gnrt_config.toml 中指定 |
| 构建 C/C++ | 否 | 进行补丁修复 |
| Arbitrary other actions | 否 | 进行补丁修复 |
幸运的是,大多数 crate 不包含构建脚本,而且大多数的构建脚本只执行前两项操作。
构建用于生成代码的脚本
如果 ninja 提示有文件缺失,请检查 build.rs,确认其是否写入了源代码文件。
如果是,请修改 gnrt_config.toml,将 build-script-outputs 添加到 crate。如果这是一个传递依赖项(即 Chromium 代码不应直接依赖的依赖项),还要添加 allow-first-party-usage=false。该文件中已经提供了若干示例:
[crate.unicode-linebreak]
allow-first-party-usage = false
build-script-outputs = ["tables.rs"]
现在,请重新运行 gnrt.py -- gen,重新生成 BUILD.gn 文件,以通知 ninja 此特定输出文件将被用作后续构建步骤的输入。
构建用于构建 C++ 或执行任意操作的脚本
有些 crate 使用 cc crate 来构建和关联 C/C++ 库。其他 crate 会在其构建脚本中使用 bindgen 解析 C/C++。Chromium 环境中不支持进行这些操作,因为我们的 gn、ninja 和 LLVM 构建系统在表达构建操作之间的关系方面具有非常严格具体的要求。
因此,您可以选择:
- 避开这些 crate
- 对 crate 应用补丁。
补丁应保存在 third_party/rust/chromium_crates_io/patches/<crate> 中,请参阅 面向 cxx crate 的补丁 中的示例。每当 gnrt 升级该 crate 时,将会自动应用补丁文件。
依赖于 Crate
添加第三方 crate 并生成构建规则后,就可轻松使用该 crate。请找到 rust_static_library 目标,并在 crate 中的 :lib 目标上添加 dep。
Specifically,
例如:
rust_static_library("my_rust_lib") {
crate_root = "lib.rs"
sources = [ "lib.rs" ]
deps = [ "//third_party/rust/example_rust_crate/v1:lib" ]
}
Auditing Third Party Crates
添加新库须遵守 Chromium 的标准 政策,当然也要遵守安全审核标准。您可能不仅要引入单个 crate,而且还要引入传递依赖项,因此可能需要审核大量代码。另一方面,安全的 Rust 代码可能产生的副作用有限。应如何对其进行审核?
随着时间的推移,Chromium 计划逐步采用以 cargo vet 为核心的处理流程。
与此同时,每当添加新的 crate 时,我们都会检查以下内容:
- 了解每个 crate 的用途。crate 之间存在什么关系?如果每个 crate 的构建系统都包含
build.rs或过程宏,请确定它们的用途。它们能否与 Chromium 的正常构建方式相兼容。 - 检查每个 crate 是否得到合理维护。
- 使用
cd third-party/rust/chromium_crates_io; cargo review检查已知漏洞(首先需要运行cargo install cargo-audit,令人意外的是,这个过程中需要从互联网下载大量的依赖项 2) - 确保所有
unsafe代码都符合 两大规则 的要求 - 检查是否使用了
fs或netAPI - 尽可能地仔细阅读所有代码,查找任何可能属于恶意插入,稍显异常的地方。(但现实中,您不可能做到百无遗漏,因为代码量通常太庞大了。)
以下只是一些指导建议,请与 security@chromium.org 的审核者合租,共同找出能够确保 crate 安全的正确方法。
Checking Crates into Chromium Source Code
git status 应显示以下内容:
//third_party/rust/chromium_crates_io中的 crate 代码//third_party/rust/<crate>/<version>中的元数据(BUILD.gn和README.chromium)
此外,请在后面的位置添加 OWNERS 文件。
您应将所有这些内容,以及对 Cargo.toml 和 gnrt_config.toml 的更改一起提交到 Chromium 仓库中。
重要提示:您需要使用 git add -f 命令,否则 .gitignore 文件可能会导致某些文件被跳过。
在此过程中,您可能会发现由于使用了非包容性语言,导致提交前检查失败。这是因为 Rust crate 数据往往包含 git 分支的名称,而许多项目仍然在使用非包容性术语。因此,您需要运行以下命令:
infra/update_inclusive_language_presubmit_exempt_dirs.sh > infra/inclusive_language_presubmit_exempt_dirs.txt
git add -p infra/inclusive_language_presubmit_exempt_dirs.txt # add whatever changes are yours
及时更新 Crate
作为任何第三方 Chromium 依赖项的所有者,您 应使用任何安全修复程序,确保该依赖项处于最新状态。我们希望能够尽快实现对 Rust crate 自动执行此操作,但目前仍由您负责执行,就像对待任何其他第三方依赖项一样。
练习
将 uwuify 添加到 Chromium,以停用 crate 的 默认功能。假设该 crate 会交付 Chromium 时被使用,但不会用于处理不可信的输入内容。
(在下一个练习中,我们将使用 Chromium 中的 uwuify;但您也可以跳过这一步,现在就开始此操作。或者,您可以创建一个使用 uwuify 的新 rust_executable 目标。
Students will need to download lots of transitive dependencies.
The total crates needed are:
instant,lock_api,parking_lot,parking_lot_core,redox_syscall,scopeguard,smallvec, anduwuify.
If students are downloading even more than that, they probably forgot to turn off the default features.
Thanks to Daniel Liu for this crate!
Bringing It Together — Exercise
在本练习中,您将运用之前所学的全部知识,添加一项全新的 Chromium 功能。
The Brief from Product Management
在偏僻的热带雨林中,发现住着一群小精灵。我们务必尽快创建一款精灵版 Chromium,交付给他们。
要求是将 Chromium 的所有界面字符串翻译为精灵语。
由于时间紧迫,无法等待准确的翻译。但幸运的是,精灵语与英语非常接近,然后我们发现有一个 Rust crate 可以执行此翻译任务。
事实上,您已经 在上一个练习中导入了该 crate。
(显然,对 Chrome 进行准确恰当的翻译,需要做到极度细致和全力以赴。请勿交付此产品!)
步骤
修改 ResourceBundle::MaybeMangleLocalizedString,在显示之前对所有字符串进行 uwu 处理。在这个特殊的 Chromium 版本中,无论 mangle_localized_strings_ 的设置如何,都应该始终执行此操作。
如果您正确完成了这些练习中的所有操作,那么恭喜您已经成功创建了一款精灵版 Chrome!

- UTF16 与 UTF8。学生应注意,Rust 字符串始终采用 UTF8 编码,它们可能会决定在 C++ 端使用
base::UTF16ToUTF8进行转换,然后再进行反向转换。 - 如果学生决定在 Rust 端进行转换,则需要考虑使用
String::from_utf16方法,同时注意错误处理,并确定哪些 CXX 支持的类型可以传输大量 u16s。 - 学生可以通过多种方式设计 C++/Rust 边界,例如按值传递和返回字符串,或对字符串采取可变引用。如果使用可变引用,CXX 可能会提示学生需要使用
Pin方法。您可能需要解释“Pin”的用途,以及为何 CXX 需要它来对 C++ 数据进行可变引用:原因是 C++ 数据无法像 Rust 数据那样自由移动,它可能包含自引用指针。 - 对于包含
ResourceBundle::MaybeMangleLocalizedString的 C++ 目标,需要依赖于rust_static_library目标。学生可能已经执行了此操作。 rust_static_library目标需要依赖于//third_party/rust/uwuify/v0_2:lib。
练习解答
Solutions to the Chromium exercises can be found in this series of CLs.
Welcome to Bare Metal Rust
这是单独为裸机 Rust 开设的课程,为期一天,主要面向熟悉 Rust 基础知识的人员(例如已学完 Comprehensive Rust),最好也有一些使用其他语言(例如 C)进行裸机编程的经验。
今天,我们将探讨 bare-metal Rust:即在没有操作系统支持的情况下运行 Rust 代码。该部分主要分为以下内容:
- 什么是
no_stdRust? - 编写微控制器固件。
- 为应用处理器编写引导加载程序 / 内核代码。
- 有助于裸机 Rust 开发的一些实用 crate。
在本课程的微控制器部分,我们将使用 BBC micro:bit v2 作为示例。这是一款基于 Nordic nRF51822 微控制器的 开发板,配有一些 LED 和按钮、连接 I2C 的加速度计和罗盘,以及板载 SWD 调试程序。
首先,请安装我们稍后需要用到的一些工具。在 gLinux 或 Debian 上:
sudo apt install gcc-aarch64-linux-gnu gdb-multiarch libudev-dev picocom pkg-config qemu-system-arm
rustup update
rustup target add aarch64-unknown-none thumbv7em-none-eabihf
rustup component add llvm-tools-preview
cargo install cargo-binutils cargo-embed
然后,向 plugdev 组中的用户授予 micro:bit 编程器的访问权限:
echo 'SUBSYSTEM=="usb", ATTR{idVendor}=="0d28", MODE="0664", GROUP="plugdev"' |\
sudo tee /etc/udev/rules.d/50-microbit.rules
sudo udevadm control --reload-rules
在 MacOS 上:
xcode-select --install
brew install gdb picocom qemu
brew install --cask gcc-aarch64-embedded
rustup update
rustup target add aarch64-unknown-none thumbv7em-none-eabihf
rustup component add llvm-tools-preview
cargo install cargo-binutils cargo-embed
no_std
|
|
|
|
|---|---|---|
|
|
|
HashMap依赖于 RNG。std会重新导出core和alloc的内容。
极小的 no_std 程序
#![no_main]
#![no_std]
use core::panic::PanicInfo;
#[panic_handler]
fn panic(_panic: &PanicInfo) -> ! {
loop {}
}- 这将编译为空二进制文件。
std提供了一个 panic 处理程序;如果没有它,我们就必须自行提供。- 其他 crate(例如
panic-halt)也可以提供该处理程序。 - 根据目标不同,可能需要使用
panic = "abort"进行编译,以避免出现与eh_personality相关的错误。 - 请注意,未提供
main函数或任何其他入口点;您可以自行定义入口点。通常需要使用链接器脚本和一些汇编代码进行设置工作,以便 Rust 代码能够顺利运行。
alloc
如需使用 alloc,您必须实现 全局(堆)分配器。
#![no_main]
#![no_std]
extern crate alloc;
extern crate panic_halt as _;
use alloc::string::ToString;
use alloc::vec::Vec;
use buddy_system_allocator::LockedHeap;
#[global_allocator]
static HEAP_ALLOCATOR: LockedHeap<32> = LockedHeap::<32>::new();
static mut HEAP: [u8; 65536] = [0; 65536];
pub fn entry() {
// SAFETY: `HEAP` is only used here and `entry` is only called once.
unsafe {
// Give the allocator some memory to allocate.
HEAP_ALLOCATOR.lock().init(HEAP.as_mut_ptr() as usize, HEAP.len());
}
// Now we can do things that require heap allocation.
let mut v = Vec::new();
v.push("A string".to_string());
}buddy_system_allocator是第三方 crate,用于实现基本伙伴系统分配器。还可以使用其他 crate,或者自行编写 crate,或者接入现有分配器。LockedHeap的常量参数是分配器的最大阶数;即在本例中,它可以最多分配 2**32 字节大小的区域。- 如果依赖项树中的所有 crate 都依赖于
alloc,则您必须在二进制文件中明确定义一个全局分配器。通常,在顶级二进制 crate 中完成此操作。 - 为了确保能够成功关联
panic_haltcrate,以便我们获取其 panic 处理程序,必须使用extern crate panic_halt as _方法。 - 我们可以构建该示例,但由于没有入口点,无法运行。
微控制器
cortex_m_rt crate 提供针对 Cortex M 微控制器的重置处理程序(以及其他内容)。
#![no_main]
#![no_std]
extern crate panic_halt as _;
mod interrupts;
use cortex_m_rt::entry;
#[entry]
fn main() -> ! {
loop {}
}接下来,我们看看随着抽象层级的不断提升,该如何访问外围设备。
cortex_m_rt::entry宏要求函数的类型为fn() -> !,因为返回重置处理程序会毫无意义。- 使用
cargo embed --bin minimum运行该示例
原始 MMIO
大多数微控制器通过内存映射 IO 访问外围设备。现在试着开启 micro:bit 上的 LED 指示灯:
#![no_main]
#![no_std]
extern crate panic_halt as _;
mod interrupts;
use core::mem::size_of;
use cortex_m_rt::entry;
/// GPIO port 0 peripheral address
const GPIO_P0: usize = 0x5000_0000;
// GPIO peripheral offsets
const PIN_CNF: usize = 0x700;
const OUTSET: usize = 0x508;
const OUTCLR: usize = 0x50c;
// PIN_CNF fields
const DIR_OUTPUT: u32 = 0x1;
const INPUT_DISCONNECT: u32 = 0x1 << 1;
const PULL_DISABLED: u32 = 0x0 << 2;
const DRIVE_S0S1: u32 = 0x0 << 8;
const SENSE_DISABLED: u32 = 0x0 << 16;
#[entry]
fn main() -> ! {
// Configure GPIO 0 pins 21 and 28 as push-pull outputs.
let pin_cnf_21 = (GPIO_P0 + PIN_CNF + 21 * size_of::<u32>()) as *mut u32;
let pin_cnf_28 = (GPIO_P0 + PIN_CNF + 28 * size_of::<u32>()) as *mut u32;
// SAFETY: The pointers are to valid peripheral control registers, and no
// aliases exist.
unsafe {
pin_cnf_21.write_volatile(
DIR_OUTPUT
| INPUT_DISCONNECT
| PULL_DISABLED
| DRIVE_S0S1
| SENSE_DISABLED,
);
pin_cnf_28.write_volatile(
DIR_OUTPUT
| INPUT_DISCONNECT
| PULL_DISABLED
| DRIVE_S0S1
| SENSE_DISABLED,
);
}
// Set pin 28 low and pin 21 high to turn the LED on.
let gpio0_outset = (GPIO_P0 + OUTSET) as *mut u32;
let gpio0_outclr = (GPIO_P0 + OUTCLR) as *mut u32;
// SAFETY: The pointers are to valid peripheral control registers, and no
// aliases exist.
unsafe {
gpio0_outclr.write_volatile(1 << 28);
gpio0_outset.write_volatile(1 << 21);
}
loop {}
}- 将 GPIO 0 的引脚 21 连接到 LED 矩阵的第一列,将引脚 28 连接到第一行。
使用以下命令运行该示例:
cargo embed --bin mmio
外围设备访问 crate
svd2rust 使用 CMSIS-SVD 文件为内存映射外围设备生成了大部分安全的 Rust 封装容器。
#![no_main]
#![no_std]
extern crate panic_halt as _;
use cortex_m_rt::entry;
use nrf52833_pac::Peripherals;
#[entry]
fn main() -> ! {
let p = Peripherals::take().unwrap();
let gpio0 = p.P0;
// Configure GPIO 0 pins 21 and 28 as push-pull outputs.
gpio0.pin_cnf[21].write(|w| {
w.dir().output();
w.input().disconnect();
w.pull().disabled();
w.drive().s0s1();
w.sense().disabled();
w
});
gpio0.pin_cnf[28].write(|w| {
w.dir().output();
w.input().disconnect();
w.pull().disabled();
w.drive().s0s1();
w.sense().disabled();
w
});
// Set pin 28 low and pin 21 high to turn the LED on.
gpio0.outclr.write(|w| w.pin28().clear());
gpio0.outset.write(|w| w.pin21().set());
loop {}
}- SVD(系统视图描述)文件通常是由芯片供应商提供的 XML 文件,用于描述设备的内存映射。
- 这些文件按照外围设备、寄存器、字段和值进行组织分类,其中包含名称、内容描述、地址等信息。
- 由于 SVD 文件常常存在错误和不完整的情况,因此有许多项目会修复这些错误,补充缺失的相关信息,并发布生成的 crate。
cortex-m-rt提供矢量表以及其他功能。- 如果您使用
cargo install cargo-binutils,则可以运行cargo objdump --bin pac -- -d --no-show-raw-insn,查看生成的二进制文件。
使用以下命令运行该示例:
cargo embed --bin pac
HAL crates
许多微控制器的 HAL crate 为各种外围设备提供了封装容器。通常,这些封装容器可以实现 embedded-hal 中的各种 trait。
#![no_main]
#![no_std]
extern crate panic_halt as _;
use cortex_m_rt::entry;
use nrf52833_hal::gpio::{p0, Level};
use nrf52833_hal::pac::Peripherals;
use nrf52833_hal::prelude::*;
#[entry]
fn main() -> ! {
let p = Peripherals::take().unwrap();
// Create HAL wrapper for GPIO port 0.
let gpio0 = p0::Parts::new(p.P0);
// Configure GPIO 0 pins 21 and 28 as push-pull outputs.
let mut col1 = gpio0.p0_28.into_push_pull_output(Level::High);
let mut row1 = gpio0.p0_21.into_push_pull_output(Level::Low);
// Set pin 28 low and pin 21 high to turn the LED on.
col1.set_low().unwrap();
row1.set_high().unwrap();
loop {}
}set_low和set_high是embedded_halOutputPintrait 上的方法。- HAL crate 被广泛用于许多 Cortex-M 和 RISC-V 设备,包括各种 STM32、GD32、nRF、NXP、MSP430、AVR 和 PIC 微控制器。
使用以下命令运行该示例:
cargo embed --bin hal
Board support crates
为了方便使用,板级支持 crate 为特定开发板提供了更高级别的封装功能。
#![no_main]
#![no_std]
extern crate panic_halt as _;
use cortex_m_rt::entry;
use microbit::hal::prelude::*;
use microbit::Board;
#[entry]
fn main() -> ! {
let mut board = Board::take().unwrap();
board.display_pins.col1.set_low().unwrap();
board.display_pins.row1.set_high().unwrap();
loop {}
}- 在本例中,该板级支持 crate 仅提供了一些实用的名称和初始化功能。
- 除微控制器以外,该 crate 还包含一些可用于板载设备的驱动程序。
microbit-v2包含一个可用于 LED 矩阵的简单驱动程序。
使用以下命令运行该示例:
cargo embed --bin board_support
类型状态模式
#[entry]
fn main() -> ! {
let p = Peripherals::take().unwrap();
let gpio0 = p0::Parts::new(p.P0);
let pin: P0_01<Disconnected> = gpio0.p0_01;
// let gpio0_01_again = gpio0.p0_01; // Error, moved.
let pin_input: P0_01<Input<Floating>> = pin.into_floating_input();
if pin_input.is_high().unwrap() {
// ...
}
let mut pin_output: P0_01<Output<OpenDrain>> = pin_input
.into_open_drain_output(OpenDrainConfig::Disconnect0Standard1, Level::Low);
pin_output.set_high().unwrap();
// pin_input.is_high(); // Error, moved.
let _pin2: P0_02<Output<OpenDrain>> = gpio0
.p0_02
.into_open_drain_output(OpenDrainConfig::Disconnect0Standard1, Level::Low);
let _pin3: P0_03<Output<PushPull>> =
gpio0.p0_03.into_push_pull_output(Level::Low);
loop {}
}- 引脚无法实现
Copy或Clone,因此,每个引脚只能存在一个实例。一旦某个引脚从端口结构体移出,任何人都无法再使用它。 - 更改引脚的配置会使旧的引脚实例失效,因此您无法再继续使用旧实例。
- 值的类型表示其所处状态:例如,在本例中,表示 GPIO 引脚的配置状态。通过这种方式,可将状态机编码成类型系统,并确保在未正确完成引脚配置之前,不会尝试以某种方式使用引脚。编译时捕获了非法状态转换。
- 您可以在输入引脚上调用
is_high,在输出引脚上调用set_high,反之则不行。 - 许多 HAL crate 都遵循此模式。
embedded-hal
embedded-hal crate 提供许多适用于常见微控制器外围设备的 trait。
- GPIO
- ADC
- I2C、SPI、UART、CAN
- RNG
- 定时器
- 监控定时器
然后,其他 crate 可以根据这些 trait 实现 驱动程序,例如加速度计驱动程序可能需要通过 I2C 或 SPI 总线实现。
- 还有适用于许多微控制器以及其他平台(例如 Raspberry Pi 上的 Linux)的实现。
- 我们正在开发
async版本的embedded-hal,但目前还欠缺稳定性。
probe-rs 和 cargo-embed
probe-rs 是一个方便的嵌入式调试工具集,跟 OpenOCD 较为相似,但集成度更高。
- 通过 CMSIS-DAP、ST-Link 和 J-Link 探针实现 SWD(串行调试)和 JTAG
- GDB 桩和 Microsoft DAP(调试适配器协议)服务器
- Cargo integration
cargo-embed 是一个 cargo 子命令,用于构建和刷写二进制文件、记录 RTT(实时传输)输出以及连接 GDB。您可通过项目目录中的 Embed.toml 文件对其进行配置。
- CMSIS-DAP 是一项基于 USB 的 Arm 标准协议,使得电路内调试程序能够接入各种 Arm Cortex 处理器的 CoreSight 调试访问端口。BBC micro:bit 的板载调试程序所使用的便是此协议。
- ST-Link 属于 ST Microelectronics 产品系列,J-Link 是 SEGGER 系列。
- 调试访问端口通常为 5 针 JTAG 接口或 2 针串行线调试接口。
- probe-rs 是一个库,如有需要,可以将其集成到您的工具中。
- 借助 Microsoft 调试适配器协议,VSCode 和其他 IDE 可以调试任何受支持的微控制器上运行的代码。
- cargo-embed 是使用 probe-rs 库构建的二进制文件。
- RTT(实时传输)是一种通过多个环形缓冲区,在调试主机和目标之间进行数据传输的机制。
调试
Embed.toml:
[default.general]
chip = "nrf52833_xxAA"
[debug.gdb]
enabled = true
在 src/bare-metal/microcontrollers/examples/ 目录下某个终端中:
cargo embed --bin board_support debug
在同一目录下的另一个终端中:
在 gLinux 或 Debian 上:
gdb-multiarch target/thumbv7em-none-eabihf/debug/board_support --eval-command="target remote :1337"
在 MacOS 上:
arm-none-eabi-gdb target/thumbv7em-none-eabihf/debug/board_support --eval-command="target remote :1337"
在 GDB 中,请尝试运行以下命令:
b src/bin/board_support.rs:29
b src/bin/board_support.rs:30
b src/bin/board_support.rs:32
c
c
c
Other projects
- RTIC
- “Real-Time Interrupt-driven Concurrency”
- 共享资源管理、消息传递、任务调度、定时器队列
- Embassy
- 具有优先级、计时器、网络和 USB 功能的
async执行器
- 具有优先级、计时器、网络和 USB 功能的
- TockOS
- 以安全为中心的 RTOS,具有抢占式调度功能和提供内存保护单元支持
- Hubris
- Oxide Computer Company 开发的微内核 RTOS,提供内存保护、非特权驱动程序和 IPC 功能
- FreeRTOS 的绑定
- 有些平台可以实现
std,例如 esp-idf。
- RTIC 可被视为 RTOS 或并发框架,
- 但不包含任何 HAL。
- 它使用 Cortex-M NVIC(嵌套虚拟中断控制器)进行调度,而不是选用适合的内核。
- 仅限 Cortex-M。
- Google 在 Haven 微控制器上使用 TockOS 作为 Titan 安全密钥的操作系统。
- FreeRTOS 主要使用 C 语言编写,但也提供了专用于编写应用的 Rust 绑定。
习题
我们将从 I2C 罗盘读取方向,并将读数记录到串行端口。
After looking at the exercises, you can look at the solutions provided.
罗盘
我们将从 I2C 罗盘读取方向,并将读数记录到串行端口。如有时间,请尝试通过 LED 灯亮起的方式,或者使用按钮来显示方向。
提示:
- 请参阅
lsm303agr和microbit-v2crate,以及 micro:bit 硬件 相关文档。 - LSM303AGR 惯性测量装置与内部 I2C 总线相连接。
- TWI 是 I2C 的别称,因此 I2C 主外围设备称为 TWIM。
- LSM303AGR 驱动程序需要使用某种方法来实现
embedded_hal::blocking::i2c::WriteReadtrait。microbit::hal::Twim结构体便可以做到这一点。 - 您拥有一个
microbit::Board结构体,其中包含各种引脚和外围设备的字段。 - 如有需要,您还可以查看 nRF52833 数据表,但对本练习来说这不是必需的。
下载 练习模板 并在 compass 目录中查找以下文件。
src/main.rs:
#![no_main]
#![no_std]
extern crate panic_halt as _;
use core::fmt::Write;
use cortex_m_rt::entry;
use microbit::{hal::uarte::{Baudrate, Parity, Uarte}, Board};
#[entry]
fn main() -> ! {
let board = Board::take().unwrap();
// Configure serial port.
let mut serial = Uarte::new(
board.UARTE0,
board.uart.into(),
Parity::EXCLUDED,
Baudrate::BAUD115200,
);
// Use the system timer as a delay provider.
let mut delay = Delay::new(board.SYST);
// Set up the I2C controller and Inertial Measurement Unit.
// TODO
writeln!(serial, "Ready.").unwrap();
loop {
// Read compass data and log it to the serial port.
// TODO
}
}Cargo.toml(无需对此进行更改):
[workspace]
[package]
name = "compass"
version = "0.1.0"
edition = "2021"
publish = false
[dependencies]
cortex-m-rt = "0.7.3"
embedded-hal = "1.0.0"
lsm303agr = "0.3.0"
microbit-v2 = "0.13.0"
panic-halt = "0.2.0"
Embed.toml(无需对此进行更改):
[default.general]
chip = "nrf52833_xxAA"
[debug.gdb]
enabled = true
[debug.reset]
halt_afterwards = true
.cargo/config.toml(无需对此进行更改):
[build]
target = "thumbv7em-none-eabihf" # Cortex-M4F
[target.'cfg(all(target_arch = "arm", target_os = "none"))']
rustflags = ["-C", "link-arg=-Tlink.x"]
运行以下命令查看 Linux 上的串行输出:
picocom --baud 115200 --imap lfcrlf /dev/ttyACM0
或者在 Mac OS 上,如下所示(设备名称可能略有不同):
picocom --baud 115200 --imap lfcrlf /dev/tty.usbmodem14502
使用 Ctrl+A Ctrl+Q 退出 picocom。
裸机 Rust 上午练习
罗盘
(返回练习)
#![no_main]
#![no_std]
extern crate panic_halt as _;
use core::fmt::Write;
use cortex_m_rt::entry;
use core::cmp::{max, min};
use lsm303agr::{
AccelMode, AccelOutputDataRate, Lsm303agr, MagMode, MagOutputDataRate,
};
use microbit::display::blocking::Display;
use microbit::hal::prelude::*;
use microbit::hal::twim::Twim;
use microbit::hal::uarte::{Baudrate, Parity, Uarte};
use microbit::hal::{Delay, Timer};
use microbit::pac::twim0::frequency::FREQUENCY_A;
use microbit::Board;
const COMPASS_SCALE: i32 = 30000;
const ACCELEROMETER_SCALE: i32 = 700;
#[entry]
fn main() -> ! {
let board = Board::take().unwrap();
// Configure serial port.
let mut serial = Uarte::new(
board.UARTE0,
board.uart.into(),
Parity::EXCLUDED,
Baudrate::BAUD115200,
);
// Use the system timer as a delay provider.
let mut delay = Delay::new(board.SYST);
// Set up the I2C controller and Inertial Measurement Unit.
writeln!(serial, "Setting up IMU...").unwrap();
let i2c = Twim::new(board.TWIM0, board.i2c_internal.into(), FREQUENCY_A::K100);
let mut imu = Lsm303agr::new_with_i2c(i2c);
imu.init().unwrap();
imu.set_mag_mode_and_odr(
&mut delay,
MagMode::HighResolution,
MagOutputDataRate::Hz50,
)
.unwrap();
imu.set_accel_mode_and_odr(
&mut delay,
AccelMode::Normal,
AccelOutputDataRate::Hz50,
)
.unwrap();
let mut imu = imu.into_mag_continuous().ok().unwrap();
// Set up display and timer.
let mut timer = Timer::new(board.TIMER0);
let mut display = Display::new(board.display_pins);
let mut mode = Mode::Compass;
let mut button_pressed = false;
writeln!(serial, "Ready.").unwrap();
loop {
// Read compass data and log it to the serial port.
while !(imu.mag_status().unwrap().xyz_new_data()
&& imu.accel_status().unwrap().xyz_new_data())
{}
let compass_reading = imu.magnetic_field().unwrap();
let accelerometer_reading = imu.acceleration().unwrap();
writeln!(
serial,
"{},{},{}\t{},{},{}",
compass_reading.x_nt(),
compass_reading.y_nt(),
compass_reading.z_nt(),
accelerometer_reading.x_mg(),
accelerometer_reading.y_mg(),
accelerometer_reading.z_mg(),
)
.unwrap();
let mut image = [[0; 5]; 5];
let (x, y) = match mode {
Mode::Compass => (
scale(-compass_reading.x_nt(), -COMPASS_SCALE, COMPASS_SCALE, 0, 4)
as usize,
scale(compass_reading.y_nt(), -COMPASS_SCALE, COMPASS_SCALE, 0, 4)
as usize,
),
Mode::Accelerometer => (
scale(
accelerometer_reading.x_mg(),
-ACCELEROMETER_SCALE,
ACCELEROMETER_SCALE,
0,
4,
) as usize,
scale(
-accelerometer_reading.y_mg(),
-ACCELEROMETER_SCALE,
ACCELEROMETER_SCALE,
0,
4,
) as usize,
),
};
image[y][x] = 255;
display.show(&mut timer, image, 100);
// If button A is pressed, switch to the next mode and briefly blink all LEDs
// on.
if board.buttons.button_a.is_low().unwrap() {
if !button_pressed {
mode = mode.next();
display.show(&mut timer, [[255; 5]; 5], 200);
}
button_pressed = true;
} else {
button_pressed = false;
}
}
}
#[derive(Copy, Clone, Debug, Eq, PartialEq)]
enum Mode {
Compass,
Accelerometer,
}
impl Mode {
fn next(self) -> Self {
match self {
Self::Compass => Self::Accelerometer,
Self::Accelerometer => Self::Compass,
}
}
}
fn scale(value: i32, min_in: i32, max_in: i32, min_out: i32, max_out: i32) -> i32 {
let range_in = max_in - min_in;
let range_out = max_out - min_out;
cap(min_out + range_out * (value - min_in) / range_in, min_out, max_out)
}
fn cap(value: i32, min_value: i32, max_value: i32) -> i32 {
max(min_value, min(value, max_value))
}应用处理器
到目前为止,我们已经讨论了微控制器,例如 Arm Cortex-M 系列。现在,尝试为 Cortex-A 编写一些代码。为简单起见,我们只使用 QEMU 的 aarch64 virt 开发板 进行编写。
- 一般来说,微控制器不具备 MMU 或多级特权(例如,Arm CPU 中的异常级别,x86 中的铃声级别)的功能,而应用处理器则具备这些功能。
- QEMU 支持针对每种架构模拟不同的机器或板级模型。“虚拟”开发板并不适用于任何特定的真实硬件,而是专为虚拟机设计的。
准备使用 Rust
在开始运行 Rust 代码之前,我们需要进行一些初始化设置。
.section .init.entry, "ax"
.global entry
entry:
/*
* Load and apply the memory management configuration, ready to enable MMU and
* caches.
*/
adrp x30, idmap
msr ttbr0_el1, x30
mov_i x30, .Lmairval
msr mair_el1, x30
mov_i x30, .Ltcrval
/* Copy the supported PA range into TCR_EL1.IPS.*/
mrs x29, id_aa64mmfr0_el1
bfi x30, x29, #32, #4
msr tcr_el1, x30
mov_i x30, .Lsctlrval
/*
* Ensure everything before this point has completed, then invalidate any
* potentially stale local TLB entries before they start being used.
*/
isb
tlbi vmalle1
ic iallu
dsb nsh
isb
/*
* Configure sctlr_el1 to enable MMU and cache and don't proceed until this
* has completed.
*/
msr sctlr_el1, x30
isb
/* Disable trapping floating point access in EL1.*/
mrs x30, cpacr_el1
orr x30, x30, #(0x3 << 20)
msr cpacr_el1, x30
isb
/* Zero out the bss section.*/
adr_l x29, bss_begin
adr_l x30, bss_end
0: cmp x29, x30
b.hs 1f
stp xzr, xzr, [x29], #16
b 0b
1: /* Prepare the stack.*/
adr_l x30, boot_stack_end
mov sp, x30
/* Set up exception vector.*/
adr x30, vector_table_el1
msr vbar_el1, x30
/* Call into Rust code.*/
bl main
/* Loop forever waiting for interrupts.*/
2: wfi
b 2b
- 这与 C 语言的情况相同:初始化处理器状态,将 BSS 清零,然后设置堆栈指针。
- BSS(由于历史原因,称为代码块起始符)属于对象文件的一部分,其中包含静态分配的变量,这些变量被初始化为零。图像中省略了这些符号,以避免因存储零值而占用过多空间。编译器假定加载器会负责将它们清零。
- BSS 可能已经被清零,具体取决于内存的初始化方式以及图像的加载方式,但为了确保起见,我们会将其手动清零。
- 我们需要先启用 MMU 和缓存功能,然后才能读取或写入任何内存。否则:
- 非对齐访问将会出错。我们为
aarch64-unknown-none目标构建 Rust 代码,该目标会设置+Strict-align以防止编译器生成非对齐访问,因此在本例中应该没有问题,但一般情况下并不一定如此。 - 如果是在虚拟机中运行该命令,可能会导致缓存一致性问题。问题在于,虚拟机是在禁用缓存的情况下直接访问内存,而主机具有同一内存的缓存别名。即使主机并没有明确访问该内存,推测性访问仍然会导致缓存被填充,然后在清除缓存或虚拟机启用缓存时,任何一方对于该内存进行的更改就会丢失。(使用物理地址来键控缓存,而 VA 或 IPA。)
- 非对齐访问将会出错。我们为
- 为简单起见,我们只使用硬编码的分页表(请参阅
dmap.S),其通过身份映射将前一个 1 GiB 的地址空间用于设备,紧接着的 1 GiB 用于 DRAM,然后在更高位置预留了 1 GiB 给其他设备。这与 QEMU 使用的内存布局一致。 - 我们还设置了异常矢量 (
vbar_el1),稍后会对此进行详细介绍。 - 今天下午的所有示例都假定我们将在异常级别 1 (EL1) 下运行。如果您需要在其他异常级别下运行,则需要修改相应的
entry.S。
内嵌汇编
有时,如果无法通过 Rust 代码实现某些操作,我们就需要使用汇编来解决。例如,如需发出 HVC(Hypervisor 调用)来指示固件关闭系统,请使用以下命令:
#![no_main]
#![no_std]
use core::arch::asm;
use core::panic::PanicInfo;
mod exceptions;
const PSCI_SYSTEM_OFF: u32 = 0x84000008;
#[no_mangle]
extern "C" fn main(_x0: u64, _x1: u64, _x2: u64, _x3: u64) {
// SAFETY: this only uses the declared registers and doesn't do anything
// with memory.
unsafe {
asm!("hvc #0",
inout("w0") PSCI_SYSTEM_OFF => _,
inout("w1") 0 => _,
inout("w2") 0 => _,
inout("w3") 0 => _,
inout("w4") 0 => _,
inout("w5") 0 => _,
inout("w6") 0 => _,
inout("w7") 0 => _,
options(nomem, nostack)
);
}
loop {}
}(如果确实想要这样做,请使用 smccc crate,其中包含适用于所有这些函数的封装容器。)
- PSCI 是 Arm 电源状态协调接口,为一组标准函数,用于管理系统和 CPU 电源状态等。在许多系统中,通过 EL3 固件和 Hypervisor 来实现该函数。
0 => _语法表示在运行内嵌汇编代码之前将寄存器初始化为 0,并在之后忽略寄存器中的内容。我们需要使用inout而非in,因为该调用操作可能会破坏寄存器中的内容。- 所用
main函数必须是#[no_mangle]和extern "C",因为是从entry.S中的入口点调用该函数。 _x0–_x3表示寄存器x0-x3的值,引导加载程序通常使用这些值来传递各种内容(例如将指针传递到设备树)。根据标准的 aarch64 调用规范(extern "C"指定使用此规范),需要使用寄存器x0-x7将前 8 个参数传递给函数,因此entry.S无需执行任何特殊操作,只要确保不会更改这些寄存器。- 在 QEMU 中,使用
src/bare-metal/aps/examples目录下的make qemu_psci运行该示例。
MMIO 的易失性内存访问
- 使用
pointer::read_volatile和pointer::write_volatile。 - 切勿提及引用。
- 借助
addr_of!,您无需创建中间引用即可获取结构体字段。
- 易失性访问:执行读取或写入操作可能会产生副作用,因此应阻止编译器或硬件对这些操作进行重新排序、复制或省略。
- 通常情况下,如果您先写入操作,紧接着进行读取操作(例如通过可变引用),则编译器可能会认为读取的值是最新写入的值,就不再执行实际的内存读取过程。
- 虽然在对硬件进行易失性访问时,一些 crate 确实会提及引用,但这很不安全。只要存在引用,编译器就会选择对其进行解引用操作。
- 使用
addr_of!宏可以从结构体指针中获取结构体字段的指针。
编写 UART 驱动程序
QEMU “虚拟机”具有 PL011 UART,现在为其编写驱动程序。
const FLAG_REGISTER_OFFSET: usize = 0x18;
const FR_BUSY: u8 = 1 << 3;
const FR_TXFF: u8 = 1 << 5;
/// Minimal driver for a PL011 UART.
#[derive(Debug)]
pub struct Uart {
base_address: *mut u8,
}
impl Uart {
/// Constructs a new instance of the UART driver for a PL011 device at the
/// given base address.
///
/// # Safety
///
/// The given base address must point to the 8 MMIO control registers of a
/// PL011 device, which must be mapped into the address space of the process
/// as device memory and not have any other aliases.
pub unsafe fn new(base_address: *mut u8) -> Self {
Self { base_address }
}
/// Writes a single byte to the UART.
pub fn write_byte(&self, byte: u8) {
// Wait until there is room in the TX buffer.
while self.read_flag_register() & FR_TXFF != 0 {}
// SAFETY: We know that the base address points to the control
// registers of a PL011 device which is appropriately mapped.
unsafe {
// Write to the TX buffer.
self.base_address.write_volatile(byte);
}
// Wait until the UART is no longer busy.
while self.read_flag_register() & FR_BUSY != 0 {}
}
fn read_flag_register(&self) -> u8 {
// SAFETY: We know that the base address points to the control
// registers of a PL011 device which is appropriately mapped.
unsafe { self.base_address.add(FLAG_REGISTER_OFFSET).read_volatile() }
}
}- 请注意,使用
Uart::new方法不安全,而其他方法则安全。原因在于,只要Uart::new的调用方保证满足其安全要求(即所指定的 UART 只有一个驱动程序实例,且没有其他内容与其地址空间存在重叠),那么后续调用write_byte始终是安全的,因为我们假定需要满足的前提条件。 - 我们也可以采用相反的方式(即确保
new安全,但write_byte不安全),不过这样会很不方便,因为每当调用write_byte时都需要推断是否安全。 - 这是安全地封装不安全代码时常见的策略:即在少数调用代码的地方进行安全验证,而不是在很多地方进行。
更多 trait
已经派生了 Debug trait。如果再实现更多 trait,会大有帮助。
use core::fmt::{self, Write};
impl Write for Uart {
fn write_str(&mut self, s: &str) -> fmt::Result {
for c in s.as_bytes() {
self.write_byte(*c);
}
Ok(())
}
}
// SAFETY: `Uart` just contains a pointer to device memory, which can be
// accessed from any context.
unsafe impl Send for Uart {}- 通过实现
Write,我们可以将write!和writeln!宏与Uart类型搭配使用。 - 在 QEMU 中,使用
src/bare-metal/aps/examples目录下的make qemu_minimal运行该示例。
更好的 UART 驱动程序
事实上,PL011 具有 很多额外的寄存器,但通过添加偏移量构建指针的方式来访问这些寄存器,既容易出错又难以读取。此外,其中有些寄存器是位字段,非常便于以结构化方式访问。
| 偏移 | 寄存器名称 | 宽度 |
|---|---|---|
| 0x00 | DR | 12 |
| 0x04 | RSR | 4 |
| 0x18 | FR | 9 |
| 0x20 | ILPR | 8 |
| 0x24 | IBRD | 16 |
| 0x28 | FBRD | 6 |
| 0x2c | LCR_H | 8 |
| 0x30 | CR | 16 |
| 0x34 | IFLS | 6 |
| 0x38 | IMSC | 11 |
| 0x3c | RIS | 11 |
| 0x40 | MIS | 11 |
| 0x44 | ICR | 11 |
| 0x48 | DMACR | 3 |
- 为简洁起见,我们省略了一些 ID 寄存器。
Bitflags
bitflags crate 非常适用于处理 bitflag。
use bitflags::bitflags;
bitflags! {
/// Flags from the UART flag register.
#[repr(transparent)]
#[derive(Copy, Clone, Debug, Eq, PartialEq)]
struct Flags: u16 {
/// Clear to send.
const CTS = 1 << 0;
/// Data set ready.
const DSR = 1 << 1;
/// Data carrier detect.
const DCD = 1 << 2;
/// UART busy transmitting data.
const BUSY = 1 << 3;
/// Receive FIFO is empty.
const RXFE = 1 << 4;
/// Transmit FIFO is full.
const TXFF = 1 << 5;
/// Receive FIFO is full.
const RXFF = 1 << 6;
/// Transmit FIFO is empty.
const TXFE = 1 << 7;
/// Ring indicator.
const RI = 1 << 8;
}
}bitflags!宏会创建类似于Flags(u16)的新类型,以及一系列用于获取和设置标记的方法实现。
多个寄存器
我们可以使用结构体来表示 UART 寄存器的内存布局。
#[repr(C, align(4))]
struct Registers {
dr: u16,
_reserved0: [u8; 2],
rsr: ReceiveStatus,
_reserved1: [u8; 19],
fr: Flags,
_reserved2: [u8; 6],
ilpr: u8,
_reserved3: [u8; 3],
ibrd: u16,
_reserved4: [u8; 2],
fbrd: u8,
_reserved5: [u8; 3],
lcr_h: u8,
_reserved6: [u8; 3],
cr: u16,
_reserved7: [u8; 3],
ifls: u8,
_reserved8: [u8; 3],
imsc: u16,
_reserved9: [u8; 2],
ris: u16,
_reserved10: [u8; 2],
mis: u16,
_reserved11: [u8; 2],
icr: u16,
_reserved12: [u8; 2],
dmacr: u8,
_reserved13: [u8; 3],
}- 通过运行
#[repr(C)]命令,指示编译器按顺序布置结构体字段,遵循与 C 语言相同的规则。这是确保结构体具有可预测布局的必要条件,因为默认的 Rust 表示法允许编译器(以及其他内容)按照其认为合适的方式重新排列字段。
驱动程序
现在将新的 Registers 结构体用于我们的驱动程序。
/// Driver for a PL011 UART.
#[derive(Debug)]
pub struct Uart {
registers: *mut Registers,
}
impl Uart {
/// Constructs a new instance of the UART driver for a PL011 device at the
/// given base address.
///
/// # Safety
///
/// The given base address must point to the 8 MMIO control registers of a
/// PL011 device, which must be mapped into the address space of the process
/// as device memory and not have any other aliases.
pub unsafe fn new(base_address: *mut u32) -> Self {
Self { registers: base_address as *mut Registers }
}
/// Writes a single byte to the UART.
pub fn write_byte(&self, byte: u8) {
// Wait until there is room in the TX buffer.
while self.read_flag_register().contains(Flags::TXFF) {}
// SAFETY: We know that self.registers points to the control registers
// of a PL011 device which is appropriately mapped.
unsafe {
// Write to the TX buffer.
addr_of_mut!((*self.registers).dr).write_volatile(byte.into());
}
// Wait until the UART is no longer busy.
while self.read_flag_register().contains(Flags::BUSY) {}
}
/// Reads and returns a pending byte, or `None` if nothing has been
/// received.
pub fn read_byte(&self) -> Option<u8> {
if self.read_flag_register().contains(Flags::RXFE) {
None
} else {
// SAFETY: We know that self.registers points to the control
// registers of a PL011 device which is appropriately mapped.
let data = unsafe { addr_of!((*self.registers).dr).read_volatile() };
// TODO: Check for error conditions in bits 8-11.
Some(data as u8)
}
}
fn read_flag_register(&self) -> Flags {
// SAFETY: We know that self.registers points to the control registers
// of a PL011 device which is appropriately mapped.
unsafe { addr_of!((*self.registers).fr).read_volatile() }
}
}- 请注意,只使用
addr_of!/addr_of_mut!获取指向各个字段的指针,而不创建中间引用,这样很不安全。
开始使用
使用驱动程序编写一个小程序,将数据写入串行控制台,并回显传入的字节。
#![no_main]
#![no_std]
mod exceptions;
mod pl011;
use crate::pl011::Uart;
use core::fmt::Write;
use core::panic::PanicInfo;
use log::error;
use smccc::psci::system_off;
use smccc::Hvc;
/// Base address of the primary PL011 UART.
const PL011_BASE_ADDRESS: *mut u32 = 0x900_0000 as _;
#[no_mangle]
extern "C" fn main(x0: u64, x1: u64, x2: u64, x3: u64) {
// SAFETY: `PL011_BASE_ADDRESS` is the base address of a PL011 device, and
// nothing else accesses that address range.
let mut uart = unsafe { Uart::new(PL011_BASE_ADDRESS) };
writeln!(uart, "main({x0:#x}, {x1:#x}, {x2:#x}, {x3:#x})").unwrap();
loop {
if let Some(byte) = uart.read_byte() {
uart.write_byte(byte);
match byte {
b'\r' => {
uart.write_byte(b'\n');
}
b'q' => break,
_ => {}
}
}
}
writeln!(uart, "Bye!").unwrap();
system_off::<Hvc>().unwrap();
}- 与 内嵌汇编 示例一样,从
entry.S中的入口点代码调用此main函数。如需了解详情,请参阅演讲者备注。 - 在 QEMU 中,使用
src/bare-metal/aps/examples目录下的make qemu运行该示例。
日志记录
最好能够使用 log crate 中的日志记录宏。可以通过实现“Log”trait 来做到这一点。
use crate::pl011::Uart;
use core::fmt::Write;
use log::{LevelFilter, Log, Metadata, Record, SetLoggerError};
use spin::mutex::SpinMutex;
static LOGGER: Logger = Logger { uart: SpinMutex::new(None) };
struct Logger {
uart: SpinMutex<Option<Uart>>,
}
impl Log for Logger {
fn enabled(&self, _metadata: &Metadata) -> bool {
true
}
fn log(&self, record: &Record) {
writeln!(
self.uart.lock().as_mut().unwrap(),
"[{}] {}",
record.level(),
record.args()
)
.unwrap();
}
fn flush(&self) {}
}
/// Initialises UART logger.
pub fn init(uart: Uart, max_level: LevelFilter) -> Result<(), SetLoggerError> {
LOGGER.uart.lock().replace(uart);
log::set_logger(&LOGGER)?;
log::set_max_level(max_level);
Ok(())
}- 使用
log进行解封装是安全的,因为我们会在调用set_logger之前初始化LOGGER。
开始使用
需要先初始化日志记录器,然后才能使用它。
#![no_main]
#![no_std]
mod exceptions;
mod logger;
mod pl011;
use crate::pl011::Uart;
use core::panic::PanicInfo;
use log::{error, info, LevelFilter};
use smccc::psci::system_off;
use smccc::Hvc;
/// Base address of the primary PL011 UART.
const PL011_BASE_ADDRESS: *mut u32 = 0x900_0000 as _;
#[no_mangle]
extern "C" fn main(x0: u64, x1: u64, x2: u64, x3: u64) {
// SAFETY: `PL011_BASE_ADDRESS` is the base address of a PL011 device, and
// nothing else accesses that address range.
let uart = unsafe { Uart::new(PL011_BASE_ADDRESS) };
logger::init(uart, LevelFilter::Trace).unwrap();
info!("main({x0:#x}, {x1:#x}, {x2:#x}, {x3:#x})");
assert_eq!(x1, 42);
system_off::<Hvc>().unwrap();
}
#[panic_handler]
fn panic(info: &PanicInfo) -> ! {
error!("{info}");
system_off::<Hvc>().unwrap();
loop {}
}- 请注意,panic 紧急处理程序现在可以记录各类 panic 详细信息。
- 在 QEMU 中,使用
src/bare-metal/aps/examples目录下的make qemu_logger运行该示例。
异常
AArch64 定义了一个包含 16 个条目的异常矢量表,适用于处理 4 种状态(当前 EL 使用 SP0,当前 EL 使用 SPx,较低 EL 使用 AArch64,较低 EL 使用 AArch32)下的 4 种异常(同步、IRQ、FIQ、SError)。可以通过汇编方式实现这一操作,以便在调用 Rust 代码之前将易失性寄存器保存到堆栈:
use log::error;
use smccc::psci::system_off;
use smccc::Hvc;
#[no_mangle]
extern "C" fn sync_exception_current(_elr: u64, _spsr: u64) {
error!("sync_exception_current");
system_off::<Hvc>().unwrap();
}
#[no_mangle]
extern "C" fn irq_current(_elr: u64, _spsr: u64) {
error!("irq_current");
system_off::<Hvc>().unwrap();
}
#[no_mangle]
extern "C" fn fiq_current(_elr: u64, _spsr: u64) {
error!("fiq_current");
system_off::<Hvc>().unwrap();
}
#[no_mangle]
extern "C" fn serr_current(_elr: u64, _spsr: u64) {
error!("serr_current");
system_off::<Hvc>().unwrap();
}
#[no_mangle]
extern "C" fn sync_lower(_elr: u64, _spsr: u64) {
error!("sync_lower");
system_off::<Hvc>().unwrap();
}
#[no_mangle]
extern "C" fn irq_lower(_elr: u64, _spsr: u64) {
error!("irq_lower");
system_off::<Hvc>().unwrap();
}
#[no_mangle]
extern "C" fn fiq_lower(_elr: u64, _spsr: u64) {
error!("fiq_lower");
system_off::<Hvc>().unwrap();
}
#[no_mangle]
extern "C" fn serr_lower(_elr: u64, _spsr: u64) {
error!("serr_lower");
system_off::<Hvc>().unwrap();
}- EL 指异常级别;我们今天下午的所有示例都在 EL1 级别下运行。
- 为简单起见,我们没有区分当前 EL 异常中的 SP0 和 SPx,也没有区分较低 EL 异常中的 AArch32 和 AArch64。
- 在本示例中,只需记录异常并进行关机操作,因为预计不会发生任何此类异常。
- 我们可以将异常处理程序和主执行上下文视为不同的线程。通过
Send和Sync控制它们之间可以共享的内容,就像使用线程进行共享一样。例如,如果想在异常处理程序和程序的其余部分之间共享某个值,并且使用Send而非Sync,则需要将该值封装在诸如Mutex之类的内容中,并放入静态变量。
Other projects
- oreboot
- “coreboot without the C”
- 支持 x86、aarch64 和 RISC-V。
- 依赖于 LinuxBoot,而不是许多驱动程序本身。
- Rust RaspberryPi 操作系统教程
- 初始化、UART 驱动程序、简单引导加载程序、JTAG、异常级别、异常处理、分页表
- 在 Rust 中,有些用于处理缓存维护和初始化的方法并不安全,不适宜照搬到正式版代码中。
cargo-call-stack- 使用静态分析来确定堆栈用量上限。
- 在 RaspberryPi 操作系统教程中,先运行 Rust 代码然后启用 MMU 和缓存。此操作会读取和写入内存(例如堆栈)。不过:
- 如果不启用 MMU 和缓存,非对齐访问将会出错。它使用
aarch64-unknown-none进行构建,后者会设置+strict-align以防止编译器生成非对齐访问,因此应该没有问题,但一般情况下并不一定如此。 - 如果是在虚拟机中运行该命令,可能会导致缓存一致性问题。问题在于,虚拟机是在禁用缓存的情况下直接访问内存,而主机具有同一内存的缓存别名。即使主机并没有明确访问该内存,推测性访问仍然会导致缓存被填充,然后任何一方对于该内存进行的更改就会丢失。再次强调,尽管在此特定示例中(即在硬件上直接运行且无 Hypervisor)这种做法是可行的,但总的来说,这并非一种良好策略。
- 如果不启用 MMU 和缓存,非对齐访问将会出错。它使用
Useful crates
接下来介绍几个 crate,用于解决裸机编程中的一些常见问题。
zerocopy
zerocopy crate(源自 Fuchsia)提供了 trait 和宏,用于确保在字节序列和其他类型之间进行安全转换。
use zerocopy::AsBytes;
#[repr(u32)]
#[derive(AsBytes, Debug, Default)]
enum RequestType {
#[default]
In = 0,
Out = 1,
Flush = 4,
}
#[repr(C)]
#[derive(AsBytes, Debug, Default)]
struct VirtioBlockRequest {
request_type: RequestType,
reserved: u32,
sector: u64,
}
fn main() {
let request = VirtioBlockRequest {
request_type: RequestType::Flush,
sector: 42,
..Default::default()
};
assert_eq!(
request.as_bytes(),
&[4, 0, 0, 0, 0, 0, 0, 0, 42, 0, 0, 0, 0, 0, 0, 0]
);
}这不适用于 MMIO(因为它不使用易失性读取和写入),但在与硬件共享的结构(例如通过 DMA 传输或发送到外部接口)中进行操作时会很有用。
- 对于可以接受任何字节模式的类型,都可以实现
FromBytes方法,因此可以对不受信任的字节序列进行安全转换。 - 如果尝试为这些类型派生
FromBytes,都将会失败,因为RequestType不会将所有可能的 u32 值用作判别标识,所以并非所有的字节模式都有效。 zerocopy::byteorder提供了适用于字节顺序感知的数字基元类型。- 使用
src/bare-metal/useful-crates/zerocopy-example/目录下的cargo run运行该示例。(由于存在 crate 依赖项,无法在 Playground 中运行该示例。)
aarch64-paging
借助 aarch64-paging crate,您可根据 AArch64 虚拟内存系统架构创建分页表。
use aarch64_paging::{
idmap::IdMap,
paging::{Attributes, MemoryRegion},
};
const ASID: usize = 1;
const ROOT_LEVEL: usize = 1;
// Create a new page table with identity mapping.
let mut idmap = IdMap::new(ASID, ROOT_LEVEL);
// Map a 2 MiB region of memory as read-only.
idmap.map_range(
&MemoryRegion::new(0x80200000, 0x80400000),
Attributes::NORMAL | Attributes::NON_GLOBAL | Attributes::READ_ONLY,
).unwrap();
// Set `TTBR0_EL1` to activate the page table.
idmap.activate();- 目前,该方法仅支持 EL1 级别,但也可以直接添加对其他异常级别的支持。
- 在 Android 中,该方法适用于 受保护的虚拟机固件。
- 由于此示例需要在真实硬件上或在 QEMU 中运行,因此没有简单的运行方法可用。
buddy_system_allocator
buddy_system_allocator 是第三方 crate,用于实现基本伙伴系统分配器。同时,也可将其用于 LockedHeap 以实现 GlobalAlloc,这样便可以使用标准的 alloc crate(正如在 之前部分 中所示),或者用于分配其他地址空间。例如,我们可能需要为 PCI BAR 分配 MMIO 空间:
use buddy_system_allocator::FrameAllocator;
use core::alloc::Layout;
fn main() {
let mut allocator = FrameAllocator::<32>::new();
allocator.add_frame(0x200_0000, 0x400_0000);
let layout = Layout::from_size_align(0x100, 0x100).unwrap();
let bar = allocator
.alloc_aligned(layout)
.expect("Failed to allocate 0x100 byte MMIO region");
println!("Allocated 0x100 byte MMIO region at {:#x}", bar);
}- PCI BAR 的对齐方式始终与其大小相等。
- 使用
src/bare-metal/useful-crates/allocator-example/目录下的cargo run运行该示例。(由于存在 crate 依赖项,无法在 Playground 中运行该示例。)
tinyvec
有时,需要一些像 Vec 一样能够调整大小的特性,但无需进行堆分配。tinyvec 提供了以下特性:由数组或 slice 支持的矢量,该矢量支持进行静态分配或堆分配;用于跟踪使用的元素数量,如果元素使用量超过了分配额度,则会出现 panic。
use tinyvec::{array_vec, ArrayVec};
fn main() {
let mut numbers: ArrayVec<[u32; 5]> = array_vec!(42, 66);
println!("{numbers:?}");
numbers.push(7);
println!("{numbers:?}");
numbers.remove(1);
println!("{numbers:?}");
}- 根据
tinyvec要求,元素类型需实现初始化Default。 - Rust Playground 中包含
tinyvec,因此本示例将以内嵌方式正常运行。
spin
在 core 或 alloc 中无法使用 std::sync::Mutex 和 std::sync 中的其他同步基元。那么该如何管理同步或内部可变性,例如在不同 CPU 之间共享状态?
spin crate 为许多基元提供了基于自旋锁的等效方法。
use spin::mutex::SpinMutex;
static counter: SpinMutex<u32> = SpinMutex::new(0);
fn main() {
println!("count: {}", counter.lock());
*counter.lock() += 2;
println!("count: {}", counter.lock());
}- 在中断处理程序中进行锁定操作时,请注意避免出现死锁的情况。
spinalso has a ticket lock mutex implementation; equivalents ofRwLock,BarrierandOncefromstd::sync; andLazyfor lazy initialisation.once_cellcrate 也提供了一些适用于延迟初始化的实用类型,它们与spin::once::Once所用方法略有不同。- Rust Playground 中包含
spin,因此本示例将以内嵌方式正常运行。
Android
如需在 AOSP 中构建裸机 Rust 二进制文件,应使用 rust_ffi_static Soong 规则来构建 Rust 代码,然后通过 cc_binary 和链接器脚本生成二进制文件本身,再使用 raw_binary 将 ELF 转换为可以正常运行的原始二进制文件。
rust_ffi_static {
name: "libvmbase_example",
defaults: ["vmbase_ffi_defaults"],
crate_name: "vmbase_example",
srcs: ["src/main.rs"],
rustlibs: [
"libvmbase",
],
}
cc_binary {
name: "vmbase_example",
defaults: ["vmbase_elf_defaults"],
srcs: [
"idmap.S",
],
static_libs: [
"libvmbase_example",
],
linker_scripts: [
"image.ld",
":vmbase_sections",
],
}
raw_binary {
name: "vmbase_example_bin",
stem: "vmbase_example.bin",
src: ":vmbase_example",
enabled: false,
target: {
android_arm64: {
enabled: true,
},
},
}
vmbase
对于在 aarch64 上使用 crosvm 运行的虚拟机,vmbase 库提供了链接器脚本和实用的默认构建规则,以及入口点、UART 控制台日志记录等功能。
#![no_main]
#![no_std]
use vmbase::{main, println};
main!(main);
pub fn main(arg0: u64, arg1: u64, arg2: u64, arg3: u64) {
println!("Hello world");
}main!宏用于标记需从vmbase入口点调用的 main 函数。vmbase入口点用于处理控制台初始化,并在 main 函数返回时发送 PSCI_SYSTEM_OFF 命令以关闭虚拟机。
习题
我们将为 PL031 实时时钟设备编写驱动程序。
After looking at the exercises, you can look at the solutions provided.
RTC 驱动程序
QEMU aarch64 虚拟机在 0x9010000 地址处 配备了 PL031 实时时钟。对于本练习,应该为其编写驱动程序。
- 使用该时钟可将当前时间输出到串行控制台。您可以使用
chronocrate 设置日期/时间格式。 - 通过匹配寄存器和原始中断状态,使得系统在某段指定的时间内一直进行繁忙等待(例如 3 秒后)。(在循环操作中调用
core::hint::spin_loop。) - _进行扩展(如有时间):_启用并处理由 RTC 匹配产生的中断。可以使用
arm-giccrate 中提供的驱动程序来配置 Arm 通用中断控制器。- 请使用 RTC 中断,将其作为
IntId::spi(2)连接到 GIC。 - 启用中断后,可以通过
arm_gic::wfi()让核心进入休眠状态,直到它收到中断信号。
- 请使用 RTC 中断,将其作为
下载 练习模板 并在 rtc 目录中查找以下文件。
src/main.rs:
#![no_main]
#![no_std]
mod exceptions;
mod logger;
mod pl011;
use crate::pl011::Uart;
use arm_gic::gicv3::GicV3;
use core::panic::PanicInfo;
use log::{error, info, trace, LevelFilter};
use smccc::psci::system_off;
use smccc::Hvc;
/// Base addresses of the GICv3.
const GICD_BASE_ADDRESS: *mut u64 = 0x800_0000 as _;
const GICR_BASE_ADDRESS: *mut u64 = 0x80A_0000 as _;
/// Base address of the primary PL011 UART.
const PL011_BASE_ADDRESS: *mut u32 = 0x900_0000 as _;
#[no_mangle]
extern "C" fn main(x0: u64, x1: u64, x2: u64, x3: u64) {
// SAFETY: `PL011_BASE_ADDRESS` is the base address of a PL011 device, and
// nothing else accesses that address range.
let uart = unsafe { Uart::new(PL011_BASE_ADDRESS) };
logger::init(uart, LevelFilter::Trace).unwrap();
info!("main({:#x}, {:#x}, {:#x}, {:#x})", x0, x1, x2, x3);
// SAFETY: `GICD_BASE_ADDRESS` and `GICR_BASE_ADDRESS` are the base
// addresses of a GICv3 distributor and redistributor respectively, and
// nothing else accesses those address ranges.
let mut gic = unsafe { GicV3::new(GICD_BASE_ADDRESS, GICR_BASE_ADDRESS) };
gic.setup();
// TODO: Create instance of RTC driver and print current time.
// TODO: Wait for 3 seconds.
system_off::<Hvc>().unwrap();
}
#[panic_handler]
fn panic(info: &PanicInfo) -> ! {
error!("{info}");
system_off::<Hvc>().unwrap();
loop {}
}src/exceptions.rs(只需在本练习的第 3 部分更改此项):
#![allow(unused)]
fn main() {
// Copyright 2023 Google LLC
//
// Licensed under the Apache License, Version 2.0 (the "License");
// you may not use this file except in compliance with the License.
// You may obtain a copy of the License at
//
// http://www.apache.org/licenses/LICENSE-2.0
//
// Unless required by applicable law or agreed to in writing, software
// distributed under the License is distributed on an "AS IS" BASIS,
// WITHOUT WARRANTIES OR CONDITIONS OF ANY KIND, either express or implied.
// See the License for the specific language governing permissions and
// limitations under the License.
use arm_gic::gicv3::GicV3;
use log::{error, info, trace};
use smccc::psci::system_off;
use smccc::Hvc;
#[no_mangle]
extern "C" fn sync_exception_current(_elr: u64, _spsr: u64) {
error!("sync_exception_current");
system_off::<Hvc>().unwrap();
}
#[no_mangle]
extern "C" fn irq_current(_elr: u64, _spsr: u64) {
trace!("irq_current");
let intid =
GicV3::get_and_acknowledge_interrupt().expect("No pending interrupt");
info!("IRQ {intid:?}");
}
#[no_mangle]
extern "C" fn fiq_current(_elr: u64, _spsr: u64) {
error!("fiq_current");
system_off::<Hvc>().unwrap();
}
#[no_mangle]
extern "C" fn serr_current(_elr: u64, _spsr: u64) {
error!("serr_current");
system_off::<Hvc>().unwrap();
}
#[no_mangle]
extern "C" fn sync_lower(_elr: u64, _spsr: u64) {
error!("sync_lower");
system_off::<Hvc>().unwrap();
}
#[no_mangle]
extern "C" fn irq_lower(_elr: u64, _spsr: u64) {
error!("irq_lower");
system_off::<Hvc>().unwrap();
}
#[no_mangle]
extern "C" fn fiq_lower(_elr: u64, _spsr: u64) {
error!("fiq_lower");
system_off::<Hvc>().unwrap();
}
#[no_mangle]
extern "C" fn serr_lower(_elr: u64, _spsr: u64) {
error!("serr_lower");
system_off::<Hvc>().unwrap();
}
}src/logger.rs(无需对此进行更改):
#![allow(unused)]
fn main() {
// Copyright 2023 Google LLC
//
// Licensed under the Apache License, Version 2.0 (the "License");
// you may not use this file except in compliance with the License.
// You may obtain a copy of the License at
//
// http://www.apache.org/licenses/LICENSE-2.0
//
// Unless required by applicable law or agreed to in writing, software
// distributed under the License is distributed on an "AS IS" BASIS,
// WITHOUT WARRANTIES OR CONDITIONS OF ANY KIND, either express or implied.
// See the License for the specific language governing permissions and
// limitations under the License.
// ANCHOR: main
use crate::pl011::Uart;
use core::fmt::Write;
use log::{LevelFilter, Log, Metadata, Record, SetLoggerError};
use spin::mutex::SpinMutex;
static LOGGER: Logger = Logger { uart: SpinMutex::new(None) };
struct Logger {
uart: SpinMutex<Option<Uart>>,
}
impl Log for Logger {
fn enabled(&self, _metadata: &Metadata) -> bool {
true
}
fn log(&self, record: &Record) {
writeln!(
self.uart.lock().as_mut().unwrap(),
"[{}] {}",
record.level(),
record.args()
)
.unwrap();
}
fn flush(&self) {}
}
/// Initialises UART logger.
pub fn init(uart: Uart, max_level: LevelFilter) -> Result<(), SetLoggerError> {
LOGGER.uart.lock().replace(uart);
log::set_logger(&LOGGER)?;
log::set_max_level(max_level);
Ok(())
}
}src/pl011.rs(无需对此进行更改):
#![allow(unused)]
fn main() {
// Copyright 2023 Google LLC
//
// Licensed under the Apache License, Version 2.0 (the "License");
// you may not use this file except in compliance with the License.
// You may obtain a copy of the License at
//
// http://www.apache.org/licenses/LICENSE-2.0
//
// Unless required by applicable law or agreed to in writing, software
// distributed under the License is distributed on an "AS IS" BASIS,
// WITHOUT WARRANTIES OR CONDITIONS OF ANY KIND, either express or implied.
// See the License for the specific language governing permissions and
// limitations under the License.
#![allow(unused)]
use core::fmt::{self, Write};
use core::ptr::{addr_of, addr_of_mut};
// ANCHOR: Flags
use bitflags::bitflags;
bitflags! {
/// Flags from the UART flag register.
#[repr(transparent)]
#[derive(Copy, Clone, Debug, Eq, PartialEq)]
struct Flags: u16 {
/// Clear to send.
const CTS = 1 << 0;
/// Data set ready.
const DSR = 1 << 1;
/// Data carrier detect.
const DCD = 1 << 2;
/// UART busy transmitting data.
const BUSY = 1 << 3;
/// Receive FIFO is empty.
const RXFE = 1 << 4;
/// Transmit FIFO is full.
const TXFF = 1 << 5;
/// Receive FIFO is full.
const RXFF = 1 << 6;
/// Transmit FIFO is empty.
const TXFE = 1 << 7;
/// Ring indicator.
const RI = 1 << 8;
}
}
// ANCHOR_END: Flags
bitflags! {
/// Flags from the UART Receive Status Register / Error Clear Register.
#[repr(transparent)]
#[derive(Copy, Clone, Debug, Eq, PartialEq)]
struct ReceiveStatus: u16 {
/// Framing error.
const FE = 1 << 0;
/// Parity error.
const PE = 1 << 1;
/// Break error.
const BE = 1 << 2;
/// Overrun error.
const OE = 1 << 3;
}
}
// ANCHOR: Registers
#[repr(C, align(4))]
struct Registers {
dr: u16,
_reserved0: [u8; 2],
rsr: ReceiveStatus,
_reserved1: [u8; 19],
fr: Flags,
_reserved2: [u8; 6],
ilpr: u8,
_reserved3: [u8; 3],
ibrd: u16,
_reserved4: [u8; 2],
fbrd: u8,
_reserved5: [u8; 3],
lcr_h: u8,
_reserved6: [u8; 3],
cr: u16,
_reserved7: [u8; 3],
ifls: u8,
_reserved8: [u8; 3],
imsc: u16,
_reserved9: [u8; 2],
ris: u16,
_reserved10: [u8; 2],
mis: u16,
_reserved11: [u8; 2],
icr: u16,
_reserved12: [u8; 2],
dmacr: u8,
_reserved13: [u8; 3],
}
// ANCHOR_END: Registers
// ANCHOR: Uart
/// Driver for a PL011 UART.
#[derive(Debug)]
pub struct Uart {
registers: *mut Registers,
}
impl Uart {
/// Constructs a new instance of the UART driver for a PL011 device at the
/// given base address.
///
/// # Safety
///
/// The given base address must point to the MMIO control registers of a
/// PL011 device, which must be mapped into the address space of the process
/// as device memory and not have any other aliases.
pub unsafe fn new(base_address: *mut u32) -> Self {
Self { registers: base_address as *mut Registers }
}
/// Writes a single byte to the UART.
pub fn write_byte(&self, byte: u8) {
// Wait until there is room in the TX buffer.
while self.read_flag_register().contains(Flags::TXFF) {}
// SAFETY: We know that self.registers points to the control registers
// of a PL011 device which is appropriately mapped.
unsafe {
// Write to the TX buffer.
addr_of_mut!((*self.registers).dr).write_volatile(byte.into());
}
// Wait until the UART is no longer busy.
while self.read_flag_register().contains(Flags::BUSY) {}
}
/// Reads and returns a pending byte, or `None` if nothing has been
/// received.
pub fn read_byte(&self) -> Option<u8> {
if self.read_flag_register().contains(Flags::RXFE) {
None
} else {
// SAFETY: We know that self.registers points to the control
// registers of a PL011 device which is appropriately mapped.
let data = unsafe { addr_of!((*self.registers).dr).read_volatile() };
// TODO: Check for error conditions in bits 8-11.
Some(data as u8)
}
}
fn read_flag_register(&self) -> Flags {
// SAFETY: We know that self.registers points to the control registers
// of a PL011 device which is appropriately mapped.
unsafe { addr_of!((*self.registers).fr).read_volatile() }
}
}
// ANCHOR_END: Uart
impl Write for Uart {
fn write_str(&mut self, s: &str) -> fmt::Result {
for c in s.as_bytes() {
self.write_byte(*c);
}
Ok(())
}
}
// Safe because it just contains a pointer to device memory, which can be
// accessed from any context.
unsafe impl Send for Uart {}
}Cargo.toml(无需对此进行更改):
[workspace]
[package]
name = "rtc"
version = "0.1.0"
edition = "2021"
publish = false
[dependencies]
arm-gic = "0.1.0"
bitflags = "2.5.0"
chrono = { version = "0.4.37", default-features = false }
log = "0.4.21"
smccc = "0.1.1"
spin = "0.9.8"
[build-dependencies]
cc = "1.0.94"
build.rs(无需对此进行更改):
// Copyright 2023 Google LLC
//
// Licensed under the Apache License, Version 2.0 (the "License");
// you may not use this file except in compliance with the License.
// You may obtain a copy of the License at
//
// http://www.apache.org/licenses/LICENSE-2.0
//
// Unless required by applicable law or agreed to in writing, software
// distributed under the License is distributed on an "AS IS" BASIS,
// WITHOUT WARRANTIES OR CONDITIONS OF ANY KIND, either express or implied.
// See the License for the specific language governing permissions and
// limitations under the License.
use cc::Build;
use std::env;
fn main() {
#[cfg(target_os = "linux")]
env::set_var("CROSS_COMPILE", "aarch64-linux-gnu");
#[cfg(not(target_os = "linux"))]
env::set_var("CROSS_COMPILE", "aarch64-none-elf");
Build::new()
.file("entry.S")
.file("exceptions.S")
.file("idmap.S")
.compile("empty")
}entry.S(无需对此进行更改):
/*
* Copyright 2023 Google LLC
*
* Licensed under the Apache License, Version 2.0 (the "License");
* you may not use this file except in compliance with the License.
* You may obtain a copy of the License at
*
* https://www.apache.org/licenses/LICENSE-2.0
*
* Unless required by applicable law or agreed to in writing, software
* distributed under the License is distributed on an "AS IS" BASIS,
* WITHOUT WARRANTIES OR CONDITIONS OF ANY KIND, either express or implied.
* See the License for the specific language governing permissions and
* limitations under the License.
*/
.macro adr_l, reg:req, sym:req
adrp \reg, \sym
add \reg, \reg, :lo12:\sym
.endm
.macro mov_i, reg:req, imm:req
movz \reg, :abs_g3:\imm
movk \reg, :abs_g2_nc:\imm
movk \reg, :abs_g1_nc:\imm
movk \reg, :abs_g0_nc:\imm
.endm
.set .L_MAIR_DEV_nGnRE, 0x04
.set .L_MAIR_MEM_WBWA, 0xff
.set .Lmairval, .L_MAIR_DEV_nGnRE | (.L_MAIR_MEM_WBWA << 8)
/* 4 KiB granule size for TTBR0_EL1. */
.set .L_TCR_TG0_4KB, 0x0 << 14
/* 4 KiB granule size for TTBR1_EL1. */
.set .L_TCR_TG1_4KB, 0x2 << 30
/* Disable translation table walk for TTBR1_EL1, generating a translation fault instead. */
.set .L_TCR_EPD1, 0x1 << 23
/* Translation table walks for TTBR0_EL1 are inner sharable. */
.set .L_TCR_SH_INNER, 0x3 << 12
/*
* Translation table walks for TTBR0_EL1 are outer write-back read-allocate write-allocate
* cacheable.
*/
.set .L_TCR_RGN_OWB, 0x1 << 10
/*
* Translation table walks for TTBR0_EL1 are inner write-back read-allocate write-allocate
* cacheable.
*/
.set .L_TCR_RGN_IWB, 0x1 << 8
/* Size offset for TTBR0_EL1 is 2**39 bytes (512 GiB). */
.set .L_TCR_T0SZ_512, 64 - 39
.set .Ltcrval, .L_TCR_TG0_4KB | .L_TCR_TG1_4KB | .L_TCR_EPD1 | .L_TCR_RGN_OWB
.set .Ltcrval, .Ltcrval | .L_TCR_RGN_IWB | .L_TCR_SH_INNER | .L_TCR_T0SZ_512
/* Stage 1 instruction access cacheability is unaffected. */
.set .L_SCTLR_ELx_I, 0x1 << 12
/* SP alignment fault if SP is not aligned to a 16 byte boundary. */
.set .L_SCTLR_ELx_SA, 0x1 << 3
/* Stage 1 data access cacheability is unaffected. */
.set .L_SCTLR_ELx_C, 0x1 << 2
/* EL0 and EL1 stage 1 MMU enabled. */
.set .L_SCTLR_ELx_M, 0x1 << 0
/* Privileged Access Never is unchanged on taking an exception to EL1. */
.set .L_SCTLR_EL1_SPAN, 0x1 << 23
/* SETEND instruction disabled at EL0 in aarch32 mode. */
.set .L_SCTLR_EL1_SED, 0x1 << 8
/* Various IT instructions are disabled at EL0 in aarch32 mode. */
.set .L_SCTLR_EL1_ITD, 0x1 << 7
.set .L_SCTLR_EL1_RES1, (0x1 << 11) | (0x1 << 20) | (0x1 << 22) | (0x1 << 28) | (0x1 << 29)
.set .Lsctlrval, .L_SCTLR_ELx_M | .L_SCTLR_ELx_C | .L_SCTLR_ELx_SA | .L_SCTLR_EL1_ITD | .L_SCTLR_EL1_SED
.set .Lsctlrval, .Lsctlrval | .L_SCTLR_ELx_I | .L_SCTLR_EL1_SPAN | .L_SCTLR_EL1_RES1
/**
* This is a generic entry point for an image. It carries out the operations required to prepare the
* loaded image to be run. Specifically, it zeroes the bss section using registers x25 and above,
* prepares the stack, enables floating point, and sets up the exception vector. It preserves x0-x3
* for the Rust entry point, as these may contain boot parameters.
*/
.section .init.entry, "ax"
.global entry
entry:
/* Load and apply the memory management configuration, ready to enable MMU and caches. */
adrp x30, idmap
msr ttbr0_el1, x30
mov_i x30, .Lmairval
msr mair_el1, x30
mov_i x30, .Ltcrval
/* Copy the supported PA range into TCR_EL1.IPS. */
mrs x29, id_aa64mmfr0_el1
bfi x30, x29, #32, #4
msr tcr_el1, x30
mov_i x30, .Lsctlrval
/*
* Ensure everything before this point has completed, then invalidate any potentially stale
* local TLB entries before they start being used.
*/
isb
tlbi vmalle1
ic iallu
dsb nsh
isb
/*
* Configure sctlr_el1 to enable MMU and cache and don't proceed until this has completed.
*/
msr sctlr_el1, x30
isb
/* Disable trapping floating point access in EL1. */
mrs x30, cpacr_el1
orr x30, x30, #(0x3 << 20)
msr cpacr_el1, x30
isb
/* Zero out the bss section. */
adr_l x29, bss_begin
adr_l x30, bss_end
0: cmp x29, x30
b.hs 1f
stp xzr, xzr, [x29], #16
b 0b
1: /* Prepare the stack. */
adr_l x30, boot_stack_end
mov sp, x30
/* Set up exception vector. */
adr x30, vector_table_el1
msr vbar_el1, x30
/* Call into Rust code. */
bl main
/* Loop forever waiting for interrupts. */
2: wfi
b 2b
exceptions.S(无需对此进行更改):
/*
* Copyright 2023 Google LLC
*
* Licensed under the Apache License, Version 2.0 (the "License");
* you may not use this file except in compliance with the License.
* You may obtain a copy of the License at
*
* https://www.apache.org/licenses/LICENSE-2.0
*
* Unless required by applicable law or agreed to in writing, software
* distributed under the License is distributed on an "AS IS" BASIS,
* WITHOUT WARRANTIES OR CONDITIONS OF ANY KIND, either express or implied.
* See the License for the specific language governing permissions and
* limitations under the License.
*/
/**
* Saves the volatile registers onto the stack. This currently takes 14
* instructions, so it can be used in exception handlers with 18 instructions
* left.
*
* On return, x0 and x1 are initialised to elr_el2 and spsr_el2 respectively,
* which can be used as the first and second arguments of a subsequent call.
*/
.macro save_volatile_to_stack
/* Reserve stack space and save registers x0-x18, x29 & x30. */
stp x0, x1, [sp, #-(8 * 24)]!
stp x2, x3, [sp, #8 * 2]
stp x4, x5, [sp, #8 * 4]
stp x6, x7, [sp, #8 * 6]
stp x8, x9, [sp, #8 * 8]
stp x10, x11, [sp, #8 * 10]
stp x12, x13, [sp, #8 * 12]
stp x14, x15, [sp, #8 * 14]
stp x16, x17, [sp, #8 * 16]
str x18, [sp, #8 * 18]
stp x29, x30, [sp, #8 * 20]
/*
* Save elr_el1 & spsr_el1. This such that we can take nested exception
* and still be able to unwind.
*/
mrs x0, elr_el1
mrs x1, spsr_el1
stp x0, x1, [sp, #8 * 22]
.endm
/**
* Restores the volatile registers from the stack. This currently takes 14
* instructions, so it can be used in exception handlers while still leaving 18
* instructions left; if paired with save_volatile_to_stack, there are 4
* instructions to spare.
*/
.macro restore_volatile_from_stack
/* Restore registers x2-x18, x29 & x30. */
ldp x2, x3, [sp, #8 * 2]
ldp x4, x5, [sp, #8 * 4]
ldp x6, x7, [sp, #8 * 6]
ldp x8, x9, [sp, #8 * 8]
ldp x10, x11, [sp, #8 * 10]
ldp x12, x13, [sp, #8 * 12]
ldp x14, x15, [sp, #8 * 14]
ldp x16, x17, [sp, #8 * 16]
ldr x18, [sp, #8 * 18]
ldp x29, x30, [sp, #8 * 20]
/* Restore registers elr_el1 & spsr_el1, using x0 & x1 as scratch. */
ldp x0, x1, [sp, #8 * 22]
msr elr_el1, x0
msr spsr_el1, x1
/* Restore x0 & x1, and release stack space. */
ldp x0, x1, [sp], #8 * 24
.endm
/**
* This is a generic handler for exceptions taken at the current EL while using
* SP0. It behaves similarly to the SPx case by first switching to SPx, doing
* the work, then switching back to SP0 before returning.
*
* Switching to SPx and calling the Rust handler takes 16 instructions. To
* restore and return we need an additional 16 instructions, so we can implement
* the whole handler within the allotted 32 instructions.
*/
.macro current_exception_sp0 handler:req
msr spsel, #1
save_volatile_to_stack
bl \handler
restore_volatile_from_stack
msr spsel, #0
eret
.endm
/**
* This is a generic handler for exceptions taken at the current EL while using
* SPx. It saves volatile registers, calls the Rust handler, restores volatile
* registers, then returns.
*
* This also works for exceptions taken from EL0, if we don't care about
* non-volatile registers.
*
* Saving state and jumping to the Rust handler takes 15 instructions, and
* restoring and returning also takes 15 instructions, so we can fit the whole
* handler in 30 instructions, under the limit of 32.
*/
.macro current_exception_spx handler:req
save_volatile_to_stack
bl \handler
restore_volatile_from_stack
eret
.endm
.section .text.vector_table_el1, "ax"
.global vector_table_el1
.balign 0x800
vector_table_el1:
sync_cur_sp0:
current_exception_sp0 sync_exception_current
.balign 0x80
irq_cur_sp0:
current_exception_sp0 irq_current
.balign 0x80
fiq_cur_sp0:
current_exception_sp0 fiq_current
.balign 0x80
serr_cur_sp0:
current_exception_sp0 serr_current
.balign 0x80
sync_cur_spx:
current_exception_spx sync_exception_current
.balign 0x80
irq_cur_spx:
current_exception_spx irq_current
.balign 0x80
fiq_cur_spx:
current_exception_spx fiq_current
.balign 0x80
serr_cur_spx:
current_exception_spx serr_current
.balign 0x80
sync_lower_64:
current_exception_spx sync_lower
.balign 0x80
irq_lower_64:
current_exception_spx irq_lower
.balign 0x80
fiq_lower_64:
current_exception_spx fiq_lower
.balign 0x80
serr_lower_64:
current_exception_spx serr_lower
.balign 0x80
sync_lower_32:
current_exception_spx sync_lower
.balign 0x80
irq_lower_32:
current_exception_spx irq_lower
.balign 0x80
fiq_lower_32:
current_exception_spx fiq_lower
.balign 0x80
serr_lower_32:
current_exception_spx serr_lower
idmap.S(无需对此进行更改)
/*
* Copyright 2023 Google LLC
*
* Licensed under the Apache License, Version 2.0 (the "License");
* you may not use this file except in compliance with the License.
* You may obtain a copy of the License at
*
* https://www.apache.org/licenses/LICENSE-2.0
*
* Unless required by applicable law or agreed to in writing, software
* distributed under the License is distributed on an "AS IS" BASIS,
* WITHOUT WARRANTIES OR CONDITIONS OF ANY KIND, either express or implied.
* See the License for the specific language governing permissions and
* limitations under the License.
*/
.set .L_TT_TYPE_BLOCK, 0x1
.set .L_TT_TYPE_PAGE, 0x3
.set .L_TT_TYPE_TABLE, 0x3
/* Access flag. */
.set .L_TT_AF, 0x1 << 10
/* Not global. */
.set .L_TT_NG, 0x1 << 11
.set .L_TT_XN, 0x3 << 53
.set .L_TT_MT_DEV, 0x0 << 2 // MAIR #0 (DEV_nGnRE)
.set .L_TT_MT_MEM, (0x1 << 2) | (0x3 << 8) // MAIR #1 (MEM_WBWA), inner shareable
.set .L_BLOCK_DEV, .L_TT_TYPE_BLOCK | .L_TT_MT_DEV | .L_TT_AF | .L_TT_XN
.set .L_BLOCK_MEM, .L_TT_TYPE_BLOCK | .L_TT_MT_MEM | .L_TT_AF | .L_TT_NG
.section ".rodata.idmap", "a", %progbits
.global idmap
.align 12
idmap:
/* level 1 */
.quad .L_BLOCK_DEV | 0x0 // 1 GiB of device mappings
.quad .L_BLOCK_MEM | 0x40000000 // 1 GiB of DRAM
.fill 254, 8, 0x0 // 254 GiB of unmapped VA space
.quad .L_BLOCK_DEV | 0x4000000000 // 1 GiB of device mappings
.fill 255, 8, 0x0 // 255 GiB of remaining VA space
image.ld(无需对此进行更改):
/*
* Copyright 2023 Google LLC
*
* Licensed under the Apache License, Version 2.0 (the "License");
* you may not use this file except in compliance with the License.
* You may obtain a copy of the License at
*
* https://www.apache.org/licenses/LICENSE-2.0
*
* Unless required by applicable law or agreed to in writing, software
* distributed under the License is distributed on an "AS IS" BASIS,
* WITHOUT WARRANTIES OR CONDITIONS OF ANY KIND, either express or implied.
* See the License for the specific language governing permissions and
* limitations under the License.
*/
/*
* Code will start running at this symbol which is placed at the start of the
* image.
*/
ENTRY(entry)
MEMORY
{
image : ORIGIN = 0x40080000, LENGTH = 2M
}
SECTIONS
{
/*
* Collect together the code.
*/
.init : ALIGN(4096) {
text_begin = .;
*(.init.entry)
*(.init.*)
} >image
.text : {
*(.text.*)
} >image
text_end = .;
/*
* Collect together read-only data.
*/
.rodata : ALIGN(4096) {
rodata_begin = .;
*(.rodata.*)
} >image
.got : {
*(.got)
} >image
rodata_end = .;
/*
* Collect together the read-write data including .bss at the end which
* will be zero'd by the entry code.
*/
.data : ALIGN(4096) {
data_begin = .;
*(.data.*)
/*
* The entry point code assumes that .data is a multiple of 32
* bytes long.
*/
. = ALIGN(32);
data_end = .;
} >image
/* Everything beyond this point will not be included in the binary. */
bin_end = .;
/* The entry point code assumes that .bss is 16-byte aligned. */
.bss : ALIGN(16) {
bss_begin = .;
*(.bss.*)
*(COMMON)
. = ALIGN(16);
bss_end = .;
} >image
.stack (NOLOAD) : ALIGN(4096) {
boot_stack_begin = .;
. += 40 * 4096;
. = ALIGN(4096);
boot_stack_end = .;
} >image
. = ALIGN(4K);
PROVIDE(dma_region = .);
/*
* Remove unused sections from the image.
*/
/DISCARD/ : {
/* The image loads itself so doesn't need these sections. */
*(.gnu.hash)
*(.hash)
*(.interp)
*(.eh_frame_hdr)
*(.eh_frame)
*(.note.gnu.build-id)
}
}
Makefile(无需对此进行更改):
# Copyright 2023 Google LLC
#
# Licensed under the Apache License, Version 2.0 (the "License");
# you may not use this file except in compliance with the License.
# You may obtain a copy of the License at
#
# http://www.apache.org/licenses/LICENSE-2.0
#
# Unless required by applicable law or agreed to in writing, software
# distributed under the License is distributed on an "AS IS" BASIS,
# WITHOUT WARRANTIES OR CONDITIONS OF ANY KIND, either express or implied.
# See the License for the specific language governing permissions and
# limitations under the License.
UNAME := $(shell uname -s)
ifeq ($(UNAME),Linux)
TARGET = aarch64-linux-gnu
else
TARGET = aarch64-none-elf
endif
OBJCOPY = $(TARGET)-objcopy
.PHONY: build qemu_minimal qemu qemu_logger
all: rtc.bin
build:
cargo build
rtc.bin: build
$(OBJCOPY) -O binary target/aarch64-unknown-none/debug/rtc $@
qemu: rtc.bin
qemu-system-aarch64 -machine virt,gic-version=3 -cpu max -serial mon:stdio -display none -kernel $< -s
clean:
cargo clean
rm -f *.bin
.cargo/config.toml(无需对此进行更改):
[build]
target = "aarch64-unknown-none"
rustflags = ["-C", "link-arg=-Timage.ld"]
使用 make qemu 在 QEMU 中运行代码。
嵌入式 Rust:进阶篇
RTC 驱动程序
(返回练习)
main.rs:
#![no_main]
#![no_std]
mod exceptions;
mod logger;
mod pl011;
mod pl031;
use crate::pl031::Rtc;
use arm_gic::gicv3::{IntId, Trigger};
use arm_gic::{irq_enable, wfi};
use chrono::{TimeZone, Utc};
use core::hint::spin_loop;
use crate::pl011::Uart;
use arm_gic::gicv3::GicV3;
use core::panic::PanicInfo;
use log::{error, info, trace, LevelFilter};
use smccc::psci::system_off;
use smccc::Hvc;
/// Base addresses of the GICv3.
const GICD_BASE_ADDRESS: *mut u64 = 0x800_0000 as _;
const GICR_BASE_ADDRESS: *mut u64 = 0x80A_0000 as _;
/// Base address of the primary PL011 UART.
const PL011_BASE_ADDRESS: *mut u32 = 0x900_0000 as _;
/// Base address of the PL031 RTC.
const PL031_BASE_ADDRESS: *mut u32 = 0x901_0000 as _;
/// The IRQ used by the PL031 RTC.
const PL031_IRQ: IntId = IntId::spi(2);
#[no_mangle]
extern "C" fn main(x0: u64, x1: u64, x2: u64, x3: u64) {
// SAFETY: `PL011_BASE_ADDRESS` is the base address of a PL011 device, and
// nothing else accesses that address range.
let uart = unsafe { Uart::new(PL011_BASE_ADDRESS) };
logger::init(uart, LevelFilter::Trace).unwrap();
info!("main({:#x}, {:#x}, {:#x}, {:#x})", x0, x1, x2, x3);
// SAFETY: `GICD_BASE_ADDRESS` and `GICR_BASE_ADDRESS` are the base
// addresses of a GICv3 distributor and redistributor respectively, and
// nothing else accesses those address ranges.
let mut gic = unsafe { GicV3::new(GICD_BASE_ADDRESS, GICR_BASE_ADDRESS) };
gic.setup();
// SAFETY: `PL031_BASE_ADDRESS` is the base address of a PL031 device, and
// nothing else accesses that address range.
let mut rtc = unsafe { Rtc::new(PL031_BASE_ADDRESS) };
let timestamp = rtc.read();
let time = Utc.timestamp_opt(timestamp.into(), 0).unwrap();
info!("RTC: {time}");
GicV3::set_priority_mask(0xff);
gic.set_interrupt_priority(PL031_IRQ, 0x80);
gic.set_trigger(PL031_IRQ, Trigger::Level);
irq_enable();
gic.enable_interrupt(PL031_IRQ, true);
// Wait for 3 seconds, without interrupts.
let target = timestamp + 3;
rtc.set_match(target);
info!("Waiting for {}", Utc.timestamp_opt(target.into(), 0).unwrap());
trace!(
"matched={}, interrupt_pending={}",
rtc.matched(),
rtc.interrupt_pending()
);
while !rtc.matched() {
spin_loop();
}
trace!(
"matched={}, interrupt_pending={}",
rtc.matched(),
rtc.interrupt_pending()
);
info!("Finished waiting");
// Wait another 3 seconds for an interrupt.
let target = timestamp + 6;
info!("Waiting for {}", Utc.timestamp_opt(target.into(), 0).unwrap());
rtc.set_match(target);
rtc.clear_interrupt();
rtc.enable_interrupt(true);
trace!(
"matched={}, interrupt_pending={}",
rtc.matched(),
rtc.interrupt_pending()
);
while !rtc.interrupt_pending() {
wfi();
}
trace!(
"matched={}, interrupt_pending={}",
rtc.matched(),
rtc.interrupt_pending()
);
info!("Finished waiting");
system_off::<Hvc>().unwrap();
}
#[panic_handler]
fn panic(info: &PanicInfo) -> ! {
error!("{info}");
system_off::<Hvc>().unwrap();
loop {}
}pl031.rs:
#![allow(unused)]
fn main() {
use core::ptr::{addr_of, addr_of_mut};
#[repr(C, align(4))]
struct Registers {
/// Data register
dr: u32,
/// Match register
mr: u32,
/// Load register
lr: u32,
/// Control register
cr: u8,
_reserved0: [u8; 3],
/// Interrupt Mask Set or Clear register
imsc: u8,
_reserved1: [u8; 3],
/// Raw Interrupt Status
ris: u8,
_reserved2: [u8; 3],
/// Masked Interrupt Status
mis: u8,
_reserved3: [u8; 3],
/// Interrupt Clear Register
icr: u8,
_reserved4: [u8; 3],
}
/// Driver for a PL031 real-time clock.
#[derive(Debug)]
pub struct Rtc {
registers: *mut Registers,
}
impl Rtc {
/// Constructs a new instance of the RTC driver for a PL031 device at the
/// given base address.
///
/// # Safety
///
/// The given base address must point to the MMIO control registers of a
/// PL031 device, which must be mapped into the address space of the process
/// as device memory and not have any other aliases.
pub unsafe fn new(base_address: *mut u32) -> Self {
Self { registers: base_address as *mut Registers }
}
/// Reads the current RTC value.
pub fn read(&self) -> u32 {
// SAFETY: We know that self.registers points to the control registers
// of a PL031 device which is appropriately mapped.
unsafe { addr_of!((*self.registers).dr).read_volatile() }
}
/// Writes a match value. When the RTC value matches this then an interrupt
/// will be generated (if it is enabled).
pub fn set_match(&mut self, value: u32) {
// SAFETY: We know that self.registers points to the control registers
// of a PL031 device which is appropriately mapped.
unsafe { addr_of_mut!((*self.registers).mr).write_volatile(value) }
}
/// Returns whether the match register matches the RTC value, whether or not
/// the interrupt is enabled.
pub fn matched(&self) -> bool {
// SAFETY: We know that self.registers points to the control registers
// of a PL031 device which is appropriately mapped.
let ris = unsafe { addr_of!((*self.registers).ris).read_volatile() };
(ris & 0x01) != 0
}
/// Returns whether there is currently an interrupt pending.
///
/// This should be true if and only if `matched` returns true and the
/// interrupt is masked.
pub fn interrupt_pending(&self) -> bool {
// SAFETY: We know that self.registers points to the control registers
// of a PL031 device which is appropriately mapped.
let ris = unsafe { addr_of!((*self.registers).mis).read_volatile() };
(ris & 0x01) != 0
}
/// Sets or clears the interrupt mask.
///
/// When the mask is true the interrupt is enabled; when it is false the
/// interrupt is disabled.
pub fn enable_interrupt(&mut self, mask: bool) {
let imsc = if mask { 0x01 } else { 0x00 };
// SAFETY: We know that self.registers points to the control registers
// of a PL031 device which is appropriately mapped.
unsafe { addr_of_mut!((*self.registers).imsc).write_volatile(imsc) }
}
/// Clears a pending interrupt, if any.
pub fn clear_interrupt(&mut self) {
// SAFETY: We know that self.registers points to the control registers
// of a PL031 device which is appropriately mapped.
unsafe { addr_of_mut!((*self.registers).icr).write_volatile(0x01) }
}
}
// SAFETY: `Rtc` just contains a pointer to device memory, which can be
// accessed from any context.
unsafe impl Send for Rtc {}
}欢迎了解 Rust 中的并发
Rust 完全支持使用带有互斥锁和通道的操作系统线程进行并发。
Rust 类型系统能帮助我们把许多并发bug转换为编译期bug 发挥着重要作用。这通常称为“无畏并发”,因为你可以依靠编译器来确保 运行时的正确性。
- Rust lets us access OS concurrency toolkit: threads, sync. primitives, etc.
- The type system gives us safety for concurrency without any special features.
- The same tools that help with “concurrent” access in a single thread (e.g., a called function that might mutate an argument or save references to it to read later) save us from multi-threading issues.
线程
Rust 线程的运作方式与其他语言中的线程类似:
use std::thread;
use std::time::Duration;
fn main() {
thread::spawn(|| {
for i in 1..10 {
println!("Count in thread: {i}!");
thread::sleep(Duration::from_millis(5));
}
});
for i in 1..5 {
println!("Main thread: {i}");
thread::sleep(Duration::from_millis(5));
}
}- 线程均为守护程序线程,主线程不会等待这些线程。
- 线程紧急警报 (panic) 是彼此独立的。
- 紧急警报可以携带载荷,并可以使用
downcast_ref对载荷进行解压缩。
- 紧急警报可以携带载荷,并可以使用
-
Rust thread APIs look not too different from e.g. C++ ones.
-
Run the example.
- 5ms timing is loose enough that main and spawned threads stay mostly in lockstep.
- Notice that the program ends before the spawned thread reaches 10!
- This is because main ends the program and spawned threads do not make it persist.
- Compare to pthreads/C++ std::thread/boost::thread if desired.
-
How do we wait around for the spawned thread to complete?
-
thread::spawnreturns aJoinHandle. Look at the docs.JoinHandlehas a.join()method that blocks.
-
Use
let handle = thread::spawn(...)and laterhandle.join()to wait for the thread to finish and have the program count all the way to 10. -
Now what if we want to return a value?
-
Look at docs again:
thread::spawn’s closure returnsTJoinHandle.join()returnsthread::Result<T>
-
Use the
Resultreturn value fromhandle.join()to get access to the returned value. -
Ok, what about the other case?
- Trigger a panic in the thread. Note that this doesn’t panic
main. - Access the panic payload. This is a good time to talk about
Any.
- Trigger a panic in the thread. Note that this doesn’t panic
-
Now we can return values from threads! What about taking inputs?
- Capture something by reference in the thread closure.
- An error message indicates we must move it.
- Move it in, see we can compute and then return a derived value.
-
If we want to borrow?
- Main kills child threads when it returns, but another function would just return and leave them running.
- That would be stack use-after-return, which violates memory safety!
- How do we avoid this? see next slide.
范围线程
常规线程不能从它们所处的环境中借用:
use std::thread;
fn foo() {
let s = String::from("Hello");
thread::spawn(|| {
println!("Length: {}", s.len());
});
}
fn main() {
foo();
}不过,你可以使用范围线程来实现此目的:
use std::thread;
fn main() {
let s = String::from("Hello");
thread::scope(|scope| {
scope.spawn(|| {
println!("Length: {}", s.len());
});
});
}- 其原因在于,在
thread::scope函数完成后,可保证所有线程都已联结在一起,使得线程能够返回借用的数据。 - 此时须遵守常规 Rust 借用规则:你可以通过一个线程以可变的方式借用,也可以通过任意数量的线程以不可变的方式借用。
通道
Rust 通道(Channel)包含两个部分:Sender<T> 和 Receiver<T>。这两个部分 通过通道进行连接,但你只能看到端点。
use std::sync::mpsc;
fn main() {
let (tx, rx) = mpsc::channel();
tx.send(10).unwrap();
tx.send(20).unwrap();
println!("Received: {:?}", rx.recv());
println!("Received: {:?}", rx.recv());
let tx2 = tx.clone();
tx2.send(30).unwrap();
println!("Received: {:?}", rx.recv());
}mpsc代表多个生产方,单个使用方。Sender和SyncSender会实现Clone(因此, 你可以设置多个生产方),但Receiver不会实现。send()和recv()会返回Result。如果它们返回Err,则表示对应的Sender或Receiver已被丢弃,且通道已关闭。
无界通道
你可以使用 mpsc::channel() 获得无边界的异步通道:
use std::sync::mpsc;
use std::thread;
use std::time::Duration;
fn main() {
let (tx, rx) = mpsc::channel();
thread::spawn(move || {
let thread_id = thread::current().id();
for i in 1..10 {
tx.send(format!("Message {i}")).unwrap();
println!("{thread_id:?}: sent Message {i}");
}
println!("{thread_id:?}: done");
});
thread::sleep(Duration::from_millis(100));
for msg in rx.iter() {
println!("Main: got {msg}");
}
}有界通道
With bounded (synchronous) channels, send can block the current thread:
use std::sync::mpsc;
use std::thread;
use std::time::Duration;
fn main() {
let (tx, rx) = mpsc::sync_channel(3);
thread::spawn(move || {
let thread_id = thread::current().id();
for i in 1..10 {
tx.send(format!("Message {i}")).unwrap();
println!("{thread_id:?}: sent Message {i}");
}
println!("{thread_id:?}: done");
});
thread::sleep(Duration::from_millis(100));
for msg in rx.iter() {
println!("Main: got {msg}");
}
}- 调用
send将阻塞当前线程,直到通道中有足够的空间放置新消息。如果无人从通道读取数据,线程会被无限期地阻塞。 - 如果通道关闭,调用
send将中止并返回错误(这就是它会返回Result的原因)。当接收器被丢弃时,通道将关闭。 - A bounded channel with a size of zero is called a “rendezvous channel”. Every send will block the current thread until another thread calls
recv.
Send 和 Sync
How does Rust know to forbid shared access across threads? The answer is in two traits:
Send 和 Sync 均为不安全特征。只要类型仅包含 Send 和 Sync 类型,编译器就会自动为类型派生 这两种特征。你也可以手动实现它们(如果你确定这样 有效的话)。
- 不妨将这些特征视为类型包含某些线程安全属性的标记。
- 它们可以在泛型约束中作为常规特征使用。
Send
如果将
T值移动到另一个线程是安全的,则类型T为Send。
将所有权转移到另一个线程的影响是,“析构函数”将在相应线程中 运行。因此,问题在于你何时可以在一个线程中分配某个值,然后在 另一个线程中取消分配该值。
例如,与 SQLite 库的连接只能通过 单个线程访问。
Sync
如果同时从多个线程访问
T值是安全的,则类型T为Sync。
更准确地说,定义是:
当且仅当
&T为Send时,T为Sync
该语句实质上是一种简写形式,表示如果某个类型对于共享使用是线程安全的,那么跨线程传递对该类型的引用也是线程安全的。
这是因为如果某个类型为 Sync,则意味着它可以在多个线程之间共享,而不存在数据争用或其他同步问题的风险,因此将其移动到另一个线程是安全的。对该类型的引用同样可以安全地移动到另一个线程,因为它引用的数据可以从任何线程安全地访问。
示例
Send + Sync
你遇到的类型大都属于 Send + Sync:
i8、f32、bool、char、&str…(T1, T2)、[T; N]、&[T]、struct { x: T }…String、Option<T>、Vec<T>、Box<T>…Arc<T>:明确通过原子引用计数实现线程安全。Mutex<T>:明确通过内部锁定实现线程安全。mpsc::Sender<T>: As of 1.72.0.AtomicBool、AtomicU8…:使用特殊的原子指令。
当类型参数为 Send + Sync 时,泛型类型通常 为 Send + Sync。
Send + !Sync
这些类型可以移动到其他线程,但它们不是线程安全的。 这通常是由内部可变性造成的:
mpsc::Receiver<T>Cell<T>RefCell<T>
!Send + Sync
这些类型是线程安全的,但它们不能移动到另一个线程:
MutexGuard<T: Sync>: Uses OS level primitives which must be deallocated on the thread which created them.
!Send + !Sync
这些类型不是线程安全的,不能移动到其他线程:
Rc<T>:每个Rc<T>都具有对RcBox<T>的引用,其中包含 非原子引用计数。*const T、*mut T:Rust 会假定原始指针可能 在并发方面有特殊的注意事项。
共享状态
Rust 使用类型系统来强制同步共享数据。这主要 通过两种类型实现:
Arc
Arc<T> 允许通过 Arc::clone 实现共享只读权限:
use std::sync::Arc;
use std::thread;
fn main() {
let v = Arc::new(vec![10, 20, 30]);
let mut handles = Vec::new();
for _ in 1..5 {
let v = Arc::clone(&v);
handles.push(thread::spawn(move || {
let thread_id = thread::current().id();
println!("{thread_id:?}: {v:?}");
}));
}
handles.into_iter().for_each(|h| h.join().unwrap());
println!("v: {v:?}");
}Arc代表“原子引用计数”,它是使用原子操作的Rc的 线程安全版本。Arc<T>implementsClonewhether or notTdoes. It implementsSendandSyncif and only ifTimplements them both.Arc::clone()在执行原子操作方面有开销,但在此之后,T便可 随意使用,而没有任何开销。- 请警惕引用循环,
Arc不会使用垃圾回收器检测引用循环。std::sync::Weak对此有所帮助。
互斥器(Mutex)
Mutex<T> ensures mutual exclusion and allows mutable access to T behind a read-only interface (another form of interior mutability):
use std::sync::Mutex;
fn main() {
let v = Mutex::new(vec![10, 20, 30]);
println!("v: {:?}", v.lock().unwrap());
{
let mut guard = v.lock().unwrap();
guard.push(40);
}
println!("v: {:?}", v.lock().unwrap());
}请注意我们如何设置 impl<T: Send> Sync for Mutex<T> 通用 实现。
Mutexin Rust looks like a collection with just one element — the protected data.- 在访问受保护的数据之前不可能忘记获取互斥量。
- 你可以通过获取锁,从
&Mutex<T>中获取&mut T。MutexGuard能够确保&mut T存在的时间不会比持有锁的时间更长。 Mutex<T>implements bothSendandSynciff (if and only if)TimplementsSend.- A read-write lock counterpart:
RwLock. - Why does
lock()return aResult?- 如果持有
Mutex的线程发生panic,Mutex便会“中毒”并发出信号, 表明其所保护的数据可能处于不一致状态。对中毒的互斥量调用lock()将会失败, 并将显示PoisonError。无论如何,你可以对该错误调用into_inner()来 恢复数据。
- 如果持有
示例
让我们看看 Arc 和 Mutex 的实际效果:
use std::thread;
// use std::sync::{Arc, Mutex};
fn main() {
let v = vec![10, 20, 30];
let handle = thread::spawn(|| {
v.push(10);
});
v.push(1000);
handle.join().unwrap();
println!("v: {v:?}");
}可能有用的解决方案:
use std::sync::{Arc, Mutex};
use std::thread;
fn main() {
let v = Arc::new(Mutex::new(vec![10, 20, 30]));
let v2 = Arc::clone(&v);
let handle = thread::spawn(move || {
let mut v2 = v2.lock().unwrap();
v2.push(10);
});
{
let mut v = v.lock().unwrap();
v.push(1000);
}
handle.join().unwrap();
println!("v: {v:?}");
}值得注意的部分:
Arc和Mutex中都封装了v,因为它们的关注点是正交的。- 将
Mutex封装在Arc中是一种在线程之间共享可变状态的常见模式。
- 将
v: Arc<_>必须先克隆为v2,然后才能移动到另一个线程中。请注意,lambda 签名中添加了move。- 我们引入了块,以尽可能缩小
LockGuard的作用域。
习题
现在通过
-
哲学家用餐示例来练习我们新学习到的并发技巧:该示例是典型的并发问题。
-
多线程链接检查器:对于大型项目,需要使用 Cargo 下载依赖项,然后并行检查链接。
After looking at the exercises, you can look at the solutions provided.
哲学家就餐问题
哲学家用餐示例是一个典型的并发问题:
五位哲学家在同一桌子上用餐。每位哲学家在桌前都有自己的座位。每个盘子之间都有一把叉子。上的菜品是一种意大利面,需要用两把叉子才能吃。每位哲学家只能交替进行思考和用餐。此外,只有当哲学家们同时拿到左边和右边的叉子才能吃这个意大利面。因此,只有当两旁坐着的人在思考,而非在吃面时,他们才能使用两把叉子。每位哲学家吃完饭后,就会放下手中的两把叉子。
在本练习中,需要使用本地 Cargo 安装。将以下代码复制到名为 src/main.rs 的文件中,并填写空白的地方,然后测试 cargo run 不会死锁:
use std::sync::{mpsc, Arc, Mutex};
use std::thread;
use std::time::Duration;
struct Fork;
struct Philosopher {
name: String,
// left_fork: ...
// right_fork: ...
// thoughts: ...
}
impl Philosopher {
fn think(&self) {
self.thoughts
.send(format!("Eureka! {} has a new idea!", &self.name))
.unwrap();
}
fn eat(&self) {
// Pick up forks...
println!("{} is eating...", &self.name);
thread::sleep(Duration::from_millis(10));
}
}
static PHILOSOPHERS: &[&str] =
&["Socrates", "Hypatia", "Plato", "Aristotle", "Pythagoras"];
fn main() {
// Create forks
// Create philosophers
// Make each of them think and eat 100 times
// Output their thoughts
}您可以使用以下 Cargo.toml:
[package]
name = "dining-philosophers"
version = "0.1.0"
edition = "2021"
多线程链接检查器
运用掌握的新知识创建一个多线程链接检查工具。应先从网页入手,并检查网页上的链接是否有效。该工具应以递归方式检查同一网域中的其他网页,并且一直执行此操作,直到所有网页都通过验证。
For this, you will need an HTTP client such as reqwest. You will also need a way to find links, we can use scraper. Finally, we’ll need some way of handling errors, we will use thiserror.
Create a new Cargo project and reqwest it as a dependency with:
cargo new link-checker
cd link-checker
cargo add --features blocking,rustls-tls reqwest
cargo add scraper
cargo add thiserror
如果
cargo add操作失败并显示error: no such subcommand,请手动修改Cargo.toml文件。添加下面列出的依赖项。
cargo add 调用会将 Cargo.toml 文件更新为如下所示:
[package]
name = "link-checker"
version = "0.1.0"
edition = "2021"
publish = false
[dependencies]
reqwest = { version = "0.11.12", features = ["blocking", "rustls-tls"] }
scraper = "0.13.0"
thiserror = "1.0.37"
您现在可以下载初始页了。请尝试使用一个小网站,例如 https://www.google.org/。
您的 src/main.rs 文件应如下所示:
use reqwest::blocking::Client;
use reqwest::Url;
use scraper::{Html, Selector};
use thiserror::Error;
#[derive(Error, Debug)]
enum Error {
#[error("request error: {0}")]
ReqwestError(#[from] reqwest::Error),
#[error("bad http response: {0}")]
BadResponse(String),
}
#[derive(Debug)]
struct CrawlCommand {
url: Url,
extract_links: bool,
}
fn visit_page(client: &Client, command: &CrawlCommand) -> Result<Vec<Url>, Error> {
println!("Checking {:#}", command.url);
let response = client.get(command.url.clone()).send()?;
if !response.status().is_success() {
return Err(Error::BadResponse(response.status().to_string()));
}
let mut link_urls = Vec::new();
if !command.extract_links {
return Ok(link_urls);
}
let base_url = response.url().to_owned();
let body_text = response.text()?;
let document = Html::parse_document(&body_text);
let selector = Selector::parse("a").unwrap();
let href_values = document
.select(&selector)
.filter_map(|element| element.value().attr("href"));
for href in href_values {
match base_url.join(href) {
Ok(link_url) => {
link_urls.push(link_url);
}
Err(err) => {
println!("On {base_url:#}: ignored unparsable {href:?}: {err}");
}
}
}
Ok(link_urls)
}
fn main() {
let client = Client::new();
let start_url = Url::parse("https://www.google.org").unwrap();
let crawl_command = CrawlCommand{ url: start_url, extract_links: true };
match visit_page(&client, &crawl_command) {
Ok(links) => println!("Links: {links:#?}"),
Err(err) => println!("Could not extract links: {err:#}"),
}
}使用以下命令运行 src/main.rs 中的代码
cargo run
任务
- 通过线程并行检查链接:将要检查的网址发送到某个通道,然后使用多个线程并行检查这些网址。
- 您可以对此进行扩展,以递归方式从
www.google.org网域的所有网页中提取链接。设置网页上限(例如 100 个),以免被网站屏蔽。
并发编程:上午练习
哲学家就餐问题
(返回练习)
use std::sync::{mpsc, Arc, Mutex};
use std::thread;
use std::time::Duration;
struct Fork;
struct Philosopher {
name: String,
left_fork: Arc<Mutex<Fork>>,
right_fork: Arc<Mutex<Fork>>,
thoughts: mpsc::SyncSender<String>,
}
impl Philosopher {
fn think(&self) {
self.thoughts
.send(format!("Eureka! {} has a new idea!", &self.name))
.unwrap();
}
fn eat(&self) {
println!("{} is trying to eat", &self.name);
let _left = self.left_fork.lock().unwrap();
let _right = self.right_fork.lock().unwrap();
println!("{} is eating...", &self.name);
thread::sleep(Duration::from_millis(10));
}
}
static PHILOSOPHERS: &[&str] =
&["Socrates", "Hypatia", "Plato", "Aristotle", "Pythagoras"];
fn main() {
let (tx, rx) = mpsc::sync_channel(10);
let forks = (0..PHILOSOPHERS.len())
.map(|_| Arc::new(Mutex::new(Fork)))
.collect::<Vec<_>>();
for i in 0..forks.len() {
let tx = tx.clone();
let mut left_fork = Arc::clone(&forks[i]);
let mut right_fork = Arc::clone(&forks[(i + 1) % forks.len()]);
// To avoid a deadlock, we have to break the symmetry
// somewhere. This will swap the forks without deinitializing
// either of them.
if i == forks.len() - 1 {
std::mem::swap(&mut left_fork, &mut right_fork);
}
let philosopher = Philosopher {
name: PHILOSOPHERS[i].to_string(),
thoughts: tx,
left_fork,
right_fork,
};
thread::spawn(move || {
for _ in 0..100 {
philosopher.eat();
philosopher.think();
}
});
}
drop(tx);
for thought in rx {
println!("{thought}");
}
}Link Checker
use std::sync::{mpsc, Arc, Mutex};
use std::thread;
use reqwest::blocking::Client;
use reqwest::Url;
use scraper::{Html, Selector};
use thiserror::Error;
#[derive(Error, Debug)]
enum Error {
#[error("request error: {0}")]
ReqwestError(#[from] reqwest::Error),
#[error("bad http response: {0}")]
BadResponse(String),
}
#[derive(Debug)]
struct CrawlCommand {
url: Url,
extract_links: bool,
}
fn visit_page(client: &Client, command: &CrawlCommand) -> Result<Vec<Url>, Error> {
println!("Checking {:#}", command.url);
let response = client.get(command.url.clone()).send()?;
if !response.status().is_success() {
return Err(Error::BadResponse(response.status().to_string()));
}
let mut link_urls = Vec::new();
if !command.extract_links {
return Ok(link_urls);
}
let base_url = response.url().to_owned();
let body_text = response.text()?;
let document = Html::parse_document(&body_text);
let selector = Selector::parse("a").unwrap();
let href_values = document
.select(&selector)
.filter_map(|element| element.value().attr("href"));
for href in href_values {
match base_url.join(href) {
Ok(link_url) => {
link_urls.push(link_url);
}
Err(err) => {
println!("On {base_url:#}: ignored unparsable {href:?}: {err}");
}
}
}
Ok(link_urls)
}
struct CrawlState {
domain: String,
visited_pages: std::collections::HashSet<String>,
}
impl CrawlState {
fn new(start_url: &Url) -> CrawlState {
let mut visited_pages = std::collections::HashSet::new();
visited_pages.insert(start_url.as_str().to_string());
CrawlState { domain: start_url.domain().unwrap().to_string(), visited_pages }
}
/// Determine whether links within the given page should be extracted.
fn should_extract_links(&self, url: &Url) -> bool {
let Some(url_domain) = url.domain() else {
return false;
};
url_domain == self.domain
}
/// Mark the given page as visited, returning false if it had already
/// been visited.
fn mark_visited(&mut self, url: &Url) -> bool {
self.visited_pages.insert(url.as_str().to_string())
}
}
type CrawlResult = Result<Vec<Url>, (Url, Error)>;
fn spawn_crawler_threads(
command_receiver: mpsc::Receiver<CrawlCommand>,
result_sender: mpsc::Sender<CrawlResult>,
thread_count: u32,
) {
let command_receiver = Arc::new(Mutex::new(command_receiver));
for _ in 0..thread_count {
let result_sender = result_sender.clone();
let command_receiver = command_receiver.clone();
thread::spawn(move || {
let client = Client::new();
loop {
let command_result = {
let receiver_guard = command_receiver.lock().unwrap();
receiver_guard.recv()
};
let Ok(crawl_command) = command_result else {
// The sender got dropped. No more commands coming in.
break;
};
let crawl_result = match visit_page(&client, &crawl_command) {
Ok(link_urls) => Ok(link_urls),
Err(error) => Err((crawl_command.url, error)),
};
result_sender.send(crawl_result).unwrap();
}
});
}
}
fn control_crawl(
start_url: Url,
command_sender: mpsc::Sender<CrawlCommand>,
result_receiver: mpsc::Receiver<CrawlResult>,
) -> Vec<Url> {
let mut crawl_state = CrawlState::new(&start_url);
let start_command = CrawlCommand { url: start_url, extract_links: true };
command_sender.send(start_command).unwrap();
let mut pending_urls = 1;
let mut bad_urls = Vec::new();
while pending_urls > 0 {
let crawl_result = result_receiver.recv().unwrap();
pending_urls -= 1;
match crawl_result {
Ok(link_urls) => {
for url in link_urls {
if crawl_state.mark_visited(&url) {
let extract_links = crawl_state.should_extract_links(&url);
let crawl_command = CrawlCommand { url, extract_links };
command_sender.send(crawl_command).unwrap();
pending_urls += 1;
}
}
}
Err((url, error)) => {
bad_urls.push(url);
println!("Got crawling error: {:#}", error);
continue;
}
}
}
bad_urls
}
fn check_links(start_url: Url) -> Vec<Url> {
let (result_sender, result_receiver) = mpsc::channel::<CrawlResult>();
let (command_sender, command_receiver) = mpsc::channel::<CrawlCommand>();
spawn_crawler_threads(command_receiver, result_sender, 16);
control_crawl(start_url, command_sender, result_receiver)
}
fn main() {
let start_url = reqwest::Url::parse("https://www.google.org").unwrap();
let bad_urls = check_links(start_url);
println!("Bad URLs: {:#?}", bad_urls);
}异步 Rust
“异步”是一种并发模型,可以同时执行多个任务。具体做法是逐个执行任务直至阻塞,然后切换到另一项可以继续进行的任务。该模型支持在有限数量的线程上运行更多任务。原因在于,每个任务的开销通常很低,并且操作系统提供了基元来高效识别能够执行的 I/O 任务。
Rust 的异步操作基于 “Futures” 来实现,即表示未来可能完成的工作。系统会对这些 Future 进行 “轮询”,直到显示全部已完成。
由异步运行时对这些 Future 进行轮询,并且有多种不同的运行时可供选择。
比较
-
Python 的
asyncio中也有类似的模型。不过,其Future类型基于回调的实现方式,而非通过轮询。使用异步 Python 程序需要类似于 Rust 中运行时的 “循环” 进行管理。 -
JavaScript 的
Promise与之类似,但同样基于回调的实现方式。语言运行时实现了事件循环,因此许多与 Promise 解析相关的细节被隐藏起来。
async/await
从高层次上看,异步 Rust 代码与“正常”的顺序代码非常类似:
use futures::executor::block_on;
async fn count_to(count: i32) {
for i in 1..=count {
println!("Count is: {i}!");
}
}
async fn async_main(count: i32) {
count_to(count).await;
}
fn main() {
block_on(async_main(10));
}关键点:
-
请注意,这只是一个简单的示例,用于展示语法。其中没有长时间运行的操作或任何真正的并发!
-
异步调用的返回类型是什么?
- 在
main中使用let future: () = async_main(10);来查看类型。
- 在
-
The “async” keyword is syntactic sugar. The compiler replaces the return type with a future.
-
你不能将
main声明为异步函数,除非在编译器中加入额外的指令来告诉它如何使用返回的 future。 -
You need an executor to run async code.
block_onblocks the current thread until the provided future has run to completion. -
.await会异步地等待另一个操作的完成。与block_on不同,.await不会阻塞当前线程。 -
.awaitcan only be used inside anasyncfunction (or block; these are introduced later).
Futures
Future 是一种 trait,由表示尚未完成的操作的对象所实现。可以轮询 Future,并且 poll 会返回 一个 Poll 对象。
#![allow(unused)]
fn main() {
use std::pin::Pin;
use std::task::Context;
pub trait Future {
type Output;
fn poll(self: Pin<&mut Self>, cx: &mut Context<'_>) -> Poll<Self::Output>;
}
pub enum Poll<T> {
Ready(T),
Pending,
}
}异步函数会返回 impl Future。对于自定义的类型,也可以实现 Future(但不常见)。例如,从 tokio::spawn 返回的 JoinHandle 会实现 Future,以允许加入该任务。
在 Future 中使用 .await 关键字会导致当前异步函数暂停,直到该 Future 准备就绪,然后计算其输出。
-
Future和Poll类型的实现完全如下所示:请点击链接查看文档中的实现。 -
我们的重点在于编写异步代码,而不是构建新的异步基元,因此不会涉及
Pin和Context。简言之:-
通过
Context,Future 在事件发生时可自行安排重新进行轮询。 -
Pin确保 Future 不会移到内存中,以便指向该 Future 的指针仍然有效。为了确保使用.await之后引用依然有效,必须执行此操作。
-
Runtimes
运行时 支持异步执行操作(即 _反应器),并负责执行 Future (即 _执行器)。Rust 没有 “内置”运行时,但有以下几个选项可供选择:
- Tokio:性能出色,拥有成熟的功能生态系统,例如适用于 HTTP 的 Hyper 或 适用于 gRPC 的 Tonic。
- async-std:旨在成为 “异步编程的标准库”,并在
async::task中包含基本运行时。 - smol:简单且轻量
有些大型应用具有自己的运行时。例如,Fuchsia 已有一个运行时。
-
请注意,在列出的运行时中,Rust Playground 仅支持 Tokio。该 Playground 也不支持任何 I/O 操作,因此大多数有趣的异步操作无法在该平台上运行。
-
Future 是 “惯性”的,除非有执行程序对其进行轮询,否则它们不会执行任何操作(甚至不会启动 I/O 操作)。这与 JS promise 不同,例如,后者即使从未使用也会完成运行过程。
Tokio
Tokio provides:
- 用于执行异步代码的多线程运行时。
- An asynchronous version of the standard library.
- 庞大的库生态系统。
use tokio::time;
async fn count_to(count: i32) {
for i in 1..=count {
println!("Count in task: {i}!");
time::sleep(time::Duration::from_millis(5)).await;
}
}
#[tokio::main]
async fn main() {
tokio::spawn(count_to(10));
for i in 1..5 {
println!("Main task: {i}");
time::sleep(time::Duration::from_millis(5)).await;
}
}-
借助
tokio::main宏,我们现在可以将main设为异步函数。 -
spawn函数会创建新的并发 “任务”。 -
注意:
spawn使用Future方法实现,而不是对count_to调用.await。
深入探索:
-
为何
count_to通常无法计数到 10?这是一个异步取消的示例。tokio::spawn会返回一个句柄,可以等待该句柄直至其代表的任务执行完毕。 -
尝试使用
count_to(10).await,而不是派生方法。 -
尝试等待
tokio::spawn返回的任务执行完毕。
任务
Rust 有一个任务系统,这是一种轻量级线程处理形式。
每个任务只有一个顶级 Future,执行器会对此进行轮询来推进任务进度。该 Future 可能包含一个或多个嵌套的 Future,可以通过其 poll 方法对它们进行轮询,类似于调用堆栈。可以通过轮询多个子 Future(例如争用定时器和 I/O 操作)在任务内部实现并发操作。
use tokio::io::{self, AsyncReadExt, AsyncWriteExt};
use tokio::net::TcpListener;
#[tokio::main]
async fn main() -> io::Result<()> {
let listener = TcpListener::bind("127.0.0.1:0").await?;
println!("listening on port {}", listener.local_addr()?.port());
loop {
let (mut socket, addr) = listener.accept().await?;
println!("connection from {addr:?}");
tokio::spawn(async move {
socket.write_all(b"Who are you?\n").await.expect("socket error");
let mut buf = vec![0; 1024];
let name_size = socket.read(&mut buf).await.expect("socket error");
let name = std::str::from_utf8(&buf[..name_size]).unwrap().trim();
let reply = format!("Thanks for dialing in, {name}!\n");
socket.write_all(reply.as_bytes()).await.expect("socket error");
});
}
}将此示例复制到准备好的 src/main.rs 文件中,并从该文件运行它。
请尝试使用像 nc 或 telnet 这样的 TCP 连接工具进行连接。
-
让学生想象一下,当连接多个客户端时,示例服务器会达到怎样的状态。存在哪些任务?具有哪些 Future?
-
This is the first time we’ve seen an
asyncblock. This is similar to a closure, but does not take any arguments. Its return value is a Future, similar to anasync fn. -
Refactor the async block into a function, and improve the error handling using
?.
异步通道
有些 crate 支持使用异步通道。例如 tokio:
use tokio::sync::mpsc::{self, Receiver};
async fn ping_handler(mut input: Receiver<()>) {
let mut count: usize = 0;
while let Some(_) = input.recv().await {
count += 1;
println!("Received {count} pings so far.");
}
println!("ping_handler complete");
}
#[tokio::main]
async fn main() {
let (sender, receiver) = mpsc::channel(32);
let ping_handler_task = tokio::spawn(ping_handler(receiver));
for i in 0..10 {
sender.send(()).await.expect("Failed to send ping.");
println!("Sent {} pings so far.", i + 1);
}
drop(sender);
ping_handler_task.await.expect("Something went wrong in ping handler task.");
}Futures Control Flow
可以将很多 Future 组合在一起生成并发计算流图。我们已经介绍过用作独立线程的任务类型。
加入
联接操作会等待一组 Future 全部就绪,然后返回它们的结果集合。这类似于 JavaScript 中的 Promise.al 或 Python 中的 asyncio.gather。
use anyhow::Result;
use futures::future;
use reqwest;
use std::collections::HashMap;
async fn size_of_page(url: &str) -> Result<usize> {
let resp = reqwest::get(url).await?;
Ok(resp.text().await?.len())
}
#[tokio::main]
async fn main() {
let urls: [&str; 4] = [
"https://google.com",
"https://httpbin.org/ip",
"https://play.rust-lang.org/",
"BAD_URL",
];
let futures_iter = urls.into_iter().map(size_of_page);
let results = future::join_all(futures_iter).await;
let page_sizes_dict: HashMap<&str, Result<usize>> =
urls.into_iter().zip(results.into_iter()).collect();
println!("{:?}", page_sizes_dict);
}将此示例复制到准备好的 src/main.rs 文件中,并从该文件运行它。
-
对于多个类型不相交的 Future,可以使用
std::future::join!进行处理,但必须要确定在编译时 Future 的数量。目前,可在futurescrate 中使用该功能,但很快也会在std::future中正式发布。 -
The risk of
joinis that one of the futures may never resolve, this would cause your program to stall. -
还可以将
join_all与join!结合使用,并行处理所有对 http 服务的请求和数据库查询。尝试使用futures::join!将tokio::time::sleep添加到 Future 中。这不是一个超时操作(其需要使用select!,下一章会详细介绍),而是展示了join!的使用方式。
选择
选择操作会等待一组 Future 中的任意一个就绪,并对 Future 产生的结果进行响应。在 JavaScript 中,该操作类似于 Promise.race。在 Python 中,它相当于 asyncio.wait(task_set, return_when=asyncio.FIRST_COMPLETED)。
Similar to a match statement, the body of select! has a number of arms, each of the form pattern = future => statement. When a future is ready, its return value is destructured by the pattern. The statement is then run with the resulting variables. The statement result becomes the result of the select! macro.
use tokio::sync::mpsc::{self, Receiver};
use tokio::time::{sleep, Duration};
#[derive(Debug, PartialEq)]
enum Animal {
Cat { name: String },
Dog { name: String },
}
async fn first_animal_to_finish_race(
mut cat_rcv: Receiver<String>,
mut dog_rcv: Receiver<String>,
) -> Option<Animal> {
tokio::select! {
cat_name = cat_rcv.recv() => Some(Animal::Cat { name: cat_name? }),
dog_name = dog_rcv.recv() => Some(Animal::Dog { name: dog_name? })
}
}
#[tokio::main]
async fn main() {
let (cat_sender, cat_receiver) = mpsc::channel(32);
let (dog_sender, dog_receiver) = mpsc::channel(32);
tokio::spawn(async move {
sleep(Duration::from_millis(500)).await;
cat_sender.send(String::from("Felix")).await.expect("Failed to send cat.");
});
tokio::spawn(async move {
sleep(Duration::from_millis(50)).await;
dog_sender.send(String::from("Rex")).await.expect("Failed to send dog.");
});
let winner = first_animal_to_finish_race(cat_receiver, dog_receiver)
.await
.expect("Failed to receive winner");
println!("Winner is {winner:?}");
}-
在本示例中,猫和狗之间进行了一场比赛。
first_animal_to_finish_race会同时监听这两个通道,并选择最先到达终点的作为胜者。由于狗用时 50 毫秒,而猫用时 500 毫秒,前者在此比赛中大获全胜。 -
在本示例中,可以使用
oneshot通道,因为这些通道只能接收一次send信号。 -
尝试为比赛添加截至时间,演示如何选择不同类型的 Future。
-
请注意,
select!会丢弃不匹配的分支,相对应的 Future 也会随之取消。最简单的方法是,每次执行select!时创建新的 Future。- 另一种方法是传递
&mut future而不是 future 本身,但这可能会导致问题,在本幻灯片的 “固定” 部分进行了详细介绍。
- 另一种方法是传递
关于 async/await 的误区
async / await 为处理并发异步编程提供了一种方便高效的抽象方法。然而,Rust 中的 async/await 模型也存在一些误区和隐患。本章将展示其中的部分内容:
阻塞执行器
大多数异步运行时支持并发运行 IO 任务。这意味着 CPU 的阻塞性任务会阻塞执行器,并阻止执行其他任务。最简单的方法是,尽可能使用异步等效方法。
use futures::future::join_all;
use std::time::Instant;
async fn sleep_ms(start: &Instant, id: u64, duration_ms: u64) {
std::thread::sleep(std::time::Duration::from_millis(duration_ms));
println!(
"future {id} slept for {duration_ms}ms, finished after {}ms",
start.elapsed().as_millis()
);
}
#[tokio::main(flavor = "current_thread")]
async fn main() {
let start = Instant::now();
let sleep_futures = (1..=10).map(|t| sleep_ms(&start, t, t * 10));
join_all(sleep_futures).await;
}-
运行该代码,您会发现休眠操作是连续发生的,而不是并发进行的。
-
"current_thread"变种将所有任务放在单个线程上。这样做效果会更明显,但 bug 仍然存在于多线程变种中。 -
将
std::thread::sleep切换为tokio::time::sleep,并等待结果。 -
另一个修复方案是
tokio::task::spawn_blocking,其会生成实际线程并将句柄转换为 Future,且不会阻塞执行器。 -
不应将任务视为操作系统线程。它们之间并非一对一的映射关系,并且大多数执行器都支持在单个操作系统线程上运行多个任务。尤其是通过 FFI 与其他库交互时,会更容易出现问题,因为在 FFI 中,因为该库可能依赖于线程本地存储或映射到特定的操作系统线程(例如,CUDA)。在这些情况下,首选
tokio::task::spawn_blocking。 -
请谨慎使用同步互斥操作。对
.await一直执行互斥操作能会导致另一个任务阻塞,并且该任务可能与其在同一线程上运行。
Pin
Async blocks and functions return types implementing the Future trait. The type returned is the result of a compiler transformation which turns local variables into data stored inside the future.
Some of those variables can hold pointers to other local variables. Because of that, the future should never be moved to a different memory location, as it would invalidate those pointers.
To prevent moving the future type in memory, it can only be polled through a pinned pointer. Pin is a wrapper around a reference that disallows all operations that would move the instance it points to into a different memory location.
use tokio::sync::{mpsc, oneshot};
use tokio::task::spawn;
use tokio::time::{sleep, Duration};
// A work item. In this case, just sleep for the given time and respond
// with a message on the `respond_on` channel.
#[derive(Debug)]
struct Work {
input: u32,
respond_on: oneshot::Sender<u32>,
}
// A worker which listens for work on a queue and performs it.
async fn worker(mut work_queue: mpsc::Receiver<Work>) {
let mut iterations = 0;
loop {
tokio::select! {
Some(work) = work_queue.recv() => {
sleep(Duration::from_millis(10)).await; // Pretend to work.
work.respond_on
.send(work.input * 1000)
.expect("failed to send response");
iterations += 1;
}
// TODO: report number of iterations every 100ms
}
}
}
// A requester which requests work and waits for it to complete.
async fn do_work(work_queue: &mpsc::Sender<Work>, input: u32) -> u32 {
let (tx, rx) = oneshot::channel();
work_queue
.send(Work { input, respond_on: tx })
.await
.expect("failed to send on work queue");
rx.await.expect("failed waiting for response")
}
#[tokio::main]
async fn main() {
let (tx, rx) = mpsc::channel(10);
spawn(worker(rx));
for i in 0..100 {
let resp = do_work(&tx, i).await;
println!("work result for iteration {i}: {resp}");
}
}-
您可能认为这是执行器模式的一个示例。执行器通常会循环调用
select!。 -
本部分是对前面几节课的总结,因此请多花时间用心学习。
-
只是单纯地在
select!中添加_ = sleep(Duration::from_millis(100)) => { println!(..) },该行代码将不会执行任何操作。这是为什么? -
请改为在
loop外部添加包含该 Future 的timeout_fut:#![allow(unused)] fn main() { let mut timeout_fut = sleep(Duration::from_millis(100)); loop { select! { .., _ = timeout_fut => { println!(..); }, } } } -
这仍然不起作用。根据编译器提示的错误,通过向
select!中的timeout_fut添加&mut解决移动问题,然后使用Box::pin:#![allow(unused)] fn main() { let mut timeout_fut = Box::pin(sleep(Duration::from_millis(100))); loop { select! { .., _ = &mut timeout_fut => { println!(..); }, } } } -
可以编译这段代码了,但超时过期后,每次迭代都会变为
Poll::Ready(使用混合 Future 有助于解决此问题)。每次超时过期后,通过更新重置timeout_fut。
-
-
Box 在堆上进行分配。在某些情况下,也可以选择使用
std::pin::pin!(最近才正式发布,较旧的代码通常使用tokio::pin!),但对于重新分配的 Future,使用此功能较为困难。 -
另一种替代方案是完全不使用
pin,而是生成另一个任务,该任务每隔 100 毫秒就会发送到oneshot通道。 -
Data that contains pointers to itself is called self-referential. Normally, the Rust borrow checker would prevent self-referential data from being moved, as the references cannot outlive the data they point to. However, the code transformation for async blocks and functions is not verified by the borrow checker.
-
Pinis a wrapper around a reference. An object cannot be moved from its place using a pinned pointer. However, it can still be moved through an unpinned pointer. -
The
pollmethod of theFuturetrait usesPin<&mut Self>instead of&mut Selfto refer to the instance. That’s why it can only be called on a pinned pointer.
异步特征
Async methods in traits are were stabilized only recently, in the 1.75 release. This required support for using return-position impl Trait (RPIT) in traits, as the desugaring for async fn includes -> impl Future<Output = ...>.
However, even with the native support today there are some pitfalls around async fn and RPIT in traits:
-
Return-position impl Trait captures all in-scope lifetimes (so some patterns of borrowing cannot be expressed)
-
Traits whose methods use return-position
impl traitorasyncare notdyncompatible.
If we do need dyn support, the crate async_trait provides a workaround through a macro, with some caveats:
use async_trait::async_trait;
use std::time::Instant;
use tokio::time::{sleep, Duration};
#[async_trait]
trait Sleeper {
async fn sleep(&self);
}
struct FixedSleeper {
sleep_ms: u64,
}
#[async_trait]
impl Sleeper for FixedSleeper {
async fn sleep(&self) {
sleep(Duration::from_millis(self.sleep_ms)).await;
}
}
async fn run_all_sleepers_multiple_times(
sleepers: Vec<Box<dyn Sleeper>>,
n_times: usize,
) {
for _ in 0..n_times {
println!("running all sleepers..");
for sleeper in &sleepers {
let start = Instant::now();
sleeper.sleep().await;
println!("slept for {}ms", start.elapsed().as_millis());
}
}
}
#[tokio::main]
async fn main() {
let sleepers: Vec<Box<dyn Sleeper>> = vec![
Box::new(FixedSleeper { sleep_ms: 50 }),
Box::new(FixedSleeper { sleep_ms: 100 }),
];
run_all_sleepers_multiple_times(sleepers, 5).await;
}-
async_trait易于使用,但请注意,它通过堆分配来实现这一点。这种堆分配会产生性能开销。 -
对于
async trait的语言支持中的挑战是深入 Rust的,并且可能不值得深入描述。如果您对深入了解感兴趣,Niko Matsakis 在这篇文章中对它们做了很好的解释。 -
尝试创建一个新的 sleeper 结构,使其随机休眠一段时间,并将其添加到 Vec 中。
消除
丢弃 Future 意味着无法再对其进行轮询。这称为 取消,在任何 await 点都可能发生。请务必小心谨慎,确保即使 Future 任务被取消,系统也能正常运行。例如,系统不应死锁或丢失数据。
use std::io::{self, ErrorKind};
use std::time::Duration;
use tokio::io::{AsyncReadExt, AsyncWriteExt, DuplexStream};
struct LinesReader {
stream: DuplexStream,
}
impl LinesReader {
fn new(stream: DuplexStream) -> Self {
Self { stream }
}
async fn next(&mut self) -> io::Result<Option<String>> {
let mut bytes = Vec::new();
let mut buf = [0];
while self.stream.read(&mut buf[..]).await? != 0 {
bytes.push(buf[0]);
if buf[0] == b'\n' {
break;
}
}
if bytes.is_empty() {
return Ok(None);
}
let s = String::from_utf8(bytes)
.map_err(|_| io::Error::new(ErrorKind::InvalidData, "not UTF-8"))?;
Ok(Some(s))
}
}
async fn slow_copy(source: String, mut dest: DuplexStream) -> std::io::Result<()> {
for b in source.bytes() {
dest.write_u8(b).await?;
tokio::time::sleep(Duration::from_millis(10)).await
}
Ok(())
}
#[tokio::main]
async fn main() -> std::io::Result<()> {
let (client, server) = tokio::io::duplex(5);
let handle = tokio::spawn(slow_copy("hi\nthere\n".to_owned(), client));
let mut lines = LinesReader::new(server);
let mut interval = tokio::time::interval(Duration::from_millis(60));
loop {
tokio::select! {
_ = interval.tick() => println!("tick!"),
line = lines.next() => if let Some(l) = line? {
print!("{}", l)
} else {
break
},
}
}
handle.await.unwrap()?;
Ok(())
}-
编译器无法确保取消操作的安全性。您需要阅读 API 文档,并考虑
async fn所持状态。 -
与
panic和?不同,取消属于正常控制流的一部分(而非错误处理)。 -
该示例丢失了字符串的某些部分。
-
每当
tick()分支先完成操作时,next() 及其buf` 均会被丢弃。 -
通过将
buf整合到结构体中,`LinesReader 可以确保取消操作的安全性:#![allow(unused)] fn main() { struct LinesReader { stream: DuplexStream, bytes: Vec<u8>, buf: [u8; 1], } impl LinesReader { fn new(stream: DuplexStream) -> Self { Self { stream, bytes: Vec::new(), buf: [0] } } async fn next(&mut self) -> io::Result<Option<String>> { // prefix buf and bytes with self. // ... let raw = std::mem::take(&mut self.bytes); let s = String::from_utf8(raw) // ... } } }
-
-
Interval::tickis cancellation-safe because it keeps track of whether a tick has been ‘delivered’. -
AsyncReadExt::readis cancellation-safe because it either returns or doesn’t read data. -
AsyncBufReadExt::read_lineis similar to the example and isn’t cancellation-safe. See its documentation for details and alternatives.
习题
为了练习您的异步 Rust 技能,我们再次为您提供了两个练习:
-
哲学家进餐:我们已经在上午看到了这个问题。这次你将使用异步 Rust 来实现它。
-
广播聊天应用:这是一个更大的项目,允许您尝试更高级的异步Rust功能。
After looking at the exercises, you can look at the solutions provided.
Dining Philosophers — Async
查看哲学家进餐以获取问题的描述。
As before, you will need a local Cargo installation for this exercise. Copy the code below to a file called src/main.rs, fill out the blanks, and test that cargo run does not deadlock:
use std::sync::Arc;
use tokio::sync::mpsc::{self, Sender};
use tokio::sync::Mutex;
use tokio::time;
struct Fork;
struct Philosopher {
name: String,
// left_fork: ...
// right_fork: ...
// thoughts: ...
}
impl Philosopher {
async fn think(&self) {
self.thoughts
.send(format!("Eureka! {} has a new idea!", &self.name))
.await
.unwrap();
}
async fn eat(&self) {
// Keep trying until we have both forks
println!("{} is eating...", &self.name);
time::sleep(time::Duration::from_millis(5)).await;
}
}
static PHILOSOPHERS: &[&str] =
&["Socrates", "Hypatia", "Plato", "Aristotle", "Pythagoras"];
#[tokio::main]
async fn main() {
// Create forks
// Create philosophers
// Make them think and eat
// Output their thoughts
}因为这次您正在使用异步Rust,您将需要一个 tokio 依赖。您可以使用以下的 Cargo.toml:
[package]
name = "dining-philosophers-async-dine"
version = "0.1.0"
edition = "2021"
[dependencies]
tokio = { version = "1.26.0", features = ["sync", "time", "macros", "rt-multi-thread"] }
另外,请注意,这次您必须使用来自 tokio 包的 Mutex 和 mpsc 模块。
- Can you make your implementation single-threaded?
广播聊天应用
在本练习中,我们想要使用我们的新知识来实现一个广播聊天应用。我们有一个聊天服务器,客户端连接到该服务器并发布他们的消息。客户端从标准输入读取用户消息,并将其发送到服务器。聊天服务器将收到的每条消息广播给所有客户端。
For this, we use a broadcast channel on the server, and tokio_websockets for the communication between the client and the server.
创建一个新的 Cargo 项目并添加以下依赖:
Cargo.toml:
[package]
name = "chat-async"
version = "0.1.0"
edition = "2021"
[dependencies]
futures-util = { version = "0.3.30", features = ["sink"] }
http = "1.1.0"
tokio = { version = "1.37.0", features = ["full"] }
tokio-websockets = { version = "0.7.0", features = ["client", "fastrand", "server", "sha1_smol"] }
所需的API
You are going to need the following functions from tokio and tokio_websockets. Spend a few minutes to familiarize yourself with the API.
- StreamExt::next() implemented by
WebSocketStream: for asynchronously reading messages from a Websocket Stream. - SinkExt::send() implemented by
WebSocketStream: for asynchronously sending messages on a Websocket Stream. - Lines::next_line(): for asynchronously reading user messages from the standard input.
- Sender::subscribe():用于订阅广播频道。
两个可执行文件
Normally in a Cargo project, you can have only one binary, and one src/main.rs file. In this project, we need two binaries. One for the client, and one for the server. You could potentially make them two separate Cargo projects, but we are going to put them in a single Cargo project with two binaries. For this to work, the client and the server code should go under src/bin (see the documentation).
Copy the following server and client code into src/bin/server.rs and src/bin/client.rs, respectively. Your task is to complete these files as described below.
src/bin/server.rs:
use futures_util::sink::SinkExt;
use futures_util::stream::StreamExt;
use std::error::Error;
use std::net::SocketAddr;
use tokio::net::{TcpListener, TcpStream};
use tokio::sync::broadcast::{channel, Sender};
use tokio_websockets::{Message, ServerBuilder, WebSocketStream};
async fn handle_connection(
addr: SocketAddr,
mut ws_stream: WebSocketStream<TcpStream>,
bcast_tx: Sender<String>,
) -> Result<(), Box<dyn Error + Send + Sync>> {
// TODO: For a hint, see the description of the task below.
}
#[tokio::main]
async fn main() -> Result<(), Box<dyn Error + Send + Sync>> {
let (bcast_tx, _) = channel(16);
let listener = TcpListener::bind("127.0.0.1:2000").await?;
println!("listening on port 2000");
loop {
let (socket, addr) = listener.accept().await?;
println!("New connection from {addr:?}");
let bcast_tx = bcast_tx.clone();
tokio::spawn(async move {
// Wrap the raw TCP stream into a websocket.
let ws_stream = ServerBuilder::new().accept(socket).await?;
handle_connection(addr, ws_stream, bcast_tx).await
});
}
}src/bin/client.rs:
use futures_util::stream::StreamExt;
use futures_util::SinkExt;
use http::Uri;
use tokio::io::{AsyncBufReadExt, BufReader};
use tokio_websockets::{ClientBuilder, Message};
#[tokio::main]
async fn main() -> Result<(), tokio_websockets::Error> {
let (mut ws_stream, _) =
ClientBuilder::from_uri(Uri::from_static("ws://127.0.0.1:2000"))
.connect()
.await?;
let stdin = tokio::io::stdin();
let mut stdin = BufReader::new(stdin).lines();
// TODO: For a hint, see the description of the task below.
}运行可执行文件
Run the server with:
cargo run --bin server
and the client with:
cargo run --bin client
任务
- 在
src/bin/server.rs中实现handle_connection函数。- 提示:使用
tokio::select!在一个连续的循环中并发执行两个任务。一个任务从客户端接收消息并广播它们。另一个任务将服务器接收到的消息发送给客户端。
- 提示:使用
- 完成
src/bin/client.rs中的main函数。- Hint: As before, use
tokio::select!in a continuous loop for concurrently performing two tasks: (1) reading user messages from standard input and sending them to the server, and (2) receiving messages from the server, and displaying them for the user.
- Hint: As before, use
- Optional: Once you are done, change the code to broadcast messages to all clients, but the sender of the message.
并发编程:下午练习
Dining Philosophers — Async
(返回练习)
use std::sync::Arc;
use tokio::sync::mpsc::{self, Sender};
use tokio::sync::Mutex;
use tokio::time;
struct Fork;
struct Philosopher {
name: String,
left_fork: Arc<Mutex<Fork>>,
right_fork: Arc<Mutex<Fork>>,
thoughts: Sender<String>,
}
impl Philosopher {
async fn think(&self) {
self.thoughts
.send(format!("Eureka! {} has a new idea!", &self.name))
.await
.unwrap();
}
async fn eat(&self) {
// Keep trying until we have both forks
let (_left_fork, _right_fork) = loop {
// Pick up forks...
let left_fork = self.left_fork.try_lock();
let right_fork = self.right_fork.try_lock();
let Ok(left_fork) = left_fork else {
// If we didn't get the left fork, drop the right fork if we
// have it and let other tasks make progress.
drop(right_fork);
time::sleep(time::Duration::from_millis(1)).await;
continue;
};
let Ok(right_fork) = right_fork else {
// If we didn't get the right fork, drop the left fork and let
// other tasks make progress.
drop(left_fork);
time::sleep(time::Duration::from_millis(1)).await;
continue;
};
break (left_fork, right_fork);
};
println!("{} is eating...", &self.name);
time::sleep(time::Duration::from_millis(5)).await;
// The locks are dropped here
}
}
static PHILOSOPHERS: &[&str] =
&["Socrates", "Hypatia", "Plato", "Aristotle", "Pythagoras"];
#[tokio::main]
async fn main() {
// Create forks
let mut forks = vec![];
(0..PHILOSOPHERS.len()).for_each(|_| forks.push(Arc::new(Mutex::new(Fork))));
// Create philosophers
let (philosophers, mut rx) = {
let mut philosophers = vec![];
let (tx, rx) = mpsc::channel(10);
for (i, name) in PHILOSOPHERS.iter().enumerate() {
let left_fork = Arc::clone(&forks[i]);
let right_fork = Arc::clone(&forks[(i + 1) % PHILOSOPHERS.len()]);
philosophers.push(Philosopher {
name: name.to_string(),
left_fork,
right_fork,
thoughts: tx.clone(),
});
}
(philosophers, rx)
// tx is dropped here, so we don't need to explicitly drop it later
};
// Make them think and eat
for phil in philosophers {
tokio::spawn(async move {
for _ in 0..100 {
phil.think().await;
phil.eat().await;
}
});
}
// Output their thoughts
while let Some(thought) = rx.recv().await {
println!("Here is a thought: {thought}");
}
}广播聊天应用
(返回练习)
src/bin/server.rs:
use futures_util::sink::SinkExt;
use futures_util::stream::StreamExt;
use std::error::Error;
use std::net::SocketAddr;
use tokio::net::{TcpListener, TcpStream};
use tokio::sync::broadcast::{channel, Sender};
use tokio_websockets::{Message, ServerBuilder, WebSocketStream};
async fn handle_connection(
addr: SocketAddr,
mut ws_stream: WebSocketStream<TcpStream>,
bcast_tx: Sender<String>,
) -> Result<(), Box<dyn Error + Send + Sync>> {
ws_stream
.send(Message::text("Welcome to chat! Type a message".to_string()))
.await?;
let mut bcast_rx = bcast_tx.subscribe();
// A continuous loop for concurrently performing two tasks: (1) receiving
// messages from `ws_stream` and broadcasting them, and (2) receiving
// messages on `bcast_rx` and sending them to the client.
loop {
tokio::select! {
incoming = ws_stream.next() => {
match incoming {
Some(Ok(msg)) => {
if let Some(text) = msg.as_text() {
println!("From client {addr:?} {text:?}");
bcast_tx.send(text.into())?;
}
}
Some(Err(err)) => return Err(err.into()),
None => return Ok(()),
}
}
msg = bcast_rx.recv() => {
ws_stream.send(Message::text(msg?)).await?;
}
}
}
}
#[tokio::main]
async fn main() -> Result<(), Box<dyn Error + Send + Sync>> {
let (bcast_tx, _) = channel(16);
let listener = TcpListener::bind("127.0.0.1:2000").await?;
println!("listening on port 2000");
loop {
let (socket, addr) = listener.accept().await?;
println!("New connection from {addr:?}");
let bcast_tx = bcast_tx.clone();
tokio::spawn(async move {
// Wrap the raw TCP stream into a websocket.
let ws_stream = ServerBuilder::new().accept(socket).await?;
handle_connection(addr, ws_stream, bcast_tx).await
});
}
}src/bin/client.rs:
use futures_util::stream::StreamExt;
use futures_util::SinkExt;
use http::Uri;
use tokio::io::{AsyncBufReadExt, BufReader};
use tokio_websockets::{ClientBuilder, Message};
#[tokio::main]
async fn main() -> Result<(), tokio_websockets::Error> {
let (mut ws_stream, _) =
ClientBuilder::from_uri(Uri::from_static("ws://127.0.0.1:2000"))
.connect()
.await?;
let stdin = tokio::io::stdin();
let mut stdin = BufReader::new(stdin).lines();
// Continuous loop for concurrently sending and receiving messages.
loop {
tokio::select! {
incoming = ws_stream.next() => {
match incoming {
Some(Ok(msg)) => {
if let Some(text) = msg.as_text() {
println!("From server: {}", text);
}
},
Some(Err(err)) => return Err(err.into()),
None => return Ok(()),
}
}
res = stdin.next_line() => {
match res {
Ok(None) => return Ok(()),
Ok(Some(line)) => ws_stream.send(Message::text(line.to_string())).await?,
Err(err) => return Err(err.into()),
}
}
}
}
}谢谢!
Thank you for taking Comprehensive Rust 🦀! We hope you enjoyed it and that it was useful.
组织这门课程让我们收获了很多乐趣。本课程并非完美无缺,因此,如果您发现任何错误或有任何改进建议,请在 GitHub 上与我们联系。我们期待收到您的宝贵意见。
词汇表
本页面的词汇表提供了许多 Rust 术语的简要定义。同时提供翻译版本和英语原文的对应。
- 分配(allocate):
在 堆 上进行动态内存分配。 - 参数(argument):
传入某个函数或方法中的信息。 - 裸机 Rust(Bare-metal Rust):
底层 Rust 开发方式,通常部署于没有操作系统的系统。请参阅 裸机 Rust。 - 代码块(block):
请参阅 代码块 和 作用域。 - 借用(borrow):
请参阅 借用。 - 借用检查器(borrow checker):
Rust 编译器的一部分,用于检查所有借用操作是否有效。 - 大括号(brace):
{和}。也称为 花括号,用于分隔 代码块。 - 构建(build):
将源代码转换为可执行代码或可用程序的过程。 - 调用(call):
调用或执行某个函数或方法。 - 通道(channel):
用于安全地 在线程之间 传递消息。 - Comprehensive Rust 🦀:
本课程统称为 Comprehensive Rust 🦀。 - 并发(concurrency):
同时执行多个任务或进程。 - Rust 中的并发(Concurrency in Rust):
请参阅 Rust 中的并发. - 常量(constant):
在程序执行期间不会改变的值。 - 控制流(control flow):
程序中各个语句或指令的执行顺序。 - 崩溃(crash):
程序出现意外的、未处理的故障或终止。 - 枚举(enumeration):
一种用于保存多个已命名常量中的一个的数据类型,可能还有一个相关的元组或结构体。 - 错误(error):
与预期行为存在偏差的意外情况或结果。 - 错误处理(error handling):
对程序执行期间发生的错误进行管理和响应的过程。 - 练习(exercise):
专为练习和测试编程技能而设计的任务或问题。 - 函数(function):
用于执行特定任务且可重复使用的代码块。 - 垃圾回收器(garbage collector):
一种自动释放不再使用的对象所占内存的机制。 - 泛型(generics):
这项功能支持使用类型占位符编写代码,支持对不同数据类型的代码进行重复使用。 - 不可变(immutable):
创建后无法再进行更改。 - 集成测试(integration test):
一种验证系统不同部分或组件之间交互的测试类型。 - 关键字(keyword):
编程语言中的保留字,具有特定含义且不能用作标识符。 - 库(library):
程序可以使用的一组预编译例程或代码。 - 宏(macro):
Rust 宏可通过名称中的!符号识别。当普通函数无法满足需求时,可以使用宏。一个典型示例是format!,其接受可变数量的参数,但 Rust 函数不支持这种类型。 main函数(mainfunction):
Rust 程序从main函数开始执行。- 匹配(match):
Rust 中的控制流结构,允许对表达式的值进行模式匹配。 - 内存泄漏(memory leak):
程序无法释放不再不要的内存的情况,会导致内存用量不断增加。 - 方法(method):
与 Rust 中的某个对象或类型相关联的函数。 - 模块(module):
Rust 中用于归纳整理代码的命名空间,其中包含函数、类型或特性等定义。 - 移动(move):
在 Rust 中,将值的所有权从一个变量转移到另一个变量。 - 可变(mutable):
Rust 中的一个属性,支持在声明变量后对其进行修改。 - 所有权(ownership):
Rust 中的概念,用于定义代码中的哪一部分负责管理与值关联的内存。 - panic:
Rust 中导致程序终止且不可恢复的错误情况。 - 参数(parameter):
在调用函数或方法时传入函数或方法的值。 - 模式(pattern):
Rust 中可与表达式匹配的值、字面量或结构的组合。 - 载荷(payload):
消息、事件或数据结构所携带的数据或信息。 - 程序(program):
计算机为执行特定任务或解决特定问题而执行的一组指令。 - 编程语言(programming language):
用于向计算机传递指令的正式系统,例如 Rust。 - 接收器(receiver):
Rust 方法中的首个参数,表示正在调用该方法的实例。 - 引用计数(reference counting):
一种内存管理方法,可以跟踪某个对象的引用数量,并在计数为零时释放该对象。 - 返回(return):
Rust 中的一个关键字,用于表示从函数返回的值。 - Rust:
一种系统编程语言,专注于安全性、性能和并发性。 - Rust 基础(Rust Fundamentals):
本课程第 1 天到第 4 天的内容。 - Android 中的 Rust(Rust in Android):
请参阅 Android 中的 Rust. - Chromium 中的 Rust(Rust in Chromium):
请参阅 Chromium 中的 Rust. - 安全(safe):
指代码遵循 Rust 的所有权和借用规则,以防止出现与内存相关的错误。 - 作用域(scope):
程序中变量有效且可使用的区域。 - 标准库(standard library):
Rust 中提供基本功能的一系列模块。 - 静态(static):
Rust 中的关键字,用于定义具有'static生命周期的静态变量或项。 - 字符串(string):
一种存储文本数据的数据类型。如需了解详情,请参阅String与str。 - 结构体(struct):
Rust 中的复合数据类型,可将不同类型的变量归到同一名称下。 - 测试(test):
Rust 中的模块,其中包含用于测试其他函数是否正确的函数。 - 线程(thread):
程序中的单独执行顺序,支持并发执行。 - 线程安全(thread safety):
一种程序属性,用于确保多线程环境中的行为正确无误。 - 特征(trait):
用于定义未知类型的一系列方法,为在 Rust 中实现多态性提供了方法。 - 特征约束(trait bound):
一种可以要求类型实现一些感兴趣的特性的抽象。 - 元组(tuple):
包含不同类型变量的复合数据类型。元组的字段没有名称,需要通过序号访问。 - 类型(type):
一种分类方式,用于指定可以对 Rust 中特定类型的值执行哪些操作。 - 类型推导(type inference):
Rust 编译器能够推断变量或表达式的类型。 - 未定义行为(undefined behavior):
Rust 中未指定结果的操作或条件,通常会导致不可预测的程序行为。 - 联合体(union):
一种数据类型,可以存储不同类型的值,但一次只能保存一个值。 - 单元测试(unit test):
Rust 内置了运行小型单元测试和大型集成测试的支持功能。请参阅 单元测试。 - 单元类型(unit type):
不保存数据的类型,写为没有成员的元组。 - 不安全(unsafe):
Rust 的子集,允许触发 未定义行为。请参阅 不安全 Rust。 - 变量(variable):
用于存储数据的内存位置。变量在 作用域 内有效。
其他 Rust 资源
Rust 社区已经创造了丰富的高质量免费资源在线提供。
官方文档
Rust 项目提供了许多资源。这些资源涵盖了 Rust 的一般内容:
- Rust 程序设计语言:一部有关 Rust 的免费权威图书。书中详细介绍了该语言,并包含一些可供读者构建的项目。
- 通过例子学 Rust:通过一系列展示不同结构的示例介绍 Rust 语法。有时会包括一些小练习,会要求您充分地阐述示例中的代码。
- Rust 标准库:Rust 标准库的完整文档。
- Rust 参考手册:一本未完成的书,介绍了 Rust 语法和内存模型。
Rust 官方网站上有更多专业指南:
- Rust 秘典:介绍了不安全 Rust,包括使用原始指针以及与其他语言 (FFI) 交互。
- Rust 中的异步编程:介绍了在《Rust 程序设计语言》成书后引入的新异步编程模型。
- 嵌入式 Rust 之书:介绍如何在没有操作系统的嵌入式设备上使用 Rust。
非官方学习资料
其他 Rust 指南和教程的小选集:
- Learn Rust the Dangerous Way(以危险的方式学 Rust):从低级 C 语言程序员的角度介绍 Rust。
- 面向嵌入式 C 程序员的 Rust:从使用 C 语言编写固件的开发者的角度介绍 Rust。
- Rust for professionals(面向专业人士的 Rust):通过与其他语言(例如 C、C++、Java、JavaScript 和 Python)进行并排比较,介绍 Rust 的语法。
- Rust on Exercism(在 Exercism 上学 Rust):100 多项练习助您学习 Rust。
- Ferrous Teaching Material:一系列小演示文稿,涵盖 Rust 语言的基础知识和高级部分。还涵盖了 WebAssembly 和 async/await 等其他主题。
- 面向 Rust 的初学者系列和使用 Rust 迈出第一步:两个面向新手开发者的 Rust 指南。第一个指南包含 35 个视频,第二个指南包含 11 个模块,内容涵盖 Rust 语法和基本结构。
- 通过大量的链表学习Rust:通过实现几种不同类型的列表结构,深入探索 Rust 的内存管理规则。
如需更多 Rust 图书,请查看 Rust 小册。
鸣谢
本课中的资料以众多优秀的 Rust 文档资源为基础。 如需查看实用资源的完整列表, 请参阅关于其他资源的页面。
The material of Comprehensive Rust is licensed under the terms of the Apache 2.0 license, please see LICENSE for details.
Rust 示例
部分示例和练习复制并 改编自Rust by Example。如需了解详情(包括许可 条款),请参阅 third_party/rust-by-example/ 目录。
Rust on Exercism
部分练习复制并 改编自 Rust on Exercism。如需了解详情(包括许可 条款),请参阅 third_party/rust-on-exercism/ 目录。
CXX
“与 C++ 的互操作性”部分引用了一张 来自 CXX 的图片。如需了解详情(包括许可条款), 请参阅 third_party/cxx/ 目录。